27 DIY Christmas Ornaments Worth Hanging Every Year
This post may contain affiliate links. As an Amazon Associate I earn from qualifying purchases.
Okay friends, is there anything better than unpacking the ornaments every December and finding the ones you made with your own two hands? I don’t think so!
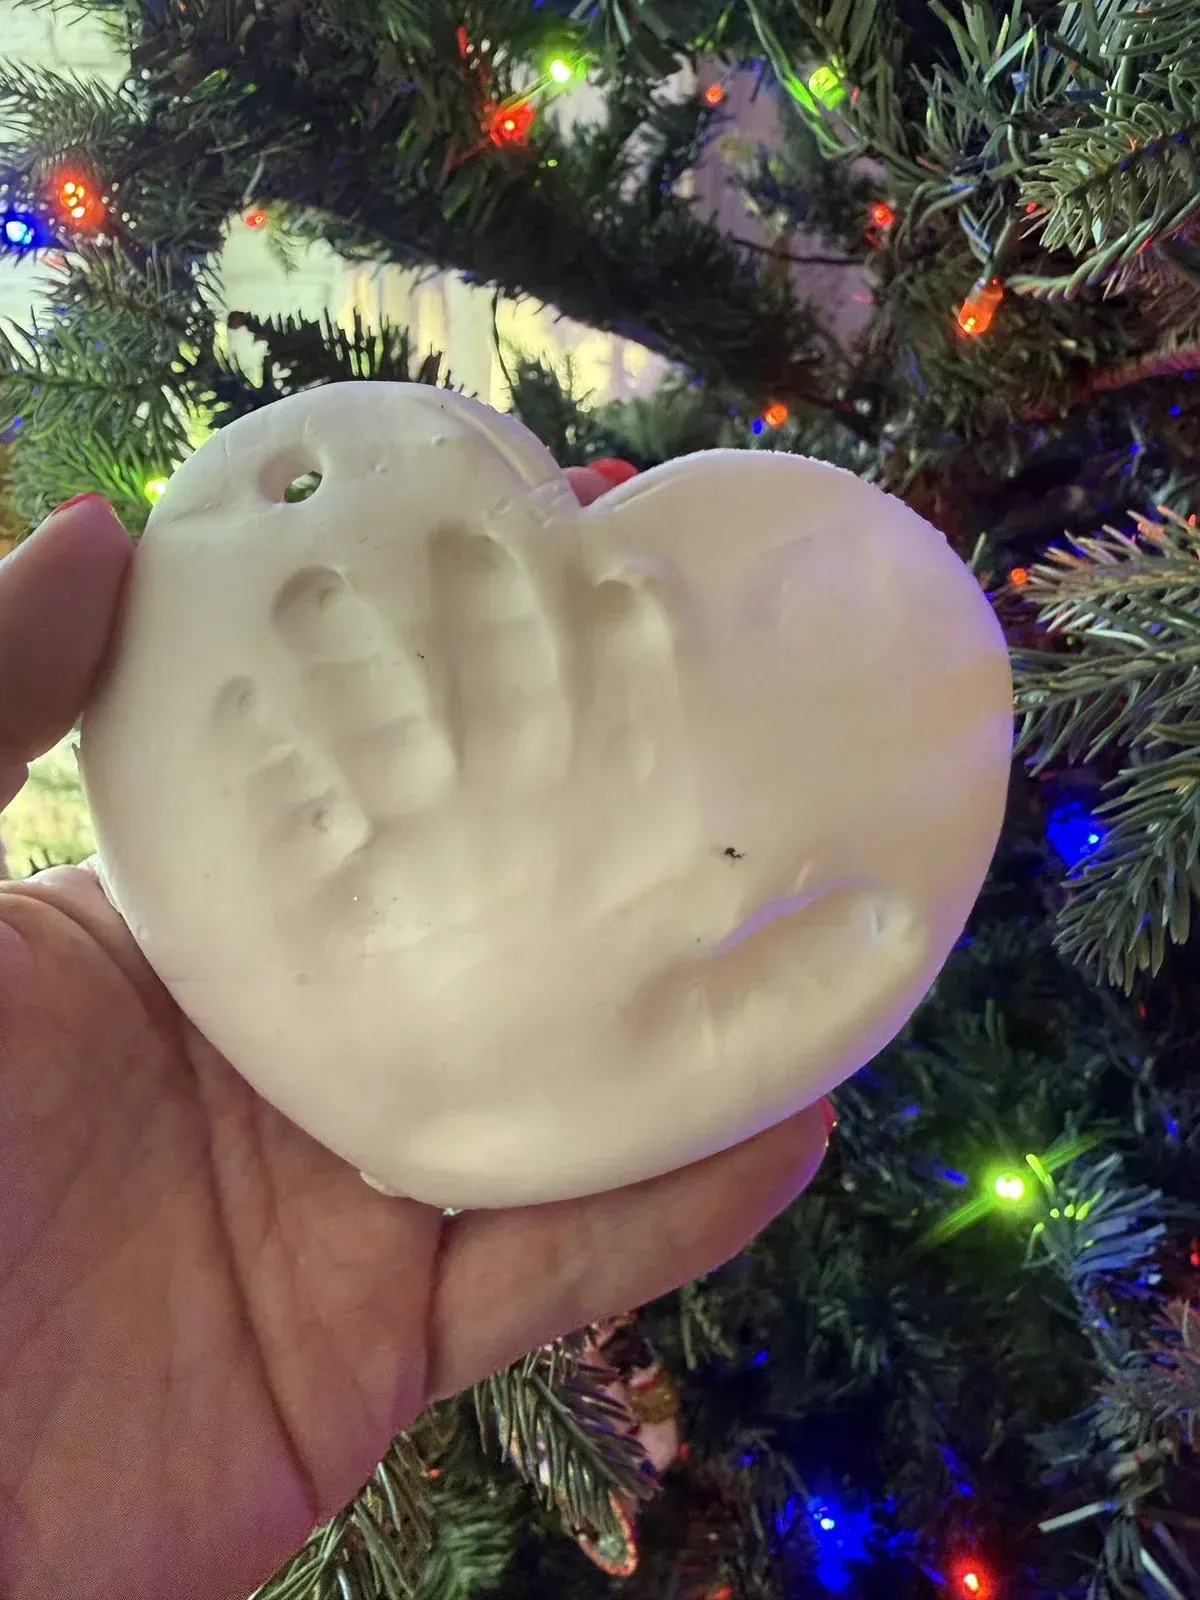
I make ornaments every single year. Some are 5-minute crafts with my kids, some I’ve sold in my Etsy shop and on my neighborhood page, and one is a salt dough handprint heart that’s seven years old and still holding strong on our tree!
So this list is filled to the brim with ornaments I’ve actually made, plus a few easy classics with quick instructions right here.
The first section needs nothing but basic craft supplies. Have a Cricut, a laser or a UV printer? Keep scrolling, because that’s where the personalized ones live!
Making ornaments with little ones? My DIY Christmas ornaments for kids has even more ideas for small hands.
My quick picks:
- Easiest (5 minutes): DIY painted ornaments
- Best to make with kids: Popsicle stick Christmas tree ornaments
- Best keepsake: Salt dough handprint ornaments
- Best for a long gift list: Engraved wooden gift tag ornaments
- Best photo ornament: Photo printed on wood
- Best for pet lovers: Ceramic pet ornament
We have a lot to cover, so feel free to jump ahead or hang with me the whole time!
What Is a DIY Christmas Ornament?
A DIY Christmas ornament is any ornament you make yourself instead of buying it, from salt dough handprints and paint-swirled plastic balls to wood slices and personalized laser cut keepsakes.
The best ones are simple enough to finish in an afternoon and meaningful enough that you’ll want to hang them every single year!
Easy DIY Ornaments (No Machine Needed)
These take basic craft supplies and an afternoon, and most are kid friendly, too. Let’s dig in!
1. DIY Painted Ornaments
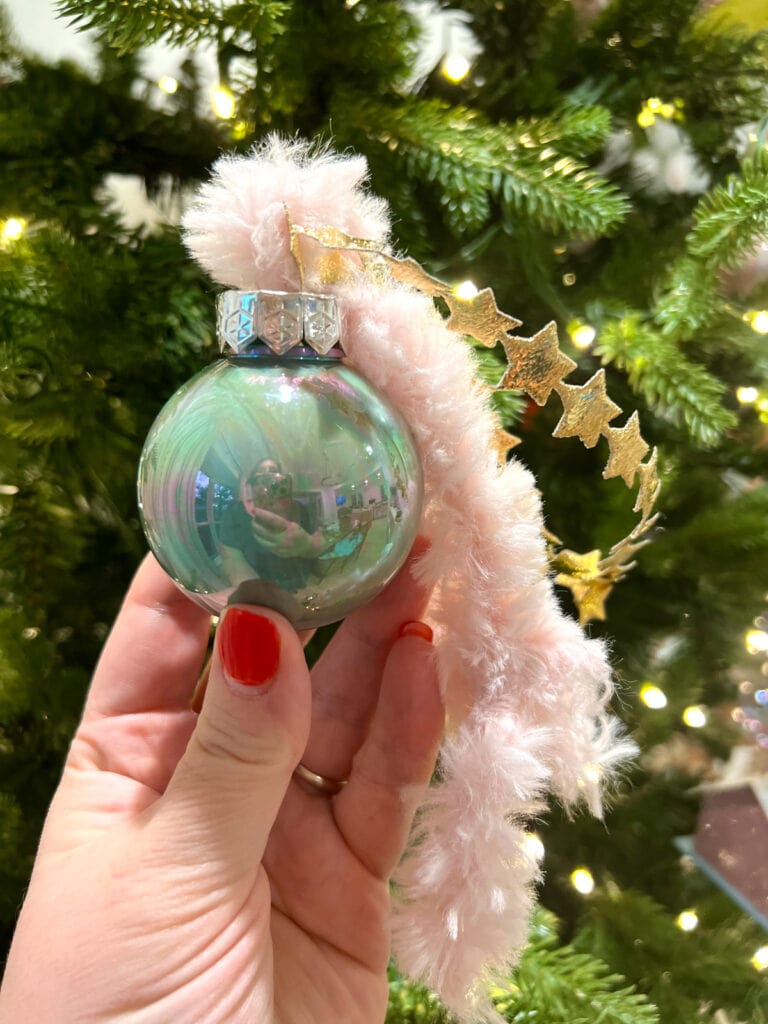
I made 24 of these testing every method I could think of, and this one won, hands down! Squeeze acrylic paint into a clear plastic ornament, swirl it around, and let it drain upside down overnight.
My 5-year-old made them right alongside me, and her colors turned out even better than mine! My easy DIY painted ornaments tutorial has a 60-second video.
What to know before you grab that paint: go with plastic ornaments, not glass. We had glass shattered everywhere within five minutes!
You’ll need: clear plastic ornaments and an acrylic paint set.
2. Rustic Filled Ornaments
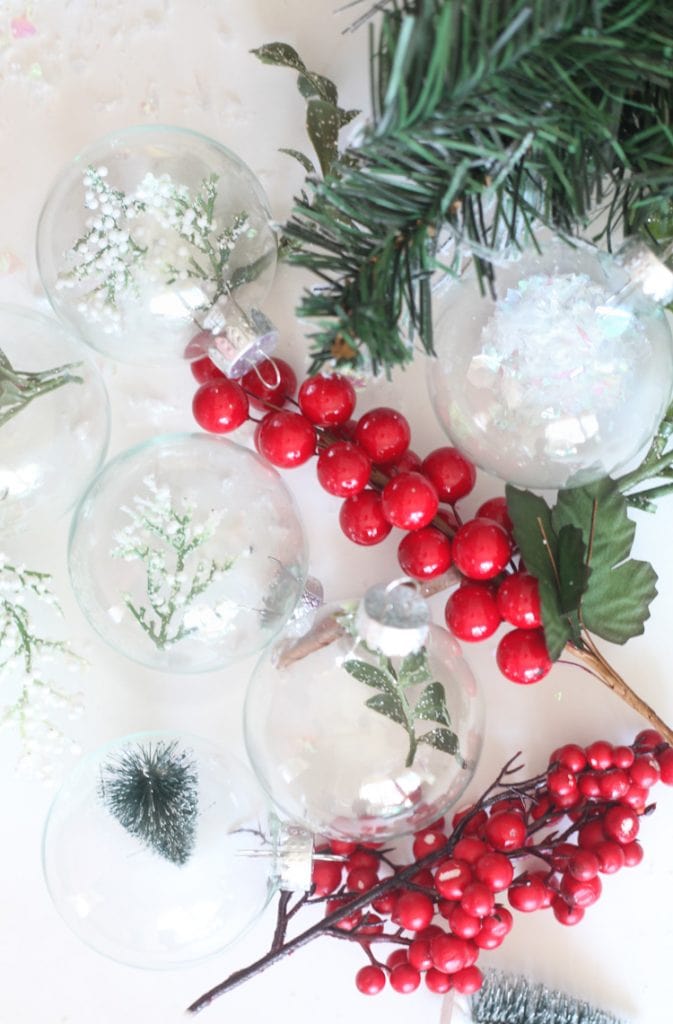
I came up with these at 8.5 months pregnant, so you know they’re easy! I had leftover greenery from my easy DIY Christmas wreath, so I tucked a few sprigs into clear glass ornaments, and that was it.
They look so classy and rustic on the tree, and they make the sweetest gift toppers tied onto a present. Here’s exactly how I made my rustic filled Christmas ornaments.
3. Popsicle Stick Christmas Tree Ornaments
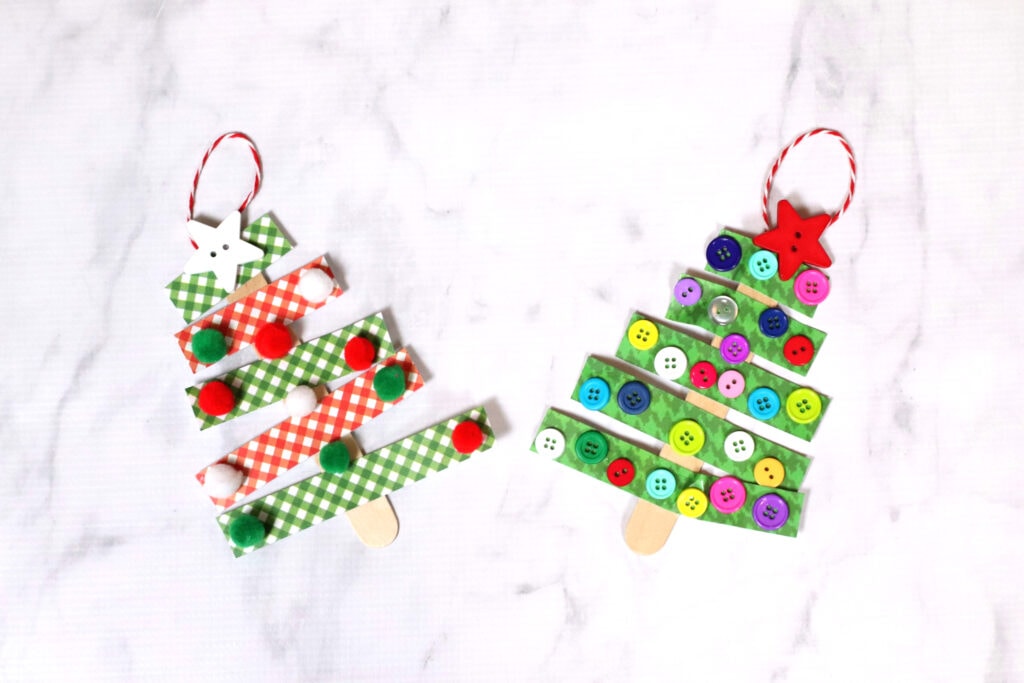
I designed these for kids to make with you, and they cost next to nothing! Glue strips of holiday scrapbook paper to a craft stick, widest at the bottom, then decorate with buttons and pom poms.
Here’s my popsicle stick Christmas tree ornament tutorial with a video.
Quick tip: get more supplies than you think you’ll need. Once kids start, they want to make a whole forest!
4. Salt Dough Ornaments
If I could only make one ornament, it’d be salt dough! This handprint heart is seven years old (I can’t believe it either!) and still holding strong on our tree.
Every December I hang it up and marvel at how tiny that little hand used to be. It’s the keepsake you’ll be so glad you made.
- Mix 1 cup flour, 1/2 cup salt and about 1/2 cup water into a smooth dough.
- Roll it 1/4 inch thick, cut shapes or press in a handprint, and poke a hanging hole with a straw.
- Bake at 250°F for 2 to 3 hours, until hard and dry.
- Leave it plain or paint it, then seal the front and back with Mod Podge so they last for years.
You’ll need: snowflake cookie cutters, acrylic paint, Mod Podge and bakers twine.
5. Wood-Burned Wood Slice Ornaments
Wood slices are the easiest blank for a rustic ornament, and a wood burning pen makes them look handmade in the best way!
- Start with pre-drilled wood slices so the hole is already there.
- Sketch a name, the year or a simple snowflake in pencil.
- Trace it with the wood burning pen, slowly and with light pressure.
- Thread bakers twine through the hole and hang.
What to know before you grab that wood burner: the tip gets very hot, so this one is for grown-ups and older kids. Practice on the back of the slice first!
You’ll need: wood slices with holes, a wood burning kit and bakers twine.
6. Stamped Air-Dry Clay Ornaments
No oven needed, which makes these perfect for a kids’ craft table! Stamp a name, the year or JOY, and you’ve got a sweet little keepsake.
- Roll air-dry clay about 1/4 inch thick.
- Cut stars or snowflakes, press in letter stamps, and poke a hole with a straw.
- Dry flat for 24 to 48 hours, flipping halfway so they don’t curl.
- Leave them white, or brush on watered-down paint and wipe it off so the letters pop.
You’ll need: air-dry clay, letter stamps and snowflake cookie cutters.
7. Cinnamon Ornaments
Let’s be honest, these are worth making for the smell alone. They make the whole house smell like Christmas!
- Mix 1 cup ground cinnamon with about 3/4 cup applesauce until it feels like cookie dough.
- Roll it 1/4 inch thick between parchment, cut shapes and poke a hole with a straw.
- Air-dry for 2 to 3 days, flipping daily, or bake at 200°F for about 2 hours.
What to know before you hang them: they aren’t edible, so keep them out of reach of pets and toddlers who might try a bite.
You’ll need: a big jar of ground cinnamon and snowflake cookie cutters.
8. Dried Orange Slice Ornaments
These look so pretty with the light coming through them, like little stained glass windows on your tree!
- Slice oranges 1/4 inch thick and blot them dry.
- Bake at 200°F for 3 to 4 hours, flipping every hour, until fully dry.
- Thread bakers twine through the top and add a cinnamon stick if you like.
Quick tip: make an extra batch for the simmer pot kit in my DIY Christmas gifts round-up!
9. Iridescent Glitter Snow Ornaments
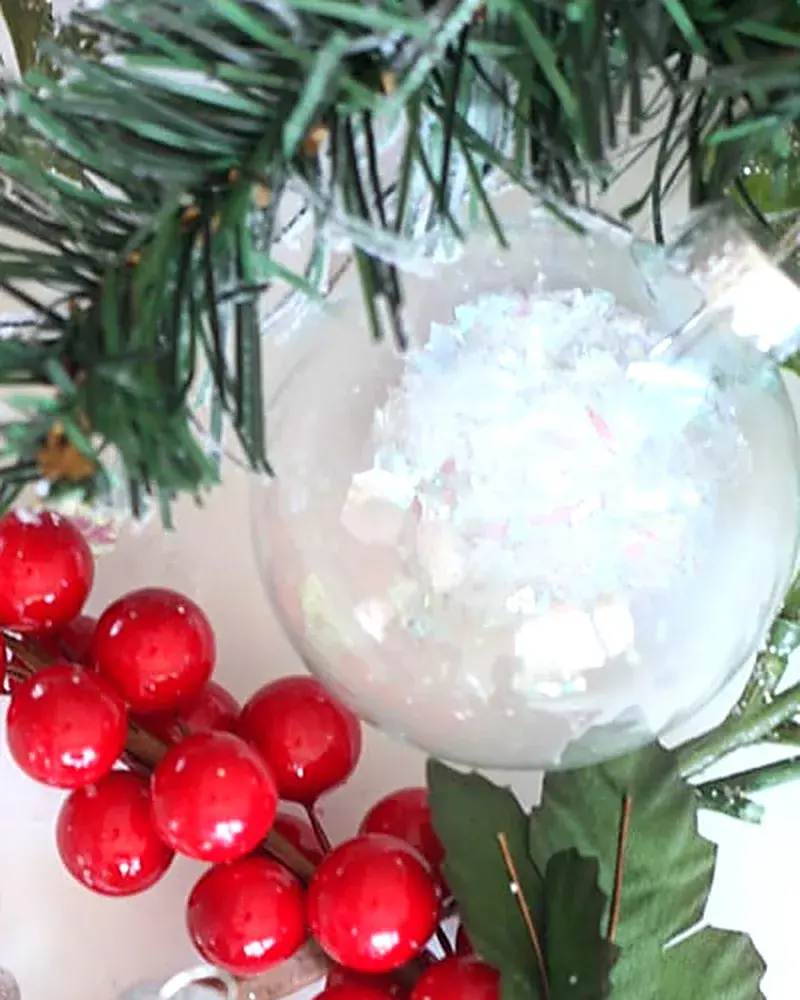
Okay, this might be the easiest ornament on the whole list! When I made my easy DIY Christmas tree ornaments, I filled a few with nothing but iridescent faux snow, and they sparkle just like glitter without the glitter mess.
Pour a spoonful into a clear ornament, snap the cap back on, and you’re done in under a minute.
Quick tip: for an all-over glitter look, swirl a little Mod Podge inside the ornament first, then add fine glitter and shake.
You’ll need: clear plastic ornaments and iridescent faux snow.
10. No-Sew Felt Ornaments
Felt ornaments are soft and kid-friendly, and nothing shatters if they hit the floor!
Trace a cookie cutter onto felt, cut two of each shape, and glue them together around the edges with a loop of twine tucked in at the top. Add felt circles, buttons or glitter glue for details.
What to know before you grab that glue gun: let an adult handle the hot glue, or use fabric glue with little ones.
Quick tip: have a Cricut? It’ll cut the felt shapes for you, too!
You’ll need: felt sheets, a mini hot glue gun and bakers twine.
11. Wood Bead Snowman Ornaments
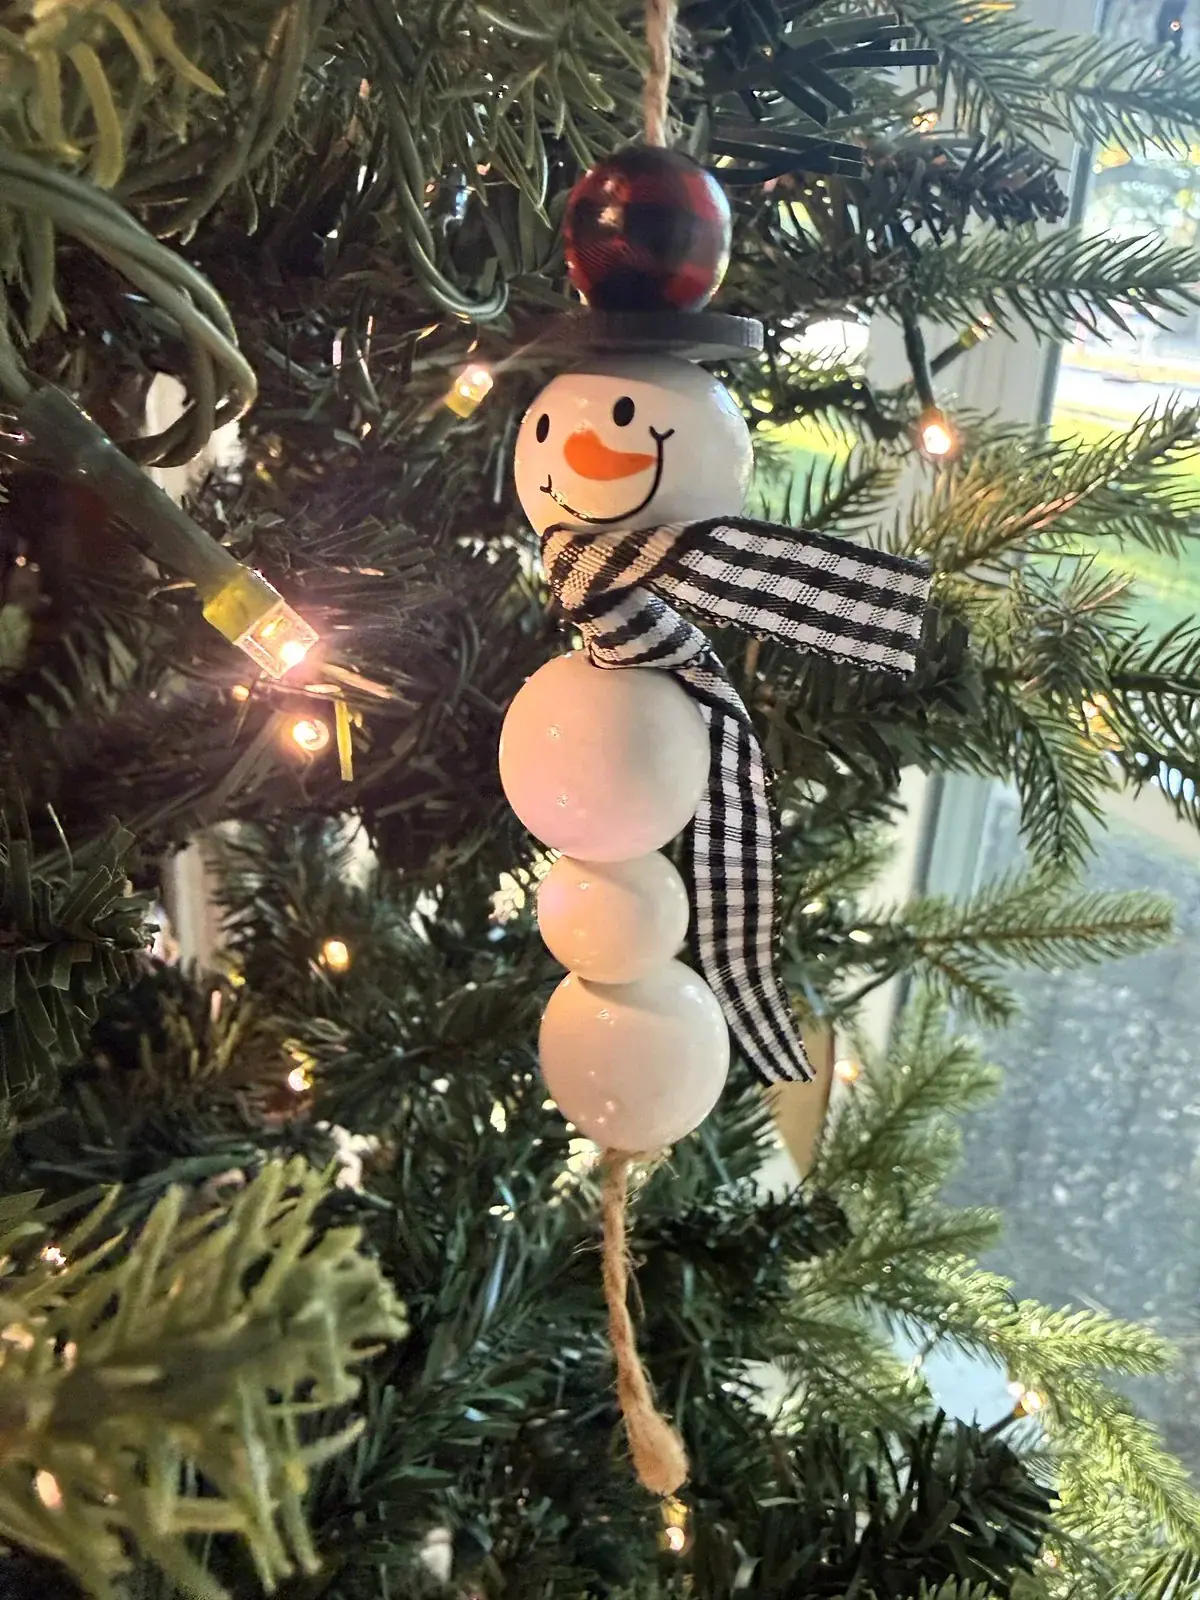
Isn’t this little guy the cutest?
My wood bead snowman has three white wood beads for the body, a fourth for the head with a painted face and carrot nose, and a buffalo check bead on a black disc for his top hat. A black and white gingham ribbon scarf and a twine loop finish him off!
Want something simpler? Thread natural wood beads onto a pipe cleaner, bend it into a circle, star or heart, and tie on a twine bow.
You’ll need: natural wood beads, buffalo plaid wood beads, gingham ribbon, acrylic paint and bakers twine.
12. Paper Strip Ornaments
These 3D paper balls look so fancy, but they take about 5 minutes! Cut 8 strips of glitter cardstock about 1/2 inch wide and 6 inches long, punch a hole at each end, and stack them.
Push a brad through the holes at each end, gently press the ends toward each other so the strips bow out, then fan them evenly into a ball. Tie twine under the top brad to hang it.
Quick tip: have a Cricut? Let it cut the strips for you.
You’ll need: glitter cardstock and mini brads.
13. Button Santa Ornaments
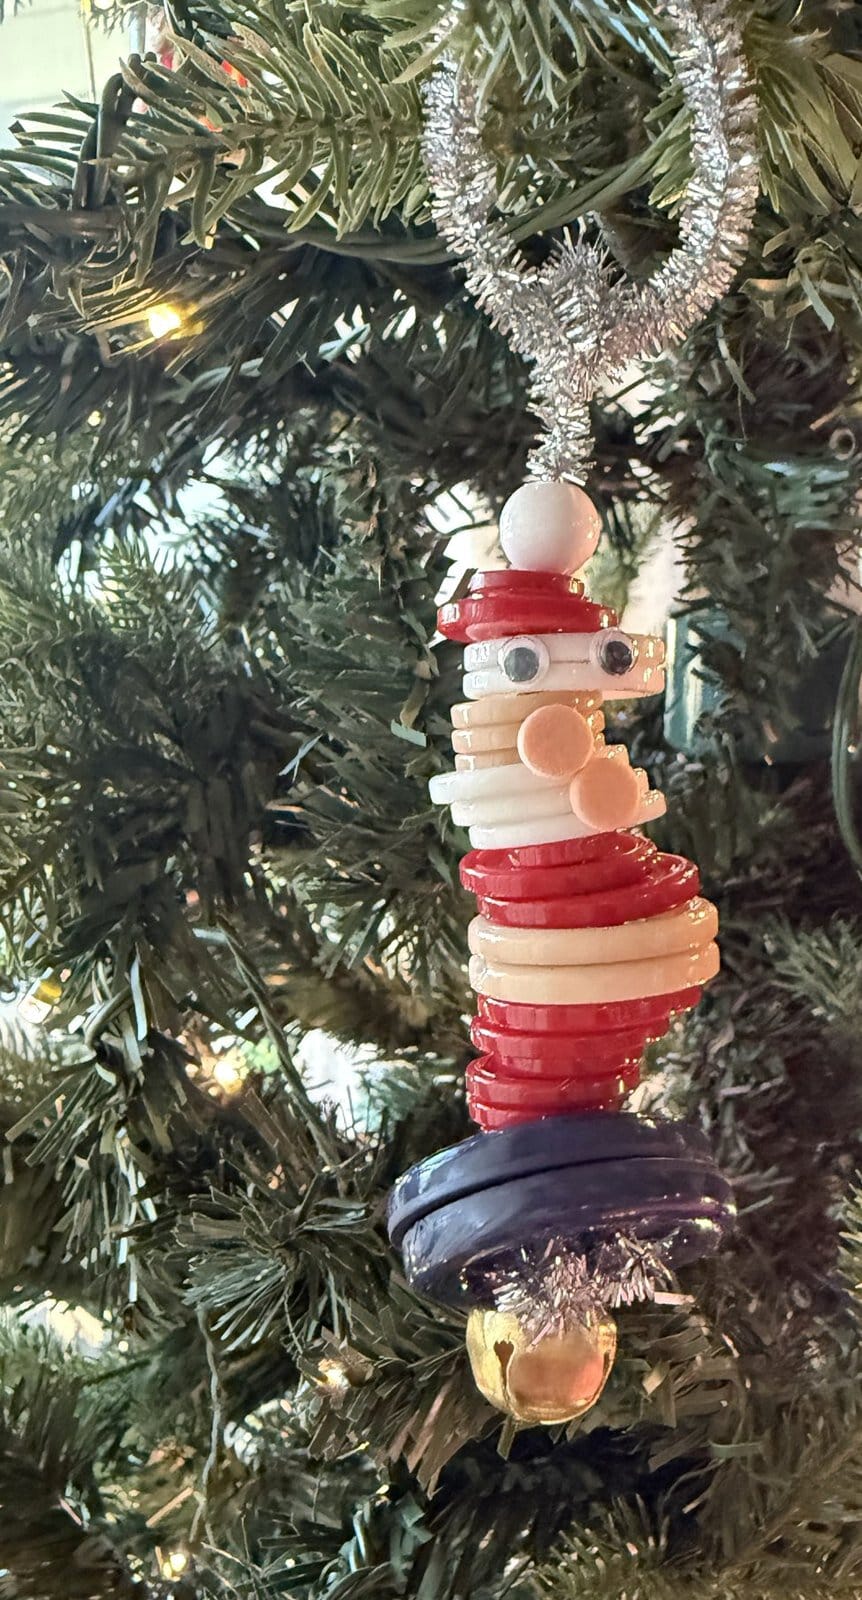
How fun is this little Santa? He’s nothing but buttons stacked on a silver glitter pipe cleaner, with googly eyes, a peach button nose and a jingle bell hanging underneath.
Kids pick the colors and stack him from the boots up. Grab the full how-to in my Christmas ornaments for kids!
You’ll need: Christmas craft buttons, silver glitter pipe cleaners, googly eyes and a jingle bell.
14. Popsicle Stick Snowman Ornaments
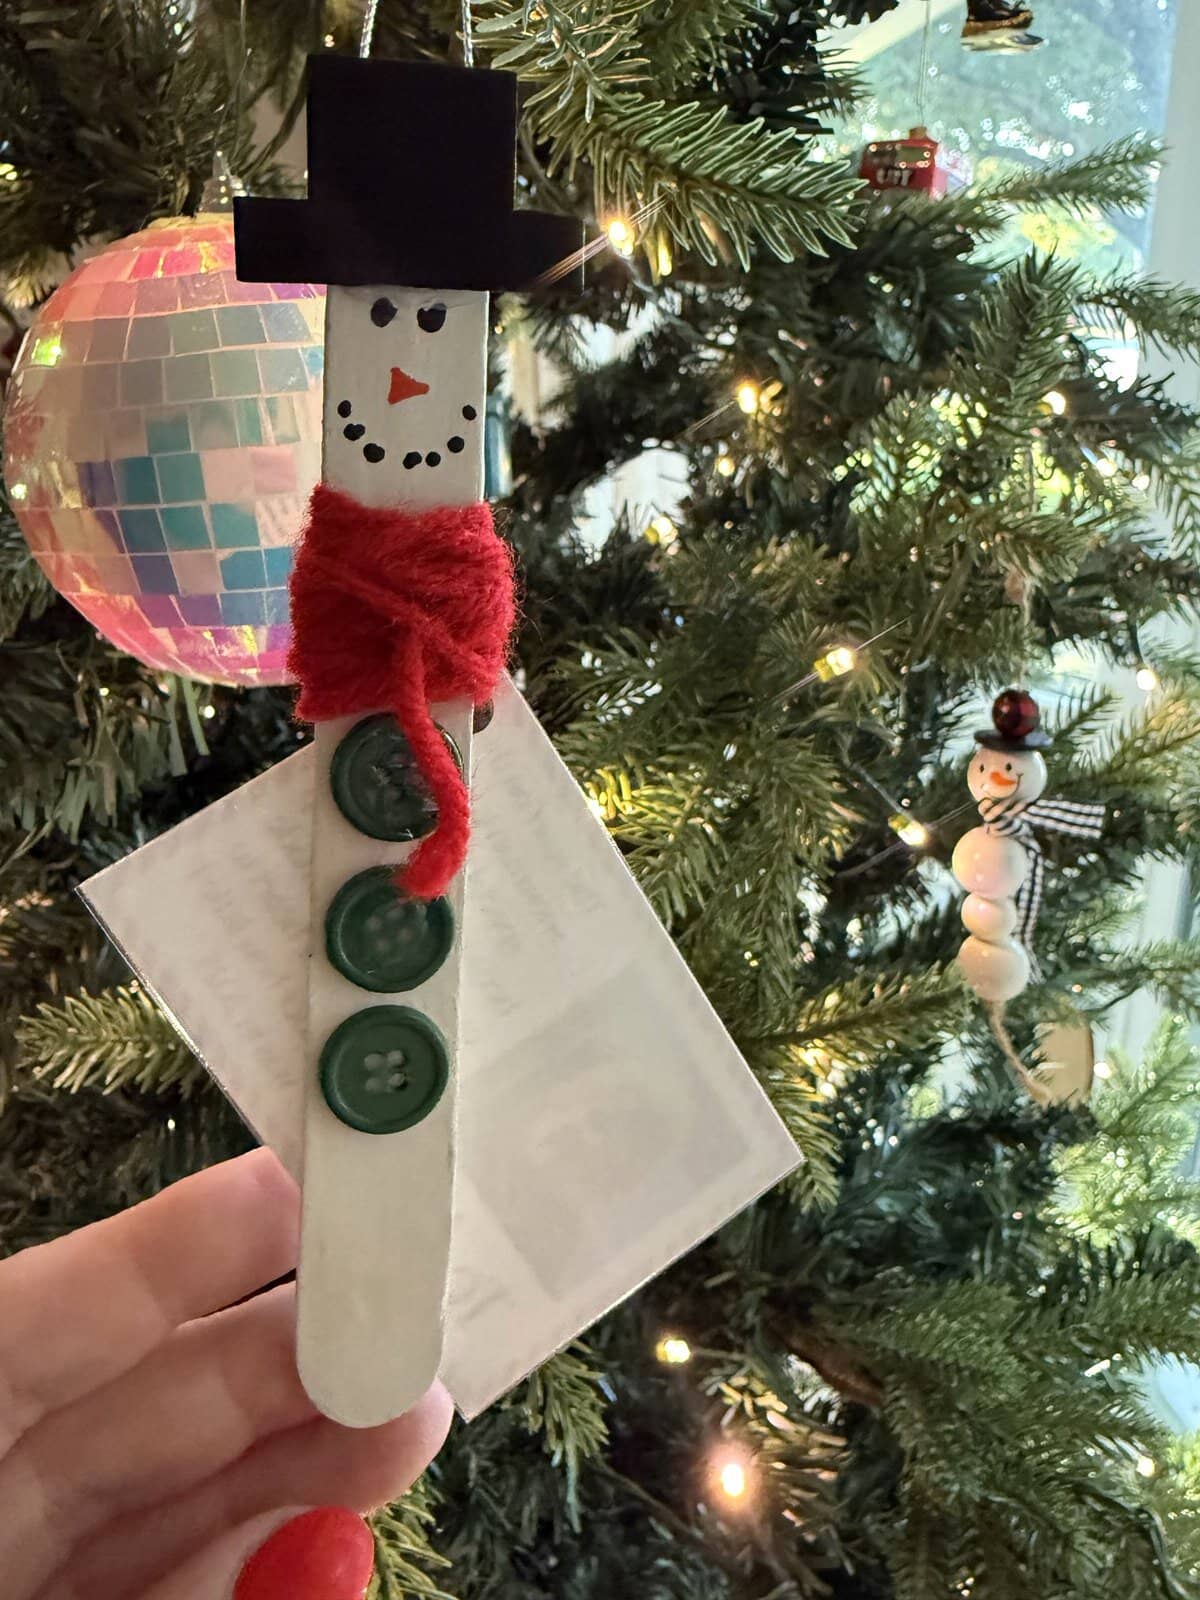
This sweet snowman was a gift from my son’s teacher, and what a great DIY! A jumbo craft stick becomes a snowman with a red yarn scarf and green buttons.
The best part is the poem tag on the back: the scarf is the exact size of the child who made it, so it’s a keepsake of how little they were in 2025. Cue the happy tears!
See how to make it in my kids Christmas ornament ideas.
You’ll need: jumbo craft sticks, acrylic paint, red yarn and buttons from #13.
15. Pony Bead Candy Cane Ornaments
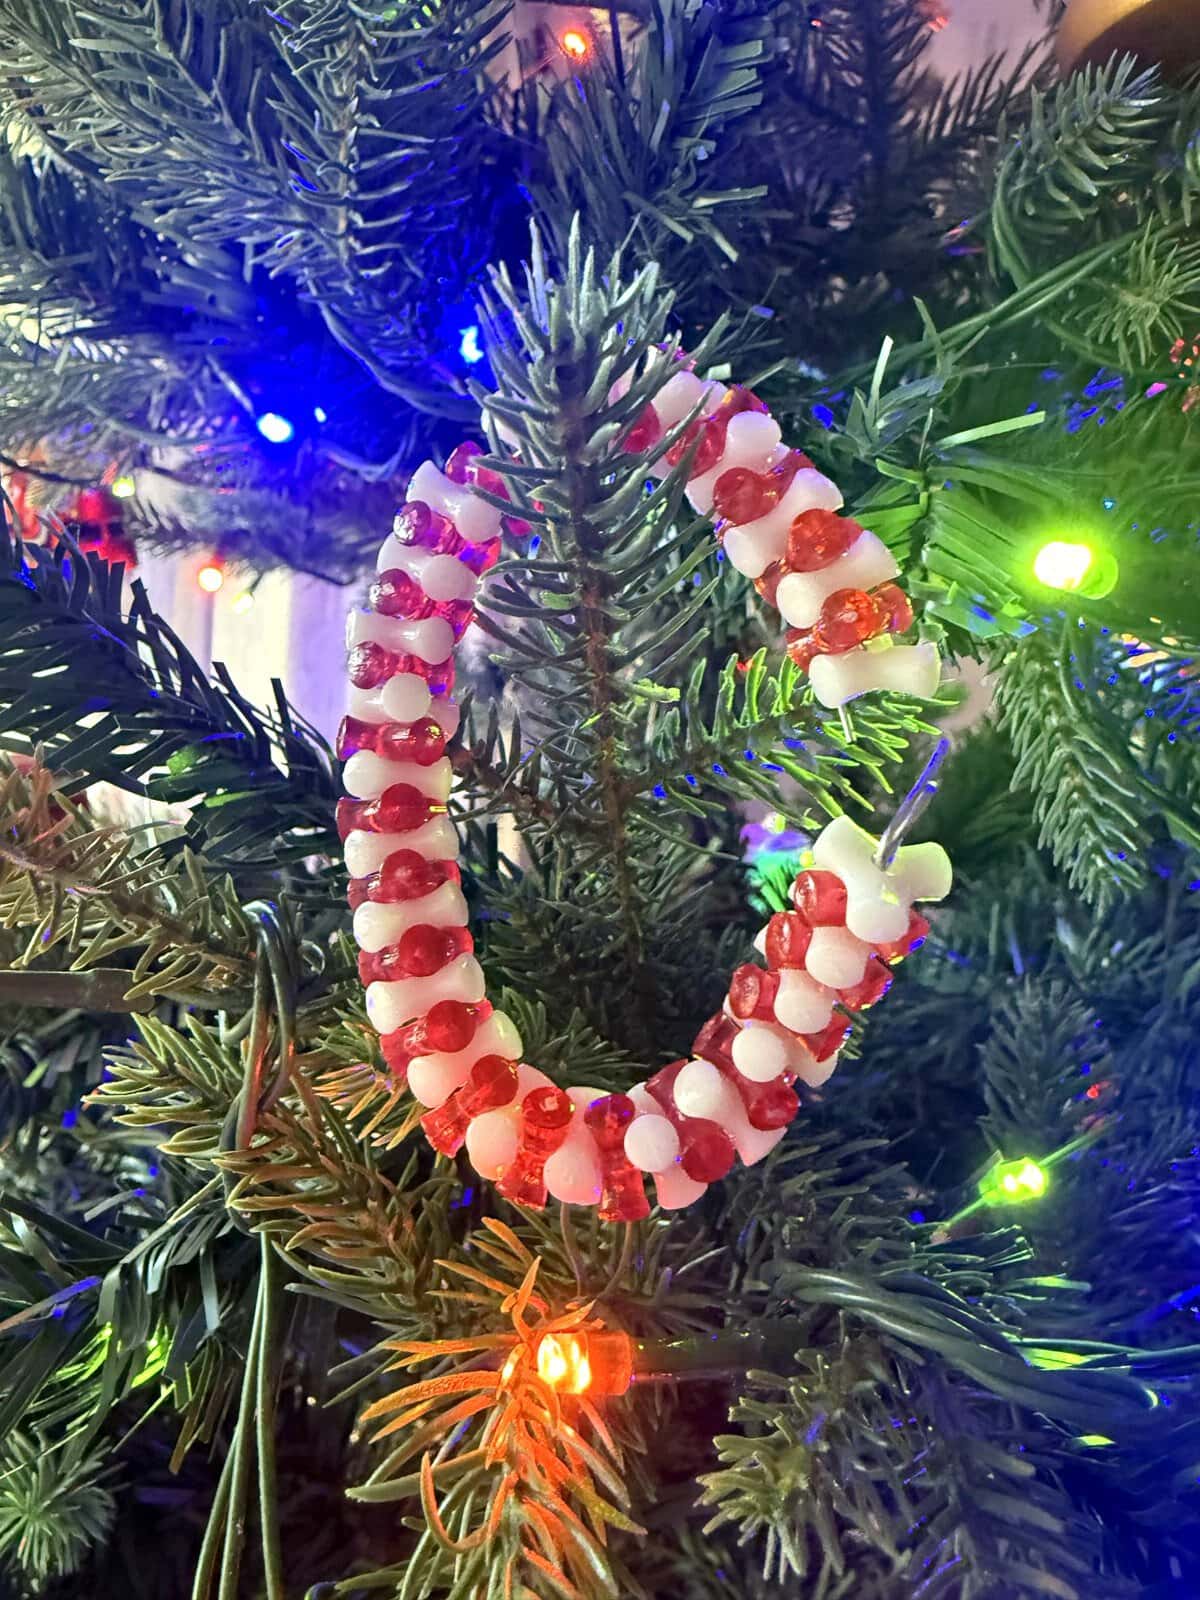
Red and white pony beads on a pipe cleaner, bent into a hook that hangs right over a branch. That’s it!
It’s the perfect first craft for little ones, and the steps are in my easy ornaments for kids.
You’ll need: red and white pony beads and pipe cleaners.
Cricut Ornaments
16. Embroidery Hoop Noel Ornament
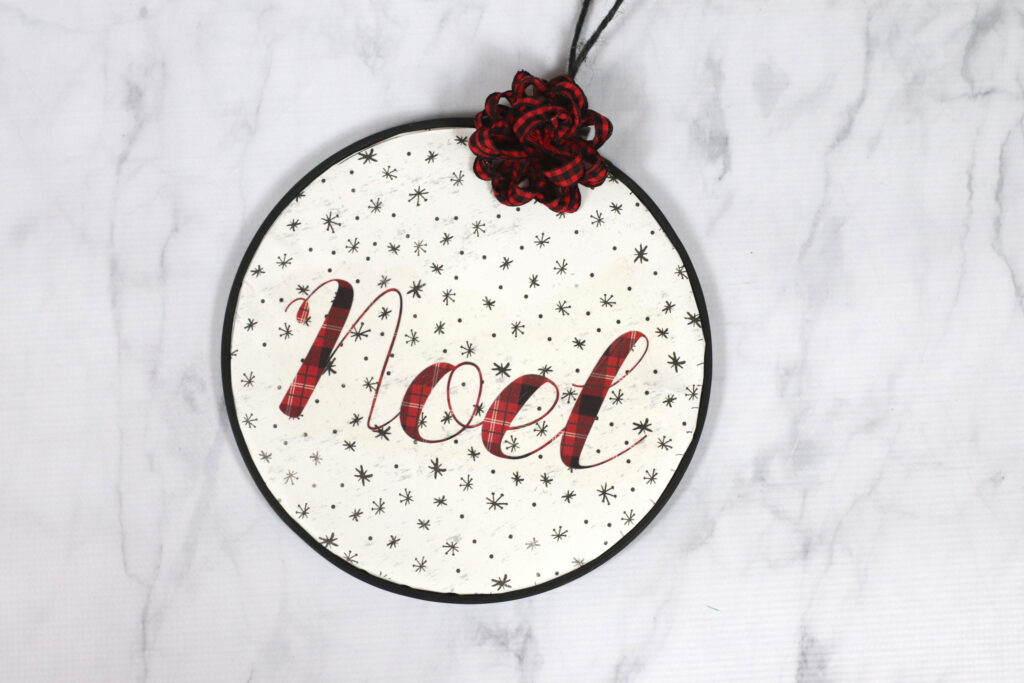
It looks like I spent all day sewing the word Noel, but it’s all paper, and it took me less than an hour! (I’m not a huge fan of sewing.)
I painted a mini hoop black, cut the lettering from plaid scrapbook paper on my Cricut Maker, and layered it over a circle of cotton batting.
Grab the free NOEL SVG in my Cricut embroidery hoop ornament tutorial, or swap in a name for each of your kids.
Quick tip: no machine? Print the word and glue it to a wood slice instead.
You’ll need: mini embroidery hoops and a Cricut.
Laser Engraved Ornaments
Okay, this is where things get really fun! A laser cuts the ornament shape AND engraves or prints on it, so these look like you ordered them from a boutique.
I make all of these on my xTool M2.
Never used a laser? Don’t be scared!
It’s not as hard as you think, and my xTool M2 review breaks it all down.
17. Personalized Wooden Name Ornaments
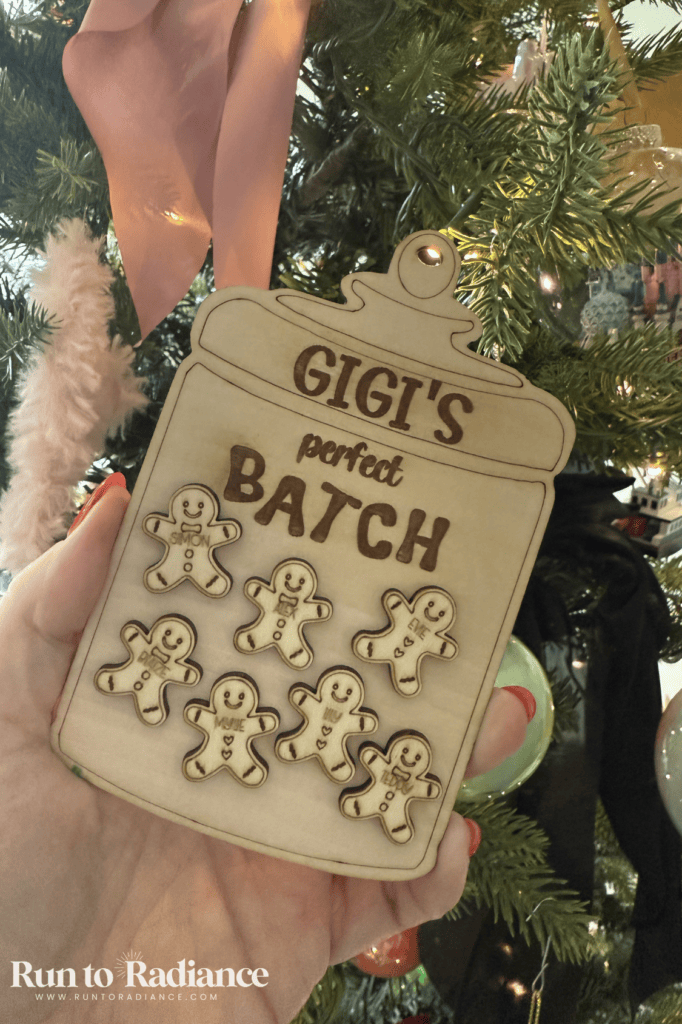
I LOVE making custom ornaments! I’ve made them for friends and family, and sold quite a few in my Etsy shop and on my neighborhood page.
Add a family’s last name, a child’s name, a special date or a gingerbread design.
Expert tip: cut a whole batch from one sheet of basswood, and you’re set for a long gift list! Here’s how I make personalized wooden Christmas ornaments.
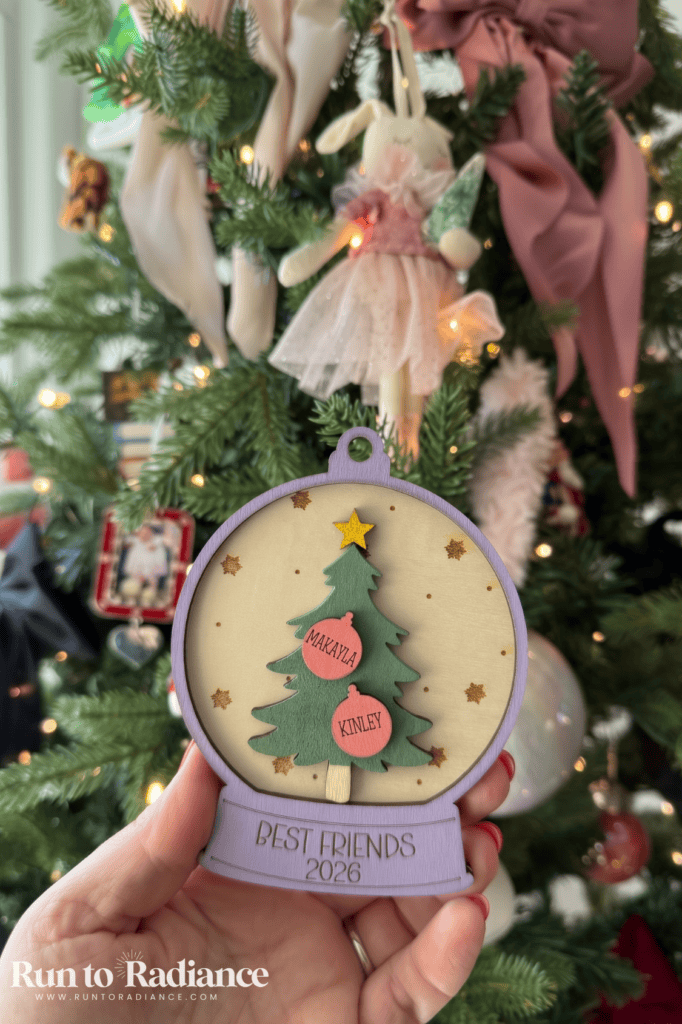
18. Best Friend Snow Globe Ornaments
This one is a layered wooden snow globe with a little tree inside, two name ornaments on its branches, and BEST FRIENDS with the year along the base. Every layer is cut and engraved on the laser, then stacked so the tree looks like it’s really sitting inside the globe!
Make one for your bestie and keep the matching one for your own tree. Here’s how I make best friend ornaments and my other personalized ones.
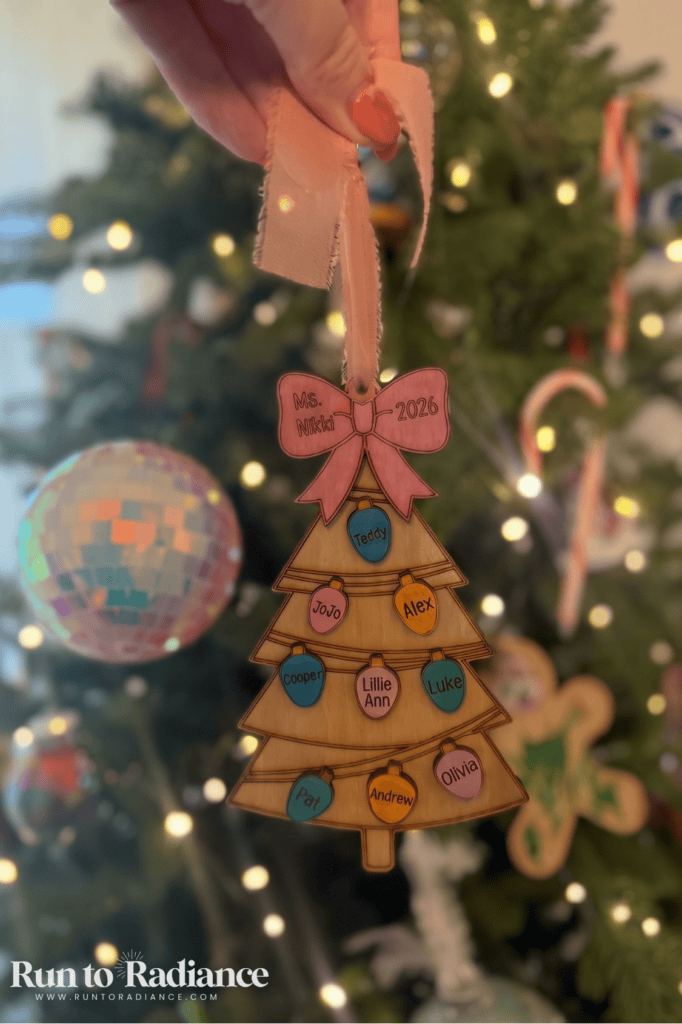
19. Class Christmas Tree Teacher Ornament
Every student’s name goes on its own little light bulb strung across a wooden Christmas tree, with a pink bow and the year up top.
It’s the sweetest class gift, and the teacher can hang it every year to remember that group of kids. Get the tissues ready!
See my personalized teacher ornament and more gifts I’ve made on the laser.
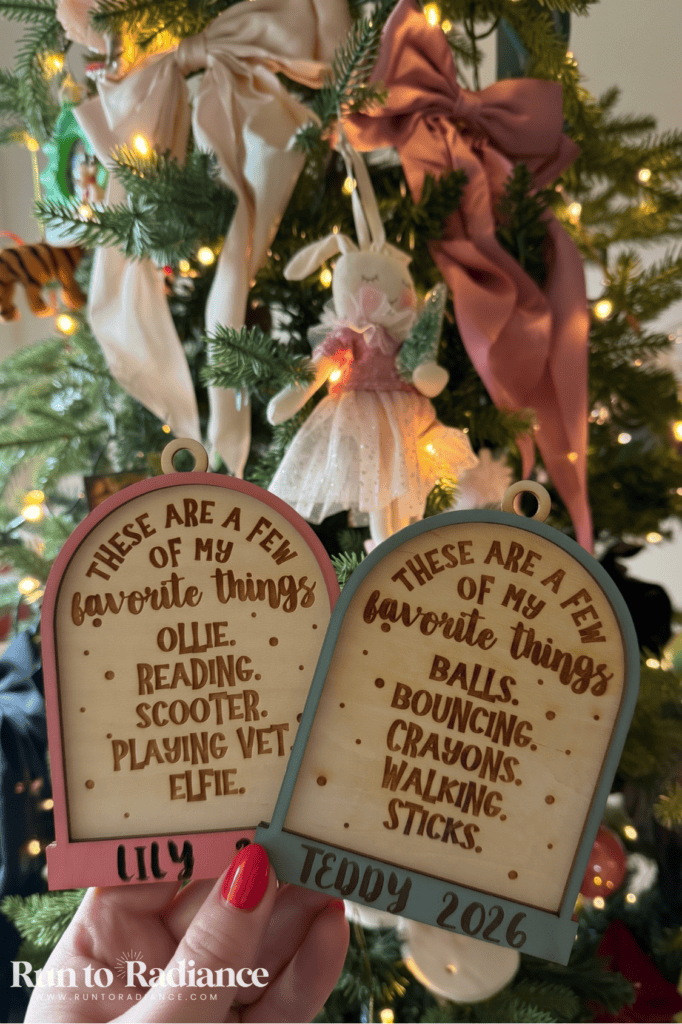
20. “My Favorite Things” Ornaments
Each one says “These are a few of my favorite things” with a list underneath, from reading and scooters to crayons and sticks, plus a name along the bottom.
Pull it out in ten years and it’s a little time capsule of everything they loved that Christmas. My heart!
Here are my favorite things ornaments with the rest of my personalized ideas.
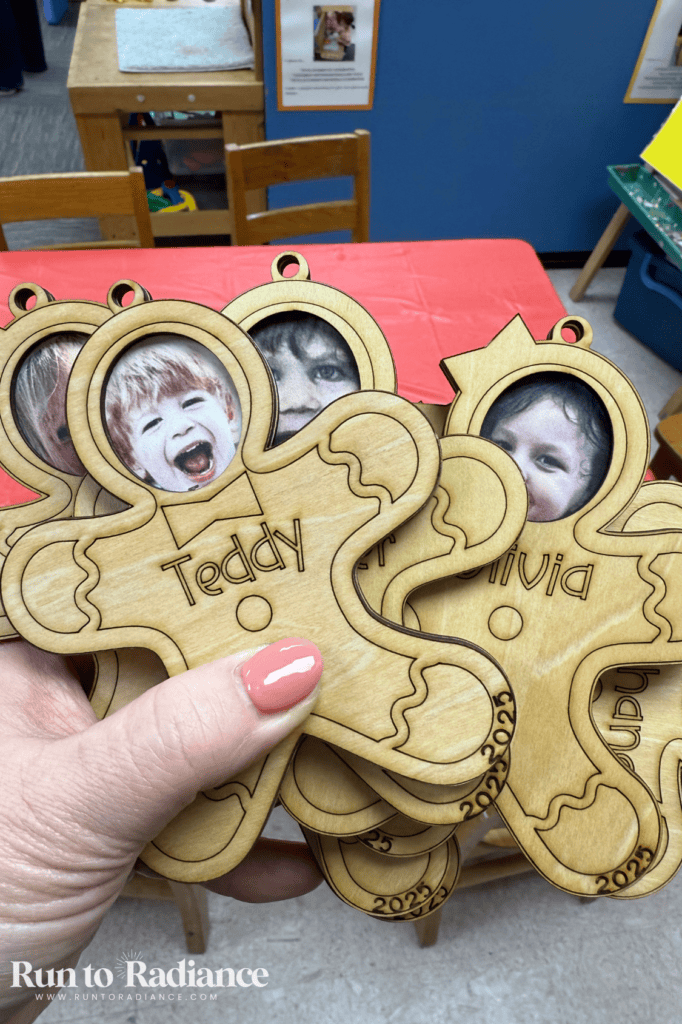
21. Paint-Your-Own Gingerbread Photo Ornaments
For a class party, I printed each child’s photo as the gingerbread’s face and engraved their name and the year on the body, then the kids painted and decorated their own.
Parents LOVED taking home a keepsake with their kiddo’s face on it! See my paint-your-own gingerbread ornaments.
Quick tip: bundle a few blanks with paint and brushes and it’s a DIY ornament kit, too.
22. Paint-Your-Own Ugly Sweater Ornaments
These were a HUGE hit at my daughter’s 2nd grade Christmas party and my son’s Pre-K 3 party!
I printed each child’s face at the top and left the sweater blank, and the kids went to town with paint, glitter glue and pom poms. See my paint-your-own ugly sweater ornaments.
What to know before you grab that laser: ask parents for a simple headshot a week or two ahead so you have time to print and cut.
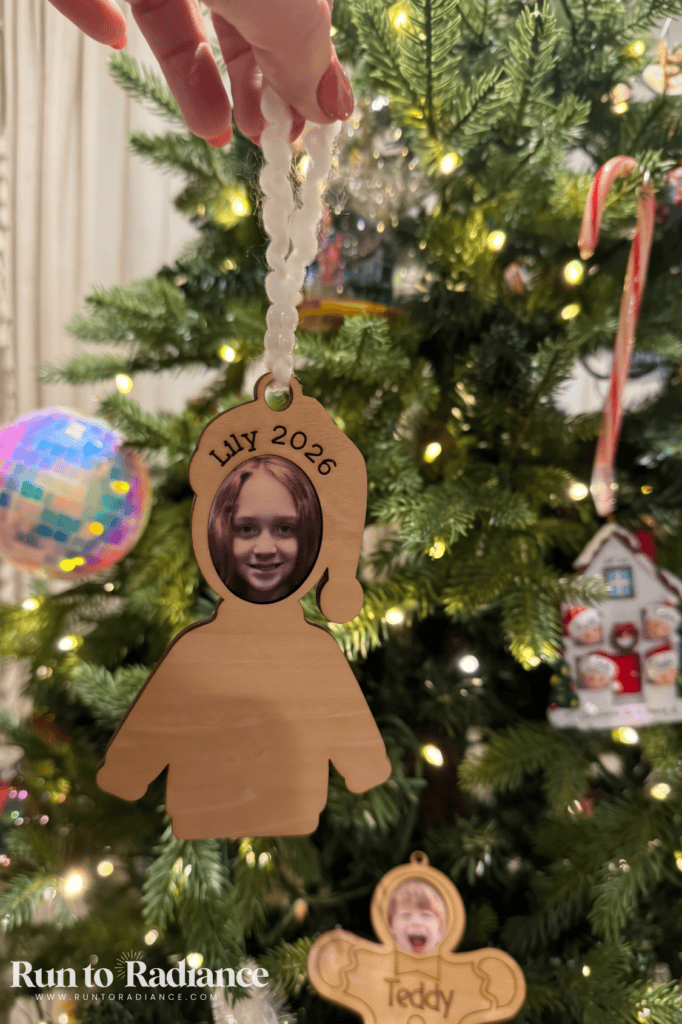
23. Photo Ornaments Printed on Wood
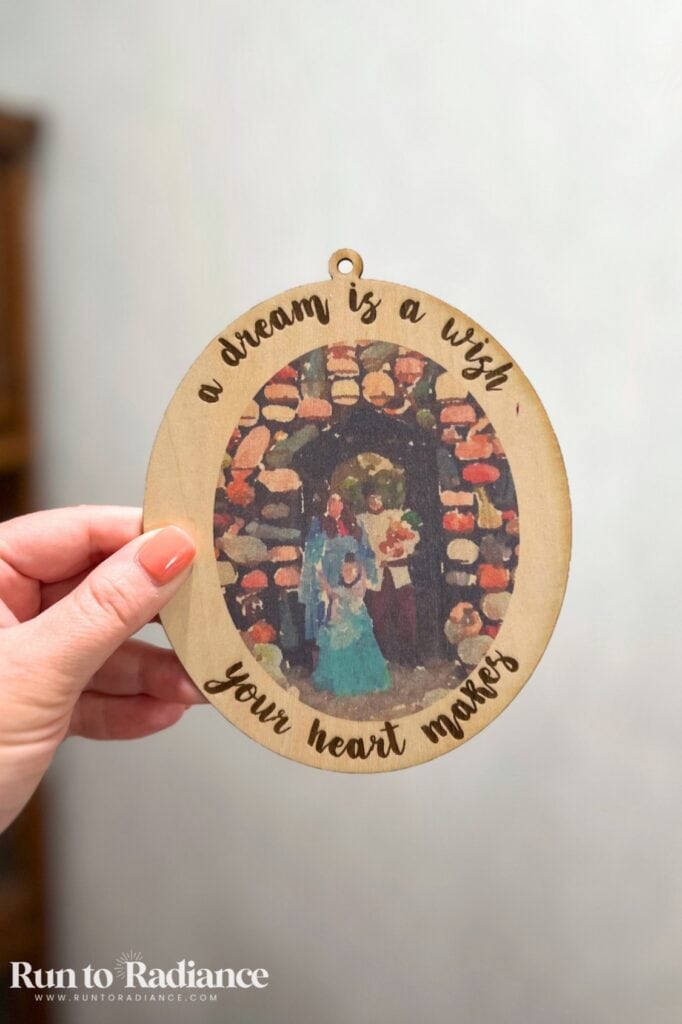
I printed our family photo right onto wood, and it’s so much more special than a photo in a frame! Here’s how I print a photo on wood.
Expert tip: I tested several inkAid precoats, and matte white gave me the crispest, brightest photo. I also love skipping the precoat so the wood grain peeks through.
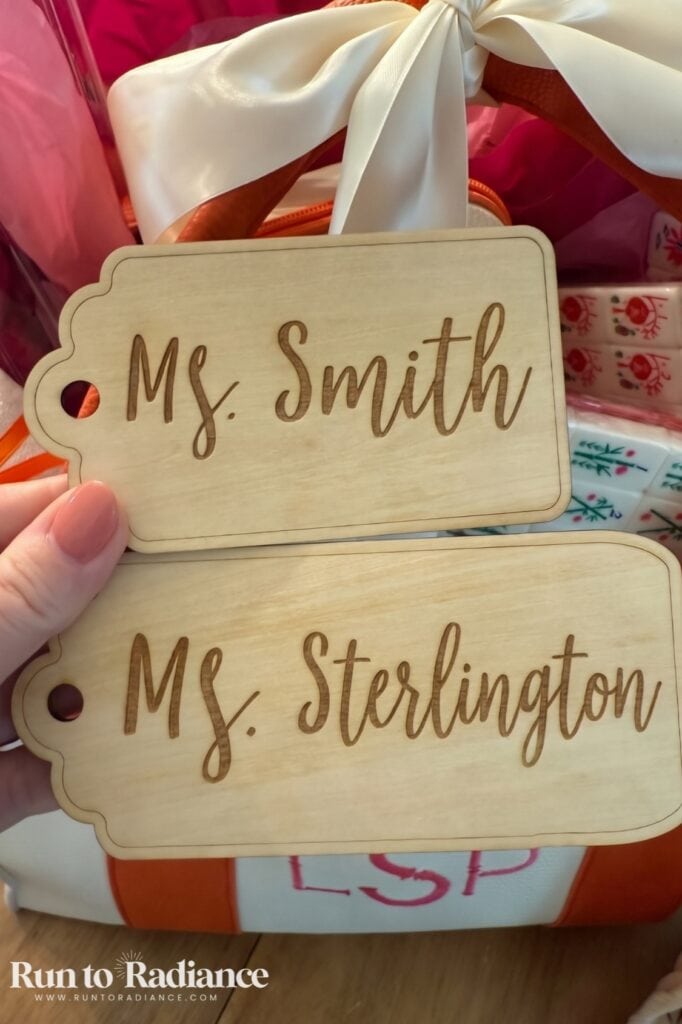
24. Engraved Wooden Gift Tag Ornaments
This is my favorite two-in-one! An engraved wooden tag with their name dresses up the gift, then hangs on the tree as an ornament next year.
I cut a whole sheet at once, so there’s one for every present under the tree. See my engraved wooden gift tags.
Quick tip: want to engrave round ornaments too? The M2’s rotary attachment handles round ornaments, mugs and tumblers.
UV Printed Ornaments
A UV printer prints full color right onto the ornament itself, and watching a design go from my screen to a finished ornament in minutes never gets old!
UV printing sounds technical, I know. But don’t be scared, it’s way easier than you think!
What to know before you grab that UV printer: pick flat-backed blanks so they sit level in the printer.
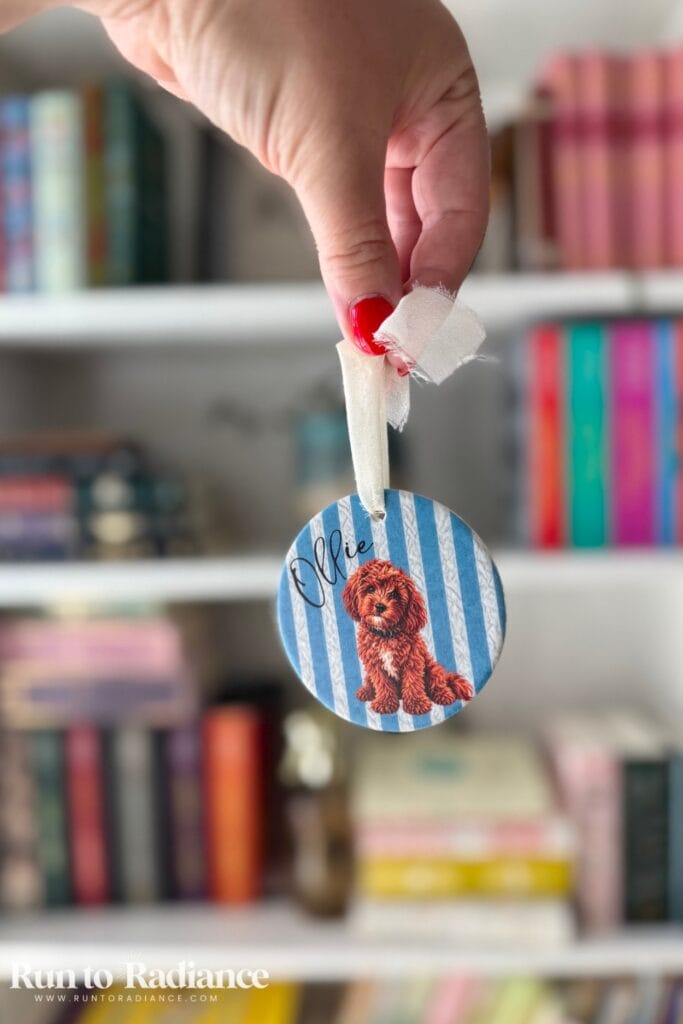
25. Ceramic Pet Ornament
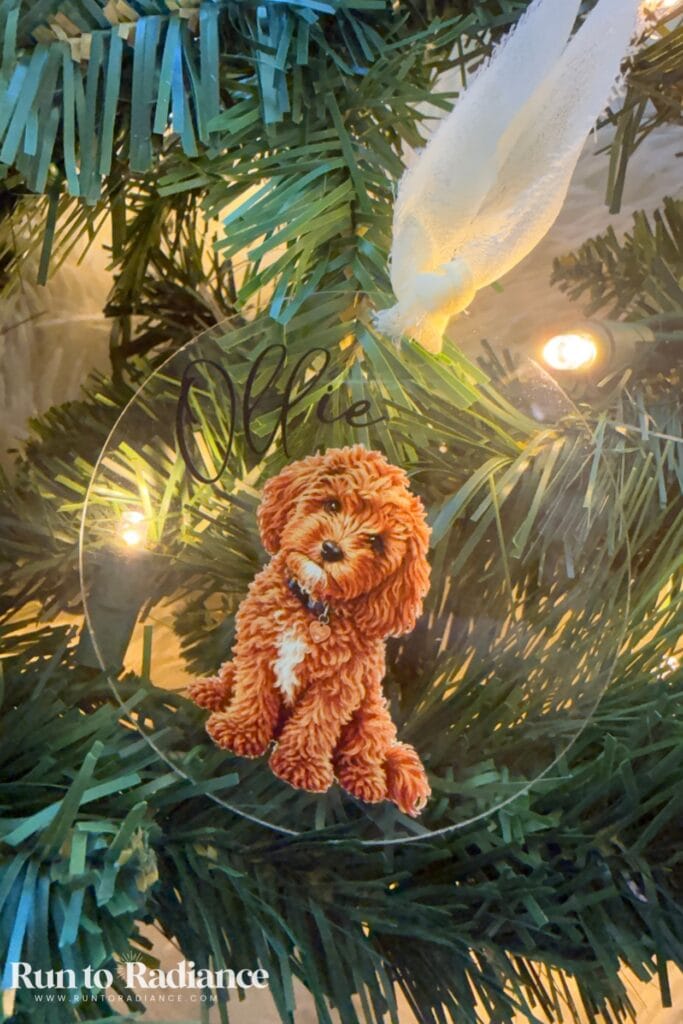
I printed our dog Ollie on a ceramic ornament with a blue and white striped background, and I can’t wait to add it to our tree! The only prep was a quick wipe with the matching prep wipe and wearing gloves so I didn’t touch the surface.
Any pet’s name and face would make the sweetest gift for a pet lover. Here are all my UV printed ornaments.
You’ll need: ceramic ornament blanks and the UV prep wipes.
26. Clear Acrylic Ornaments
I made these in acrylic, too, and I love how both turned out! They’re going straight into our own ornament collection.
I’m also making a batch of little house ornaments as Christmas gifts for my husband’s real estate clients, which would be perfect for any new homeowner. My xTool Omni review has everything I’ve printed so far.
You’ll need: acrylic ornament blanks.
27. UV Printed Wood Slice Ornaments
I printed right onto a wooden round from my craft stash with no pretreating, and it came out beautifully! Start with a pre-drilled wood slice and you’ve got a full-color ornament in minutes.
Expert tip: go bold with your design. Mine could have used an extra layer of white.
You’ll need: wood slices with holes.

Frequently Asked Questions
What is the easiest DIY Christmas ornament?
Painted ornaments, hands down! Squeeze acrylic paint into a clear plastic ornament, swirl, and let it drain overnight. It takes about 5 minutes of hands-on time, and a 5-year-old can do it.
How do you make homemade ornaments last?
Seal salt dough and clay ornaments front and back with Mod Podge, and make sure they’re completely dry first. Store them wrapped in tissue in a hard bin, not a bag.
My salt dough handprint heart is seven years old and still holding strong! My seasonal decor storage tips help, too.
Should I use glass or plastic ornaments for crafts?
Plastic, especially with kids. They look just as pretty once they’re painted or filled, and they won’t shatter when someone drops one. Trust me on this one!
What ornaments can kids make?
Painted ornaments, popsicle stick trees and snowmen, salt dough handprints, button Santas, pony bead candy canes and stamped clay ornaments are all easy for little hands. My DIY Christmas ornaments for kids has even more.
Final Thoughts
There you have it, friends: 27 DIY Christmas ornaments worth hanging every year! Start with a 5-minute painted ornament, or go all in with a personalized one for everyone on your list.
Either way, you’re making the ornaments your family will pull out and smile at for years to come.
Which one are you making first? Let me know in the comments. Can’t wait to see what you create!