xTool O1 Omni Review (UV Printer)
This post may contain affiliate links. As an Amazon Associate I earn from qualifying purchases.
Okay, we HAVE to talk about the new xTool UV printer. Let me paint you a quick picture: two to three hours of setup. A rush order of almost $500 in extra supplies I didn’t know I needed. A whole new set of rules and a semi-intense learning curve…so was it worth it? Let’s find out.
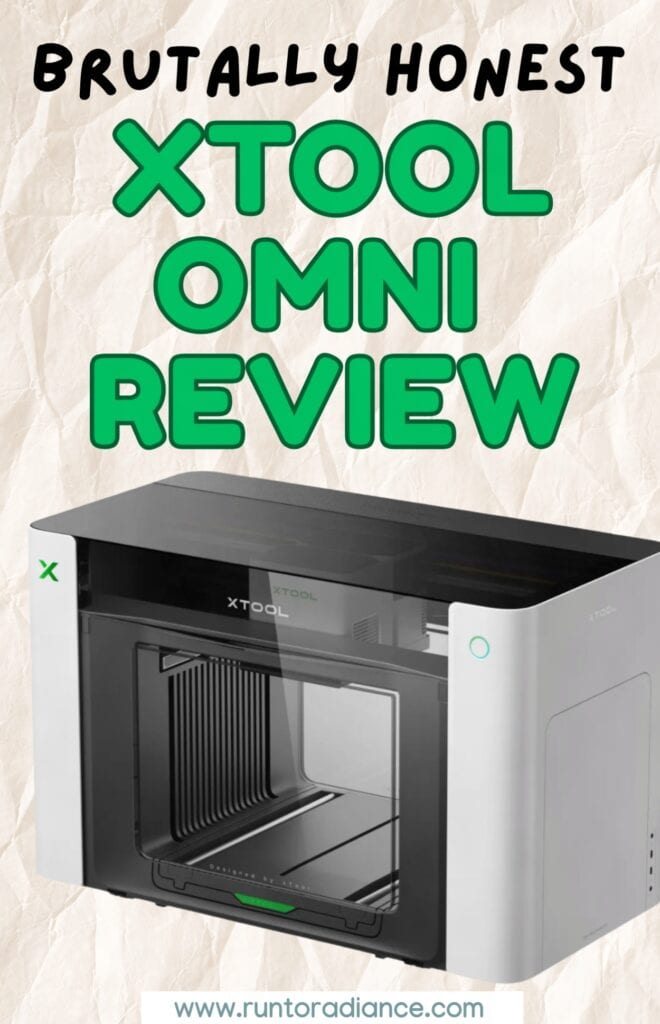
I own five xTool machines and counting, and the xTool Omni is a different beast from all of them. In fact, it’s unlike anything I’ve ever owned before (and I’ve been a professional crafter for over a decade!).
But, is the xTool O1 Omni right for YOU? Well…maybe? That’s what I want to help you find out, because there is a LOT to consider and know with this machine, more than any other one I’ve ever reviewed.
In this xTool UV printer review, I’ll walk you through the editions and prices, the ink situation, my projects, and everything else you’ll need to buy. Let’s dig in!
Disclosure: xTool sent me this machine in exchange for an honest review, but every opinion here is 100% mine. This post contains affiliate links.
Psst…fair warning: this post really is a deep dive! The Omni is a big investment, so before you spend your hard-earned money, I want you to be sure it’s the right machine for you. I encourage you to read the whole post, but we have a lot to cover, so feel free to use the table of contents to jump ahead, or hang with me the whole time!
🏅 Why You Can Trust This Review
Okay, quick pause before we dive in. Let me tell you why you can trust everything I’m about to say!
I’ve been laser crafting since 2023, and I own five xTool machines (plus a full craft room of other crafting tools to compare against), so I’m not reviewing the Omni in a vacuum. I’ve partnered with xTool since 2023, testing the majority of machines they’ve released, and I’ve sold 120+ laser-crafted items in my Etsy shop. This is how I create, and it’s part of my income.
Here’s the honest part: the Omni is my first UV printer. I’m learning right alongside you, so I’ll tell you exactly what I’ve tested and what I’m still figuring out.
Want to check out my past reviews?
And as always: every opinion here is 100% mine, jargon-free, and as honest as it gets. Let’s get into it!
xTool Omni at a Glance 👀
- The machine: a desktop UV printer (the xTool O1 Omni UV printer) with optional fabric printing, not a laser
- My edition: UV + DT Fabric Edition
- Prints on: wood, metal, glass, ceramic, acrylic, canvas, and so much more (hairbrushes, iPhone cases, etc!)
- Price: varies depending on sales and edition, but ranges between $2,200 – $4,900
- Skill level: beginner-friendly to semi-advanced, with a learning curve for UV printing
- Perfect if you love: personalized gifts, making everything cute, and selling custom products
What Is the xTool Omni?
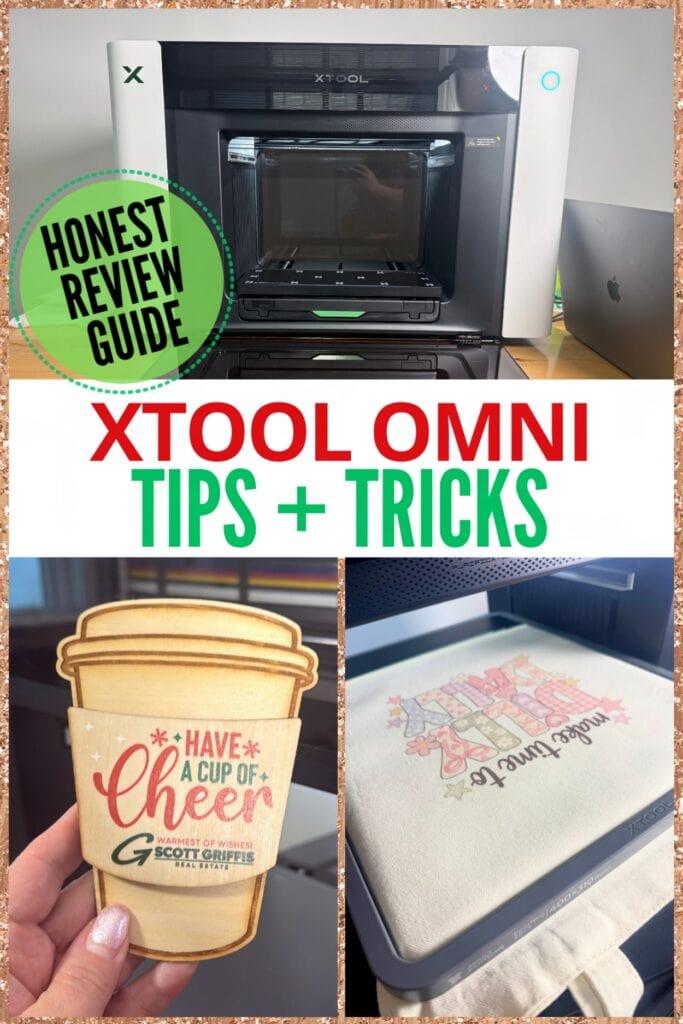
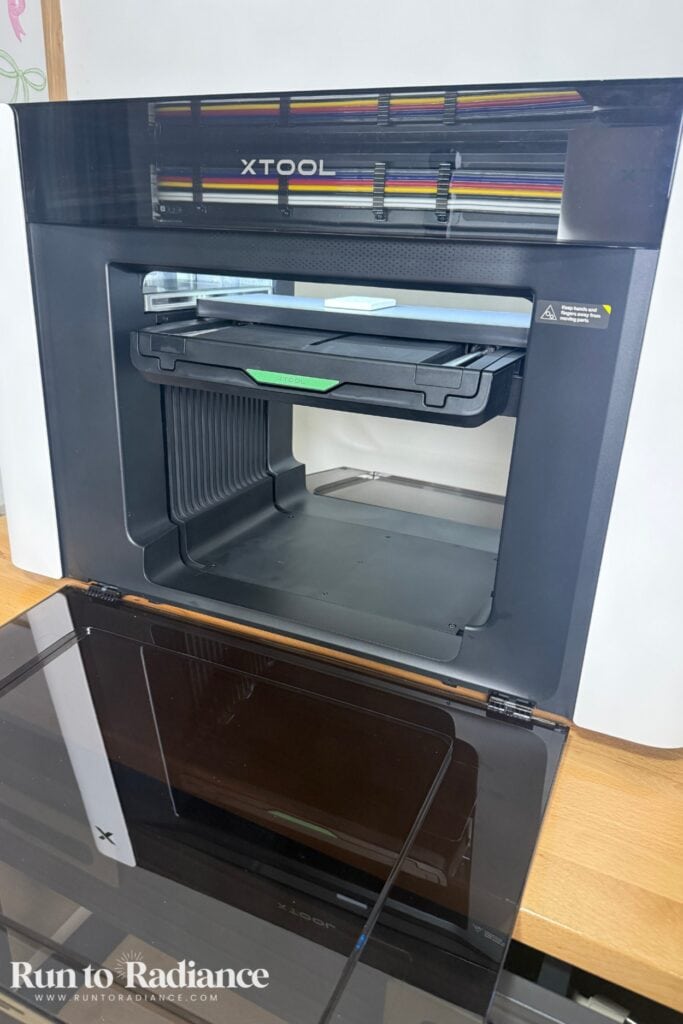
The xTool O1 Omni printer is xTool’s first UV printer, a desktop machine that uses UV light to cure ink instantly, so you can print full-color designs directly onto hard items like ceramic, acrylic, wood, and metal. Depending on the edition, it can also print on fabric.
It is important to note that this is a printer, not a laser engraver, but it works beautifully alongside one.
What Makes the Omni Different
Okay friends, there’s a little jargon coming up. But don’t be scared! It’s not as hard as it sounds.
- UV printing: UV light dries the ink the moment it’s printed, so there’s no waiting around for it to dry.
- Print on the item itself: you can print straight onto a flat object, not just paper. xTool says it handles items up to 50mm thick.
- Camera alignment: the Omni scans your item and places the design for you, so there are no jigs and far less guesswork.
- Texture and finish: xTool’s varnish options add matte, gloss, and raised effects. I tried both texture and relief on canvas, and I share the results below.
- UV DTF transfers: print onto film, then apply the design to items that are hard to print on directly. That makes one of the versions of the Omni an xTool UV DTF printer, too. You’ll need the laminator for this, and I cover that below.
The best part? Seeing a design go from my screen to a finished ornament in minutes. I’ll be honest…it’s my favorite machine in the craft room right now!
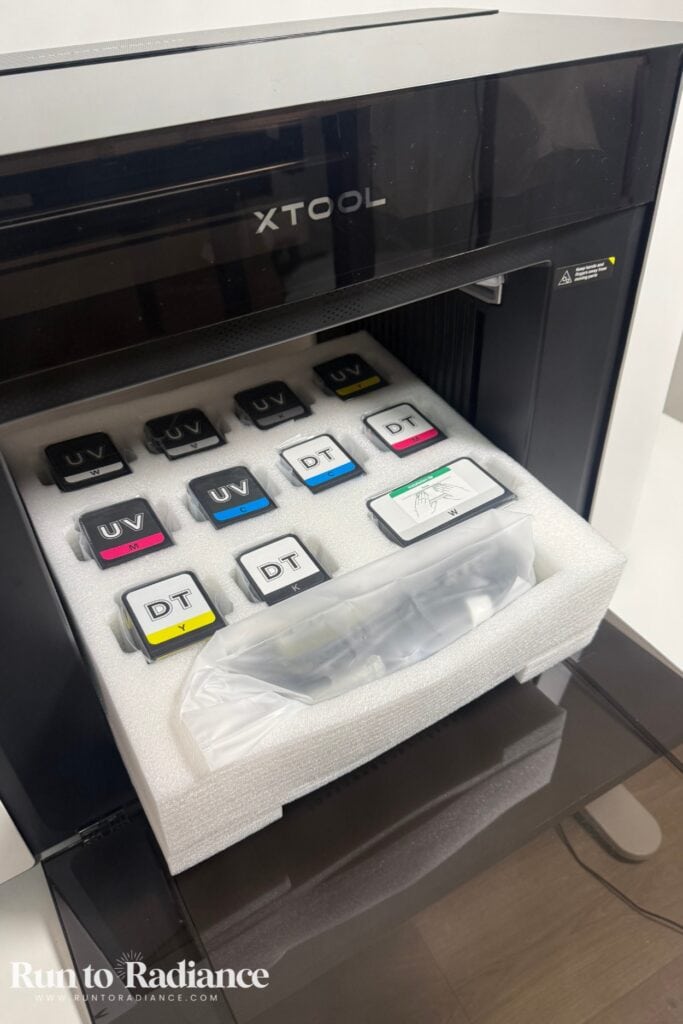
Which Omni Should You Get?
This is the question I get asked most, and I understand why. There are three different versions, and each look similar but do very different things.
Here’s the simple breakdown.
Single UV Edition
- What it does: one UV printhead for hard goods (the single head UV printer)
- Get it if: you only print on rigid items like wood, acrylic, ceramic, and metal
- What you need to know: it uses rigid white ink, which is made for hard surfaces. For things that bend, like leather, xTool points you to the Dual-Head. The good news is that texture, varnish, and foil effects, plus UV DTF decals (with the laminator), come with every edition, so the Single UV isn’t a stripped-down version.
Grab the Single UV Edition here!
Dual-Head UV Edition
- What it does: two UV printheads, larger white ink capacity, fluorescent effects, and flexible white ink for items like leather
- Get it if: you want those effects or use a lot of white ink
- What you need to know: flexible white ink is the big one. Rigid white can crack when a material bends, while flexible white moves with leather, canvas, and patches. The fluorescent red and yellow inks are for vivid, neon-style pops. Both are only on this edition.
Grab the Dual UV Edition here!
UV + DT Fabric Edition (my edition)
- What it does: UV plus a fabric printhead for DTG and DTF. This is the only edition that can print on fabric, like totes, shirts, and hats.
- Get it if: you want hard goods and apparel, since it’s the only edition that can do both
- What you need to know: the second printhead is for fabric ink, not a second UV head. That means this edition doesn’t have flexible white or fluorescent inks. DTG is best on cotton, and DTF works on polyester, nylon, and blends. You’ll also need a heat press.
Grab the DT + UV Edition here!
Here’s the part that isn’t clear but needs to be: you cannot convert one edition into another later. The ink systems are physically different, so choose carefully!
What to know before you buy: if you’re a gift-and-ornament maker like me, the Single UV covers hard goods. xTool sent me the DT + UV Fabric Edition, so I didn’t pick it myself. But if I had chosen, I’d be drawn to this one, because I’m a sucker for versatility and options! I still need to try DTF, so we’ll see.
I’m even thinking daydreaming about a second Omni, and if I got one, I’d go with the Dual UV edition to test out that flexible white ink! For now, I’m super happy to have this one with all the possibilities.
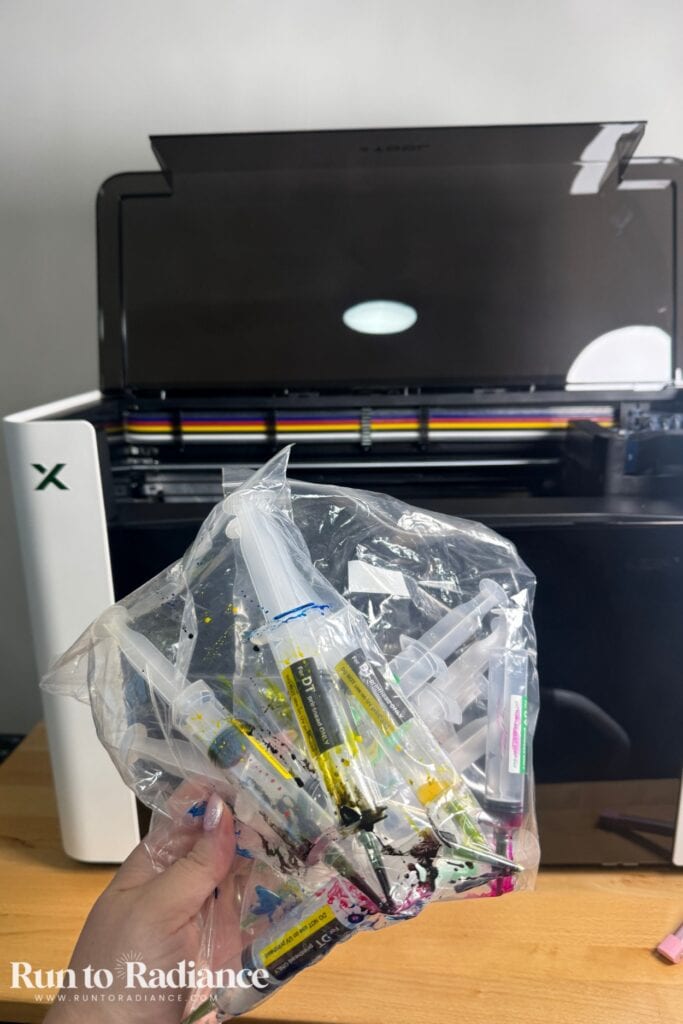
Unboxing and Setup
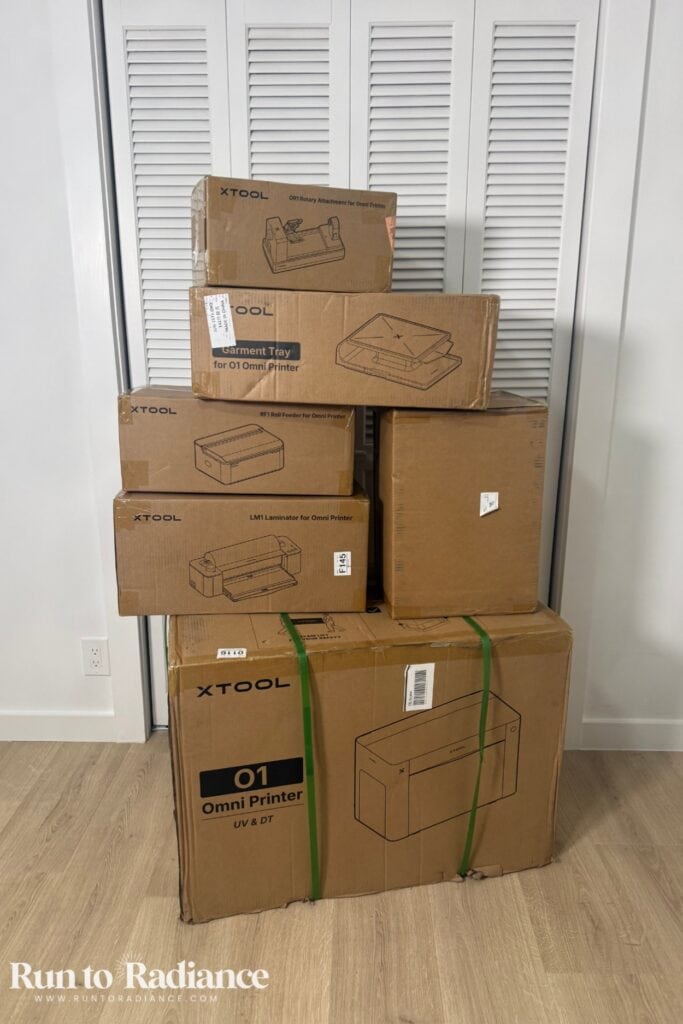
Good news: the instructions are clear and everything is labeled, so it’s not hard, but be ready: setup took me 2 to 3 hours, and it was the longest xTool setup I’ve ever done.
There are a lot of steps and I think it would be hard to stop and pick it back up, so block out an afternoon and get it done!
What to know before you unbox it:
- Get a helper. The Omni is heavy, and you do not want to drop it. Plan on two people for lifting.
- Use a rolling cart. It makes placing and moving the machine so much easier.
- Keep it out of the sun.
- Shake the ink and wear the gloves. Pay close attention to what you unwrap and what stays wrapped when you install the ink.
- Update xTool Studio first. If you already have it, update to the latest version before you connect.
- Expect a firmware update. As soon as I connected, a mandatory firmware and plugin update kicked in, and I had to restart xTool Studio.
- Don’t panic at the noise. The moisturizing liquid step gets loud and churny. It said it would take 3 to 5 minutes, and that’s normal.
My connection hiccup: my Omni didn’t show up in the device list at first, and the software kept flagging a data transfer detection issue. I couldn’t find a fix online, so here’s what worked for me: I unplugged the connecting cable and flipped it around so each end went into the opposite machine. It connected right away!
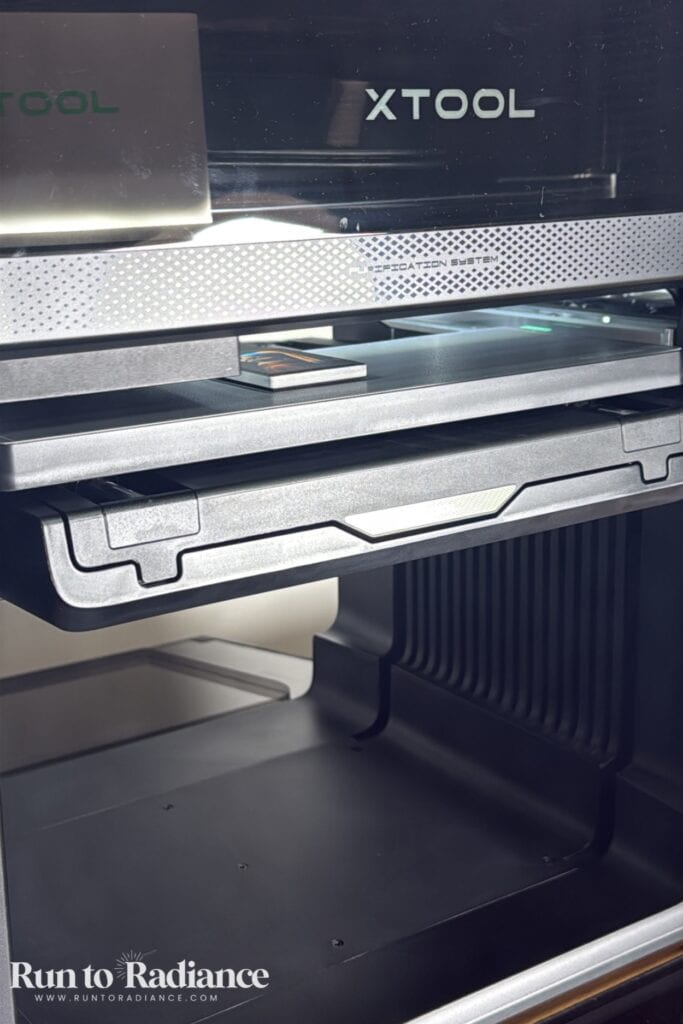
Software: xTool Studio
If you can use Canva, you can use this. You drag your design onto the canvas, click Scan so the camera captures the workspace, and size it to fit your item. Then you choose your print mode (flat, texture, or relief) and hit print. Update xTool Studio before you connect, since the software gets frequent improvements.
The software has changed quite a bit (for the better!) since the early days. You now have access to a lot more features and I truly feel it’s one of the most user-friendly design softwares out there (MUCH easier than Cricut Design Space).
I’ll also add that they have moved to a token system where you can buy and spend token credit to have access to more AI features that will automatically remove background, add things, etc. Some people will love that and others not so much. But, it’s there if you want to use it!
Projects I Made With the Omni
OKAY. Now we can get to the good stuff….what I made! You’ve seen the photos sprinkled throughout but let’s dig in.
Here’s what I have printed on over the last six weeks with this fabulous machine!
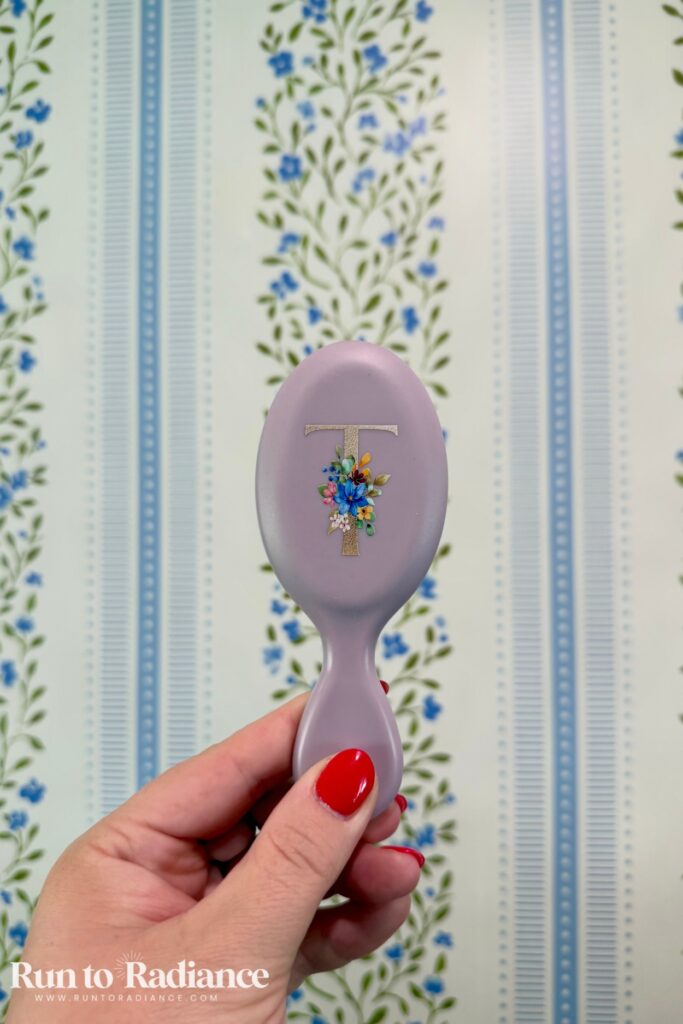
Hairbrushes
These are basic little hairbrushes I grabbed off Amazon, and they turned out SO cute!
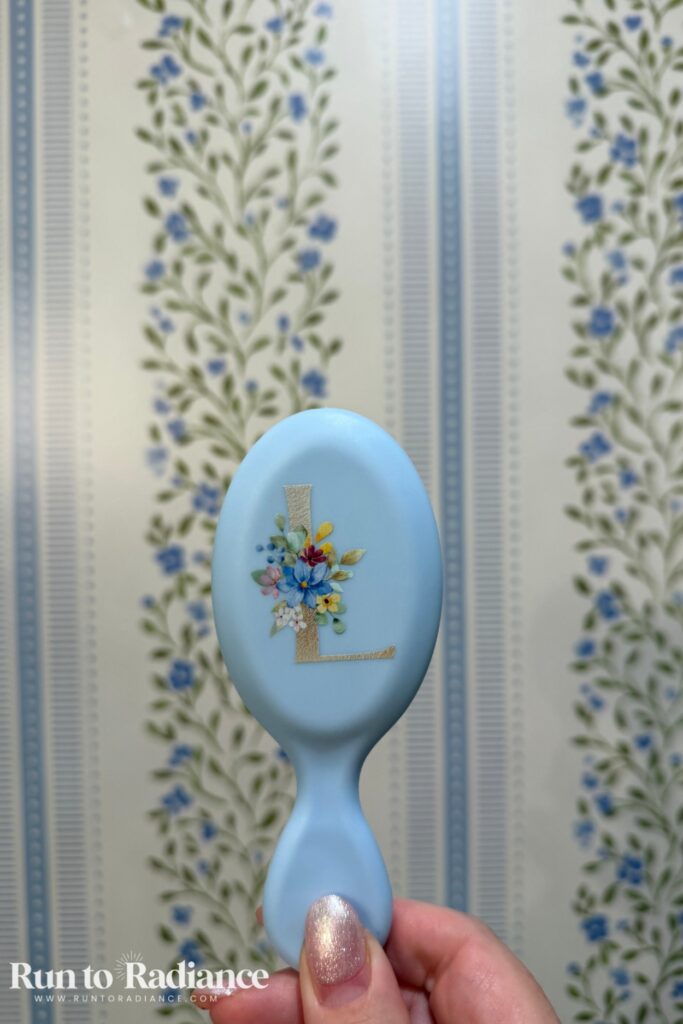
I was surprised at how much the printed gold looked like real gold leaf. The color is excellent, and I’m planning to make these as party favors for my daughter’s birthday.
Wood
I wanted to make a simple wood coaster, so I grabbed a wooden round I had in my craft stash. I didn’t pretreat, and it printed beautifully.
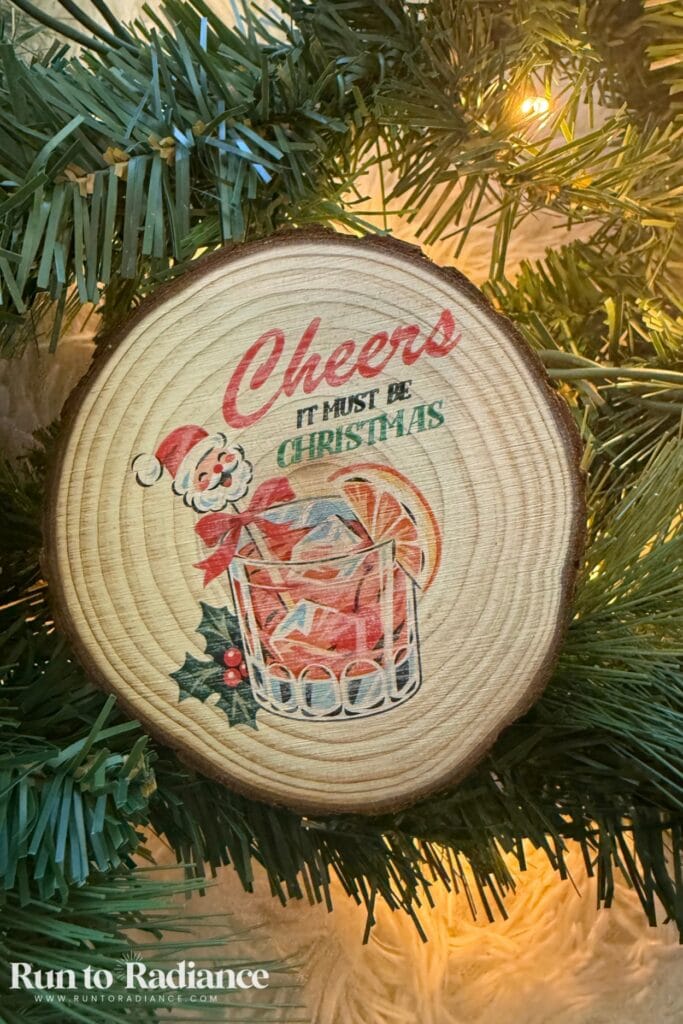
My design could have been a bit bolder, since I only used one layer of white and one layer of color (I’m hoarding my ink because it’s hard to get right now – more on that below).
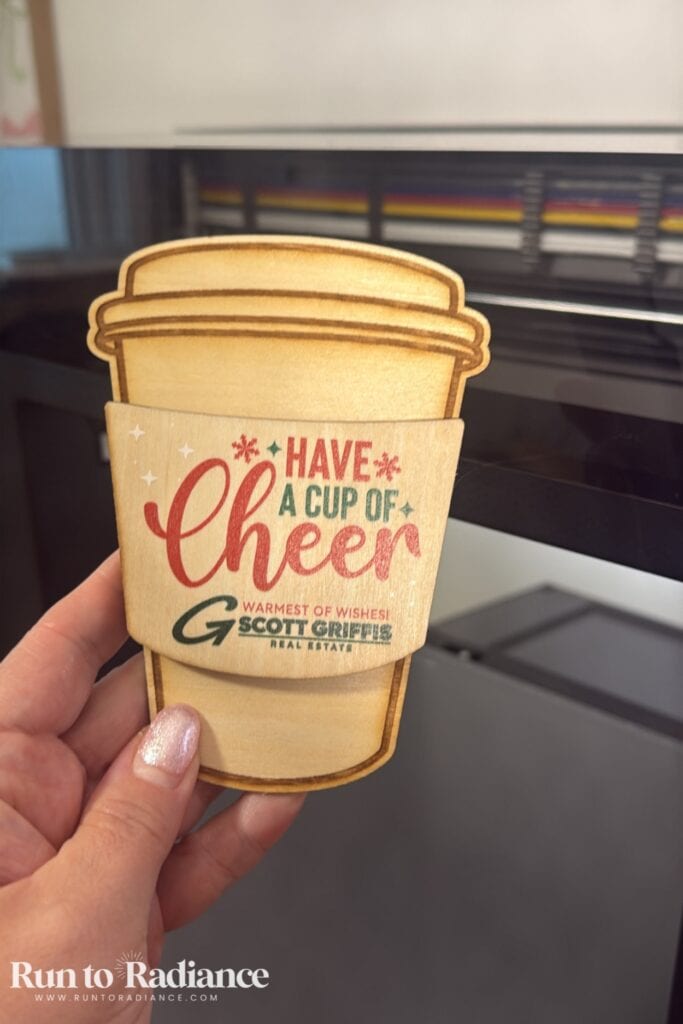
I also made a custom coffee cup sleeve using my xTool M2 laser, then decided I wanted to try printing on it with my husband’s real estate info.

These gift card holders turned out SO cute and I am 100% going to make these as little gifts for his clients! I also think these would make awesome teacher’s gifts too, with a different design on them.
Cup
This wine tumbler turned out so cute, and gave me a good chance to test out the rotary accessory. Getting a cup that works with the rotary was the hard part, though.
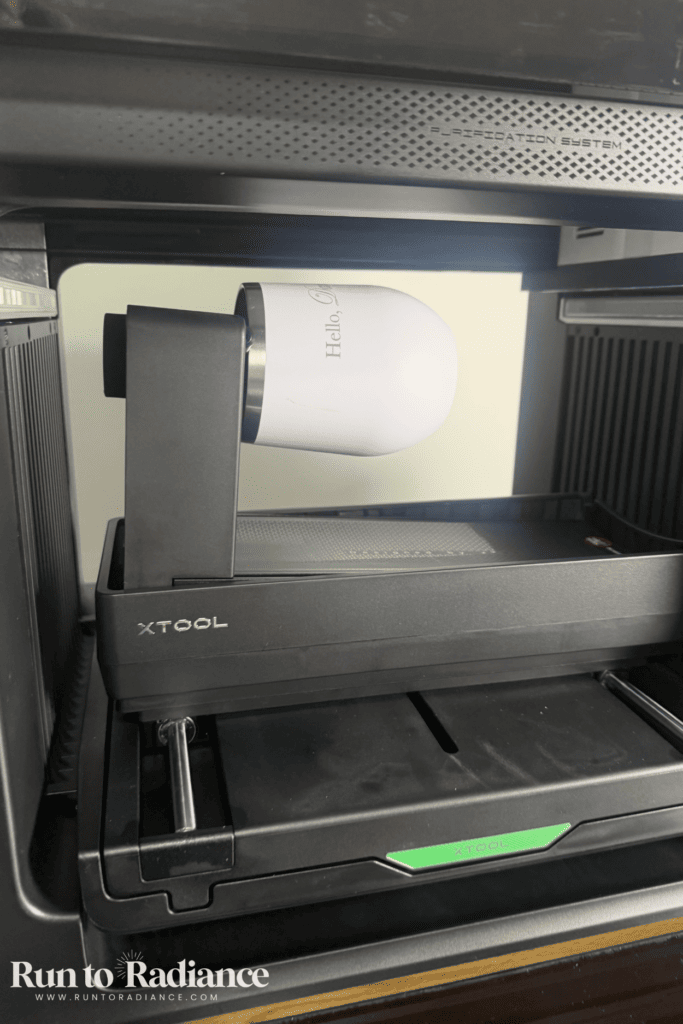
My first cup, a 40-ounce Stanley-style tumbler with a handle, didn’t work because the handle hit the bottom of the rotary and it couldn’t turn fully. My second cup, a metal camping-style mug, didn’t work either.
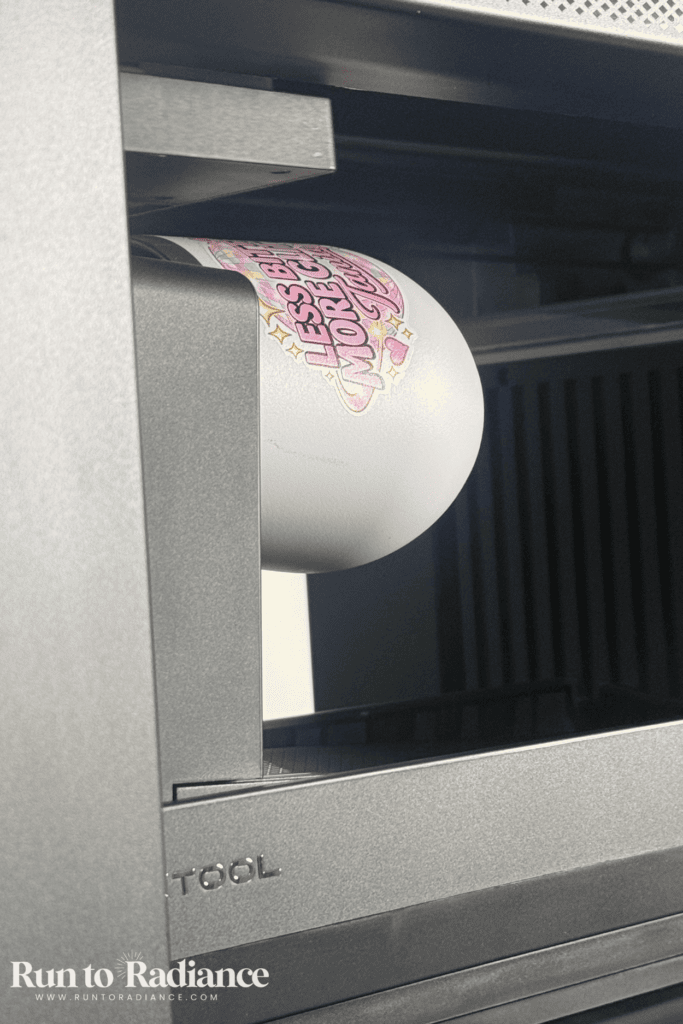
The third was a wine tumbler, and thankfully it worked! It was a promo item from a home builder with “Hello, darling” etched on it, so I covered it with my own design. I printed a white background with color on top.
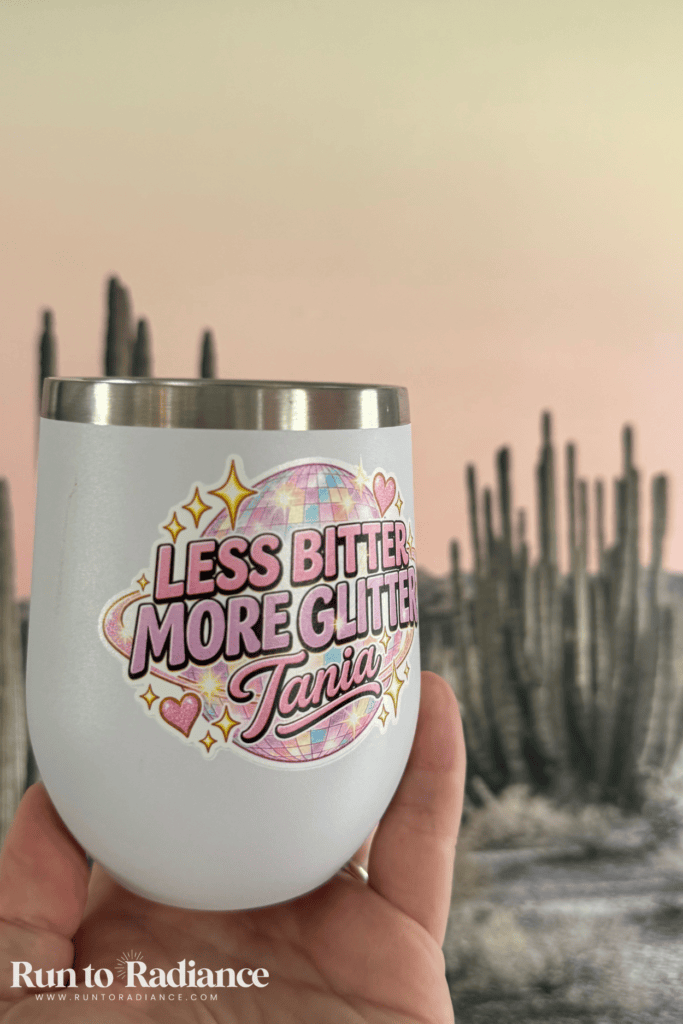
Choosing which design to print was harder than the printing, since there were so many options! This would be such an easy, fun way to make gifts, and I can’t wait to test it more.
Tip: check xTool’s rotary guide for supported cup types before you pick one.
Ceramic and acrylic ornaments
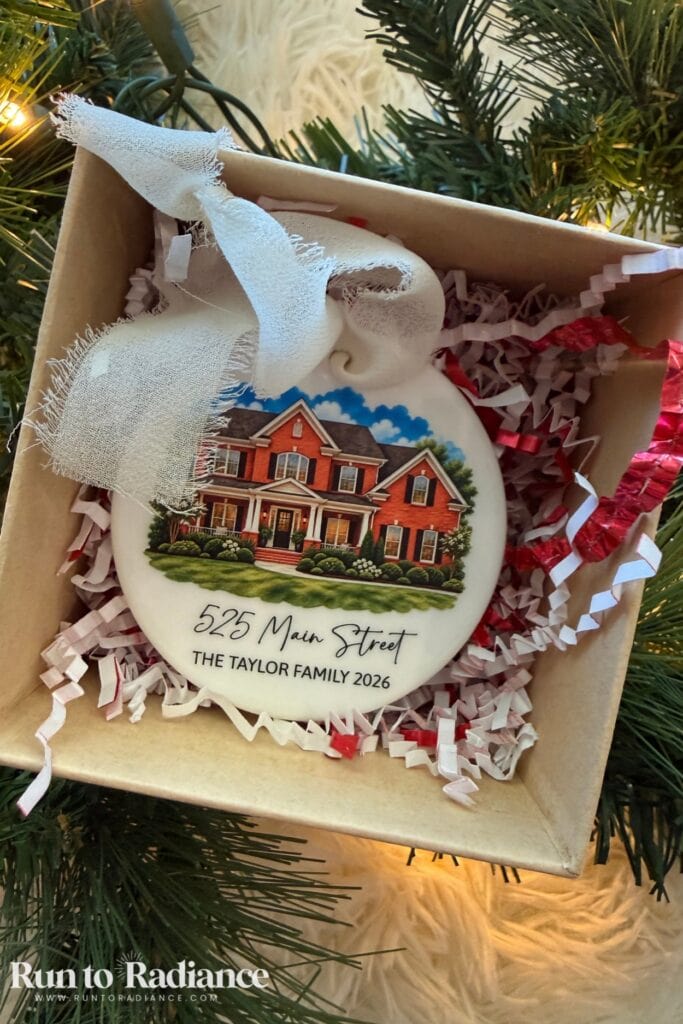
So pretty and so easy to make. The only prep was wiping each blank with the matching xTool prep wipe, and wearing gloves so I didn’t touch the surface.
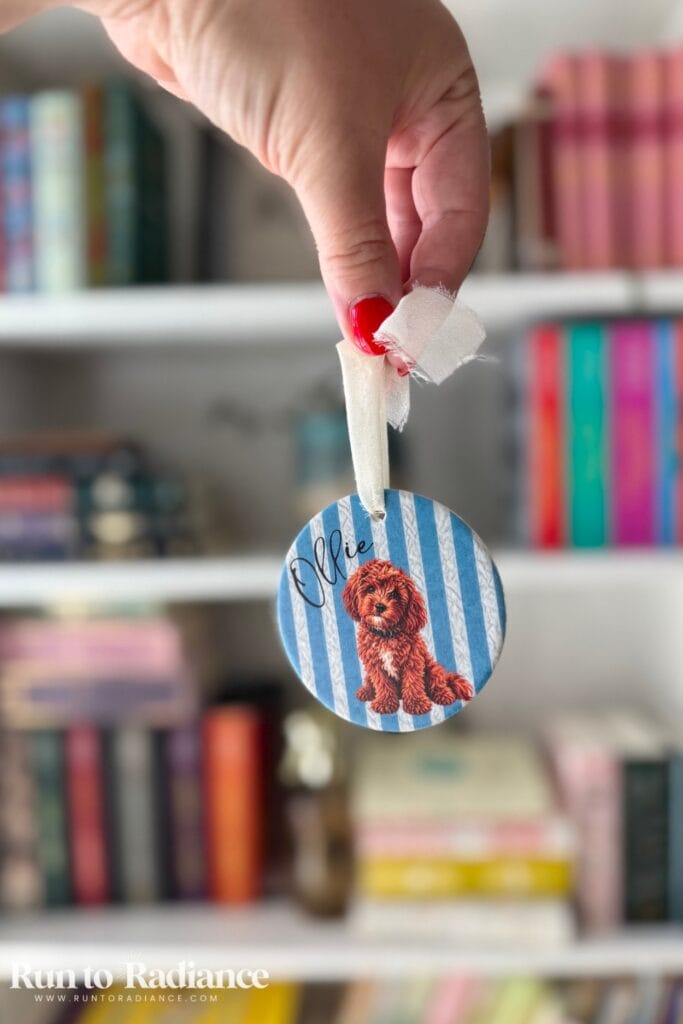
I made ornaments in both acrylic and ceramic, and love how both turned out. I am super excited to add to our own Christmas tree collection!

I’m also planning on making a bunch of these cute house ornaments as Christmas gifts for my husband’s clients. Cute, right?

3-D printed keychains
I used our 3d printer to print some flat keychains using matte PLA to see if I could use the Omni to print on them…and I could!
These turned out super cute. I’m definitely going to do more of this in the future!
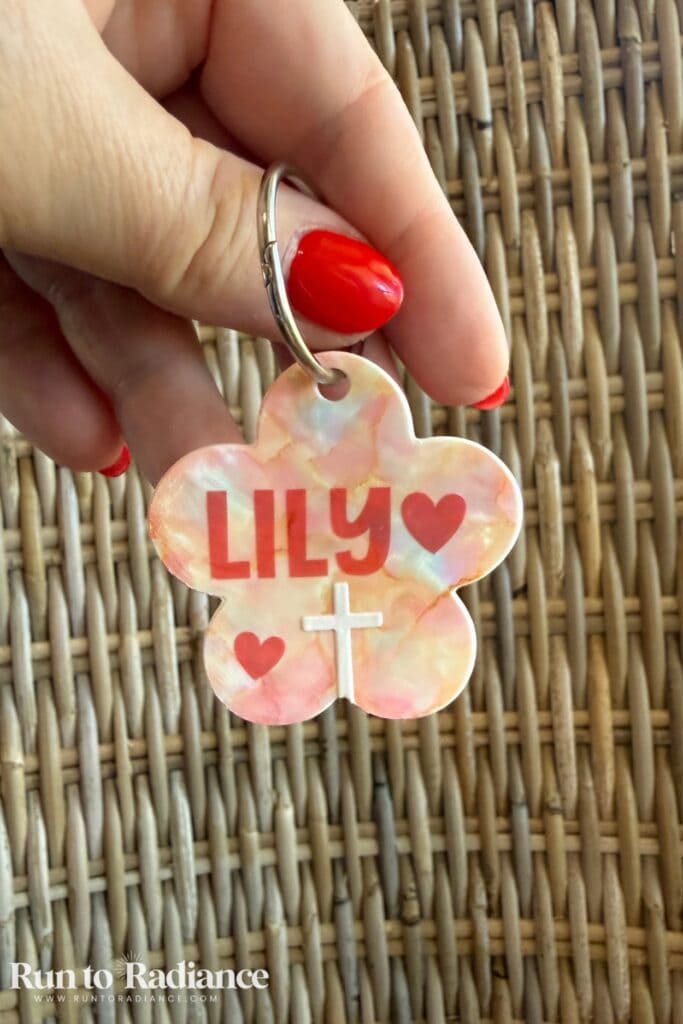
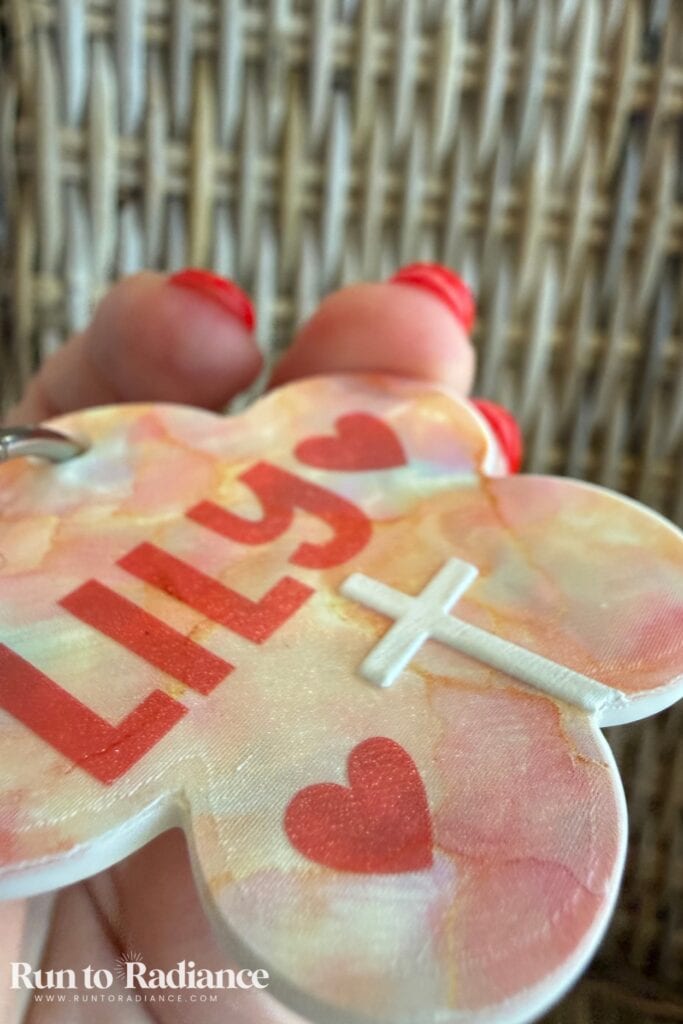
I was testing the raised texture feature here and used it on the cross – here’s a side angle so you can see how it stands out!
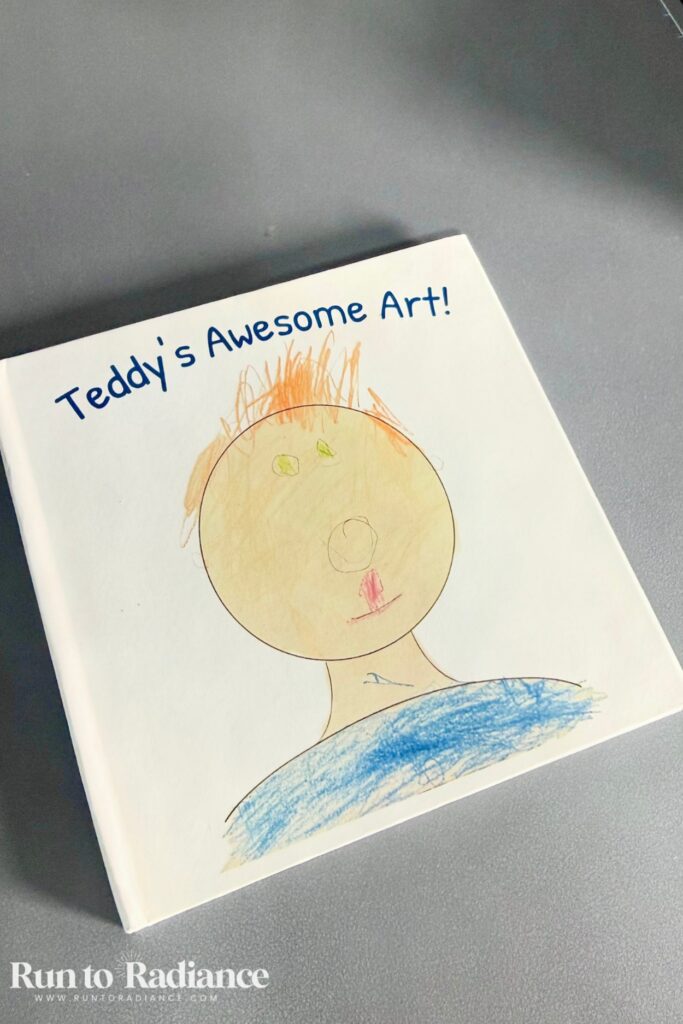
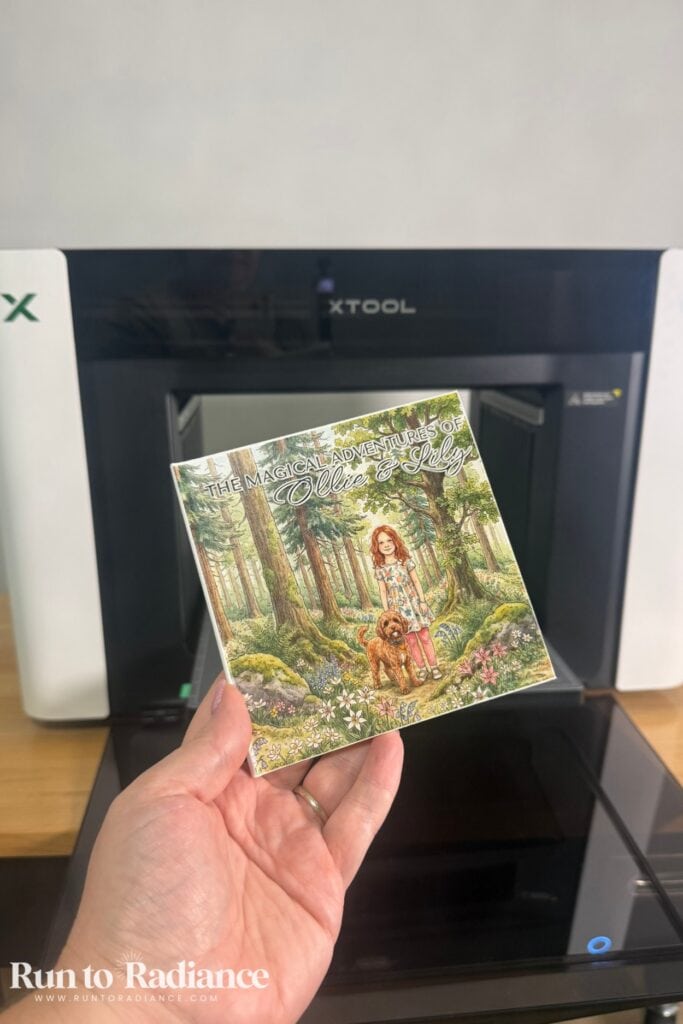
Notebook covers
This was one of the first things I tried and it was one of my favorites!
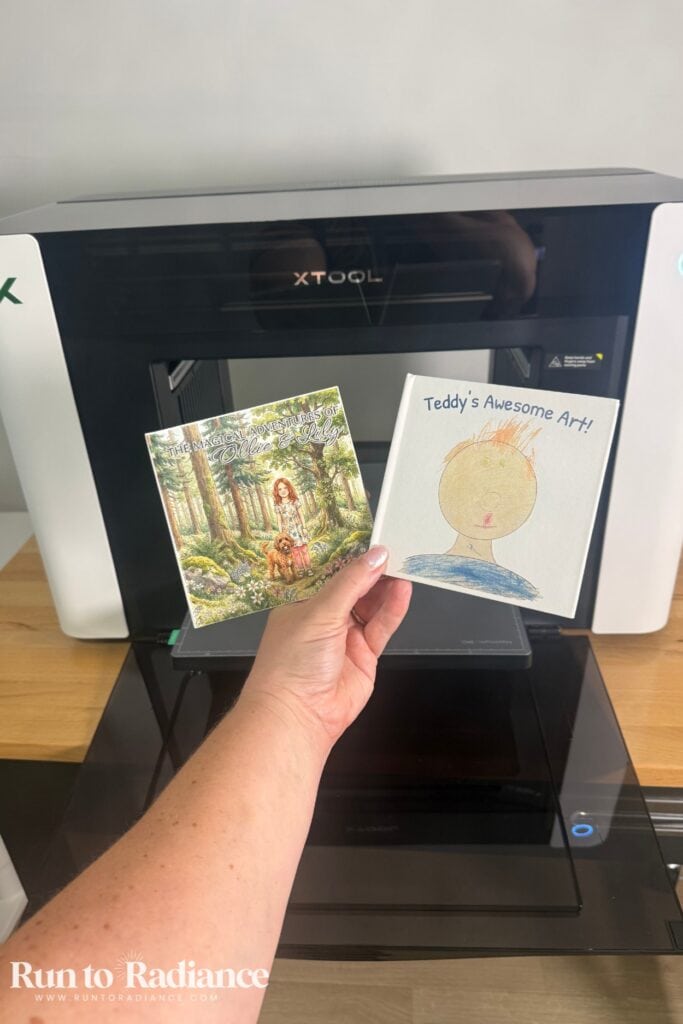
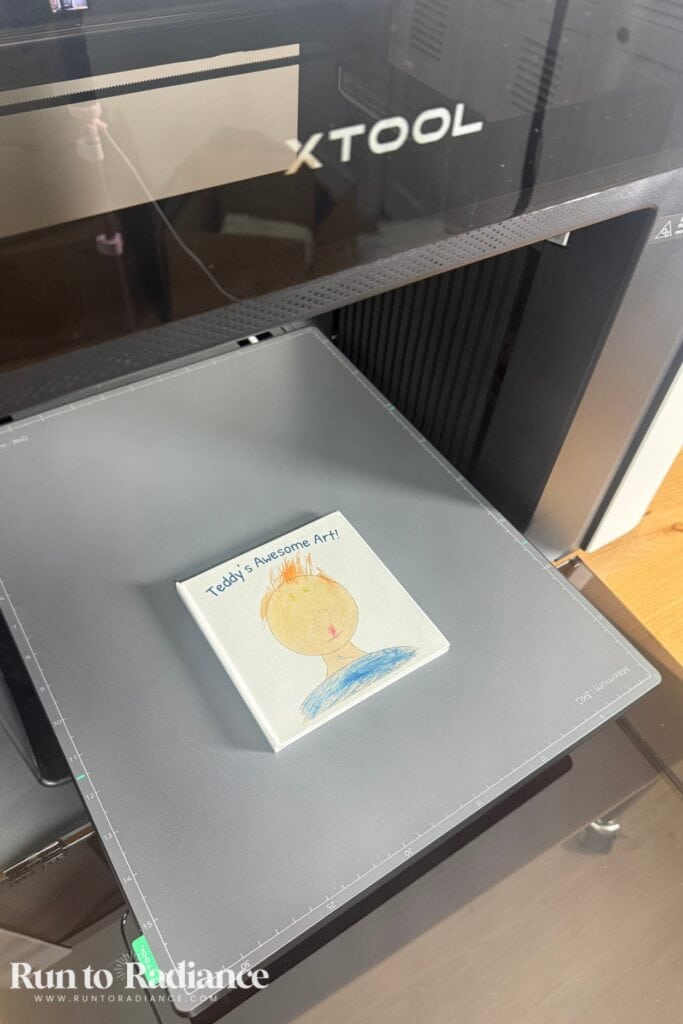
I scanned my son’s art work and printed a custom cover for him on a blank notebook so he could continue to draw.
I also made one for my daughter with an image of her and our dog, Ollie. She has already filled it with so many stories of their adventures!
Lenticular cards
This was an interesting experiment. xTool sells Lenticular cards and stickers that you can print on. I tried it twice, and the first time was a total disaster but that was on the design end rather than the print side.
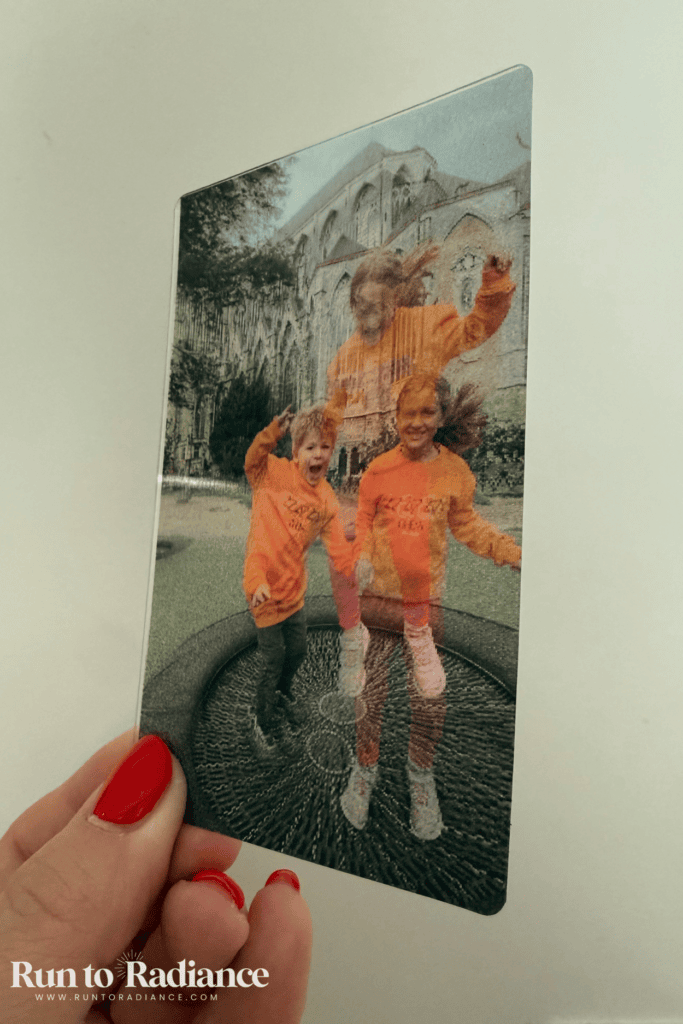
The second time looked much better and my kids loved it but I need to experiment more with this one too!
Canvas
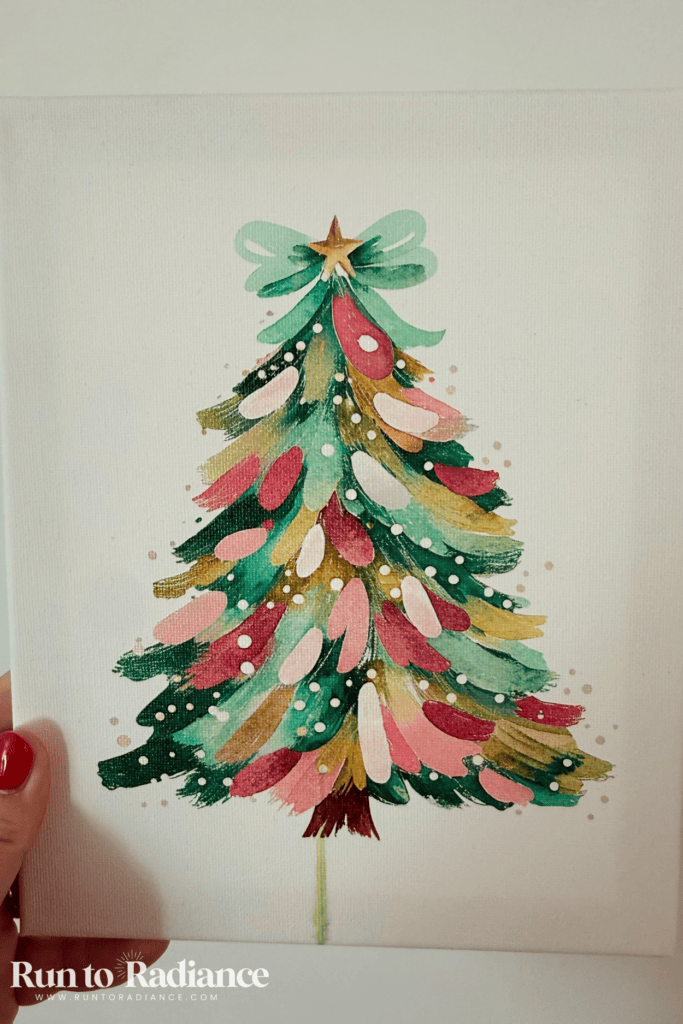
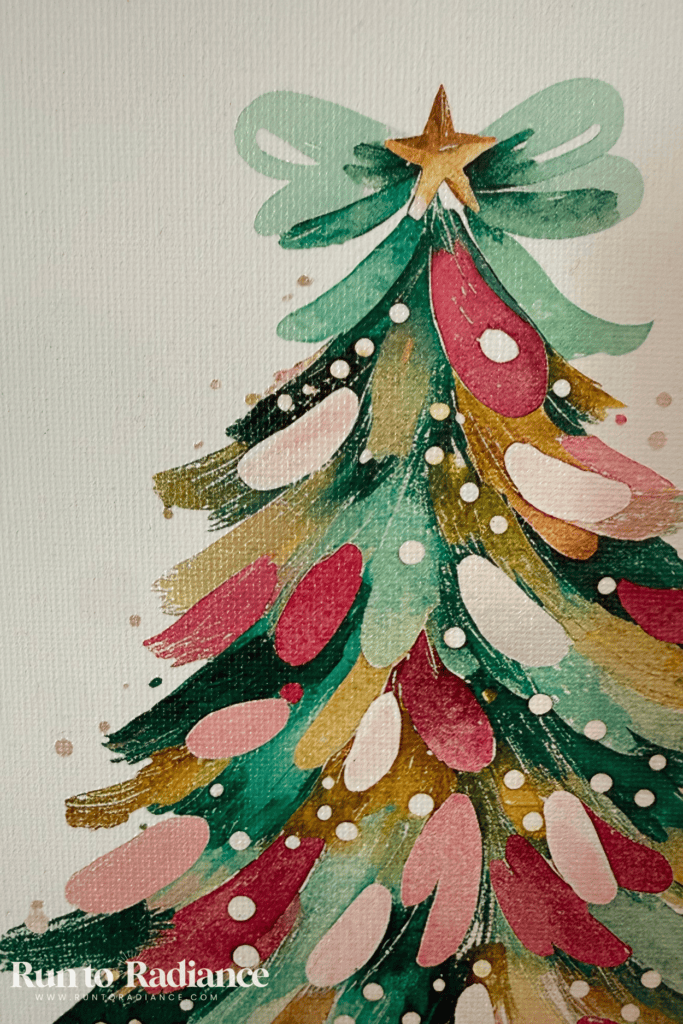
Pretty and fun! I printed a Christmas tree on flat canvas, and I plan to glue gemstones onto it for a DIY. I also tested texture vs. relief on a second canvas (see below).
You can see the Christmas tree canvas turned out very pretty, but there was a streak of paint at the bottom by the trunk, and it’s impossible to remove. I’m not sure what caused it, but the 3 other canvases I did after didn’t have any issues.
Texture vs. Relief
I printed the same photo on the same canvas two ways, side by side, to test the difference. In xTool Studio, the Omni’s flatbed mode offers three choices: Flat, Texture, and Relief.
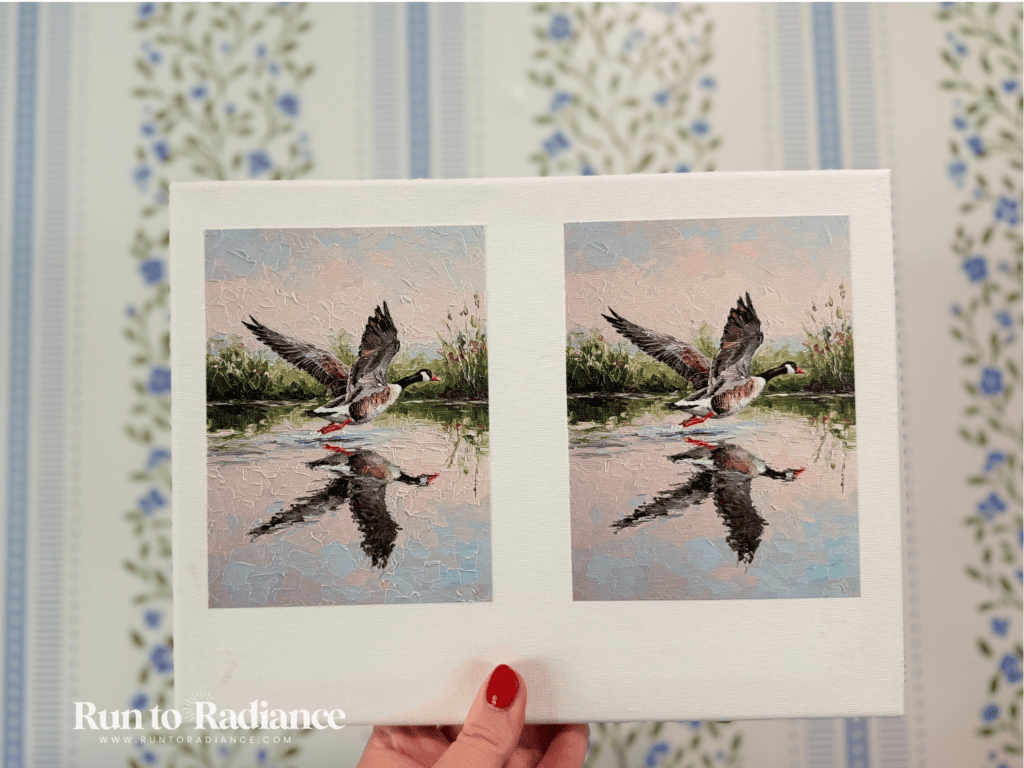
Looking straight on, you can’t tell as much of a difference, but check out the side view of each below!
- Flat: the standard, flat print.
- Texture: this made the whole print raised, with no real difference between the colors or areas. In xTool Studio you set a maximum thickness and a smoothness level.
- Relief: this automatically picked parts of the design to raise higher, and I loved it. It looked so much cooler! Relief uses a depth map, and xTool says generating one uses credits.
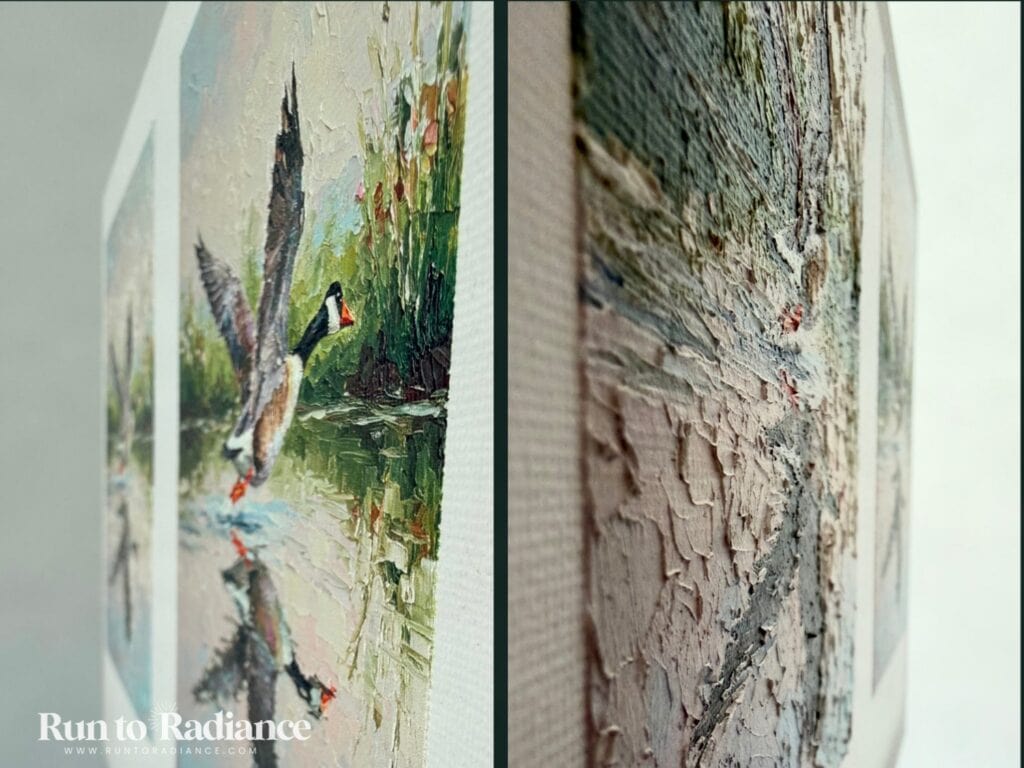
Quick tips: xTool says the Omni can build up to 7mm of raised texture. Taller texture can use more ink, so keep an eye on your supply. And update xTool Studio first, since the latest version improved relief mode with finer depth maps.
Tote bags (printed with DTG)
I tested DTG on three canvas tote bags. DTF, which is a totally separate thing, is next on my list, and I’ll update this post once I’ve tried it.
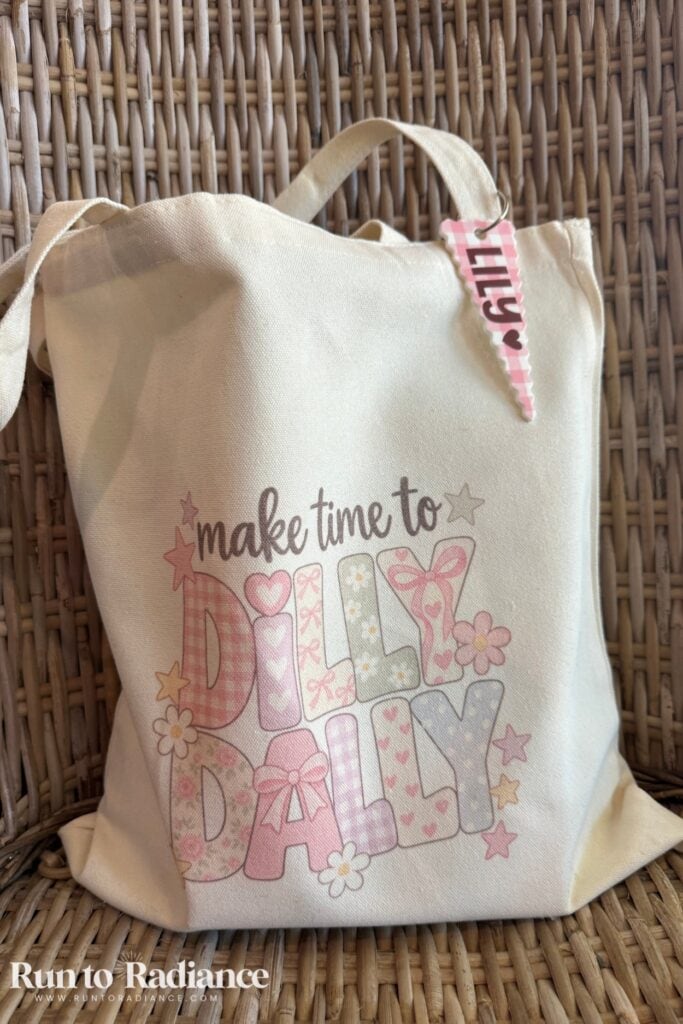
Here’s where the UV + DT Fabric Edition earns its name. The second printhead is dedicated to fabric, which adds two ways to print apparel.
Okay friends, a little jargon ahead, but don’t be scared! It’s not as hard as it sounds.
- DTG (direct-to-garment): the Omni prints right onto the fabric, which is then heat cured. It’s best on cotton and gives a soft, breathable feel. xTool’s workflow goes pretreat, load, print, cure. This is how I made this tote.
- DTF (direct-to-film): the Omni prints onto film, you add adhesive powder and cure it, then heat press the transfer onto the fabric. It’s the better pick for polyester, blends, nylon, hats, and bags.
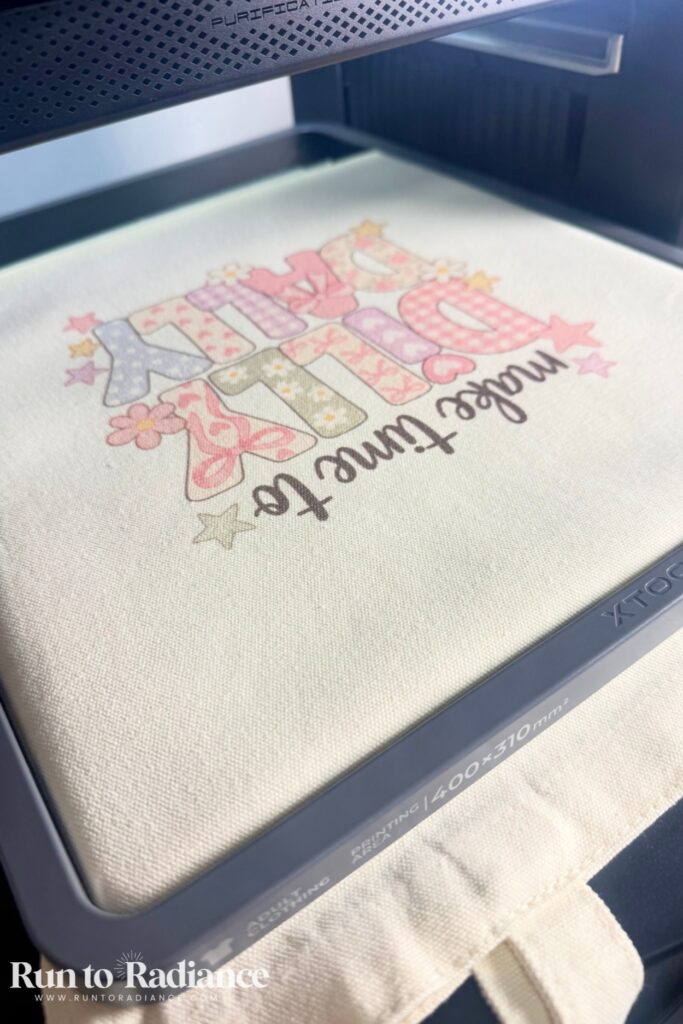
What I printed: three off-white canvas tote bags using DTG. Two of them ended up double-sided, because I redid one side of each. Lessons learned, and I’m sharing them below so you don’t repeat them!
Prep: it wasn’t too hard! You need to have a heat press and the solution that comes with the included garment tray. I measured the pretreatment at 19 parts water to 1 part solution (so mostly water), heat pressed a few times, and then printed.
My results:
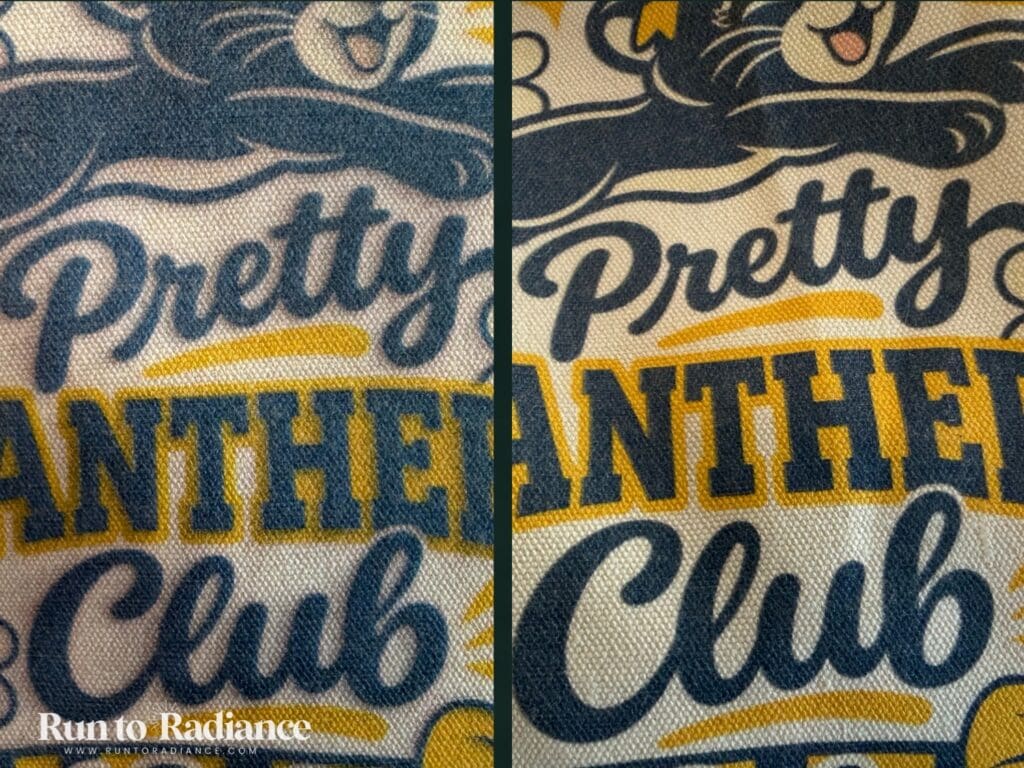
- Bag 1 (my first one): excellent!
- The sticker file: I accidentally bought a sticker file and it had outlines around everything, so it looked funky. I removed the outlines, printed on the other side, and it was perfect. If you use a sticker file for DTG, check for those outlines first.
- The bag that wasn’t flat: the ink came out blurry and smeared. I used the same file, spent extra time making sure the bag was flat, and it turned out perfect. Flat is everything!
- Colors: they printed more muted than what I saw on screen. That might be because my totes are off-white, not pure white, so I’ll keep testing.
- Canvas is thick: since these were totes and not shirts, the material was thicker, and it was hard to get the magnetic snap-on frame to snap all the way.
What to know before you buy
- You need a heat press. Wrinkle-pressing, pretreatment, and setting the print all use heat, and a heat press isn’t included with the printer. This is the big one! The xTool Wonderpress is a good option, but you can use any brand or press you have on hand!
- Only this edition prints fabric. The Single UV and Dual-Head UV editions can’t do DTG or DTF, and you can’t upgrade later.
- Make sure it’s flat. A bag that isn’t flat can give you blurry, smeared ink.
- Check your file. Remove any outlines you don’t want before you print.
- Washing claims. xTool says the OEKO-TEX certified fabric ink holds up to 50+ washes. I haven’t run my own wash tests yet, and I’ll update this post when I have.
- DTF needs extras. Film, adhesive powder, and a heat press are not included with the printer. I’m saving DTF for a future update.
Is DT worth it? Overall, I’m happy with DTG so far. If you want to print totes and apparel, it’s a great add-on, as long as you have a heat press. If you only make hard goods, the Single UV is enough. I’m still testing colors, and I’ll be back with more, including DTF!
What I Love and What I’d Change
Okay, let’s get down to the verdict. Here’s what I think.
What I love
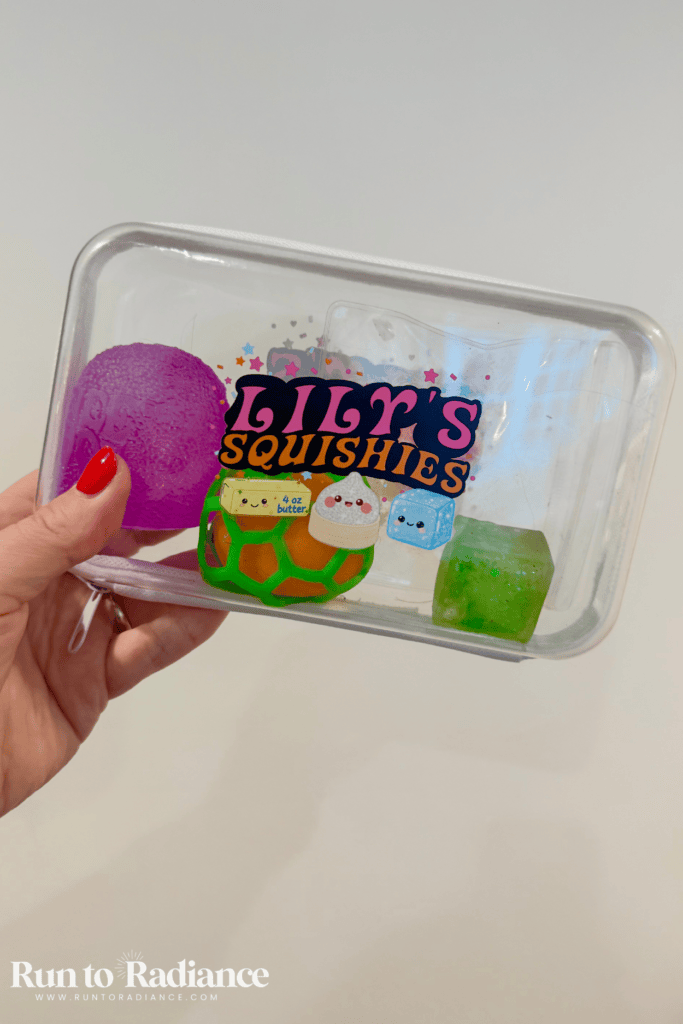
- Full-color results straight onto real items, like ornaments, hair brushes, zippered cases, etc.
- Setup that’s labeled and clear with visual and written instructions
- Almost endless versatility. I have so much more to learn and explore, and that’s the fun part!
- Excellent for those who want to make a side hustle or add another tool to their small business. Just think of all the things you can make and offer your clients!
- Camera included for easy placement. It’s very easy to see where to place items, and the automatic masking feature works very well!
What I’d change (and my workarounds)
- Ink is backordered. Order extra now so you’re not stuck waiting. See the ink section above for the full story.
- It’s heavy and big. A helper and a rolling cart solve this.
- Air quality. xTool says the machine doesn’t need air purifying, but some owners who are sensitive wish the filtering were better. The purifier made for it runs about $300, so budget or plan for ventilation. The machine didn’t smell to me while I was in the room, but I noticed a scent when I stepped away and came back. In my craft room I keep a fan on and a window open, and I really haven’t had a problem. Others say they can smell it a lot, so it seems to depend on the person and the space.
- Sticky mats are easy to ruin. I overspray-ruined my first one, and the auto-masking feature then picked up the overspray as part of my item. Keep spares on hand.
- You’ll need to buy more items and accessories to use some of the features and unfortunately, many of them are backordered, including the laminator and rotary. The machine ended up being a lot more popular than xTool imagined!
The Ink Situation (Please Read Before You Buy)
Okay friends, I want to be upfront about this one, because it’s a big topic in the xTool community right now.
Extra ink for the Omni has been VERY hard to get. Here’s where things stand as of November 12, 2026:
- xTool has been sharing updates about ink, but omni owners are still confused about how ink is being delivered, to whom, in what order, and when it arrives.
- Some people who preordered the machine still say they don’t have replacement ink and can’t use their machine. Others who ordered later have already received theirs, and it isn’t always clear how or why ink is delivered.
- The Omni uses a closed cartridge system. xTool says non-xTool ink may affect warranty coverage for printhead issues, so availability really matters.
- Why the ink matters so much: white ink naturally settles over time, which can clog the printhead. The Omni automatically stirs and circulates it, which is a great feature (xTool calls this Smart Cycle 2.0), and xTool says to keep the machine powered on so that maintenance can run. That system is built around xTool’s own ink, and xTool doesn’t support third-party ink, so you can’t just grab a substitute while you wait.
- My experience: I received ink with my machine. When I found out about the shortage, I ordered another round in mid-October, and the website estimated shipping around November 4 (about 2 weeks ago). Unfortunately, I haven’t gotten a shipping update yet, so I’m still waiting. In the meantime, I’m hoarding mine, so I’m choosing my projects carefully!
This isn’t a dealbreaker for everyone since the machine does come with your first round of ink, but you deserve the full picture. I’ll update this post as things change.
What Else You’ll Need to Buy
Here’s the list I wish I’d had before my Omni arrived. Skipping these will slow you down!
Heads up: Like I mentioned, I was gifted the machine. However, I spent almost $500 of my own money on accessories and supplies I needed to actually fully test this machine, so budget for that on top of the printer.
- Extra ink: order now, because it’s backordered. And make sure you get the right set for your edition!
- xTool prep wipes: there’s a general cleaning wipe, then a separate cleaning wipe for glass and ceramic, one for acrylic, and one for metal. Wear gloves when you use them, and don’t touch the cleaned surface with bare hands. The wipes smell strongly, so I use them outside.
- LM1 Laminator + Roll Feeder: this is what joins the A and B films together. You will need this to do DTF printing
- UV DTF A and B film: a requirement if you do DTF printing. While they are sold separately, the two films work as a set, so you need both. A film is what you print on, and B film goes over it to make the decal.
- OR1 Rotary: you must have this to be able to print directly onto cups and cylinder objects.
- Heat press: specifically if you want to do DTG or DTF, you must have a heat press
- Blanks to test with: have test items ready before your first print.
- Extra sticky mats: trust me on this one. I ruined mine on the first print!
- Gloves: the ones in the box are great, but keep a lot of extras
- An air purifier (optional): the SafetyPro AP Mini is the one that works with the Omni. It is not included and costs about $300, so plan accordingly
Who Should Buy the Omni?
- Gift makers: if you love personalized gifts, ornaments, and mugs, this is a game-changer.
- Entertainers: if you love hosting parties this machine would be a great add on! You can print custom signage on clear acrylic, print directly onto balloons, create awesome party favors and more!
- Small business owners: custom products are the draw. I sell my laser-crafted items in my Etsy shop, so personalized products are close to my heart!
- Anyone wanting apparel too: that’s where the UV + DT Fabric Edition comes in.
Who should NOT Buy This UV Printer
Okay, more brutally honest truth here. For some of you, this machine is going to either be overkill or not give you enough functions to do the kind of projects you want (like laser cutting and engraving!)
If you only want to cut and engrave, a laser is your machine. I’d recommend the xTool M2 for sure, because it allows you to print directly onto many surfaces, laser cut, and even has a module for metal engraving! Read my full xTool M2 review here to see what this workhorse can do!
Additionally, if you are someone who might make things a couple times a month, this is probably overkill and your budget would be better spent outsourcing these items.
If you travel a lot or only plan on crafting very occasionally, skip it. It’s not good for the machine to sit idle and the ink can dry out. While there is vacation mode and self-circulating settings, it’s not ideal to let it sit.
If you are business owner that needs high volume production – this may not be the right machine for you. While I have no problem waiting 10 minutes for a printed design on canvas or a tote bag, that time adds up of you are bulk making 100 items!

Final Verdict
So, is the xTool Omni worth it? For gift makers and small-business sellers who want full-color custom items, it’s worth every penny.
So I give this one a resounding YES.
In fact, I’ll be honest, it’s my favorite machine in my craft room right now, with almost endless versatility.
But…pick your edition carefully, order extra ink now, and stock up on the extras I listed. Because while I do love the machine (like a lot!) it’s only great if you can actually use it. Fingers crossed ink comes soon!
Buy the xTool O1 Omni ✨
So, there you have it – my super honest review of the xTool O1 Omni.
If, after reading this post, you have decided the Omni is right for you, I would love it if you consider purchasing through one of the affiliate links in this post (like this one right here!). It doesn’t cost you anything extra, and the small commission I receive allows me to continue creating content like this. Thank you for your support!