Easy DIY Bath Bombs (Copycat Lush Recipe!)
This post may contain affiliate links. As an Amazon Associate I earn from qualifying purchases.


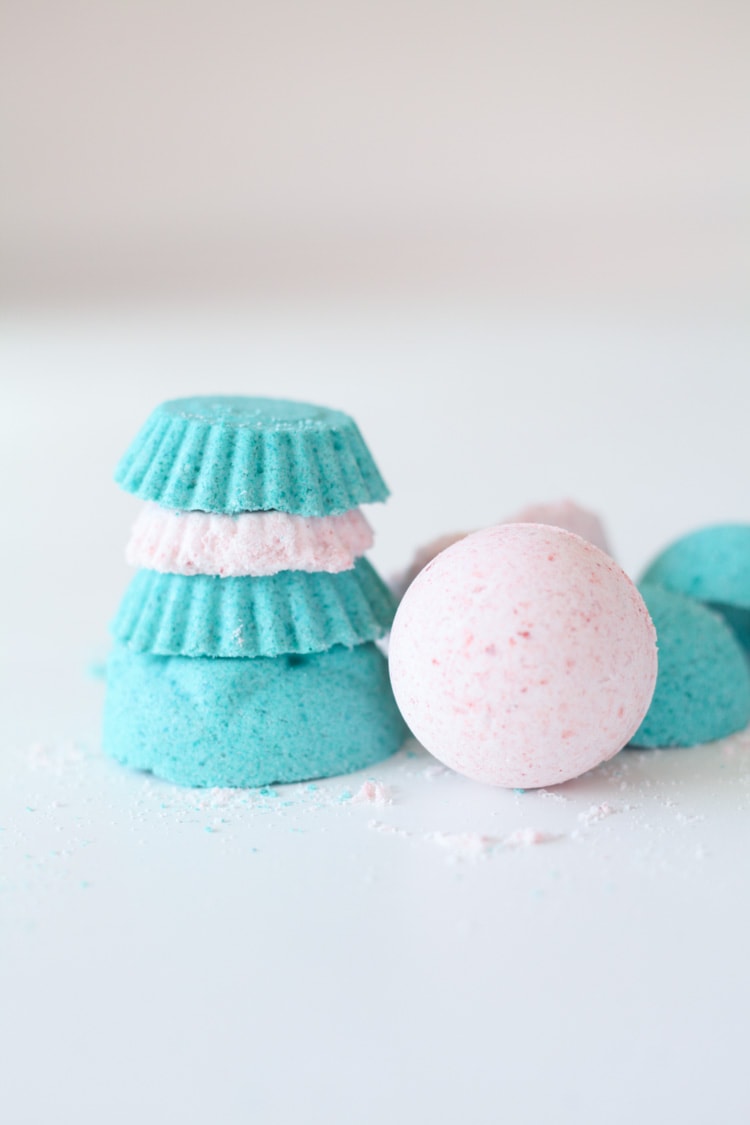
Save money without compromising your self-care by learning how to make bath bombs yourself! This DIY bath bombs recipe will show you exactly how to whip up a batch of your own in minutes.
All you need are a few natural ingredients (like essential oils) to achieve bath bomb bliss. Dare I say making them is almost as enjoyable as using them!

You know how people say adults don’t take baths? I have NO clue where they get that. I challenge any toddler to love bath time as much as I do!
The bath is my happy place, and I’ve been known to spend an hour or two in a relaxing bath with a good book + a good glass of…something. 😉
Bathing (like pretty much anything else) is much more enjoyable when it smells nice!
I was spending a small fortune buying Lush bath bombs until I finally decided to try to make them myself. You guys, this DIY version had me kicking myself for not doing this sooner!
These easy homemade bath bombs are so fun to make! Plus, they’re perfect DIY gifts.
Looking for more DIY gift inspiration? My list of the best DIY Christmas gifts has tons of ideas – even for non-holiday gifting!

I’m spilling all the beans on how to make your own DIY bath bombs using only natural ingredients.
With minimal prep time, you can make this DIY bath bomb recipe and transform your time in the tub from good to amazing, too. 🙂
A Note for Readers in 2025
I originally published this post in 2016. Over the past 9 years, I continued to try multiple different methods of making DIY bath bombs, but found my original bath bomb recipe to still be the best and produce the most consistent results!
Bath Bomb Ingredients Needed
While I recommend weighing out the ingredients using a kitchen scale for accuracy, I have also made this several times by simply using measuring cups and spoons.
I didn’t have any issues, but using a kitchen scale is a best practice here. Just know that if you don’t have one, you don’t necessarily need to run out and buy one!
Ingredients
- 8 oz baking soda
- 4 oz citric acid (or cream of tartar)
- 4 ox cornstarch
- 4 oz Epsom salt
- 3/4 tbsp water
- 10-20 drops of high quality essential oil (See below for more info. I personally use Plant Therapy and love it, but you can use whatever brand you prefer)
- 1-2 drops food coloring – liquid food coloring works, but gel-based colors can make the mixture too wet. Mica powder is another great natural alternative!
Additional Supplies
- Large and small mixing bowls (I prefer using a set of glass mixing bowls)
- Bath bomb molds
- Measuring cups
- Kitchen scale – optional
Best Essential Oils for Bath Bombs
The best essential oils for bath bombs depend on the vibe you are going for—whether you’re looking for relaxation, energy, skin nourishment, or a spa-like experience.
With oils, less is more. Pure essential oils are quite potent, so you don’t need much! I recommend starting with 10 drops of essential oil per bath bomb to get a lasting scent without irritation.
Always use pure, skin-safe essential oils and avoid synthetic fragrance oils.
Here are some great options:
🌿 Relaxation & Stress Relief
- Lavender – The ultimate calming oil; great for relaxation and sleep.
- Chamomile – Soothes skin and promotes a peaceful mind.
- Ylang Ylang – A sweet floral scent known for reducing stress and promoting relaxation.
- Sandalwood – Earthy and grounding; excellent for meditation and unwinding.

🍊 Uplifting & Energizing
- Sweet Orange – Bright and refreshing; great for boosting mood.
- Lemon – Invigorating and purifying; provides a clean, fresh scent.
- Peppermint – Cooling and energizing; helps relieve headaches and fatigue. Note: peppermint oil is quite strong. I recommend using only 3-5 drops per batch to start!
- Grapefruit – A citrusy burst of freshness; great for morning baths.

🌸 Skin-Nourishing & Soothing
- Rose – Hydrates skin and gives bath bombs a luxurious floral scent.
- Geranium – Balances oily or dry skin and has a sweet, floral aroma.
- Tea Tree – Helps with acne, inflammation, and skin irritation.
- Frankincense – Known for its anti-aging and skin-repairing properties.
🌲 Spa-Like & Earthy Scents
- Eucalyptus – Clears sinuses and refreshes the senses.
- Cedarwood – Deep, woodsy scent that promotes relaxation.
- Rosemary – Helps improve circulation and mental clarity.

🛀 Essential Oil Blends for Bath Bombs
Can’t decide? Make a few blends instead!
💜 Relaxation Blend: Lavender + Chamomile + Ylang Ylang
🍊 Energizing Blend: Sweet Orange + Peppermint + Grapefruit
🌿 Spa Blend: Eucalyptus + Cedarwood + Tea Tree
🌸 Floral Luxury Blend: Rose + Geranium + Frankincense
Basic Bath Bomb Recipe
You are going to be SO surprised by how easy bath bombs are to make! Let’s get to it!
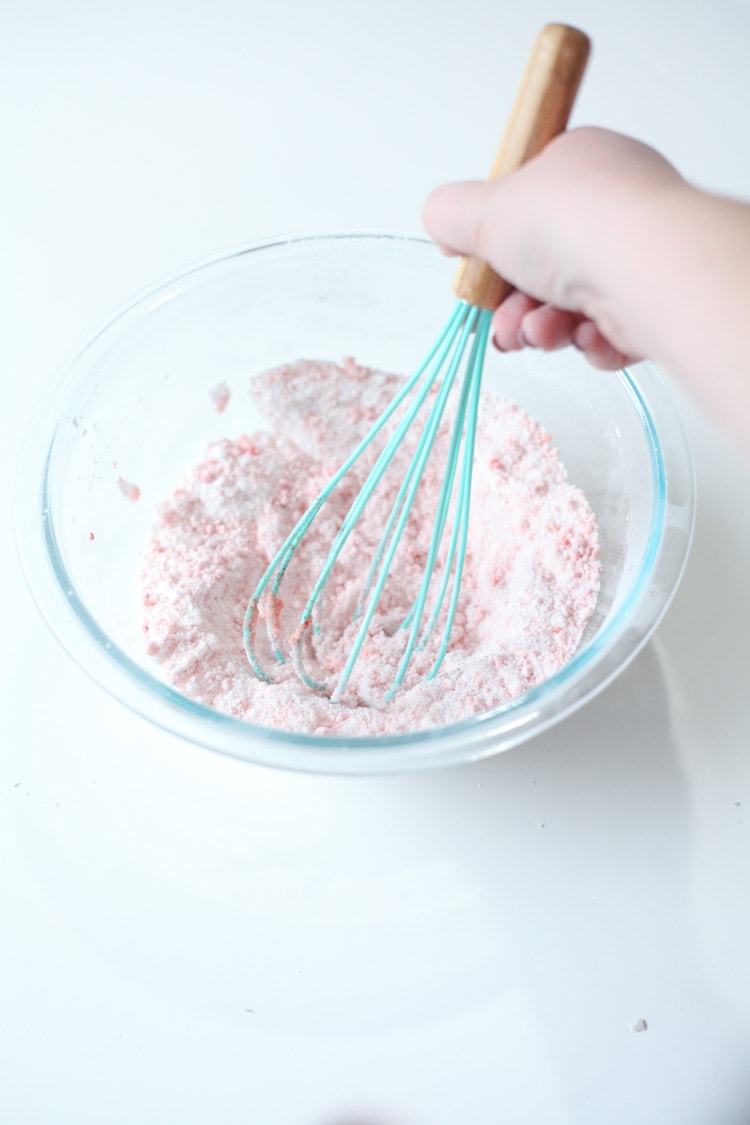
Step 1
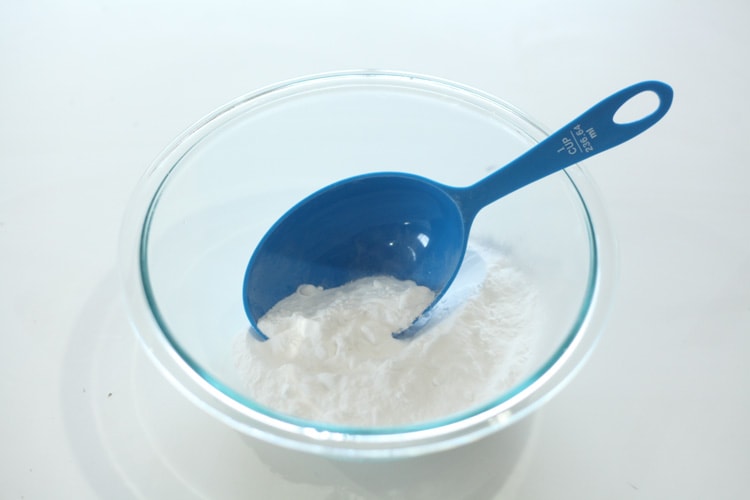
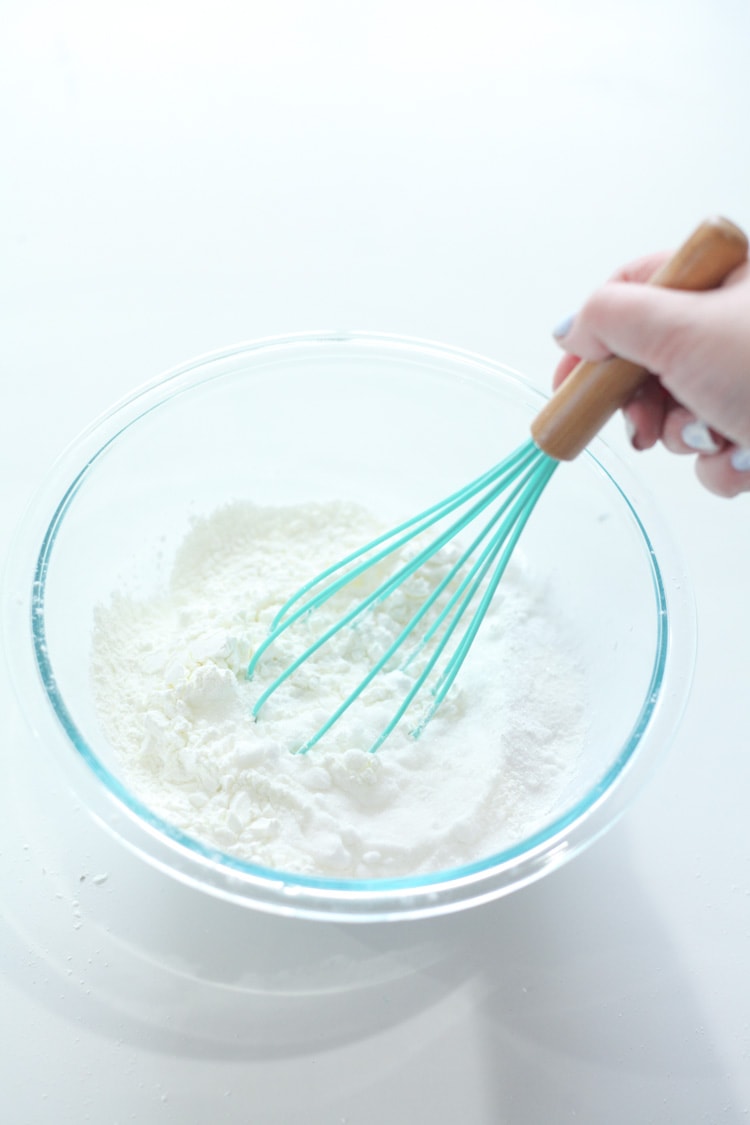
When you go to make bath bombs, start by mixing the baking soda, citric acid, cornstarch, and Epsom salts in a glass bowl with a whisk.
I recommend using a large bowl here because you’ll add the other ingredients into this bowl when you combine everything.
It’s important to make sure you get all the lumps out!
Step 2
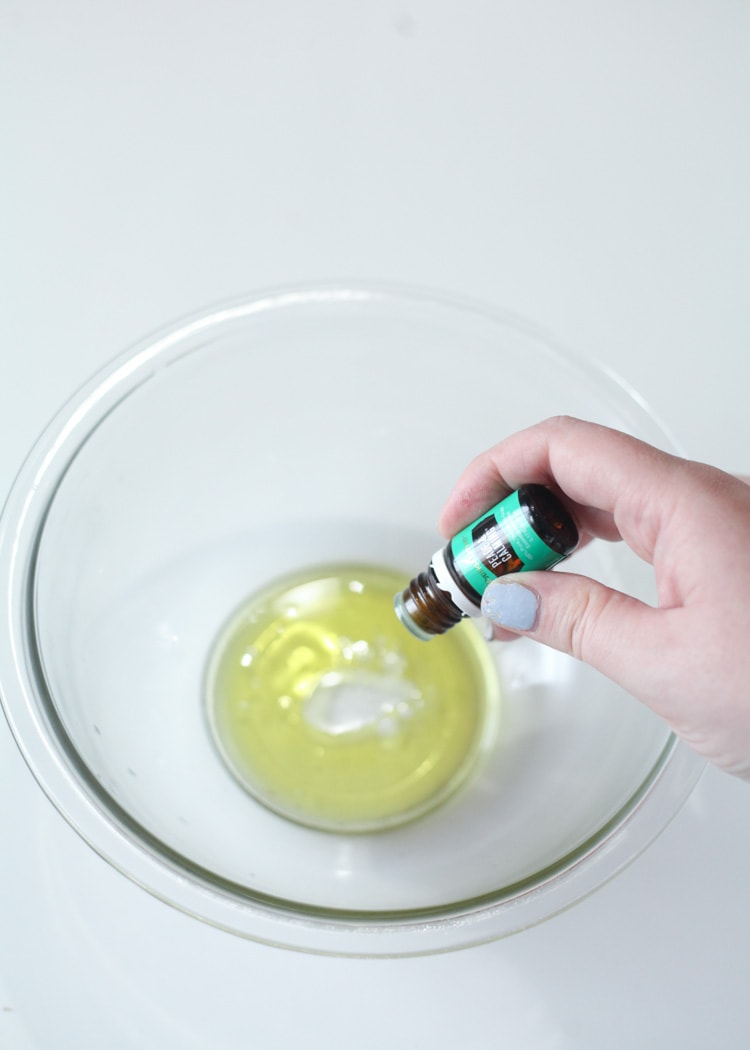
Next, mix all the wet ingredients (water, food coloring, and essential oil of your choice) together in a separate small bowl to create a liquid mixture.
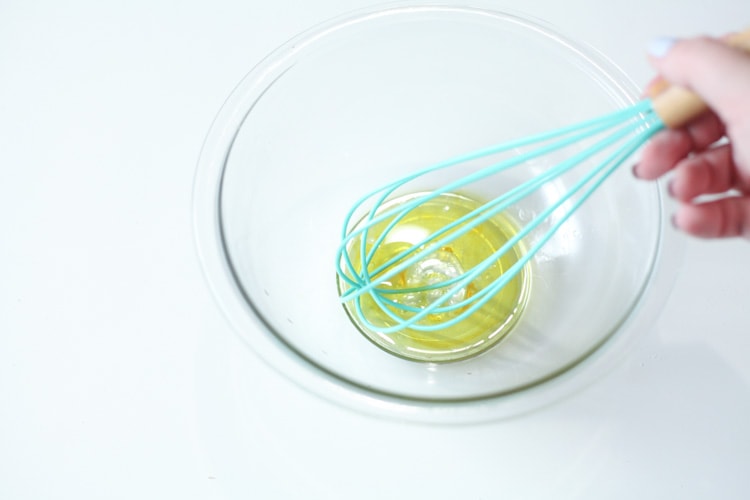
Step 3
Slowly pour the wet ingredients into the dry mixture bowl and mix. If you notice your mixture fizz as you slowly add in the wet ingredients, stop!
You want to save that fizzing action for your bathtub, after all! 🙂
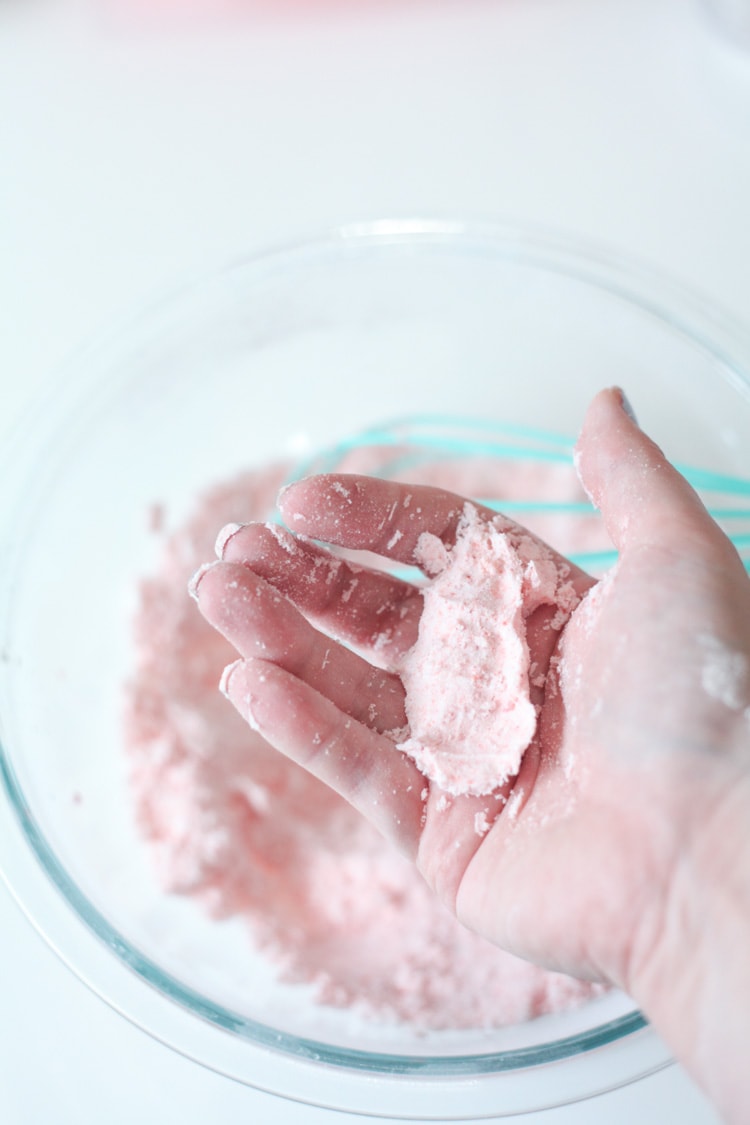
Step 4
Once the wet ingredients are mixed in, test the consistency by pinching some together. You want it to resemble wet sand and hold the shape.
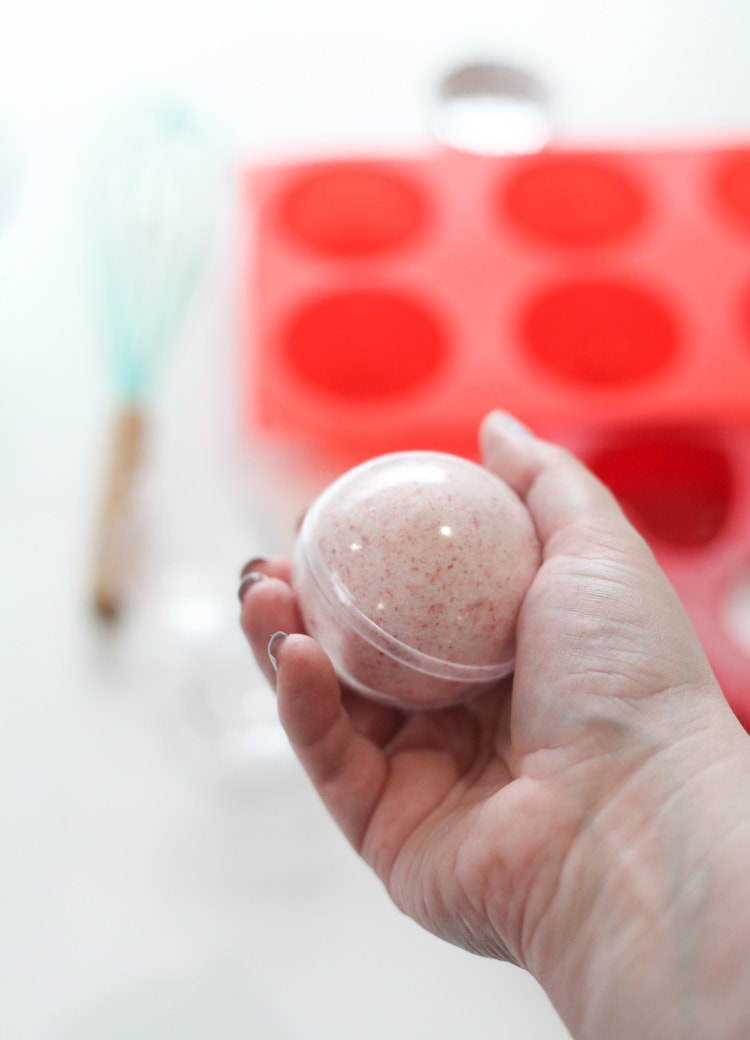
Step 5
Now it’s time to put the mixture into your bath bomb molds! You want to make sure to firmly press the mixture so your molds are packed TIGHT!
Once they are in the mold, let them sit for about 24 hours to dry. Your room will smell SO GOOD as they dry!
The last part of the molding process is gently removing your bath bombs from the molds. If they don’t just pop out when you remove the mold, give it a light tap to release.
How To Use Bath Bombs
After you’ve made a set of copycat Lush bath bombs, it’s time to use them! I’m happy to say that using them couldn’t be easier.
All you do is run a warm bath. Then, add your bath bomb to the water in the tub. Delight in how the bath bomb dissolves, leaving you with a luxurious, relaxing bath to soak away all the stresses of the day.
Storage
To keep these fresh, store your homemade bath bombs in a glass airtight container in a cool, dark place.
Make sure NO moisture touches them, or they’ll all start fizzing and falling apart in the jar instead of your tub!
They’ll last about 6 months when stored properly.

Troubleshooting Tips
Making bath bombs is fun, but sometimes things don’t go as planned. Here are some common issues and how to fix them:
1. My bath bombs are crumbling or falling apart!
Cause: The mixture is too dry or not packed tightly enough.
Fix:
- Add a few more drops of witch hazel or water, mixing in small amounts until the mixture holds together like damp sand.
- Press the mixture firmly into the mold and let it sit longer before unmolding.
2. My bath bombs are expanding or cracking after molding!
Cause: Too much moisture or humidity in the air.
Fix:
- Reduce the amount of liquid ingredients slightly.
- Try using a dehumidifier or making bath bombs in a drier environment.
- Let them dry in a cool, dry place, not near a heat source.
3. My bath bombs aren’t fizzing in the water!
Cause: The baking soda and citric acid ratio may be off, or the ingredients might be too old.
Fix:
- Make sure your baking soda and citric acid are fresh—old ingredients may lose effectiveness.
- Double-check that you used the right proportions of dry ingredients.
4. My bath bombs are sticking to the mold!
Cause: The mixture is too wet, or you’re using the wrong mold type.
Fix:
- Lightly coat the mold with cornstarch or oil to prevent sticking.
- Try using silicone molds, which make it easier to remove the bath bombs.
- If using metal molds, tap gently on the sides before unmolding.
Bath Bomb FAQs
If you have questions about making homemade bath bombs, this is the place to find your answers! Do you have a question but don’t see it answered below? Leave it in the comments. 🙂
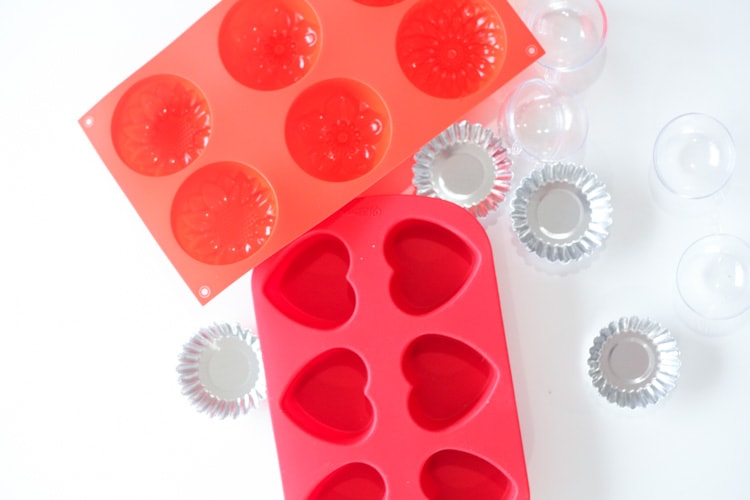
What kind of bath bomb molds should I use?
Here’s part of the fun par – this is a great project because there’s a lot of freedom in the types of molds you can use when you make bath bombs.
There are so many great mold options for bath bomb making, including…
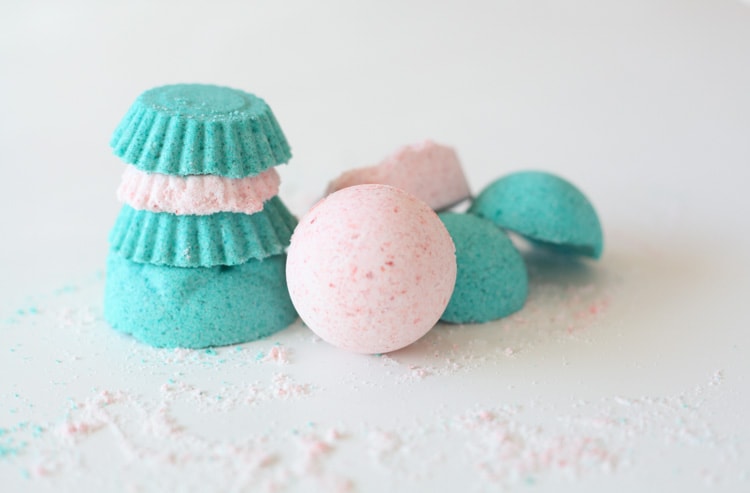
- Sphere molds – the classic ball shape with two halves
- Silicone molds – these come in so many fun shapes!
- Mini tart molds
- Metal shaped molds
- Ice cube trays
- And more!
Here are some of the exact molds I have used:

How many bath bombs does this recipe make?
How many bombs this recipe makes varies, depending on what size (and type) of mold you use. If you use only round ball mold pieces, you’ll get three bath bombs from this recipe.
On the other hand, if you use silicone molds or ice cube trays, you will make at least double that number of bath bombs.
If you want to make more homemade bath bombs at one time, you can easily double the recipe!

Why isn’t my bath bomb mixture sticking together?
If your bath bombs won’t hold a shape when you pinch the mixture, the mixture needs a little more moisture.
You’ll just want to add a tiny bit more water to add the needed moisture. I recommend filling a spray bottle with water and spraying your mixture one time. If that’s still not enough moisture, repeat the process one more time.
Take care not to get your mixture too wet. It should have the texture of wet sand rather than wet snow.

Can you add dried flowers to your bath bombs?
Yes! I didn’t use them in this recipe, but I’ve used dried lavender when I made bath salts. You could add a variety of natural ingredients, such as dried flower buds or leaves, to your homemade bath bombs.
Note: I don’t recommend adding large items. In addition, you might need to add more moisture to your mixture to account for the extra ingredients.
What can I use instead of citric acid in bath bombs?
Citric acid produces the best results, but you can easily substitute cream of tartar for the citric acid in this recipe!
You can use the same amount of cream of tartar as you would citric acid. However, your fizzing effect will not be as dramatic.

At $8+ per bomb in the Lush store, buying bath bombs can become a budget-buster faster than you may realize. However, you can easily make your own bath bombs of the same quality for a tiny fraction of the cost.
I hope you love this DIY project! It’s super quick and easy to make, which makes me feel productive and (nearly) instantly gratified. Enjoy!
More DIY Project Ideas
- Easy DIY Essential Oil Candles
- DIY Mason Jar Vase To Display Flowers
- Easy DIY Sugar Scrub
- DIY Personalized Mug Gift Idea

Supplies
- 8 oz baking soda
- 4 oz citric acid or cream of tartar
- 4 oz cornstarch
- 4 oz Epsom salt
Wet Ingredients
- 3/4 tbsp water
- 20 drops essential oils
- 1-2 drops food coloring
Additional Supplies
Instructions
- Mix the dry ingredients together in a glass bowl with a whisk. Make sure to eliminate the lumps.
- Next, mix together the wet ingredients in a separate bowl.
- Slowly add the wet ingredients to the dry ingredients and mix to combine. If your mixture starts fizzing, stop.
- Test the consistency of the mixture by pinching some together to see if it holds its shape.
- Firmly pack your mixture into your bath bomb molds. Allow them to dry overnight before carefully removing your bath bombs from the molds.
Love this idea. Thanks for sharing.
Hi Karen! Thanks so much – hope you get a chance to make some and treat yourself! <3
Oh I love this idea! They would be great gift ideas!
Yay! Thanks for sharing! An easy tutorial that I hope to follow someday!
Do you have an estimate on how many this made? I realize it depends on the size of your mold, but approximate cupcake size would even help. Thanks!
I made them! Question, what would you do if when you’re packing into the mold, they seem too dry?
Very easy to follow directions though! So fun to make! Thank you!!
Tried these this week. Absolutely perfect! Thank you for sharing.
I’ve now made more for Xmas gifts.
Tips..
Definitely leave overnight, I got impatient and checked one early and it crumbled… whoops. The ones I left overnight were perfect and had hardened.
I used a couple of extra spoons of water until I thought it was the right consistency.
They really do need to be packed in tight. Keep pressing down guys.
I also add more coloring and water
I also add more coloring and water.
This technique is incredibly safe for the skin and saves money while also protecting the environment. I’ll prepare it to share with my family and friends.