Is the xTool P2 worth it? Don’t buy until you read this review!
This post may contain affiliate links. As an Amazon Associate I earn from qualifying purchases.

If you are looking to level up your home crafting game or even start a side hustle (or a new full-time gig, why not!?), then I’ve got a potentially game-changing tool for you: the xTool P2. In this post, we’re taking a deep dive into this Co2 laser, how to set it up, and what it can do.
Is this the right laser for you? Possibly! I’ll say right off the bat that it’s an incredibly powerful (and fun!) machine to use. I don’t think I’ve had this much fun crafting (and making DIY gifts!) in a looong time. But, the P2 is definitely a more premium product, which may or may not fit what you are looking for.

So, let’s jump in and learn all about the xTool P2!
Disclosure: xTool provided me the P2 55w Desktop CO2 Laser Cutter as well as several accessories in exchange for this review. All opinions are 100% my own. This post also contains affiliate links.
Psst…this post is thorough and LONG. I recommend you read through it all to get the most info possible about this laser cutter, but if you are looking for something in particular, use the table of contents below to jump ahead.
Looking into other laser options? Make sure to check out my xTool M1 Ultra review, to learn more about the world’s first 4-in-1 laser crafting machine!
xTool P2 Highlights
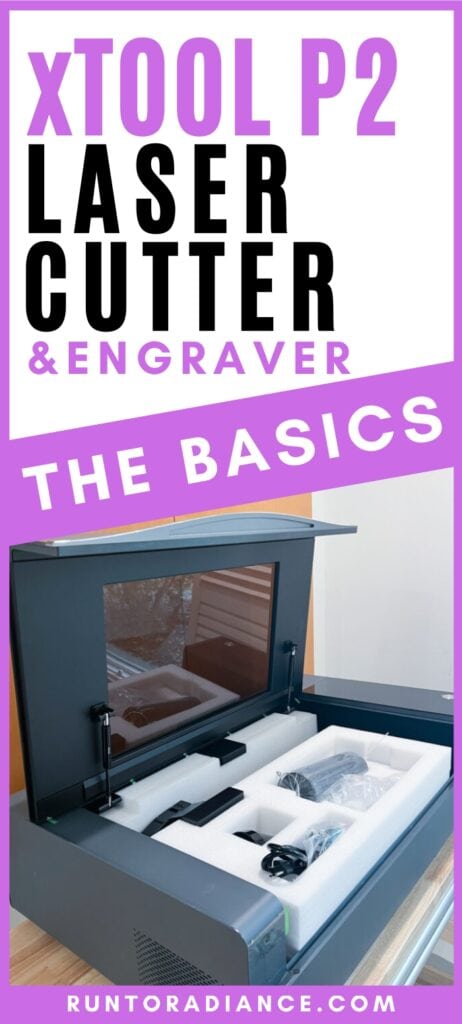
Alright, folks, let me introduce you to my new crafting bestie, the xTool P2, a CO2 laser cutter with a very impressive 55W of power, making it the most powerful smart desktop CO2 laser.
The P2 not only has power on its side, but it is also super accurate, thanks to its dual 16MP cameras. These cameras allow you to have a live view of your material in the cutting bed, so you can accurately place your designs. I can’t imagine creating something without this feature!
There’s even a close-range camera that can get you a closer view of your material for the perfect design. We’re talking about a positioning accuracy of 0.3mm, so it’s precise to the point.
This is super handy for all the little details that make a project look awesome.
But wait, there’s more! The P2 has some awesome additional features, including:
- automatic measuring (called Aimed Measurement) so you can find out the thickness of your material with the literal click of a button.
- the ability to seamlessly work on curved surfaces so you can engrave items like tumblers.
- automatic passthrough for extra-long projects up to 3 meters (9.8 feet!) long.
- large bed, which means you can process items up to 23.6 x 12.1″ in the enclosed space.
- locking lid, which, as a mom of small kids, is one of my favorite safety features!
- built-in air-assist. If you remember my previous post about the xTool M1, you’ll remember I’m HUGE fan of air assist for smooth designs!
What can the xTool P2 cut?
Here’s where the fun really begins. There are so many different materials you can use with this machine, including:
- wood
- acrylic
- paper
- cardboard
- bamboo
- felt
- leather
- fabric
- plastic
- MDF
- PVC
- glass*
- ceramic*
- jade*
- marble*
- brick*
- metal*
*you can only engrave these items, not cut them.
What can you make with the xTool P2?
You can make SO MANY THINGS with this machine! Truly, the sky is the limit. In anticipation of receiving the P2, I started doing a lot of research and watching videos of people’s projects and was truly blown away. Here’s just a short list of what you can create to get your wheels turning!
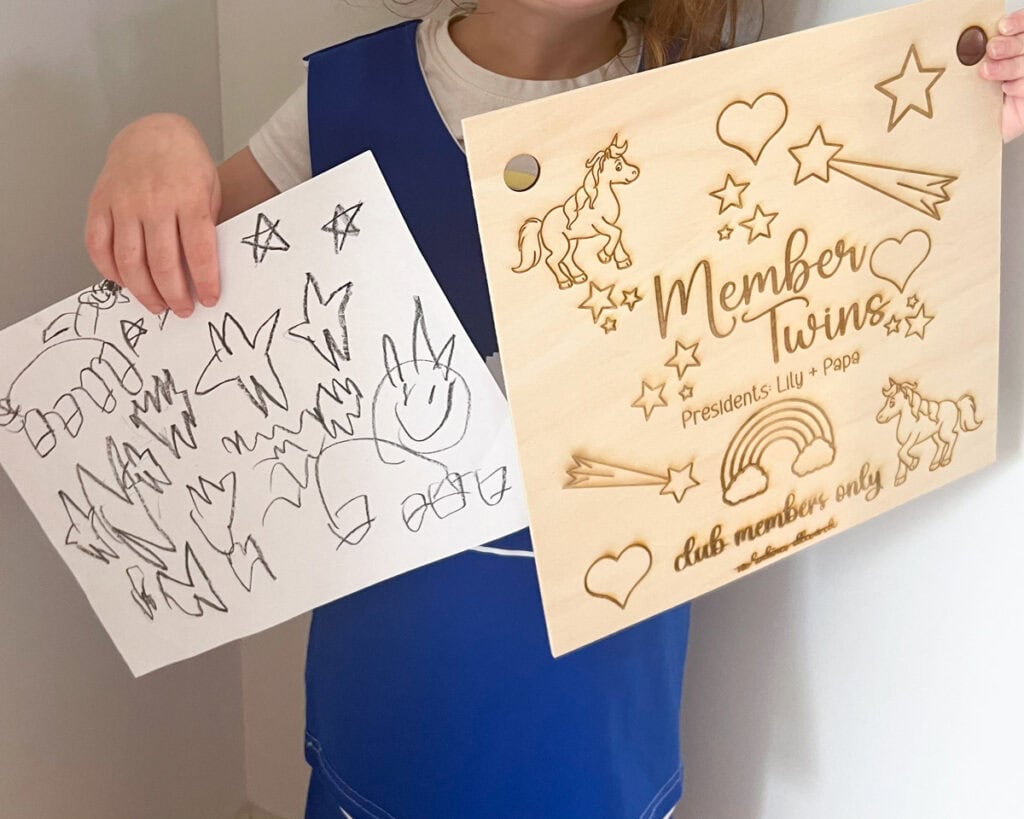
- gifts – create personalized gifts for your loved ones, such as engraved coasters, cutting boards, or custom jewelry. You can also make custom signs as gifts, like my daughter did below!
- home decor – make unique home decor pieces like wooden wall art or acrylic signs
- personalized apparel – add designs to t-shirts, hats, or bags with ease.
- customized items for small businesses – if you have a small business, the P2 can help you create personalized products with your own branding to help you gain more customers.
- craft projects – use the P2 to create intricate designs and patterns on paper, cardboard, wood, or fabric for your next crafting project.
Optional Accessories
While the P2 is awesome as is – right out of the box, there are also several add-ons that can help make your workflow even smoother.
You may or may not need these, depending on what you want to make—but I’m betting you’ll want to add at least one to your order!
xTool RA2 Pro
The xTool RA2 Pro is the world’s first 4-in-1 rotary, giving it more bang for your buck:
- roller rotary – perfect for longer or slightly wider projects or irregularly shaped cylinders. It’s perfect for engraving items like wine glasses or baseball bats.
- chuck rotary – this is what you’d use for engraving things like mugs or tumblers.
- sphere rotary – use this for engraving round things like Christmas ornaments or baseballs.
- ring rotary – yes, you can engrave actual rings using this! How cool would that be for a custom gift or a business?
Riser Base
If you are interested in working with items that are taller than 2.5″, you’ll need to purchase a riser base. The riser base is basically what it sounds like—it adds extra height to the machine, so you can create even more goodies!
By using the riser base, you can work with materials that are up to 8.4″ high, which is definitely an upgrade!
If you are mostly interested in making flatter items like wooden signs, earrings, etc, you probably don’t need this. But if you want to engrave items like wooden boxes, large tumblers, or blocks of wood, this is definitely a game-changer!
Automatic Conveyer Feeder
If you are interested in doing long designs, I highly recommend the automatic conveyer feeder. The basic version supports designs up to 39″ long, but with the add-on kit, you can design items that are 90″ long!
This would be perfect for porch leaner signs, trim for bookshelves, and large format signs, just to name a few things.
Note: you must have the riser base for the feeder to work!
Honeycomb Panel
Finally, if you want to work with thinner materials (like 4mm or less), you’ll need to purchase a honeycomb panel. The P2 comes with a slat system, which works beautifully for items that are a couple of inches wide.
But, if you do a lot of small-scale projects, like earrings, dog tags, keychains, jewelry, etc, this is a worthy investment. It essentially creates a flat surface for your material to sit on, so you don’t have to worry about it falling through slats during engraving.
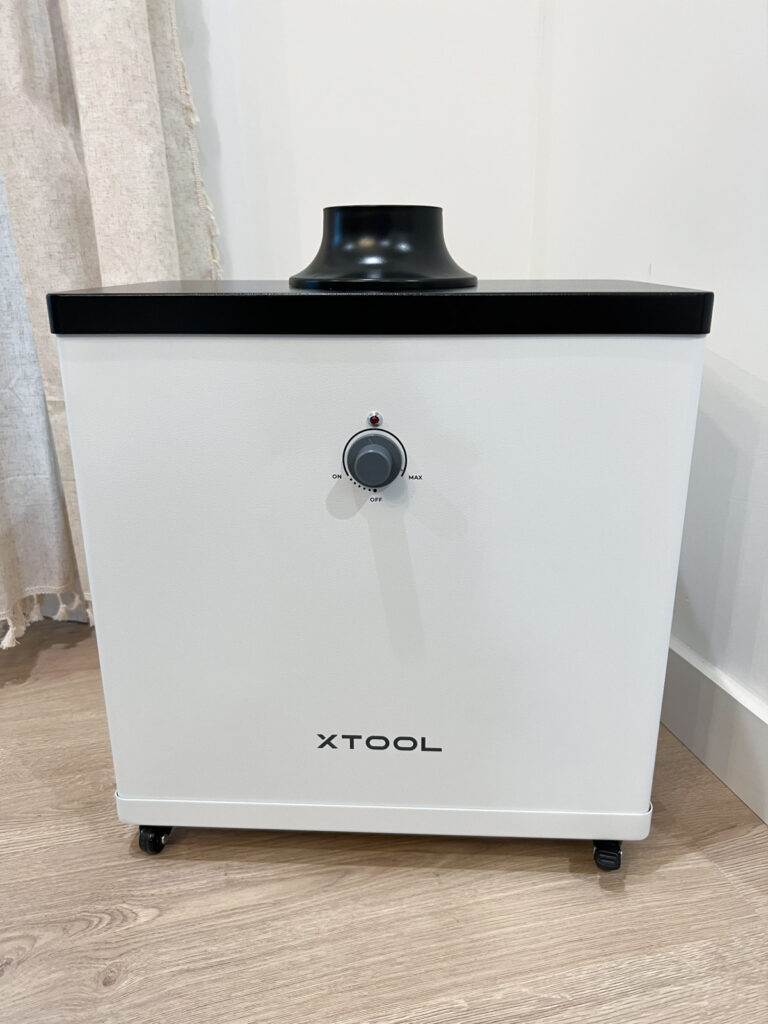
Smoke Purifier
Last but not least is the xTool smoke purifier. This is a 3-stage air filter that absorbs the smoke and dust your machine creates as it’s working. While I opted to vent my M1 out the window, I decided to give the air purifier a try this time around. It was super nice to be able to keep the windows closed while it was freezing cold and raining out!
I also thought the smoke purifier machine was sleek looking and loved that it had wheels for easy mobility.
However, since the replacement filters are a bit pricey, I will probably use a combination of the air purifier and window-venting in the future, depending on what I make and what the weather is outdoors. But, definitely thankful to have the option of using it now during the cold months!
Supplies to Create With!
Of course, you’ll want to get some goodies to create with! The P2 will come with a few basic supplies to get you started. I received 4 sheets of cardboard, 2 sheets of clear acrylic, and 4 sheets of 3mm basswood.
You can buy your supplies from anywhere, but xTool has a nice selection of items that are tested to work specifically with the machine. You can find their selection of materials here!
Buy a Bundle
Depending on what you are interested in, it’s a better value overall if you purchase a bundle with the P2. There are two that I recommend:
The Versatile Bundle
This bundle includes:
- P2 laser
- rotary tool
- conveyer feeder
- riser base
- additional bonus gifts
The All-In-One Bundle
This bundle includes:
- P2 laser
- rotary tool
- conveyer feeder
- riser base
- smoke purifier
- additional bonus gifts
How to Set Up the P2
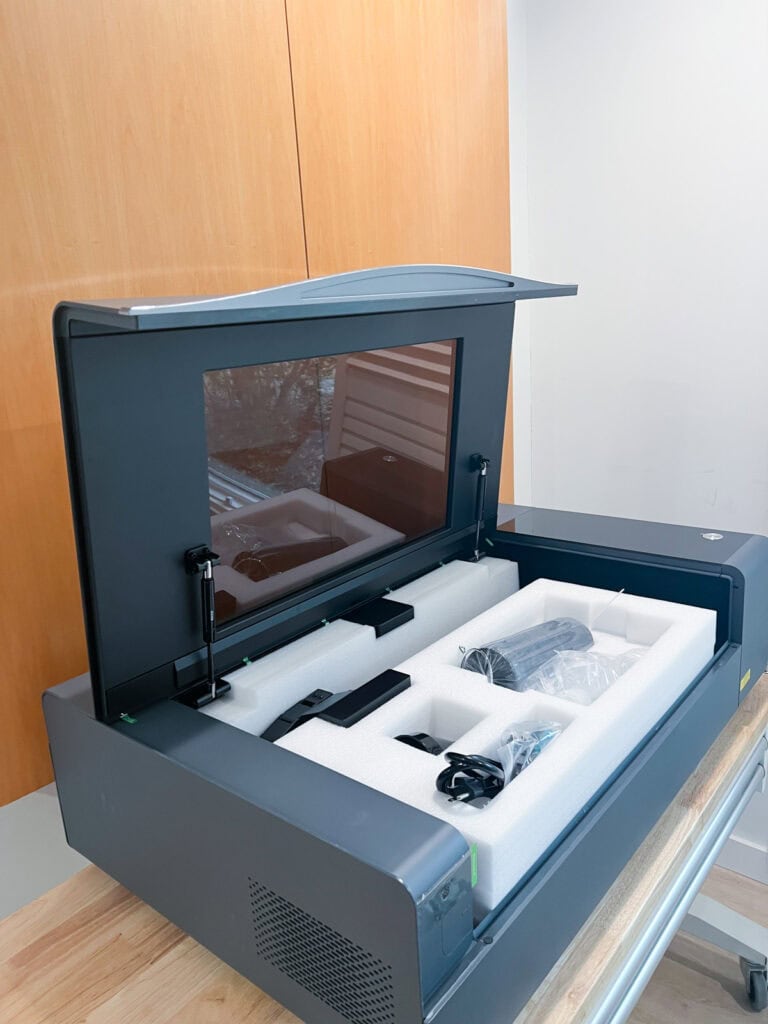
Once you’ve chosen your machine and accessories and survived the wait for it to arrive (it doesn’t take long, but I was counting the minutes!), it’s time to unbox and set it up!
Setting up the P2 isn’t hard, but it does take time. There are several steps you’ll need to take, and they aren’t all exactly fun. 😉 But it needs to be done, and soon you’ll be on your way to making all the things!
xTool includes a Quick Start guide showing how to get everything up and running. While I found the guide pretty self-explanatory, I did google/watch videos for a few steps just to make sure I was understanding correctly.
The basic setup steps can be seen in this set-up document provided by xTool, and are as follows:
1) Open the box and take out all the packaging materials and items. Visually inspect the outside of the machine to make sure all appears to be in good condition.
2) Unscrew the screw that holds the bottom tray in place, then take out the items stored there. Screw the screw back in.
3) Make sure the slats are installed with the pointy end up.
4) Unscrew the rear cover and remove it. There are little stickers to show you exactly where each screw is, which I SO appreciated! There are 6 screws on the inside, then 5 on the back outside. Once all the screws are out, you have to wiggle and pull on the plate until it comes out—I was a bit nervous, but I eventually got it!
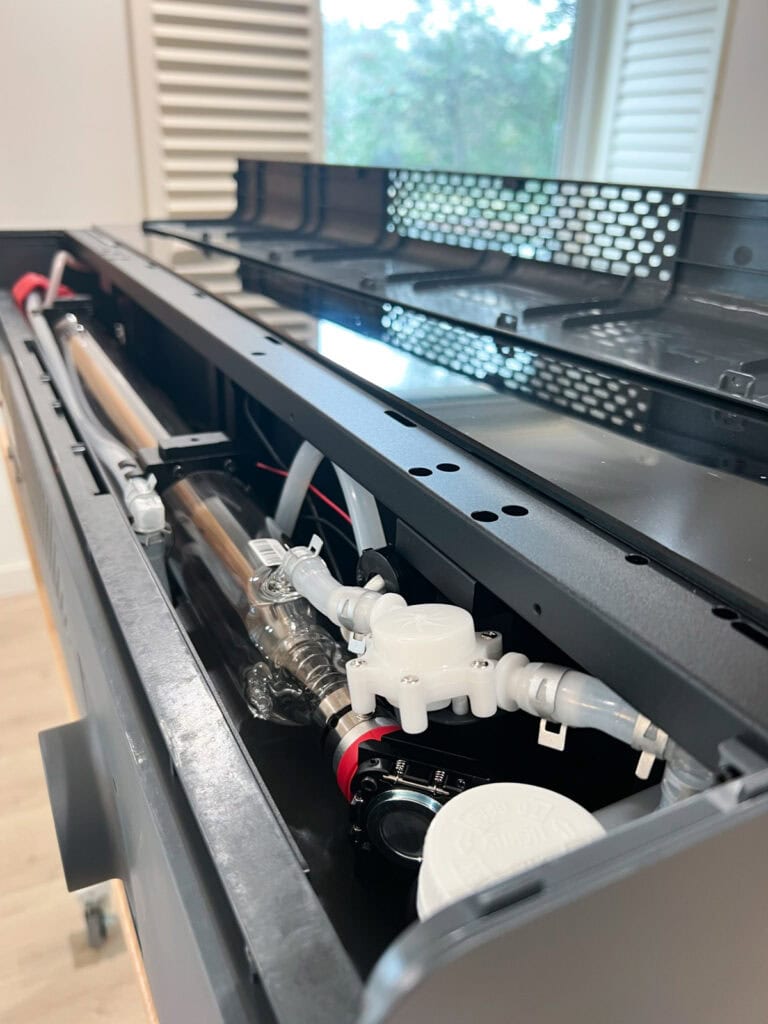
5) Make sure the laser tube isn’t broken or cracked, then add your antifreeze and water combo using the chart in the setup guidebook. The amount you need depends on your area’s weather. Remember, use DISTILLED WATER.
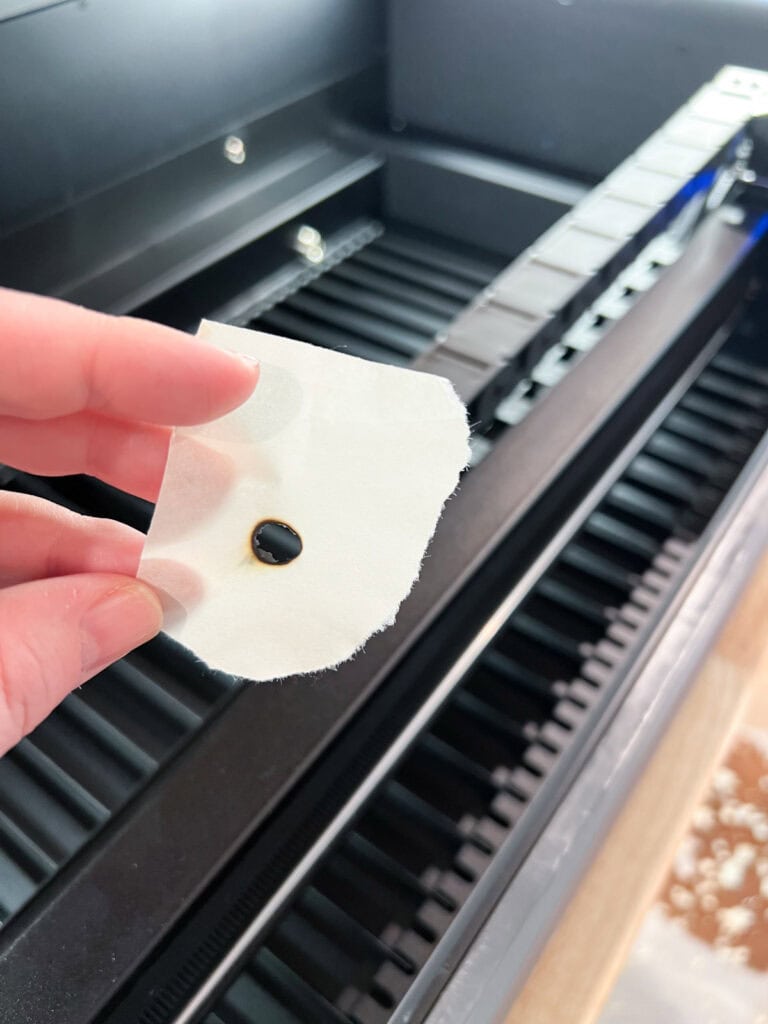
6) Here, the instruction manual tells you to put the rear cover back on and screw it in place. BUT, I’d say to wait to do that until you have performed this super-crucial laser calibration test because if your laser needs calibration, you’ll have to take it off all over again!
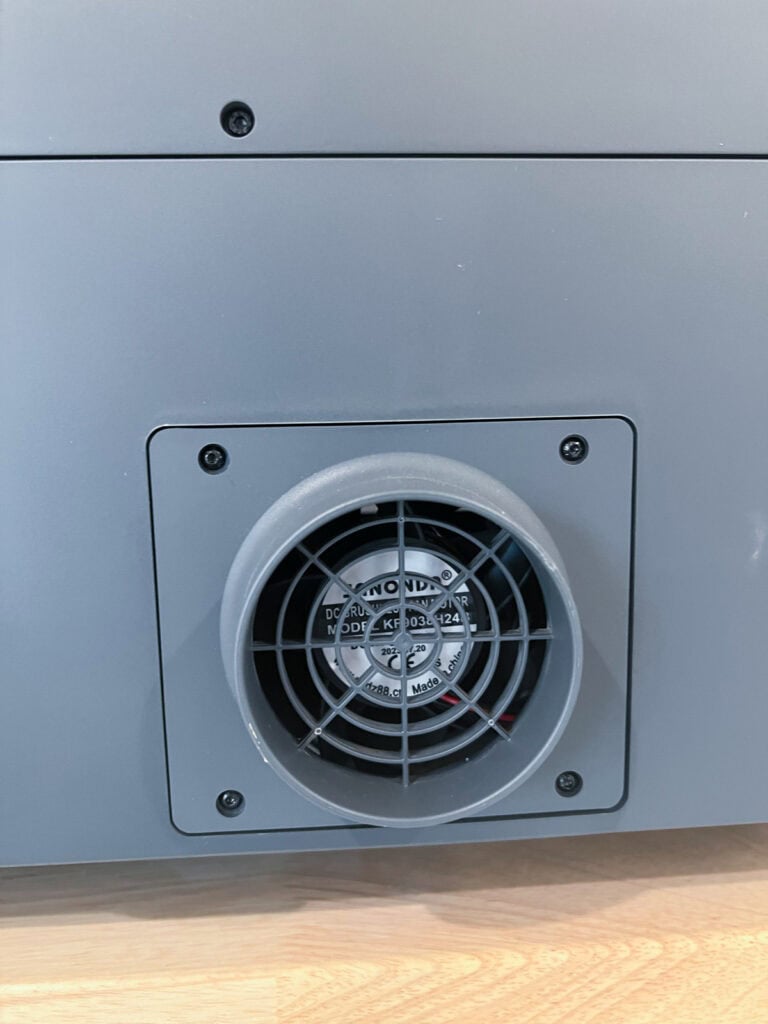
7) Once you have verified the laser is calibrated correctly, screw the rear cover back on, then add the smoke exhaust pipe. One end goes to the laser itself, and the other end either goes into the smoke purifier machine or out the window. You MUST fumigate properly!
8) After you have the machine up and running, it’s time to set up xTool’s design software, xTool Creative Space (XCS). Download the software, then connect your machine.
The first time you connect your machine with the program, you’ll need to use the included USB to tether the P2 to your computer. Once you have it set up via USB, you can then set it up to connect via WiFi moving forward.
This was a super smooth experience, and it took me about 3 minutes total!
9) Add your material, choose a design, and start crafting. At this point, the fun REALLY begins. There is so much you can make and do—the hard part is narrowing down where to start!
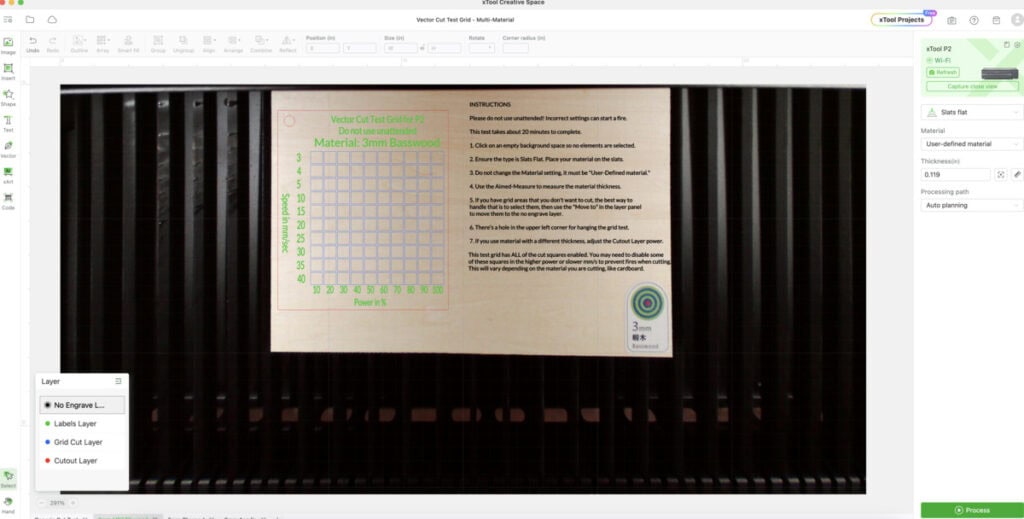
As I’ll share more about below, my first project I made was a test grid. I got the file from the super helpful xTool CO2 Facebook group. The dual cameras make setting up your file on the material correctly so easy—it’s ultra-precise!
What you’ll need to have on hand for set up
Almost everything you need to get your new toy up and running is included with the machine itself (even the screwdriver!). However, there are two additional things you’ll need to have:
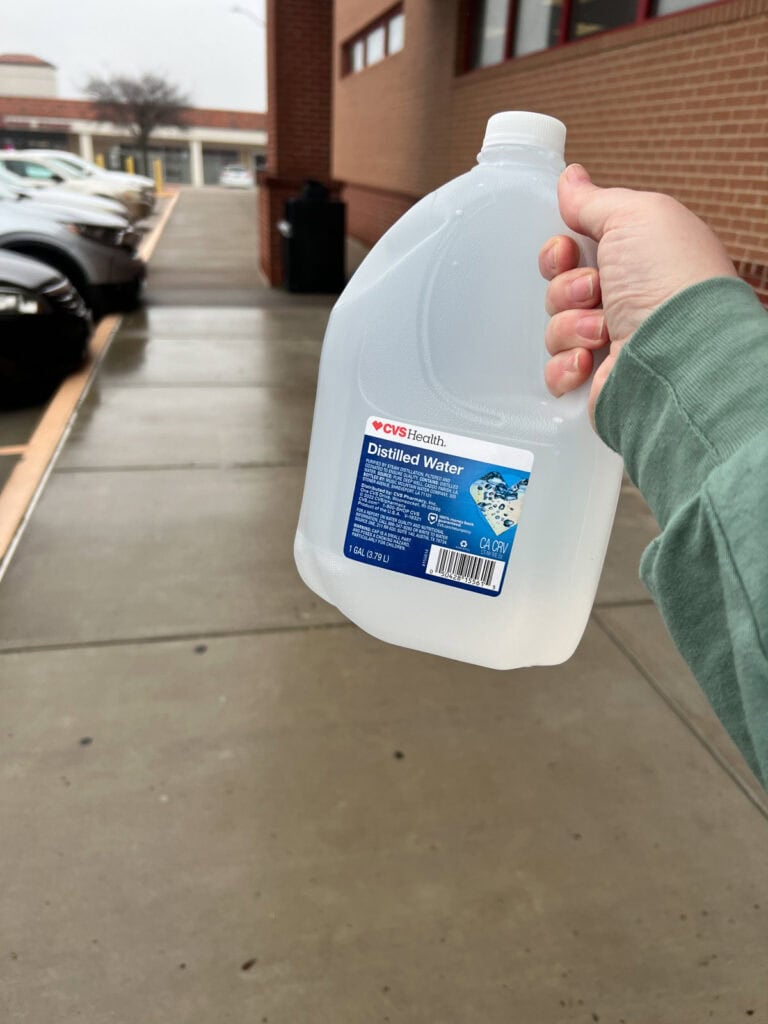
- distilled water – the instructions say “purified” water, but if you are in the US, don’t use filtered or bottled water. I did some research, and in this case, purified really means distilled. You don’t want to add any minerals to your machine!
- measuring cup with milliliters – when you are adding the antifreeze and water combo to the machine, you’ll need to measure out ml of water. If you are US-based like me, you may or may not have that on hand. Thankfully, I was able to use a combination of a glass measuring cup and a small cup I swiped from my daughter’s science kit to measure out 610 ml.
- masking tape – for the laser calibration test.
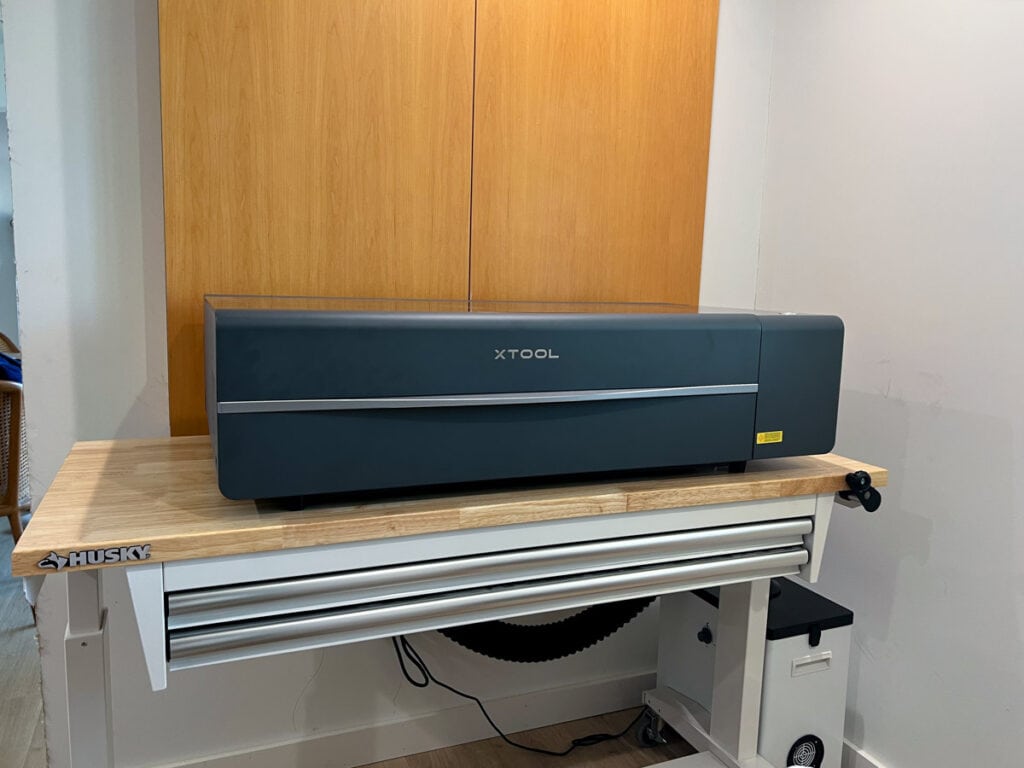
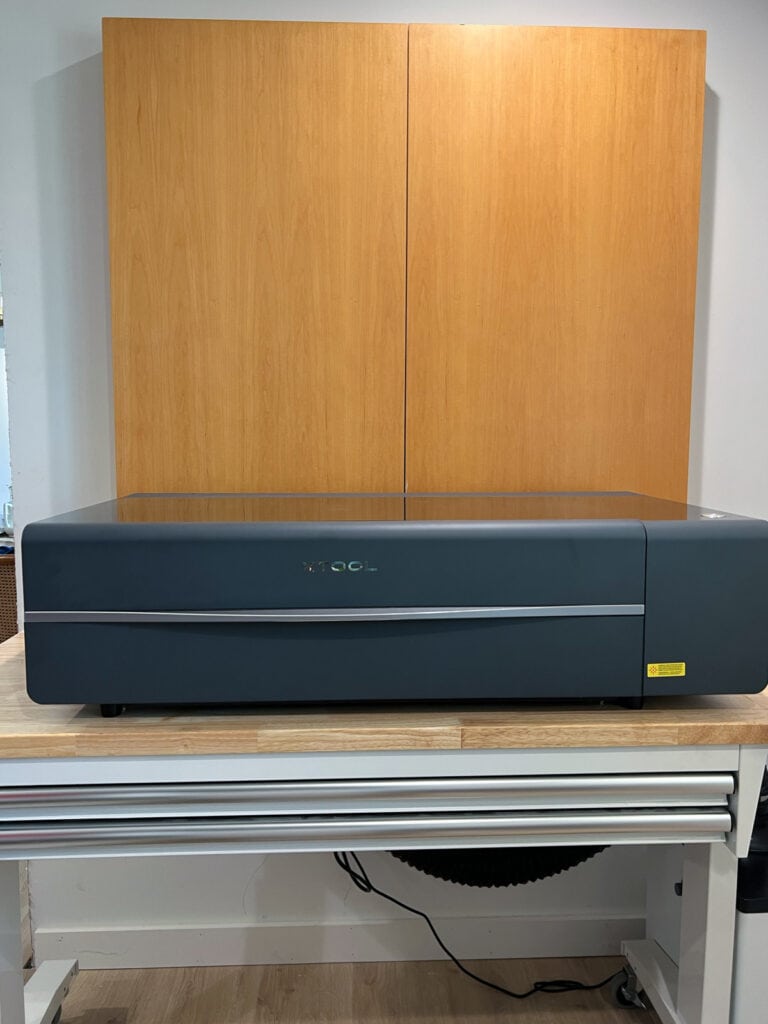
- something heavy-duty to hold the machine! This machine is heavy – right around 100 pounds! So, you’ll want to make sure you have a strong workspace that can support the machine. I purchased this Husky 52 inch adjustable work table and I LOVE it. I found the adjustable height to be super handy during setting up the machine – it was nice to bring it to eye level to see all those tiny screws better. And I love the 2 drawers it has for all my supplies.

How long does it take to set up the P2?
I think the answer to this question is highly varied based on how familiar and comfortable you are with machines and tasks such as screwing/unscrewing bolts, how precise you want to be, etc.
I obviously enjoy DIY, but I would not consider myself “mechanically inclined.” It took me about 3 hours to get the P2 set up and ready to use (and that’s not including going to three different stores looking for distilled water!).
I’d recommend setting aside several hours to set it up. It’s worth doing right! Don’t rush the process.
My Personal Experience with the P2
While I certainly have a craft/DIY background, I am fairly new to the world of laser cutting.
Even with my limited experience (using the xTool M1), I found it relatively easy to get started quickly! In fact, all the pictures throughout this post are items I made within 3 days of setting up my machine.
Because I knew this laser was so much more powerful than the M1, I decided to start out by making test grids. If you aren’t familiar with these, it’s basically a pre-made template that allows you to test what combination of speed and power works best on a material.
While xTool does give you setting recommendations for materials, that’s more of a starting point than the absolute best. You may want a different look or have slightly different material, for example.
I knew I would be primarily using the P2 laser for wood and acrylic, so I made 2 test grids for each material, one for engraving and one for cutting.
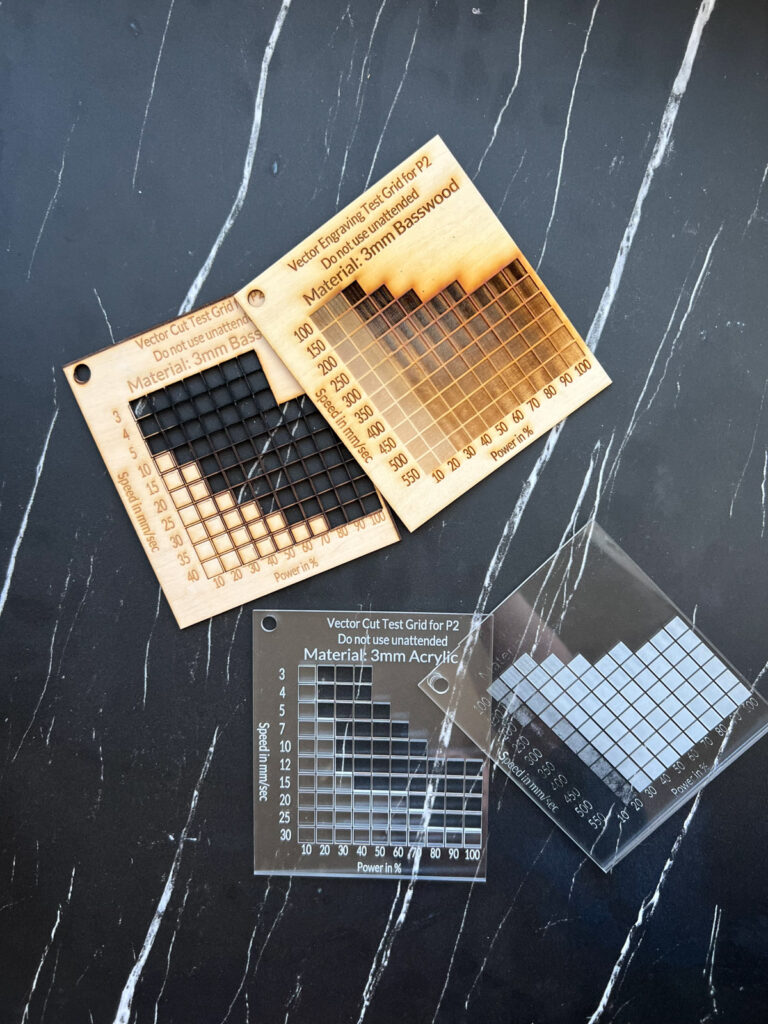
Now I have great visual guides for how I’d like my projects to look!
Next, I decided to test out the acrylic by making earrings using a file I purchased on Etsy. It cut perfectly the first time! I have never worked with acrylic before and it was what I was most excited about doing, so I was really happy.
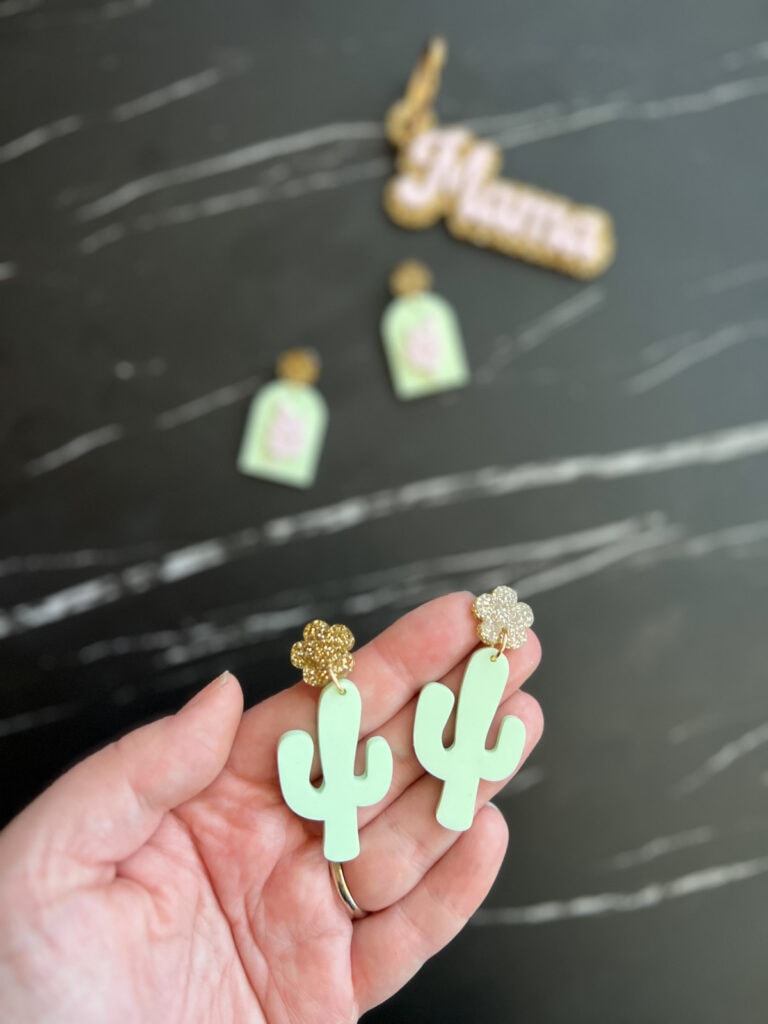
I’m working on a full post about acrylic with tons of tips and tricks as I learn, so keep an eye out.
I also decided I needed a new earring stand to show off my new jewelry, so I bought a file for that, too, and made one with the Basswood that xTool included with my machine. I love how it turned out! I’ll have a full post on this soon too!

It also happened to be my dad’s birthday a few days after I set up the xTool P2, and my daughter wanted to make him a custom sign. She drew it up, and then we sat down together and chose the SVGs she wanted to go with it.
It took about 30 minutes from start to finish, and she was absolutely fascinated with it. It turned out SO cute and was the hit of the party!
Of course, I had to whip up a cake topper for my dad and brother-in-law, who we were also celebrating, because why not? 🙂

So, is the xTool P2 worth it?
Absolutely, I’d say the xTool P2 packs a punch for its price, especially if you’re looking into producing products to sell or have the itch to frequently dive into creative projects (like me!).
This laser offers a level of precision and versatility that can totally elevate your side hustle or add a professional touch to personalized items for around your home, gifts, etc.
And let’s talk acrylic – the P2 handles it like a champ. If you’re like me and have been dreaming about crafting with acrylic, this machine is your new best buddy.
Overall, the P2 is the perfect crafting partner to engrave intricate designs or cut out sleek, custom pieces. This is a machine that’s built to keep up with your imagination and workload!
That being said, it’s an investment for sure. If you are interested in creating smaller-scale projects for personal use and don’t have the desire to work with a variety of acrylic, then I encourage you to check out the xTool M1 instead—it may fit your needs better!
You can read my full review of the M1 by xTool for more info!
Limited Time Offer: Trade in Your Laser and Upgrade to the P2
If you already own an open diode laser, and after seeing all the P2 can do, have a twinge of regret…I’ve got GREAT news for you!
Now through February 16th, 2024, you can join the Trade-in Program with xTool and claim up to a $500 reward for switching to a safer, enclosed laser—AND you can keep your old laser (not that you’d use it much after receiving you new one!).
Check out the Trade-In Program details here for more info.
Buy the xTool P2 ✨
So, there you have it – my super honest review of the xTool P2.
If, after reading this post, you have decided the P2 is right for you, I would love it if you consider purchasing through one of the affiliate links in this post (like this one here!). It doesn’t cost you anything extra, and the small commission I receive allows me to continue creating content like this.
💰 xTool was kind enough to also give me an exclusive discount code to share with you all! Use promo code RADIANCE100 to save off your xTool purchase! 💰
Buy the White xTool P2 😱
If you are LOVING the idea of this machine, but cringing at the thought of a big dark gray box in your craft room…I have the BEST news for you. For a limited time, you can grab the P2 in white!
There are only 200 units of these machines, so definitely jump on it if you want one. It’s absolutely gorgeous and I won’t lie…I wish I had one of these too!
So, is the P2 right for YOU? What questions do you have about the P2? Drop them in the comments, and I’ll get back to you!