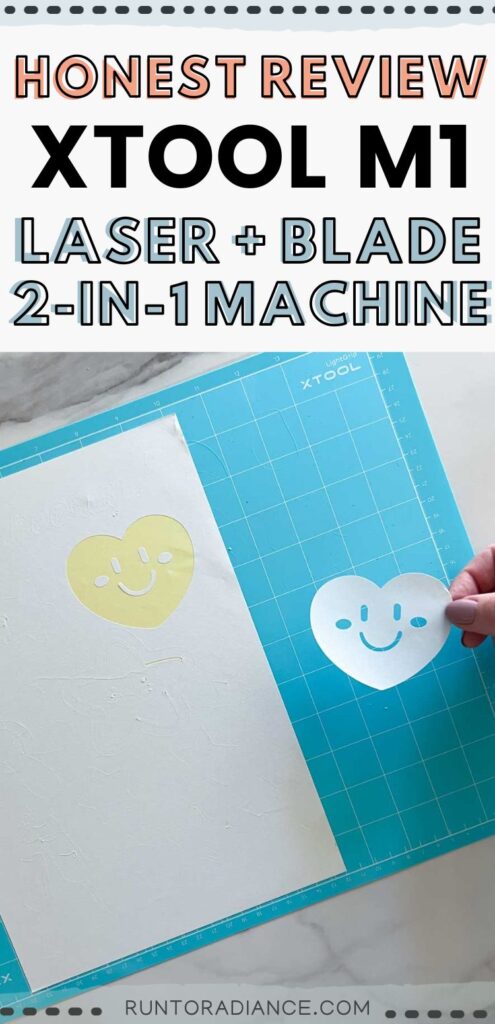
Brutally Honest xTool M1 Review – Read This Before You Buy!
This post may contain affiliate links. As an Amazon Associate I earn from qualifying purchases.


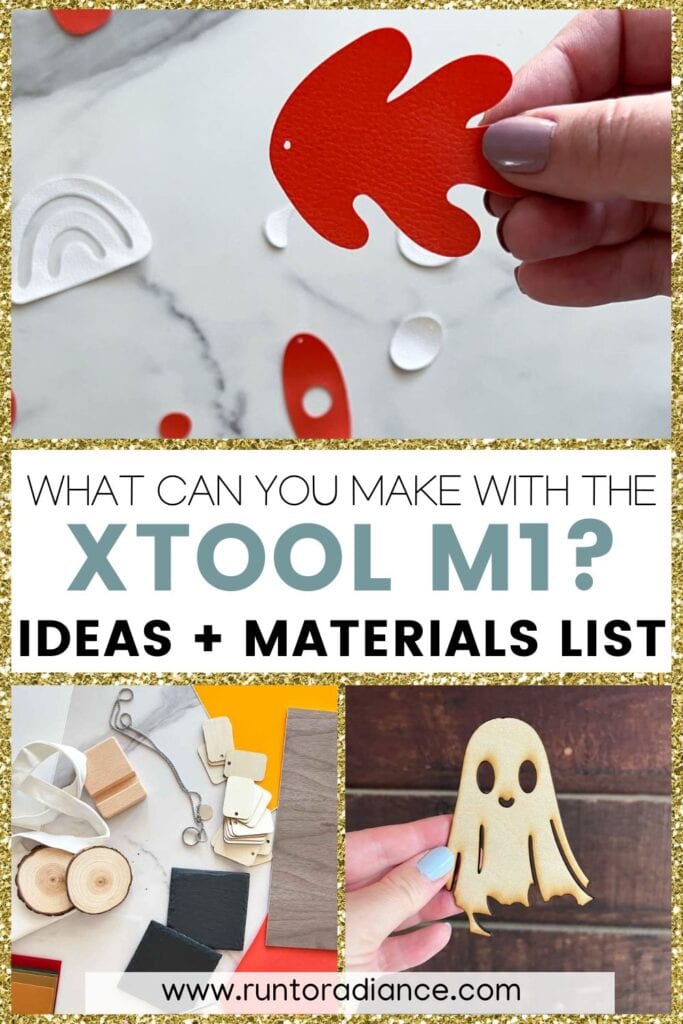
You all know I love a good DIY tool. And while I have certainly seen (and coveted) laser cutting machines, I’ve never owned one…until now. Today I’m taking you all on a deep dive of my new crafting tool, xTool M1. We’ll talk about the good, the bad, the ugly…and the absolutely gorgeous. 😉
I’ll say right off the bat that the M1 isn’t for every crafter. But, chances are, it will be the right fit for many of you. By the end of this in-depth review, you’ll know which group you fall into!
Disclosure: xTool provided me the M1 10w Smart Laser Engraver and Vinyl Cutter and the Air Assist Tool in exchange for this review. All opinions are 100% my own. This post also contains affiliate links.
Psst…this post is a long one, so feel free to jump ahead!
Table of contents: xTool M1 review
- Overview of the xTool M1 laser cutter
- What materials can be used with the M1?
- Unboxing the xTool M1
- xTool’s design software
- Safety guidelines to consider
- Is it worth getting Air Assist?
- What type of projects is the xTool M1 not suitable for?
- Who should buy an xTool M1 (and who should consider other options)
- Overall thoughts on the xTool M1 laser cutter
- Buy the xTool M1
Psst…did you know that there is now a second version of this machine? Make sure to check out my xTool M1 Ultra review, to learn more about the world’s first 4-in-1 laser crafting machine!
Overview of the xTool M1 laser cutter
The xTool M1 is a diode laser cutter and engraver that, unlike other laser tools out there, also has a blade so it can cut materials like vinyl and fabric too. In fact, it’s the world’s first 2-in-1 laser engraver and vinyl-cutting machine.
The biggest benefit here is you can craft a ton of different projects using one machine! As you’ll see throughout this post, I tried it with a wide variety of materials, and the machine processed them effortlessly.
What also makes this machine different from others I’ve used in the past is that it has a built-in 16-megapixel camera. This means that you can make sure you get a real-time preview of how your projects will look on your computer before you start processing them.
As you can imagine, this feature is SUPER handy – and one of my favorite things about the machine!
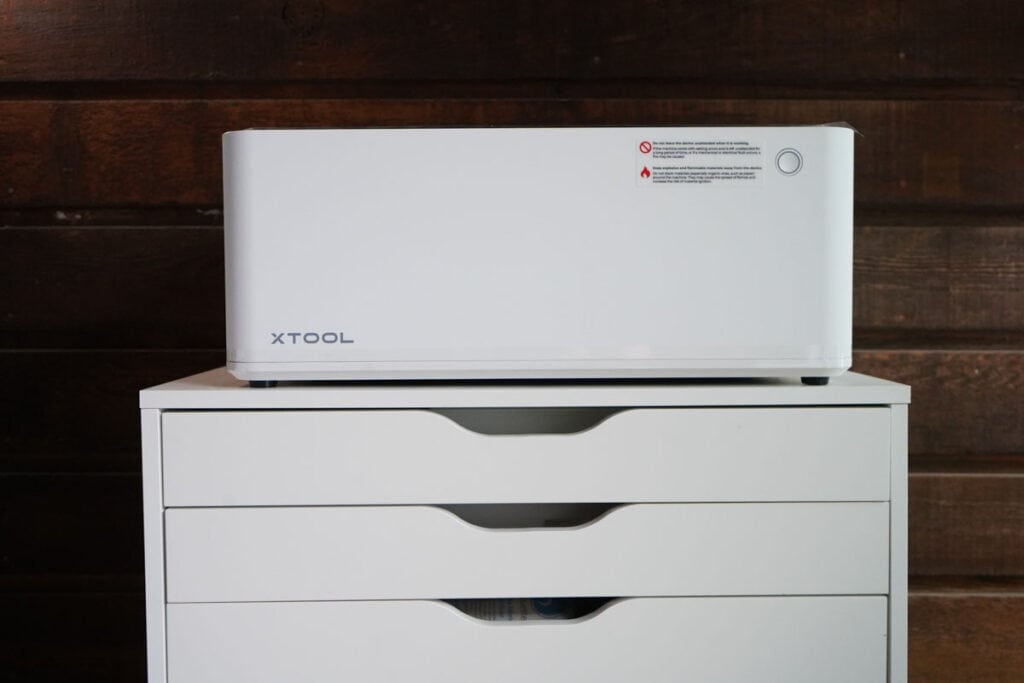
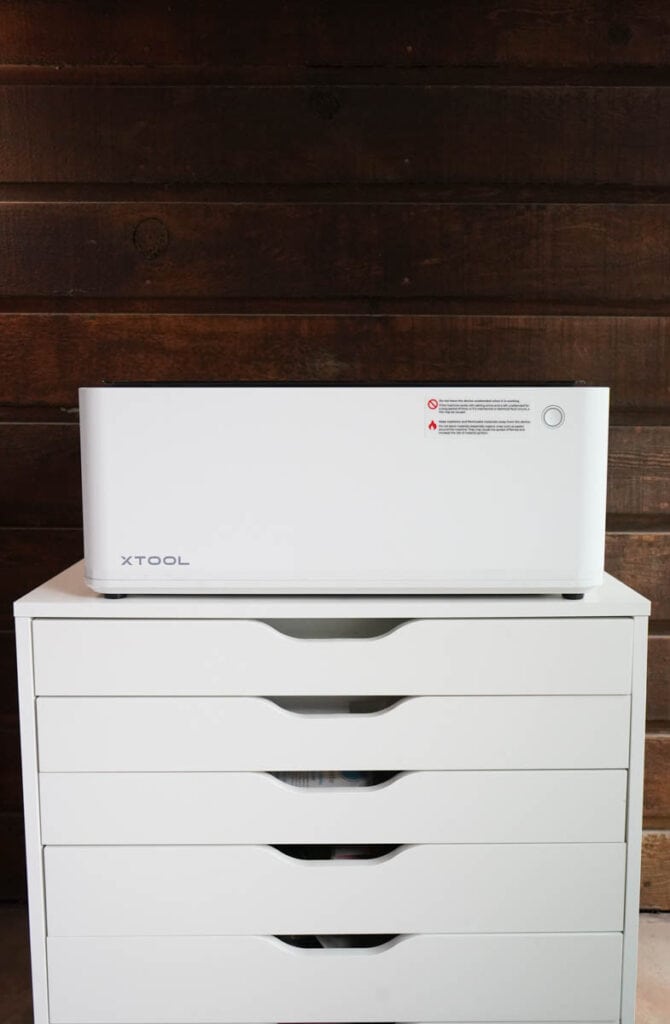
The M1 itself is large, but not overly so. At 22″ wide, 18″ deep, and 9″ tall, it is similarly sized to my printer, so it can fit in most homes, which is nice.
It clocks in at over 20 pounds, so it’s not necessarily lightweight, but it can somewhat easily be carried and moved if needed.
But, the most important size you need to know is 12″ x 15″, which is the cutting area. You’ll want your items to be slightly smaller than this (an extra 1/4″ works great). To access the working area, you simply open up the lid, place your material down, and shut the lid.
I’ll also add that the machine is really nice-looking. The design is modern and clean, and overall just aesthetically pleasing.
What materials can be used with the M1?
Now, onto the fun part! Let’s chat about what materials can be used (and what can’t be used) with the M1. Thanks to the tool’s unique combination of laser and blade-cutting capabilities, you can tackle 100+ materials.

Here is the highlight reel—there are too many materials to list each, but this should give you a good idea!
You can engrave:
- stone – marble (white, green, and black all work), white jade, terrazzo, granite, pebbles, and rocks.
- wood and plywood – including aspen, balsa, bamboo, basswood, birch, pine, and more.
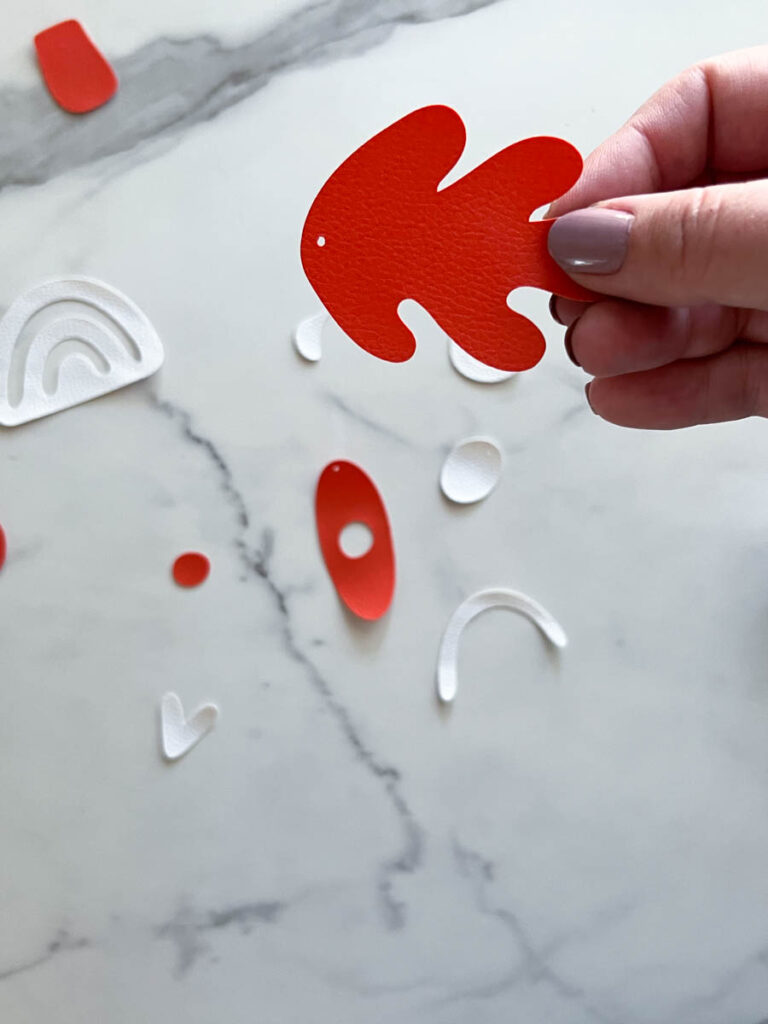
- leather + faux leather
- sheets of PVC + plastic
- fabric
- felt
- rubber
- acrylic – in certain colors only.
You can laser cut:
- wood and plywood – including mahogany, MDF, pine, birch, and more.
- sheets of PVC + plastic
- fabric
- felt
- foam
- acrylic – in certain colors only.
You can blade cut:
- leather + faux leather
- sheets of PVC + plastic
- fabric
- felt
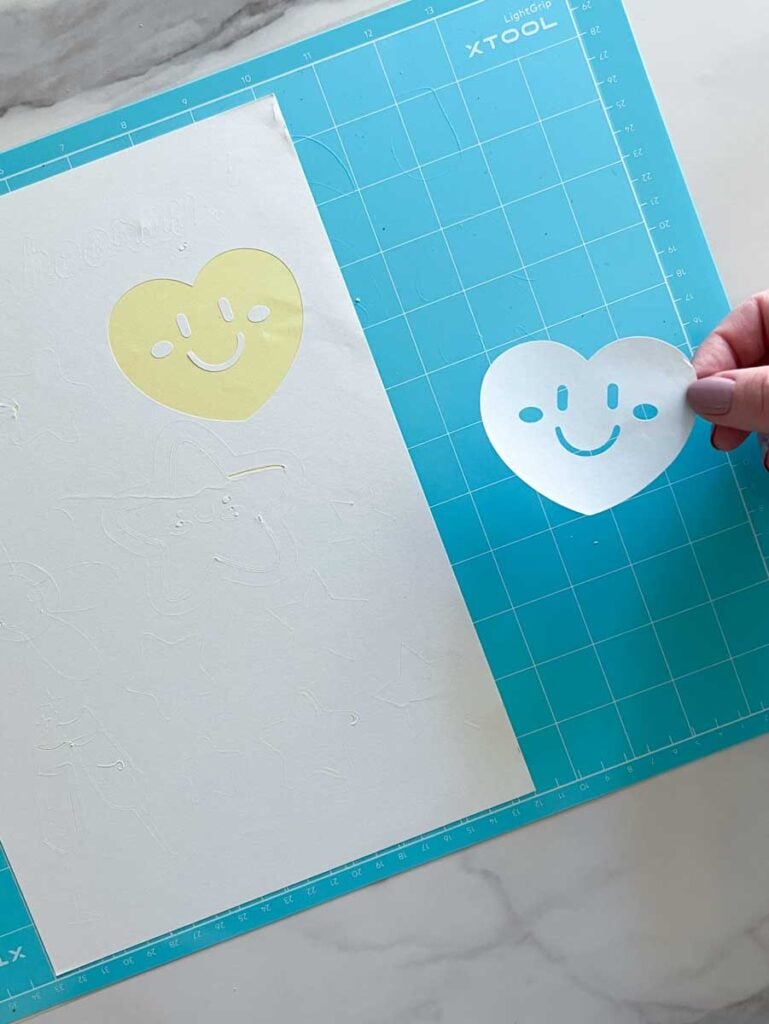
- vinyl
- paper
- sticker paper
xTool sells a huge assortment of materials in their online shop and often runs specials. Check out the material selection here!
Want even more functionality? Check out the xTool M1 Ultra, the world’s first 4-in-1 laser crafting machine! In addition to all the M1 features above it also offers ink jet printing, pen writing, foiling, and much more!
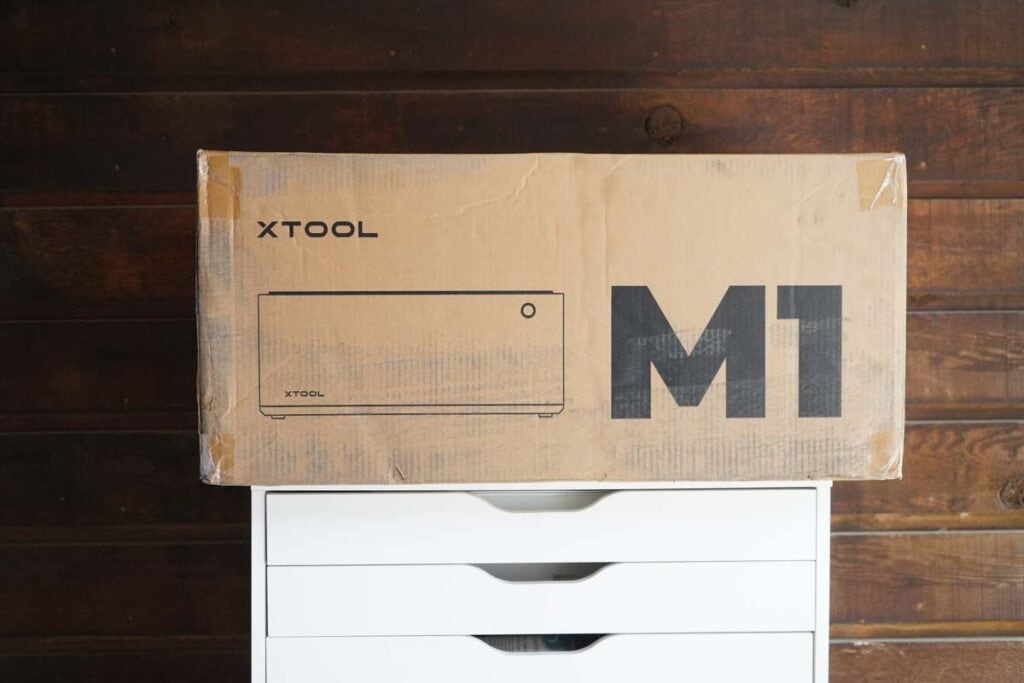
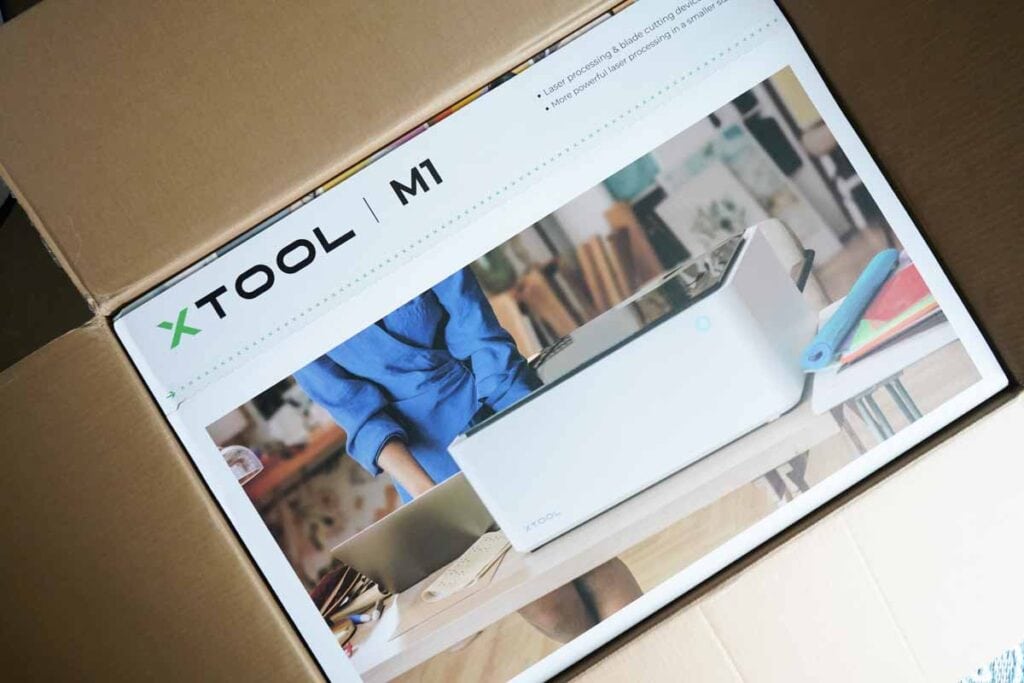
Unboxing the xTool M1
Setting up the machine itself is very simple. It’s pretty much as close to plug-and-play as you can imagine IF you have a smooth experience with the software, which, unfortunately, I did not.
But, more on that in a minute.
What comes in the box?
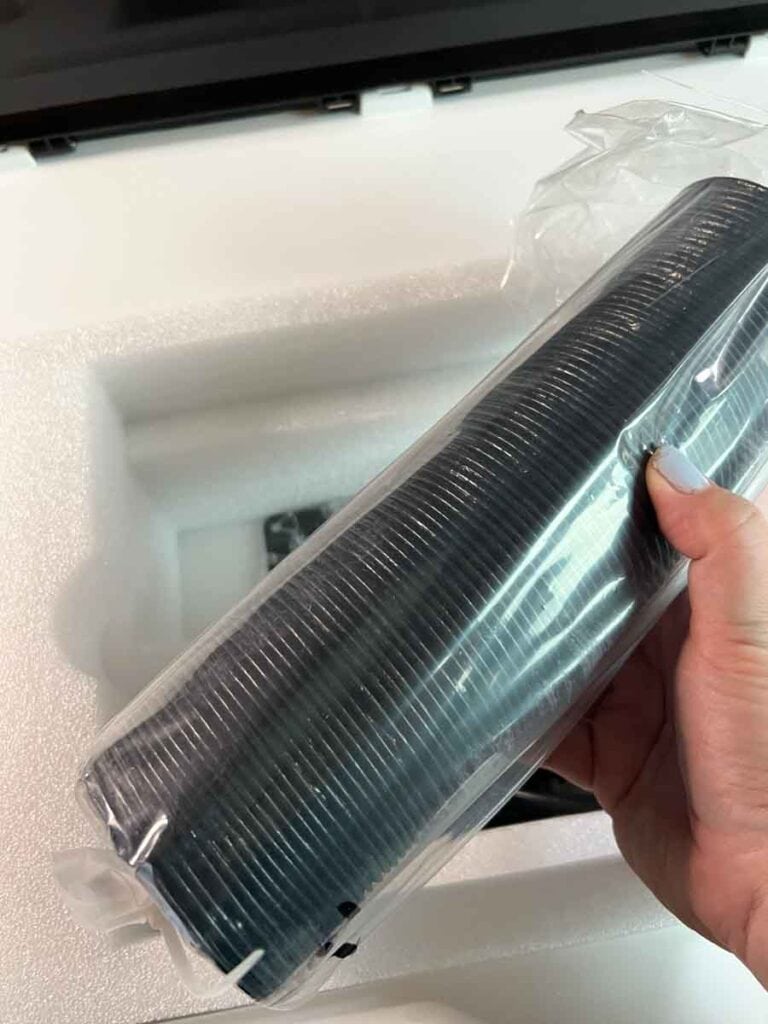
The packaging for the M1 is lovely, and everything was well-protected when I unpacked it.
But, of course, the fun part is all the goodies inside the box!
Besides the machine itself, you will also receive some materials to start playing with right away. I really appreciate that, as it allowed me to test out cutting and engraving a wide variety of items that I may have never even considered working with!
You also get 2 cutting mats to use with the blade cuts, a pink and blue mat. The blue is a light grip mat, which is used for materials like vinyl and sticker paper. The pink is for fabric.
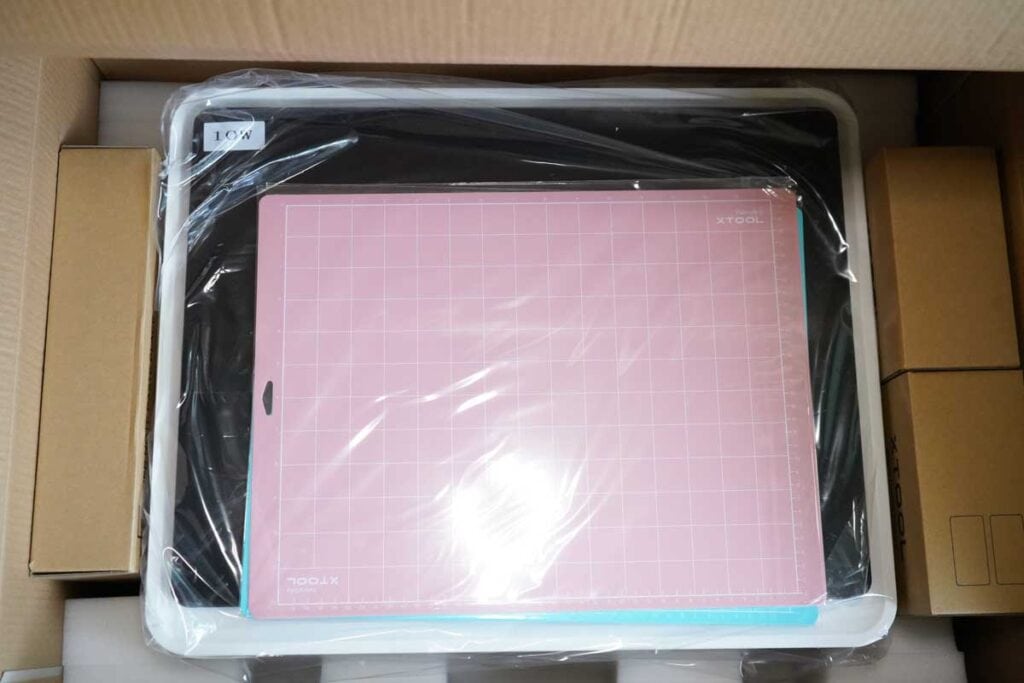
Additionally, you receive the blades (five of them!) so you can enjoy hours of crafting.
Because I received the Deluxe package, I also got the xTool RA2 Pro, which is a super cool 4-in-1 tool. It acts as a roller rotary, chuck rotary, sphere rotary, and ring rotary.
In layman’s terms, that basically means you can use this tool for pretty much any cylindrical thing that fits within the machine, including:
- rings
- mugs
- tumblers
- baseballs
- wine bottles
- rolling pins
As you can imagine, the RA2 Pro adds a ton of additional options for creating all kinds of goodies. I haven’t had a chance to play with this tool yet, but it’s at the top of my list!
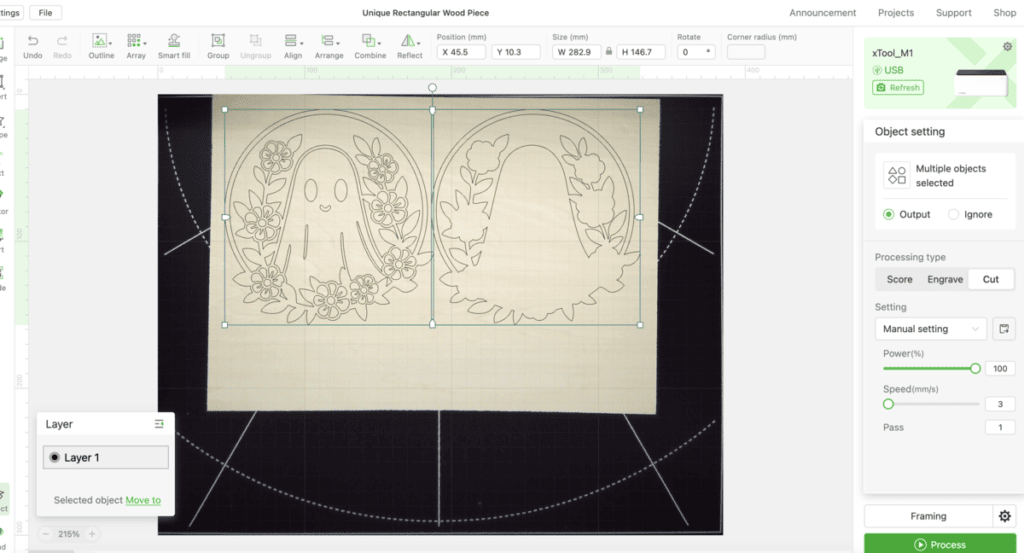
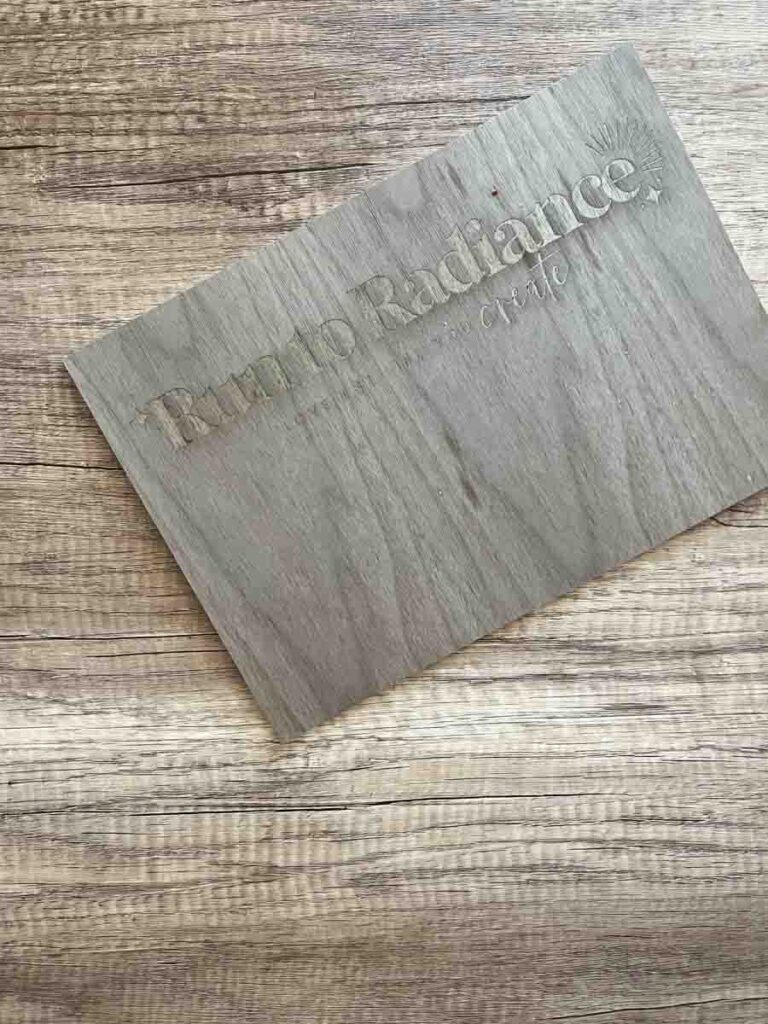
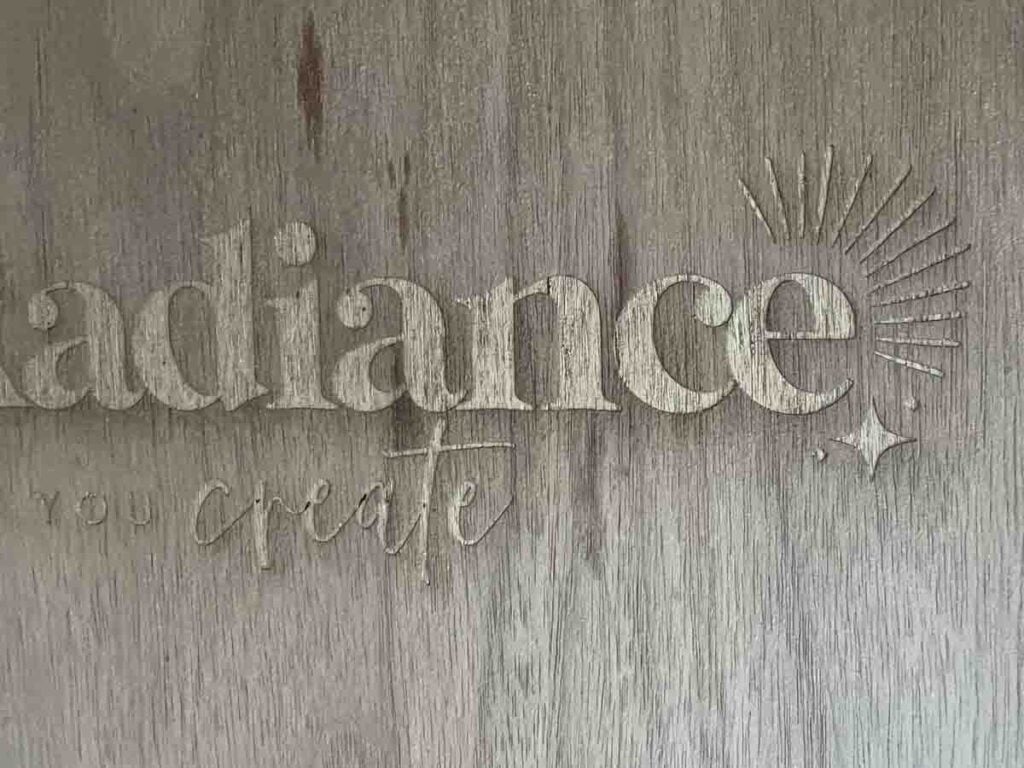
Lastly, I also received the Air Assist tool. This was something I knew I would use since I’m very excited to use my machine for creating wood designs.
Spoiler alert: I was right! I ran the same design without air assist, then again after I installed it, and it was a HUGE difference, as you’ll see below.

How to set up the xTool M1
There are 3 simple steps you need to take to set up the xTool M1:
- First, install the exhaust tubing. This is essential for safety reasons (see more on this below). But the tube is easy to install – just screw on the attachment to the back of the machine, then grab the tube and clamp it on tightly.
- Next, install the blade. The machine comes with 5 blades, and installing one into the blade housing is super simple.
- Plug in the cord and power it up!
Once the machine itself was ready, it was time to download the accompanying software. This part was where I ran into some trouble—and probably the only frustrating part of the entire setup.
Note: if you opt to purchase Air Assist, you will have additional setup work to do on the machine. I cover this in more detail in the section on Air Assist below.
xTool’s design software
The design software is called xTool Creative Space (XCS). Downloading it from the xTool website is easy enough, but when it came time to connect my computer to the M1 and use XCS, I had a few frustrations.
Setting up xTool Creative Space (XCS)
First of all, it’s important to know that the company provides a USB connection. So, if you have a Mac, chances are you’ll need to have an adaptor on hand to get the wire to connect. Thankfully, I was able to find one after digging in my drawers a bit!
Secondly, for some reason, my machine would not connect to XCS or show up as a connected device. xTool does have a robust support website with plenty of troubleshooting documents, and after digging through a few, I learned that some Macs need to have additional drivers installed.
Admittedly, I’m not super techy. I was finally able to figure out how to do what the instructions said, but it took me about 40 minutes to work it out. I was eager to jump in and start crafting, and I found the initial setup to be less than stellar.
From the research I’ve done, it looks like my driver issue wasn’t what the majority of people experienced. Once I installed the component, the connection has worked just fine every time after.
Adding projects to xTool Creative Space
When it’s time to start crafting, you will use XCS to upload or create your project and view it with the M1’s camera before starting the actual cut.
Creative Space does have some projects included, but to be honest, I didn’t think any of them were particularly exciting. My hope is that the design center continues to evolve and we start to see more projects there.
So, I went two routes with looking for files to cut or engrave. I purchased several SVGs from Etsy (simply searching for laser cut files) and also tested out creating my own designs in Canva, then exporting them as an SVG to upload to xTool Creative Space.
Both of these methods worked really well!
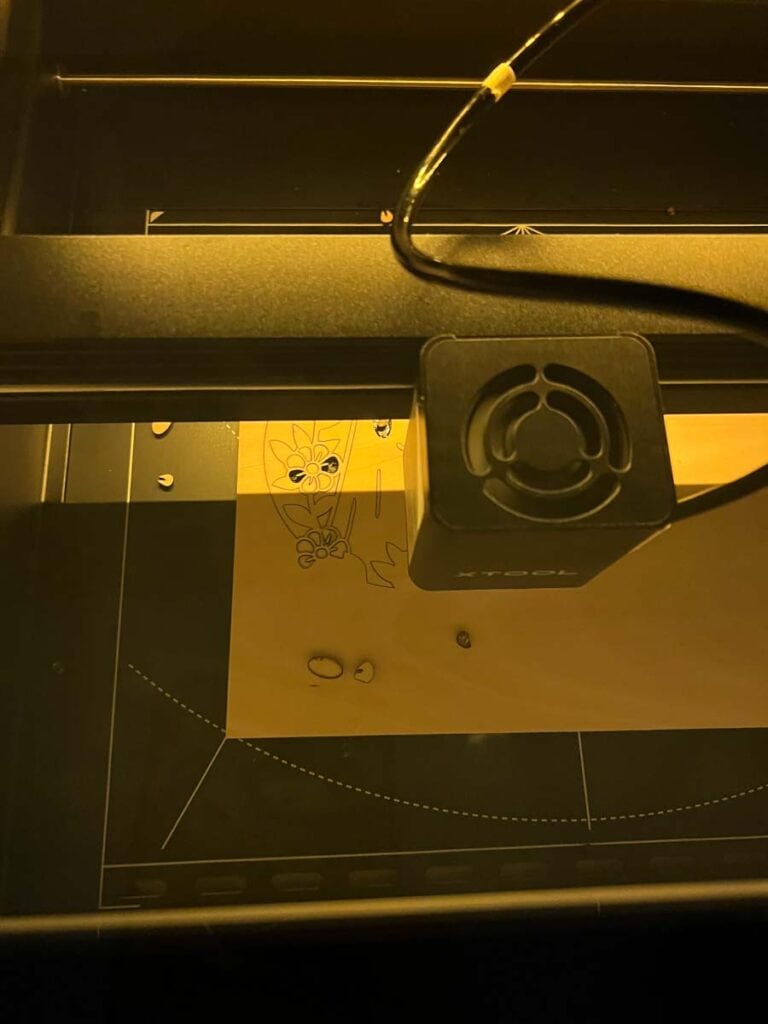
Once you have your file uploaded, you can view how it looks via your computer and the M1’s camera. Make sure everything is aligned properly, double-check your settings for engraving or cutting, and then hit start!
It was much easier to do than I had imagined!
Safety guidelines to consider
Remember earlier when I mentioned that the machine has an exhaust tube that has to be used?
One end of that clamps onto the machine. The other end of that will need to vent outside to avoid any potentially toxic fumes when using the laser. To do this, you need to stick the other end of the tube out the window.
This isn’t a requirement unique to xTool, by the way. You’ll find all laser cutters need to be vented properly.
I keep mine on top of my Ikea Alex Drawer unit. It fits perfectly, and I keep all my evergrowing stash of supplies underneath in the drawers. 😉
I particularly like that the Alex has wheels because it allows me to roll the entire cart over to the window to vent the machine properly. When I’m done, it rolls right back into the corner of my office. Easy peasy!
You’ll also want to make sure you don’t leave the machine unattended while it’s in use. It is, after all, a laser, so there is some risk of fire. I had ZERO issues, but thought to mention it!
Lastly, when you handle the blades, be careful! They are definitely sharp. Again, no issues on my end whatsoever, but use caution.
Is it worth getting Air Assist?
Now, let’s talk a little bit about the Air Assist tool. This is an optional upgrade you can choose when purchasing the xTool M1. It essentially uses air to help with laser engraving or cutting, and was something I definitely wanted to try out!
The setup for this one took me a while (we’re talking close to an hour). But the effort was more than worth it!
Do I wish that Air Assist came pre-installed? Sure do! But, if you are purchasing this tool to mainly work with stone or metal or vinyl vs. wood, you probably don’t need this add-on. For those who want to work with wood, I’d go as far as to say Air Assist is a MUST.
Here’s why: it helps the machine operate much faster, and your designs look much better.
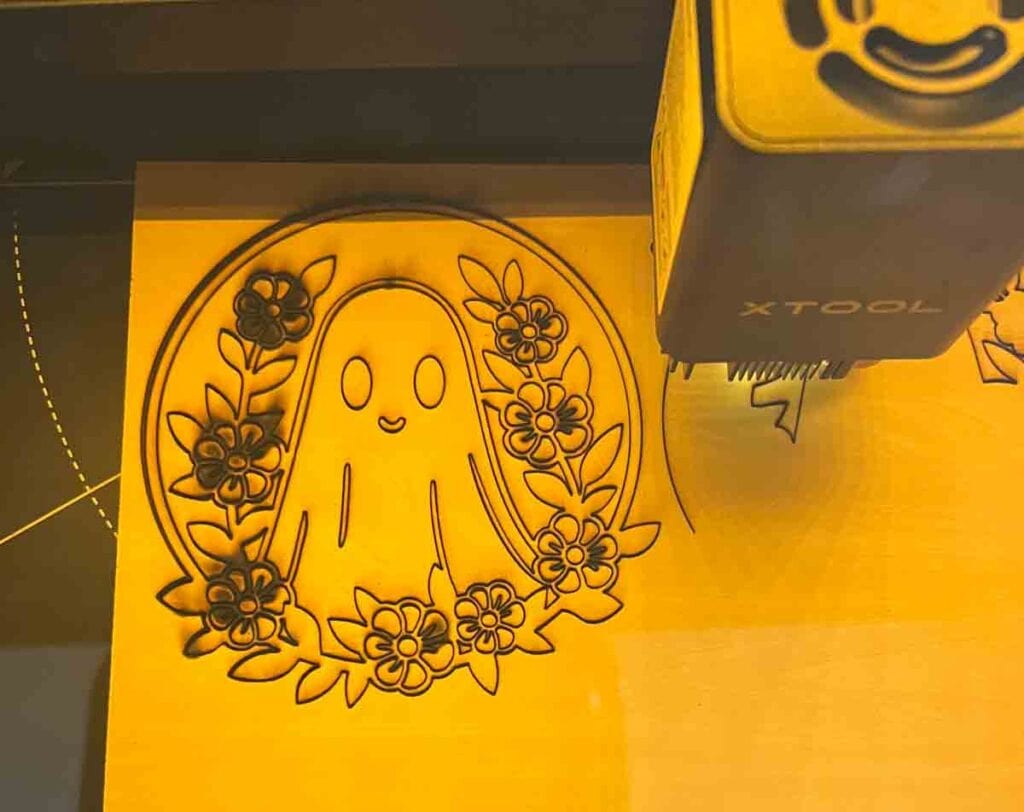
It took me over 40 minutes to cut the 3-piece cute little ghost design out without Air Assist. When I re-ran the same project with Air Assist, it took me 24 minutes. And it definitely looked way better!
Here is the visual proof:

What type of projects is the xTool M1 not suitable for?
If you are hoping to primarily cut acrylic, I would choose another tool. The xTool M1 is a diode laser, which means it can’t cut clear acrylic due to how the laser functions.
If you are a fellow acrylic fan, I’d recommend the xTool P2 instead. I have to admit I’m eyeing it, imagining all the fun acrylic items I could craft up!
I also would not recommend using the M1 without Air Assist for super detailed woodcuts if you want a clean look. With the Air Assist, I 100% recommend using the M1 for cutting very detailed wood projects, but I truly do think the Air Assist is a must.
If you are someone who wants to create a high volume of crafts—like if you have a large crafting business, this may not be the right tool for you. However, for the everyday crafter and small business owner, this machine is more than capable, particularly if you opt for the 10W.
Who should buy an xTool M1 (and who should consider other options)
Whether the xTool M1 is right for you or not all comes down to what you want to make and how much volume you want to create.
For a hobbyist, occasional crafter, or small business owner looking to make custom laser creations for gifts or weddings, the M1 is an excellent choice. It’s very easy to set up and use, has plenty of power, and offers fantastic value for money with its versatile engraving and cutting capabilities.
Additionally, xTool has now added a second version of this machine, the M1 Ultra. This machine now offers 4 functions in 1: laser, blade, pen writing, and ink jet printing! There are also a bunch of new sub-features like a foiling tip and rotary blade that makes it a VERY versatile machine.
If you have a slightly higher budget and are interested in even more craft options, I highly recommend you check out my xTool M1 Ultra review to learn more!
If, however, you have zero interest in cutting anything besides vinyl or paper, this machine may be overkill, and you may need to look at a more basic cutting tool.
Overall thoughts on the xTool M1 laser cutter
My overall impression after working with the xTool M1? This thing is FUN.
Honestly. I truly enjoyed creating projects and have a list of about a dozen things I want to make next.
Is there a learning curve? Sure. But that’s half the adventure sometimes! I’m looking forward to trying out different materials and techniques over the next several months.
I am still kind of in awe at how easy (and fun!) it was to cut and engrave wood, as it was my first time ever working with either of those functions. Especially when paired with Air Assist, the M1 is a very powerful tool in a crafter’s arsenal.

Since my craft room has now officially been converted to my son’s nursery, I only have so much space in my current hybrid office-craft room setup, and I have to be choosy about what I keep and don’t keep. I absolutely am giving the M1 a spot!

Buy the xTool M1
So, there you have it – my super honest review of the xTool M1. 🙂
If, after reading this post, you have decided the M1 is right for you, I would love it if you consider purchasing through one of the affiliate links in this post (like this one here!). It doesn’t cost you anything extra, and the small commission I receive allows me to continue creating content like this.
💰 xTool was kind enough to also give me an exclusive discount code to share with you all! Use promo code RADIANCE100 to save off your xTool purchase! 💰
So, is the M1 right for YOU? What questions do you have about the M1? Drop them in the comments, and I’ll get back to you!


Hi Tania,
Thanks for the great article. I have this bookmarked since I recently got my M1. I have a question about cutting clear acrylic. Is it possible to “trick“ the laser by attaching removable vinyl or masking tape? Or maybe putting some sort of basswood under the clear acrylic? I still have my cricut maker 3 to use for cutting thin sheets of clear acrylic with the deep point blade.
Just wondering and trying to do some thinking outside of the box to see if thick acrylic is really off the table.
Thanks!
Donald
Hi, Donald! I haven’t tried that personally, but I have heard of some people doing that with some success. It does seem like it doesn’t cut as smooth as people would like though. I may just give it a try and report back! Let me know if you do the same.
Hi Tania, Im looking at the M1 for wood working and engraving primarily, without the Air Assist can you hand sand were it looks burned?
Thanks for any advise. Great article, very informative.
Roz.
Hi, Roz! The machine would definitely be a great addition to wood working! With the hand saw, I would be concerned if you did that the design wouldn’t be as smooth, but it would depend on your design. While I do recommend the air assist, I also have played around with some other ways of reducing burn marks.
I’ve had the most success using a thin layer of masking tape over the top of wood, then once I cut/burn the design, I remove the masking and scrub the burn marks with a toothbrush and dawn dish soap and/or rubbing alcohol. It takes a bit of arm power but it can be done! 🙂
great
good luck
Thank you so much, you too! 🙂
Hi we recently just bought their P2 series and F1 lazer what computer do you recommend for your lazer ? We are having a hard time deciding…
Thanks
Amber
Hi! Congrats on your purchase. I already own a Mac Desktop, so that’s what I use and it has worked great. I have also used my husband’s macbook (laptop) with no issues. I know several people who use windows computers and even iPads, so I think any option that can support the xtool software would be great!
Hello Everyone, I just purchased an X TOOL M1 HOME PACK refurbished !! Only £615 but worth a punt as this is my first venture into engraving.. Am waiting for AIR ASSIST and RISER BASE as they are included in the fantastic price. Got a sample pack of goodies to play with as well as the ROTARY engraver. Only thing is I didnt have the triangular prisms to raise the material from the baseplate. They dont appear to have been included in the kit. Apart from that its a great piece of kit. Looks brand new. !! Hoping to get some projects done before my 81st birthday in a few weeks !!! Wish me luck.
Hi, Billy! I’m so glad you get to work with the M1! It’s a wonderful machine and I have enjoyed making things with it so much. If you reach out to xTool, they may be able to help you locate some prisms.
I would love to hear how you like it and what you make—please share when you do! And, happy early birthday to you!
I was given (yes you read that correctly) an original M1. I think this person upgraded to the Ultra but I want chosey.
Question: my machine did not come with a bed/base or whatever it is called. Any suggestions on what I should purchase and feel free to send an affiliate link. It at least tell me the size of what I’m looking for.
Hi, George! Wow, what a gift! I am sure you’ll love it. Yes, there is a riser base that includes the honeycomb pannel, which I highly recommend. You can find it here with my affiliate link!
https://www.xtool.com/products/xtool-m1-riser-base-with-honeycomb-panel?ref=Gf-xcjskWpLta0&srsltid=AfmBOoqysx8sKOWcNXtV1-2sAgVgxpaYk0d4xWqe2mbOspRkbsIvLdFu&utm_medium=affiliate&utm_source=goaffpro&utm_term=5005