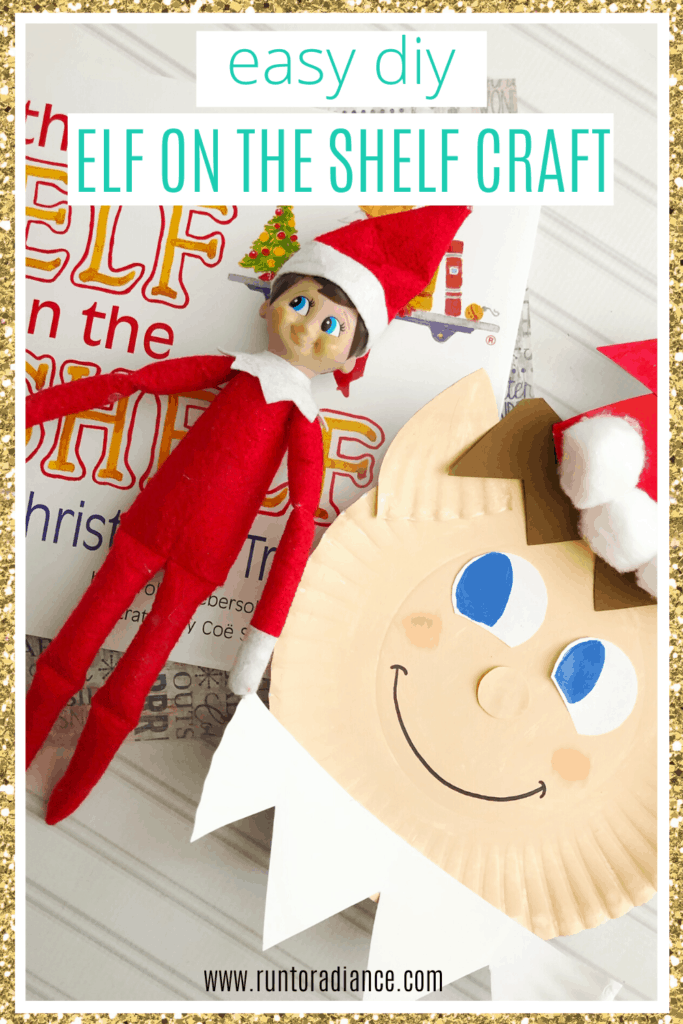
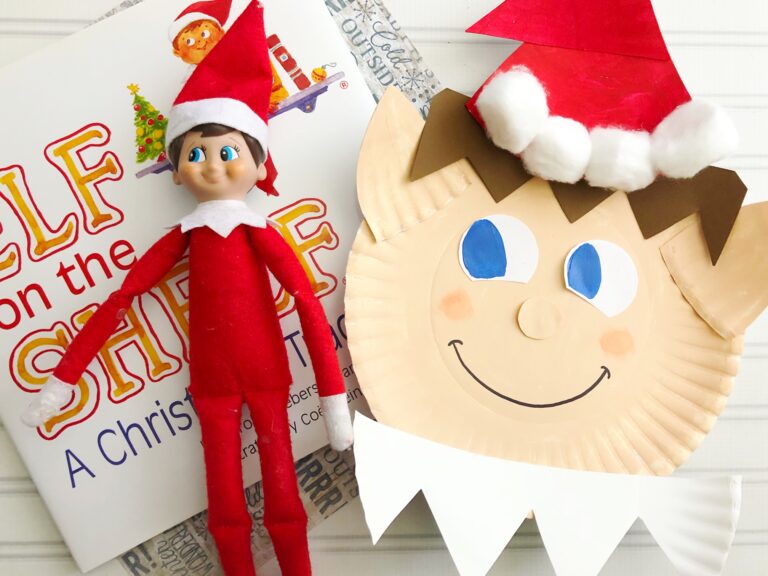
Elf on The Shelf Paper Plate Craft
This post may contain affiliate links. As an Amazon Associate I earn from qualifying purchases.
This is one of the cutest paper plate crafts for kids I’ve seen! Use basic, inexpensive supplies to create an Elf on the Shelf Christmas craft that will bring Christmas cheer to your home.

I love a good Christmas craft! Lily is too young this year to do Elf on the Shelf, but she is definitely becoming very interested in crafting. We’ve been trying out lots of Christmas crafts for kids this season, and this one might be one of my favorites!
Paper Plate Christmas Crafts

Paper plate crafts are pretty brilliant. Not only are plates generally a very affordable supply, but there is also so much you can do with them. They can be painted on, cut, and glued together to create all kinds of fun projects.
Just make sure to buy the right kind of paper plates for crafting. They need to be plain white unwaxed plates—the kinds with designs and a smooth coating will not hold the paint properly.
Fun Elf on the Shelf Idea for Toddlers
Doing elf on the shelf for toddlers can be so fun and magical. They’ll love racing from room to room to see where their buddy ended up each morning and what mischevious behavior he got into!
You can use their enthusiasm for the Christmas elf to do a fun elf on the shelf idea for toddlers like this one—making a likeness of their friend as part of a craft project!
Not only will your toddler or preschooler enjoy the finished product, but they’ll be learning through play: scissor skills (make sure to use safety scissors!), painting, and how to glue things together just to name a few.
How to Make This Paper Plate Christmas Craft
Let’s talk about how to make this cute elf on the shelf craft! Make sure to put down butcher paper or a tablecloth you don’t mind getting paint on first, then get to work!
This post contains affiliate links.
Elf on the Shelf Craft Supplies Needed
Here’s what to gather together to make this cute craft. You may have some of these supplies already, even!
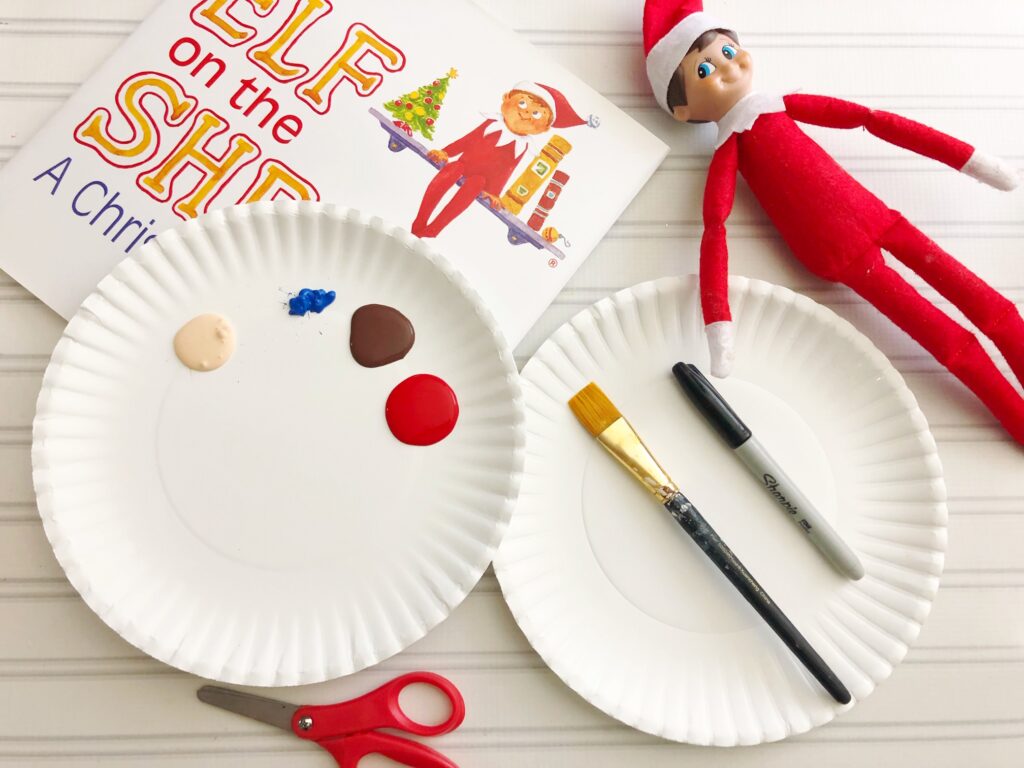
- Paper plates – note: make sure to purchase the unwaxed plain plates like those in the link. The other kind will not hold paint.
- Craft paint – Tan, blue, brown, peach, and red are the colors you will use for this project.
- Brown paper
- Cotton balls
- Scissors
- Marker
- Paintbrushes
- Glue
How to Make the Elf Paper Plate Craft
Once you have all your supplies gathered (and your kid wrangled), you can start making this easy elf paper plate craft. It will take you less than 15 minutes of active crafting (plus some drying time for the painted pieces), but the joy it will bring will be endless!
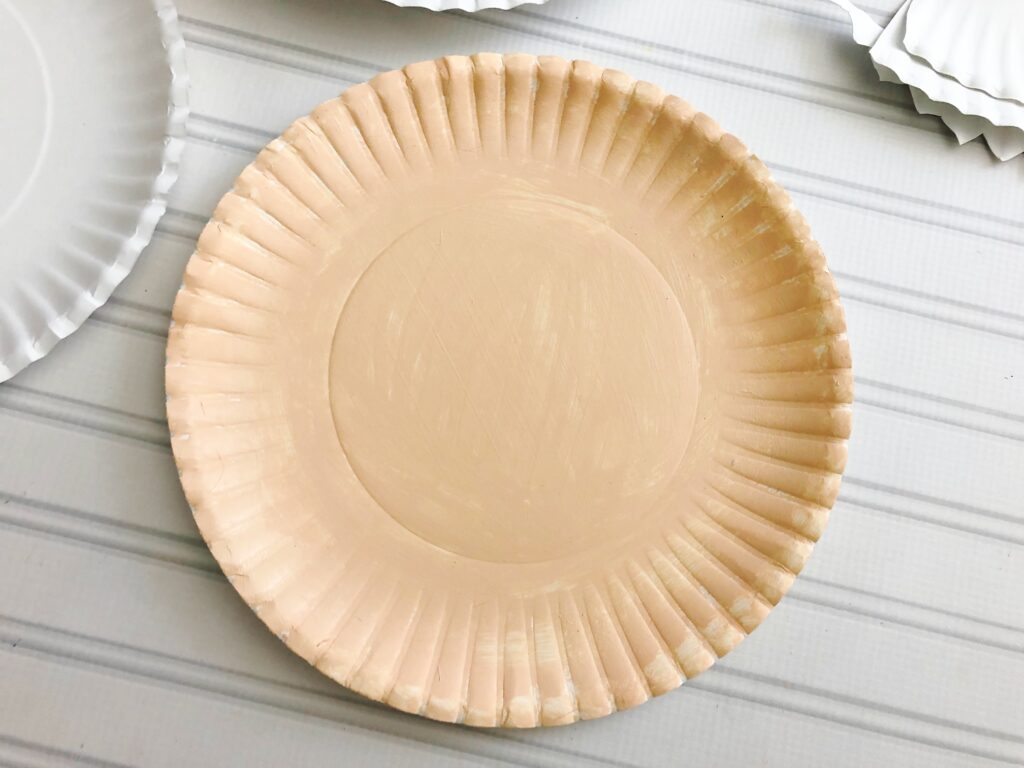
Layout a piece of scrap paper to keep your work surface clean. Then, paint one of your paper plates tan, and let it dry. If you are in a hurry, you can use a hairdryer to speed the drying process up.
Cut Out the Shapes for the Paper Plate Craft
Next, you’ll want to cut out the shapes for the elf’s face. I recommend tracing the shapes out on the paper plates first. Then you can allow your child to use safety scissors to cut out the shapes (or just cut them out yourself).
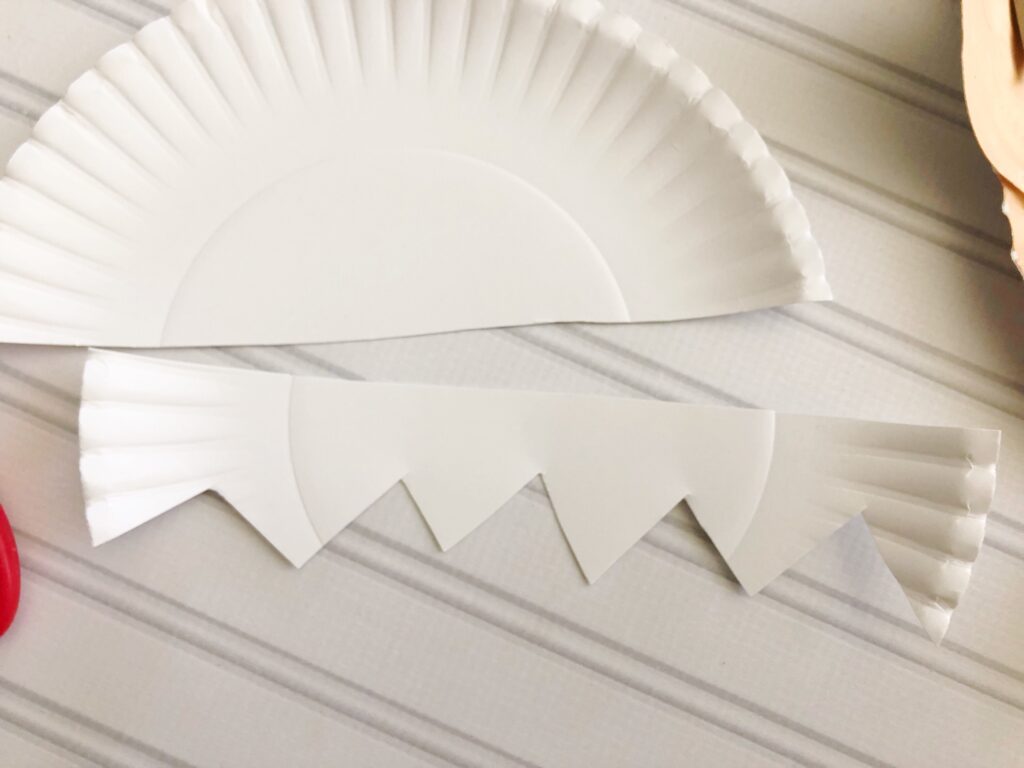
You’ll need to cut these out from the paper plates:
- 2 elf ears
- 2 triangles. One should be large and the other is longer and skinnier—these will make up the elf’s hat.
- 1 small circle for the nose
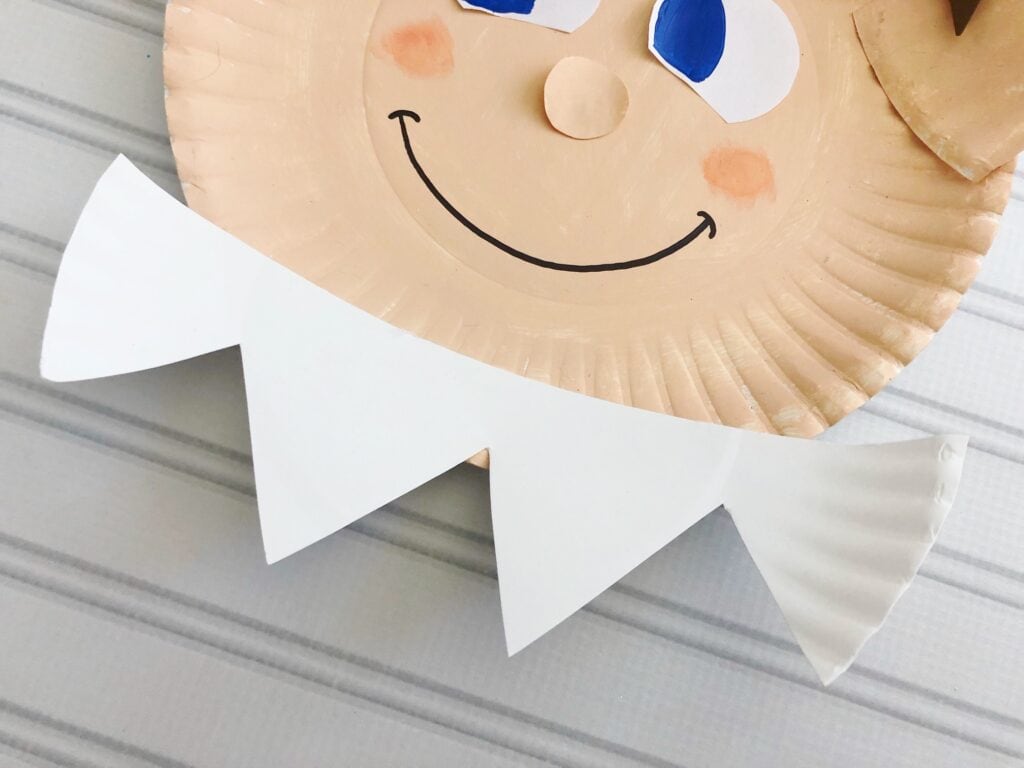
- Elf collar (see the image above for a visual)
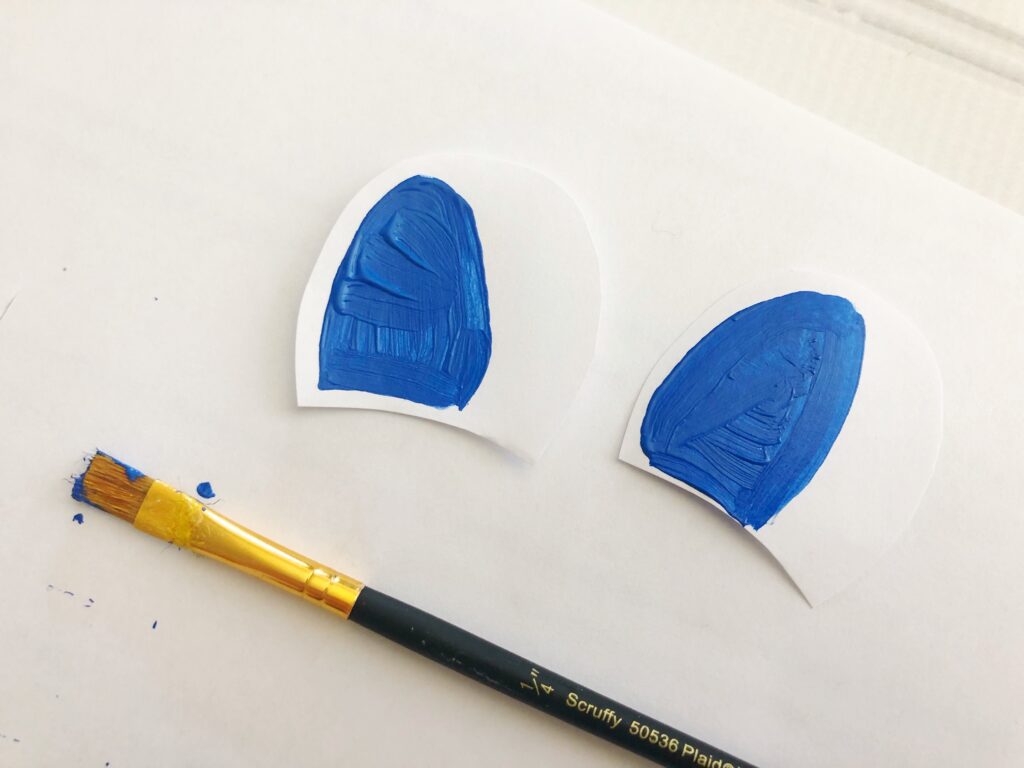
- Circle eyes with the rounded bottom cut off
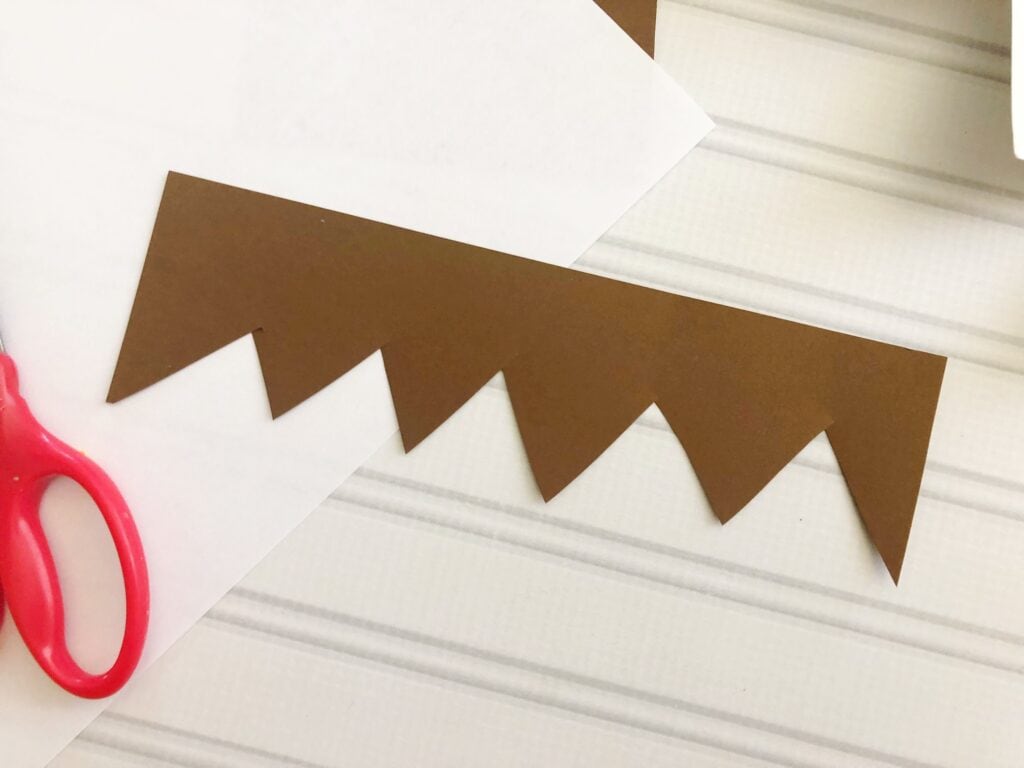
Then cut an 8 x 2-3” rectangle from the brown paper and cut the bottom so that it looks like hair. This piece will end up being very similar looking to the collar.
Paint the Paper Plate Pieces
Once you have all your pieces cut out and ready, it’s time to paint them. This is the most fun part for your kiddo! Just make sure to use a smock or a shirt you don’t mind getting covered in paint!
Here’s what color to paint each piece:
- ears: tan
- hat: red
- nose: tan
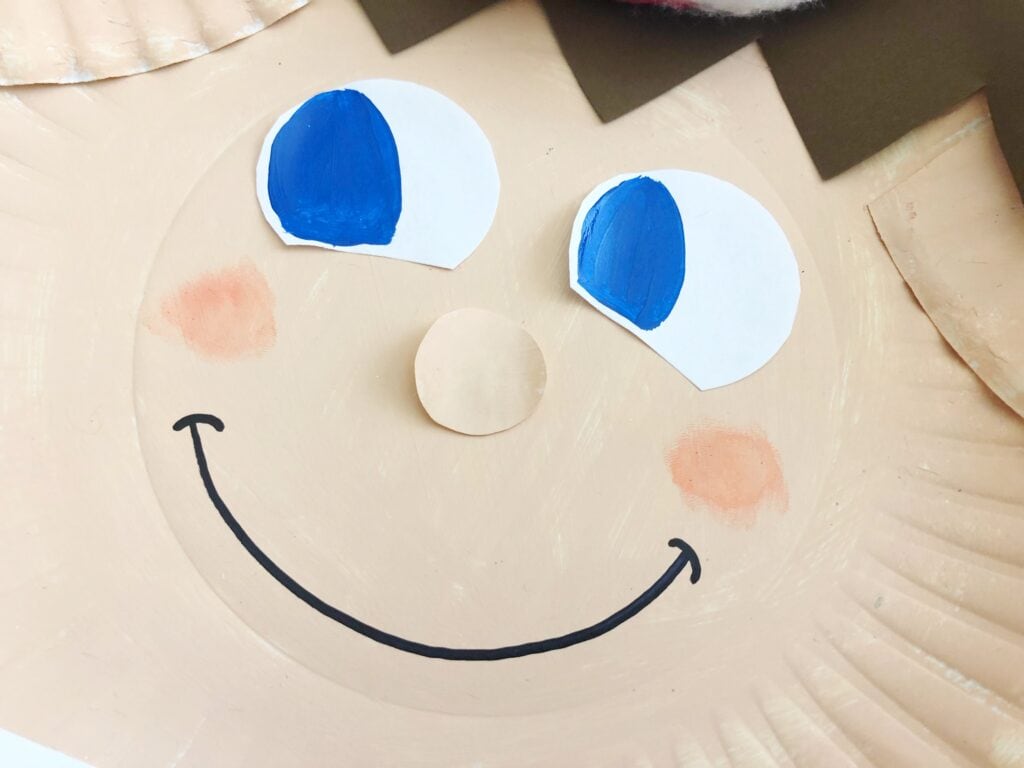
- eyes: blue (paint them looking to the side like the image shows)
Assemble the Elf Paper Plate Christmas Craft
Assemble the elf by gluing the pieces on the tan painted plate.
Dab the tip of your finger in the peach paint and give the elf some rosy cheeks (see above).
Draw a smile under the nose with a marker.
Glue cotton balls along the bottom rim of the hat and let dry.

That’s it! You’re officially done with the paper plate craft. Make sure to put your child’s name and the date they made the craft on the back—this one may turn into a keepsake, after all! 🙂
More Christmas Crafts to Try:
Equipment
- 1 pair of safety scissors (or regular scissors if you are cutting the pieces yourself)
Supplies
- 3 paper plates make sure to purchase the unwaxed plain plates like those in the link. The other kind will not hold paint.
- craft paint tan, blue, brown, peach, and red
- 1 piece brown paper
- 4 cotton balls
- 1 marker black
- 4 paintbrushes
- glue
Instructions
Create the Base Layer (Face)
- Paint one of your paper plates tan, and let it dry. You can speed up the drying process by using a hair dryer.
Cut Out Shapes
- You’ll need to cut these out from the unpainted paper plates:2 elf ears2 triangles – one should be large and the other is longer and skinnier—these will make up the elf’s hat.1 small circle for the noseElf collar Circle eyes with the rounded bottom cut off
Cut Out the Hair
- Cut an 8 x 2-3” rectangle from the brown paper and cut the bottom so that it looks like hair.
Paint the Paper Plate Pieces
- Paint the cut pieces the following colors:ears: tanhat: rednose: taneyes: blue (paint them looking to the side like the images show)
Assemble the Elf Paper Plate Craft
- Glue the cut painted pieces onto the tan plate to create a face.
- Dab the tip of your finger in the peach paint and give the elf some rosy cheeks.
- Draw a smile under the nose with a marker.
- Glue cotton balls along the bottom rim of the hat and let dry.