Let it Snow: DIY Christmas Shadow Box
This post may contain affiliate links. As an Amazon Associate I earn from qualifying purchases.
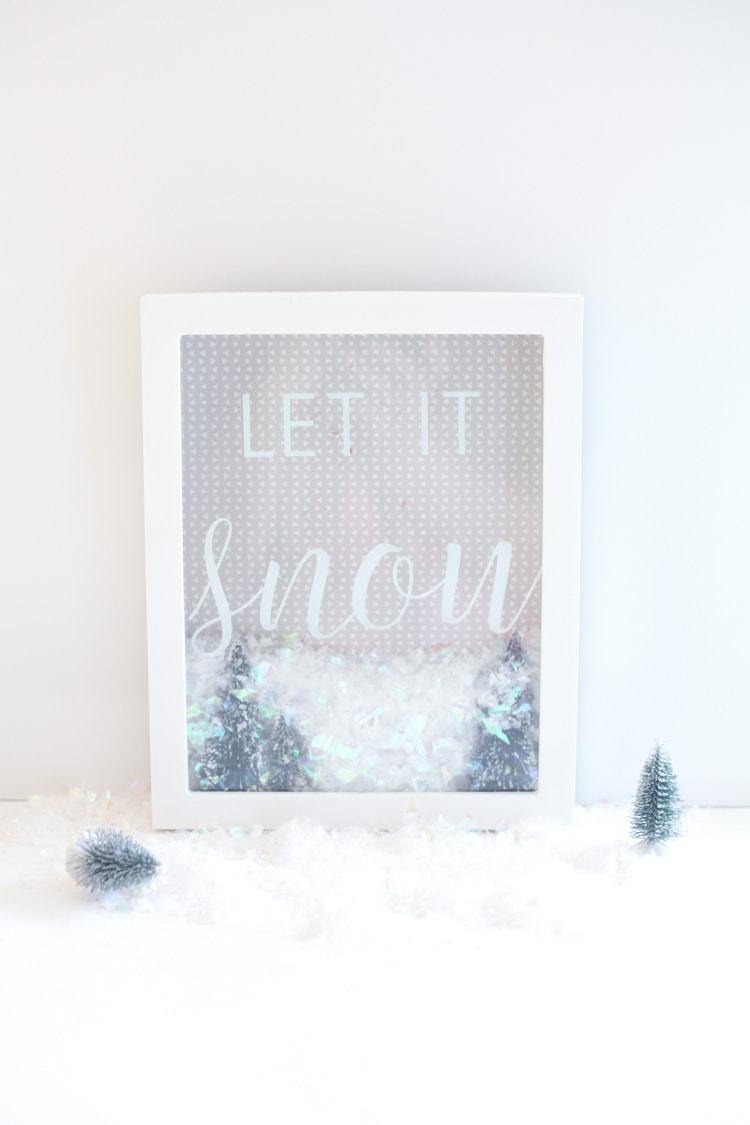
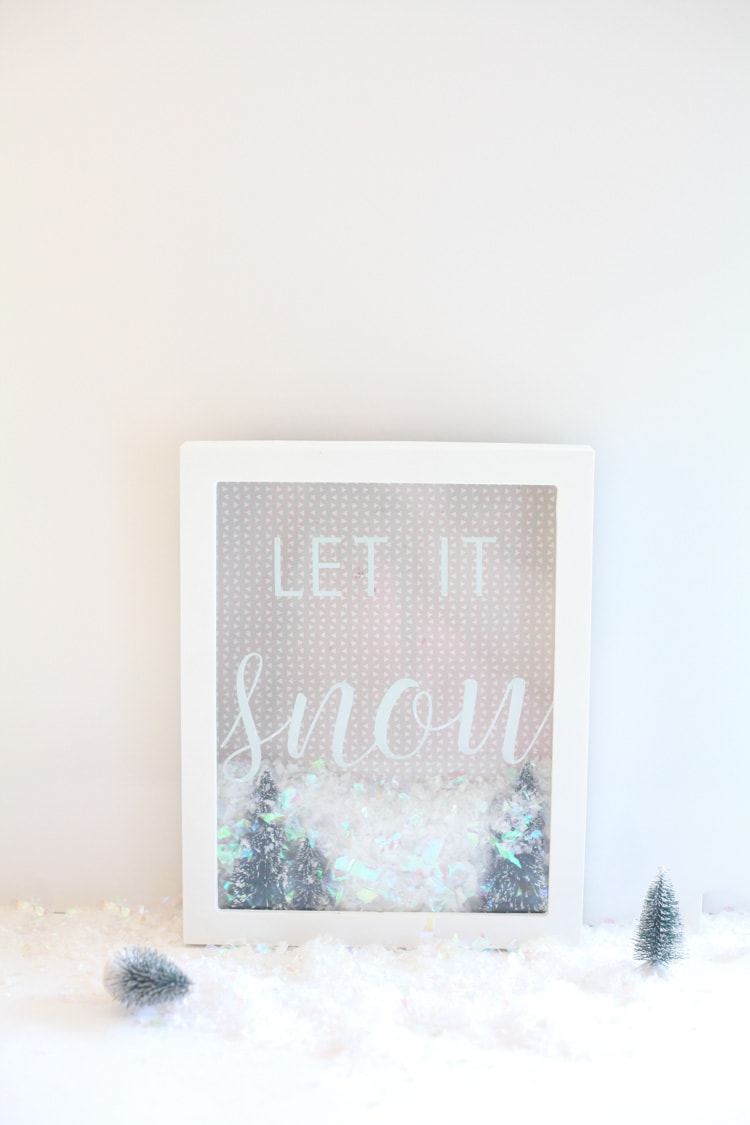
This might be my last Christmas project for the season, but it’s such a fun one! I love adding DIY Christmas projects to our home every year—sometimes they make the cut for next year, and sometimes they are meant to be enjoyed for one season only. This one, I’m pretty sure, will be showing up in next year’s decor! I made this DIY Christmas shadowbox in about 30 minutes—it’s an easy DIY project that you can completely customize!
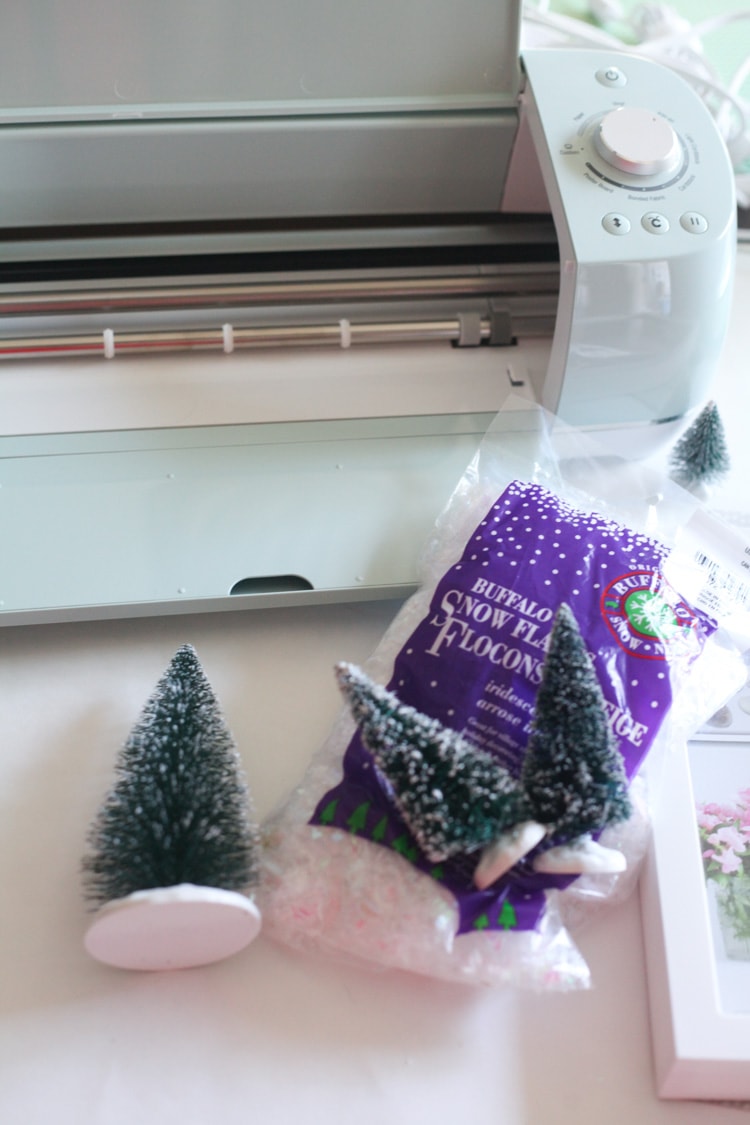
First up, gather your supplies!
 DIY Christmas Shadow Box Supplies
 DIY Christmas Shadow Box Supplies
- 8 x 10 Shadow Box

- Christmas-patterned scrapbook paper
- Brush bottle Christmas trees
- Faux snow
- Cricut Explore Air 2 + Permanent Vinyl (OR large stickers if you don’t have a Cricut!)
- Cricut weeding tool
- Transfer paper
- Hot glue gun and sticks


 +
+  (OR
(OR  if you don’t have a Cricut!)


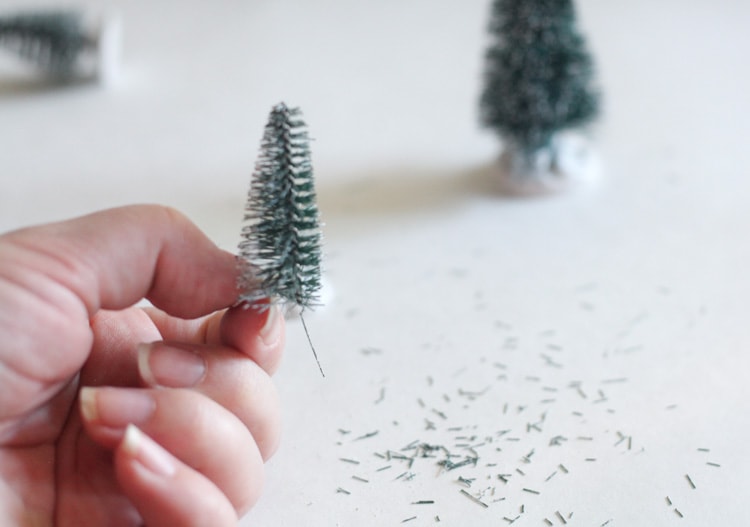
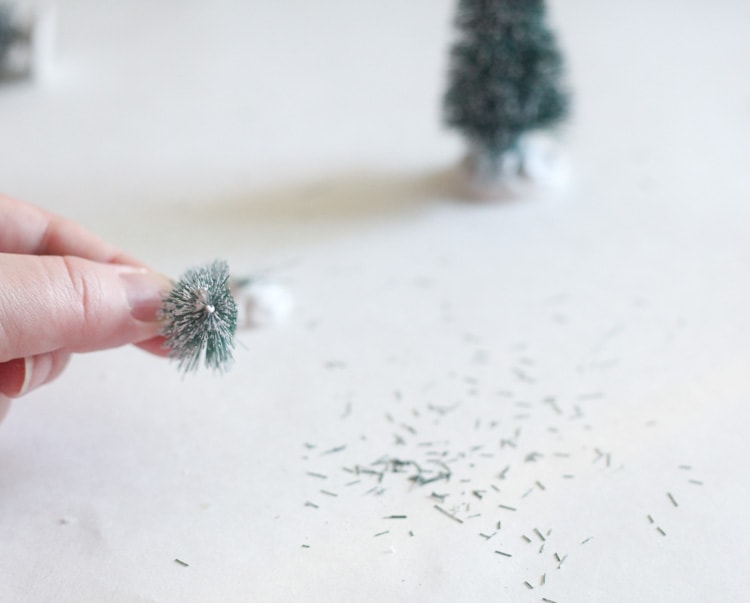
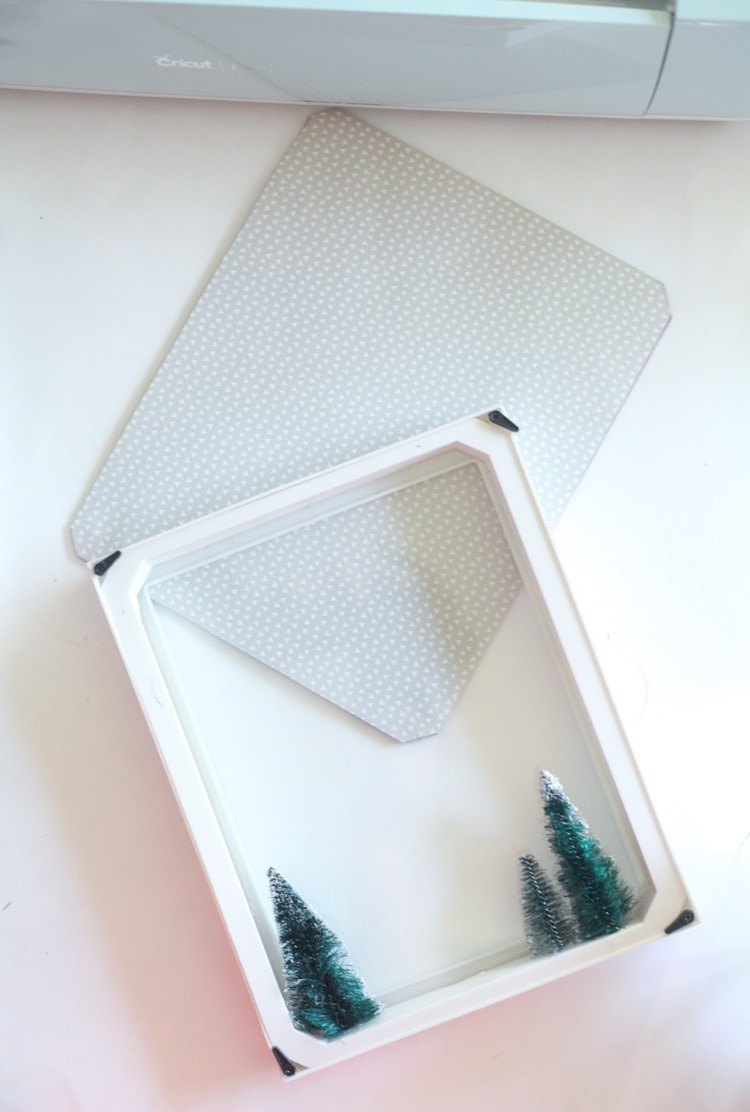
First up, get 3 brush bottle trees (or more if you like!) and see if they will fit into the shadow box with the base on them. Mine didn’t, so I chopped the base off.
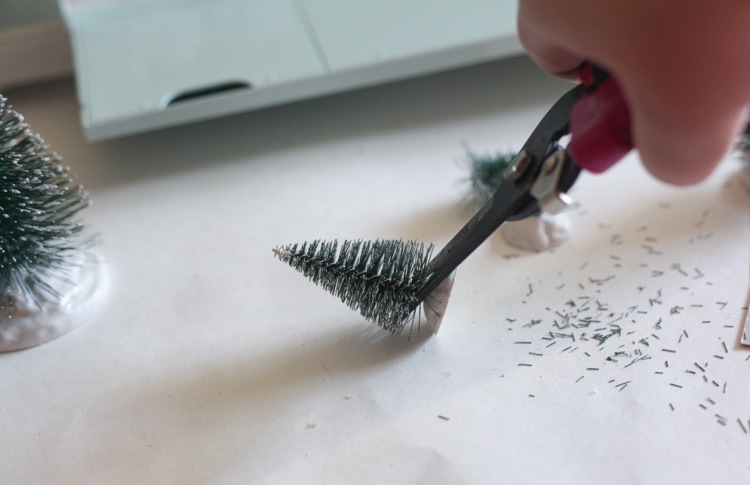
I also trimmed the tree bristles on one side, because otherwise, they would have splayed out when the backing of the shadow box was on. Depending on the depth of your shadow box, this might not be necessary.
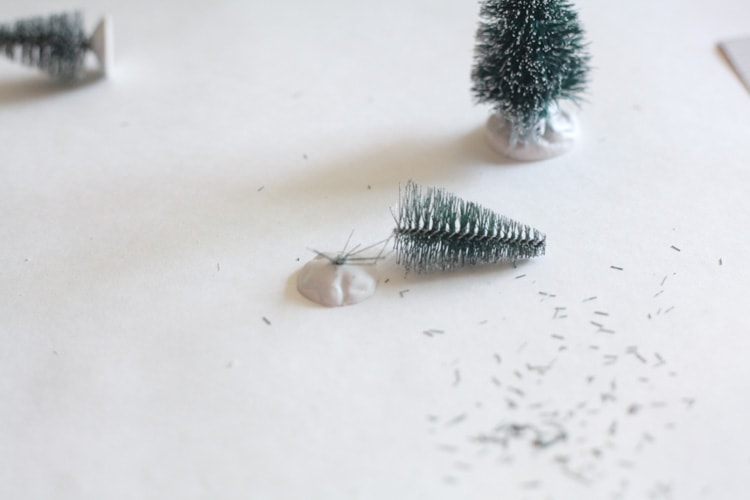
Glue the trees onto the base of the shadow box with your hot glue gun. Don’t forget the finger caps —they will save you from some seriously painful hot glue burns! #survivor
Now it’s time to add the lettering! My birthday was mid-November and I treated myself to something I had been eyeing for quite awhile…the Cricut Explore Air 2!  Of course, I chose it in my favorite color—mint! I have had SO much fun playing with it and highly recommend! 🙂 I simply typed out the phrase “let it snow” in Design Space and mirrored it so I could put it on the back of the glass. I used permanent vinyl
 for this.
If you don’t have a Cricut, you can still do this project! You’ll just have to find stickers that can fit the space you have on your shadow box, and put them on the front of the glass.

After you have your words cut out, reverse weed (remove the things you don’t want to show like everything around the letters). I like the extra step of using transfer tape with it because I don’t have the hand-eye coordination to line up each letter individually perfectly straight. 😛


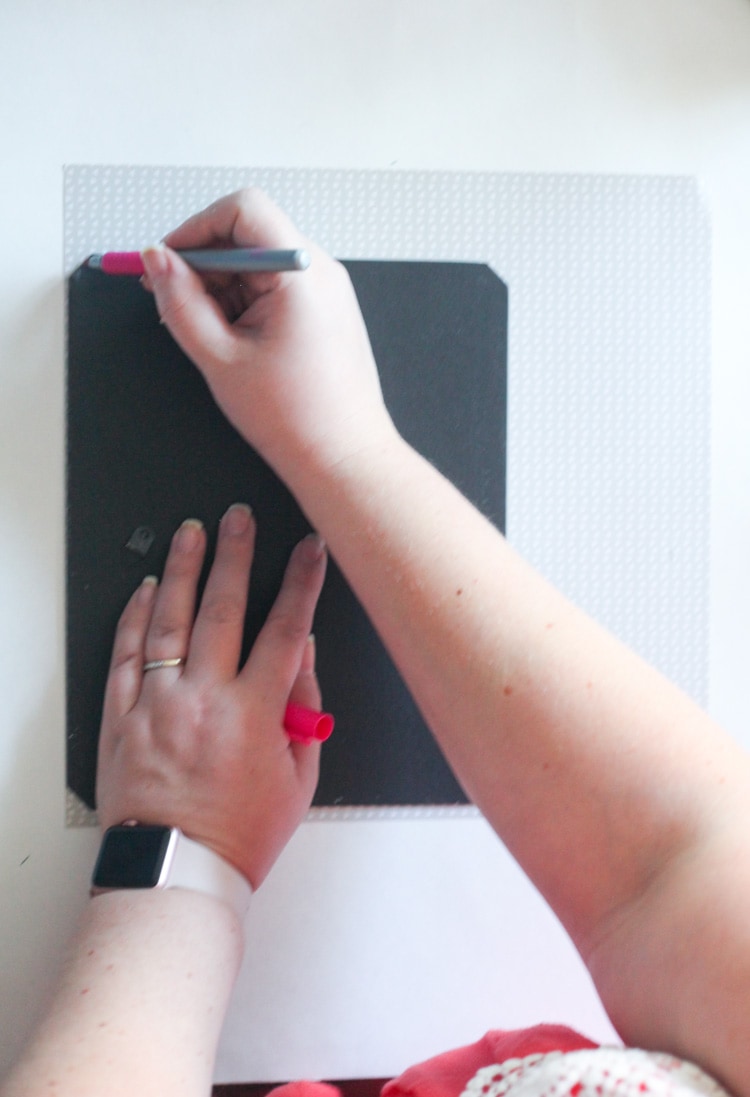
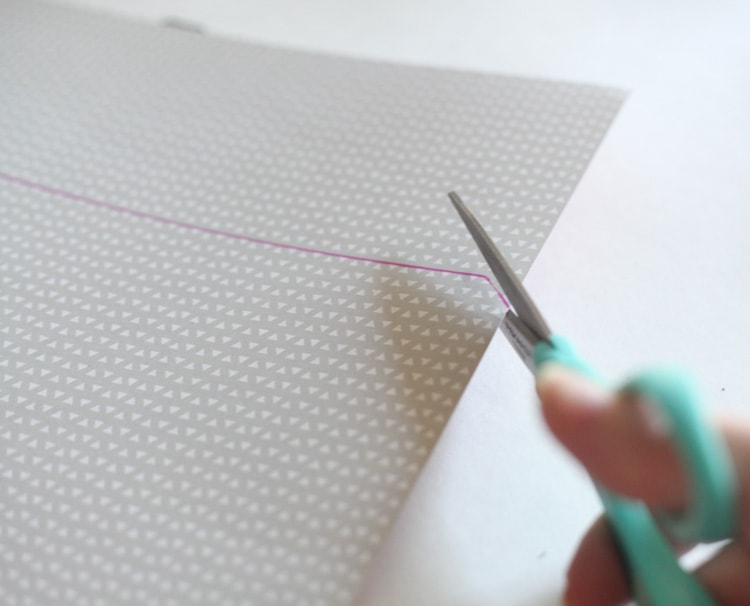
To make the backing pretty, I traced a piece of festive cardstock I had on hand, then used glue to layer it onto the backing.

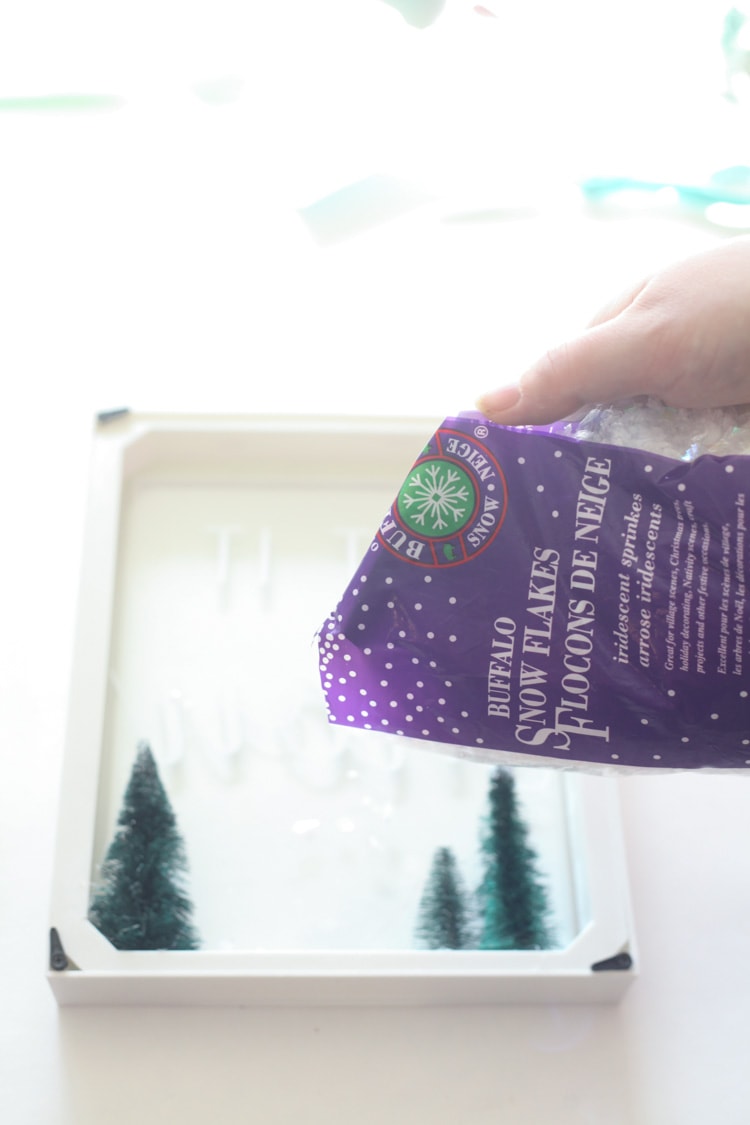
Now it’s time to add in your snow. I love this brand—it’s so sparkly and festive! I filled my shadow box about 1/5 full—but you can add more or less depending on the look you’d like.
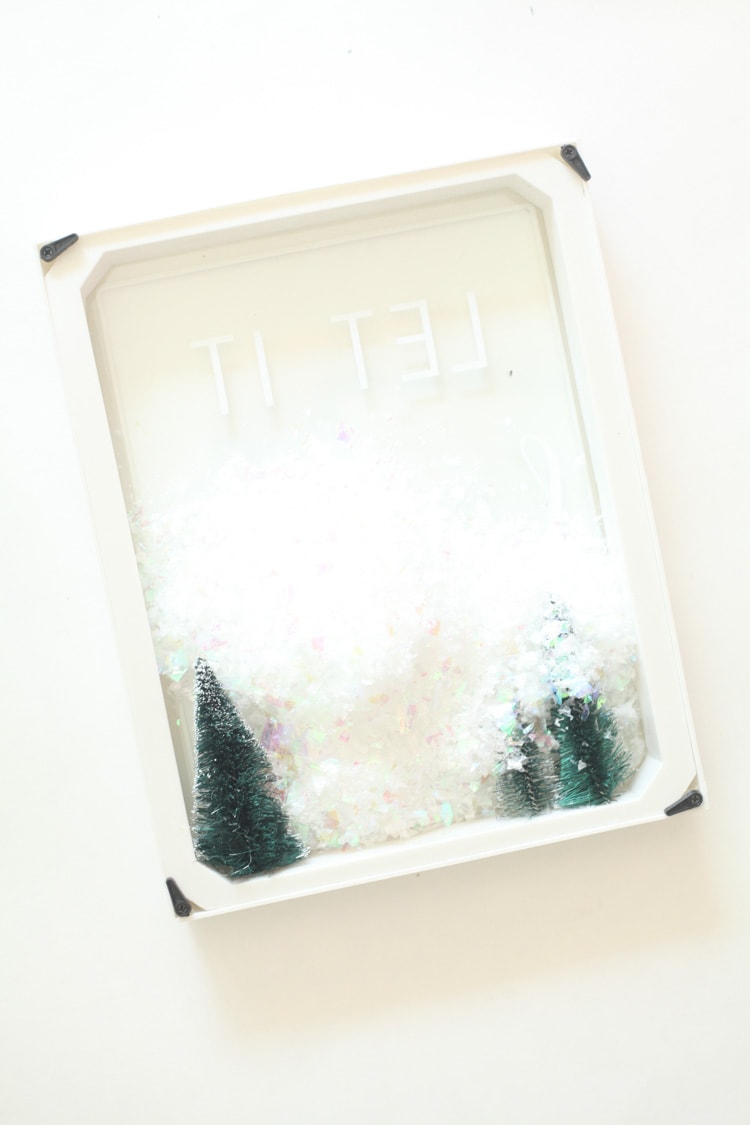
Add your back on, and that’s it! You’re done! Isn’t it cute?

How is Christmas decorating going at your place? What are your favorite things you’ve added this year?

That is adorable!
Tania
Love this idea.
Fabulous idea, I love it! Happy Holiday’s
Such a simple, yet cute, idea! I will be saving it for next year!
I absolutely love how this shadowbox turned out! We received a shadowbox for Christmas one year and we love it! It was a fun gift to receive from our neighbor!
This is beautiful!
I love this! I think I am going to make one. Does the snow leak out of the box? Thanks!
Hi Edith! No, it doesn’t. Totally secure! 🙂
thanks! Off to re create!