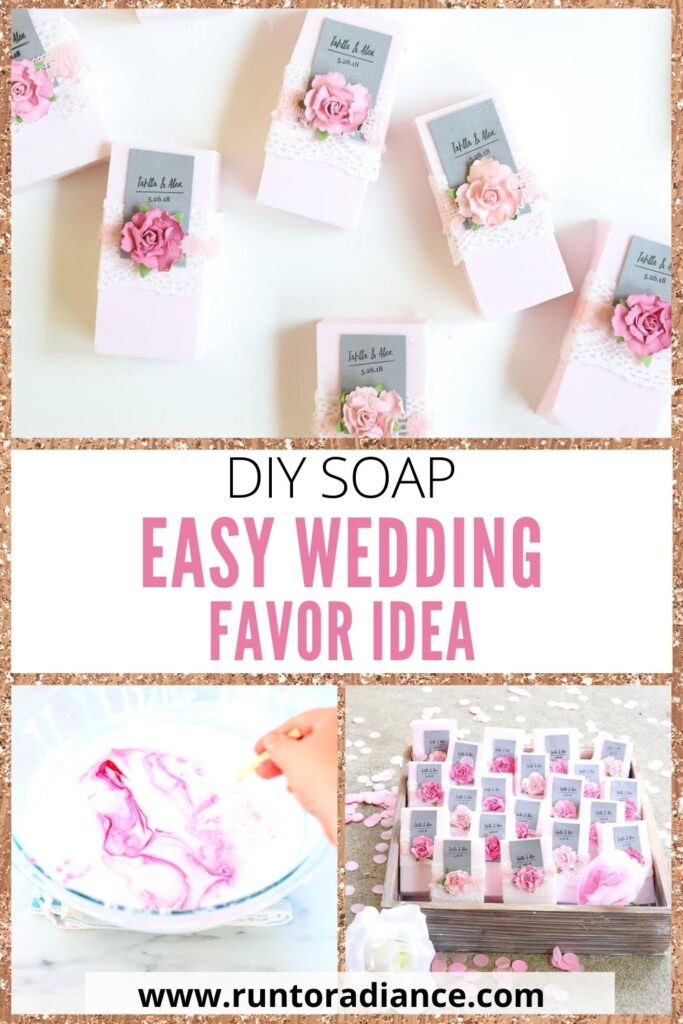
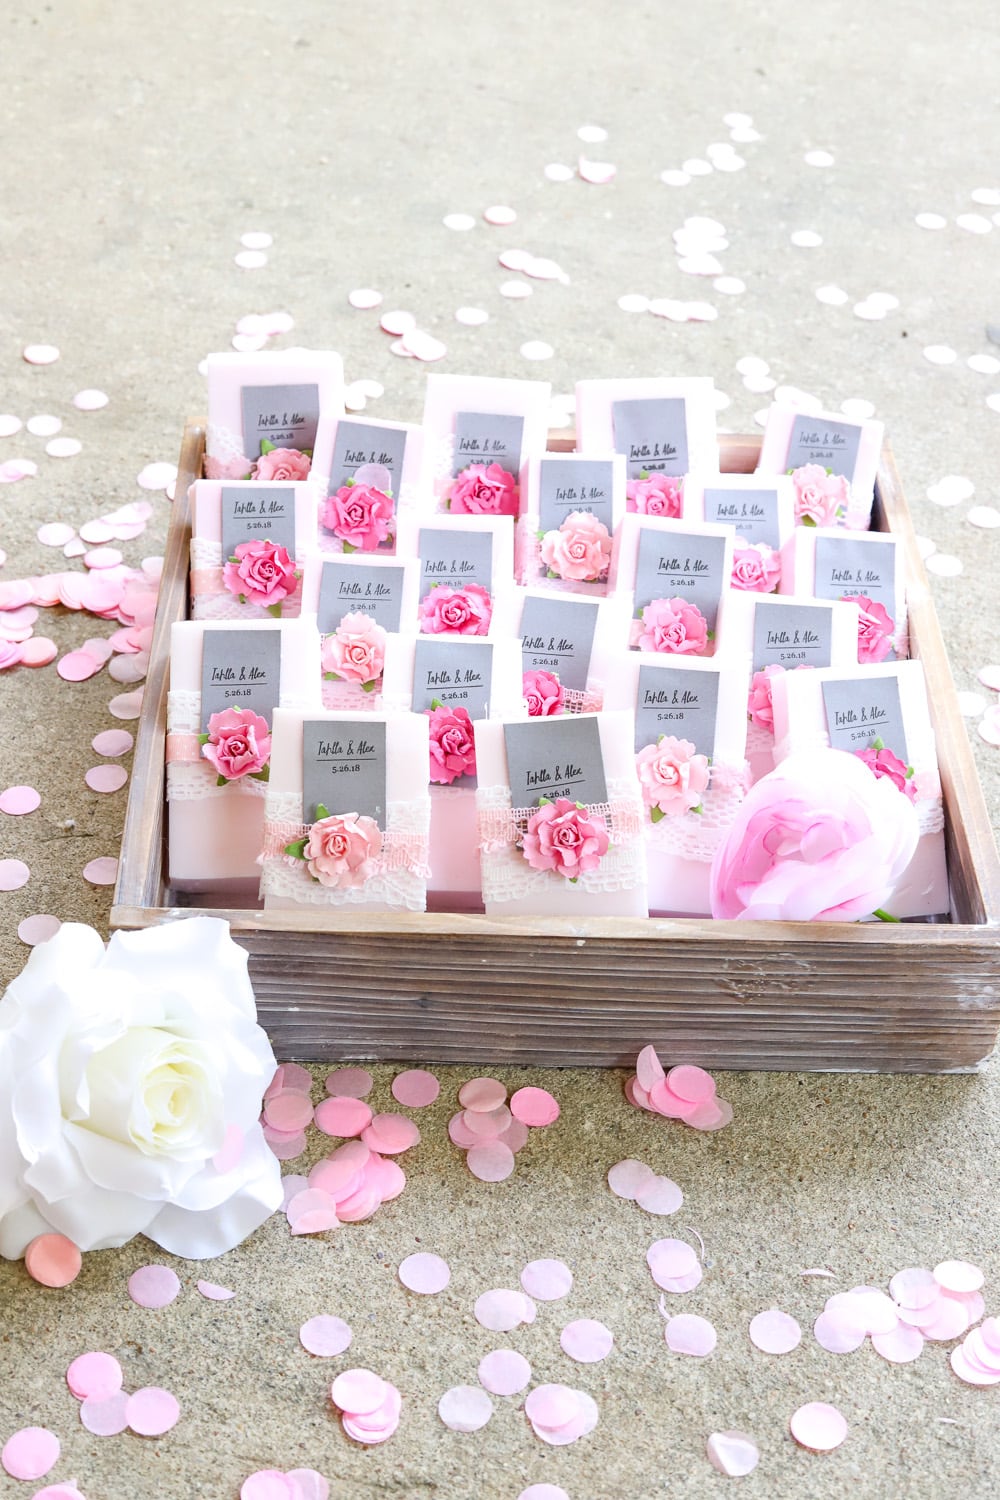
Customized DIY Soap {Easy Wedding Favor Idea}
This post may contain affiliate links. As an Amazon Associate I earn from qualifying purchases.
This wedding favor idea is incredibly easy to customize to match your theme. Here’s how to make your own DIY soap for any occasion!
A wedding is about a lot of different things, but at its core, your big day is about your loved ones gathering to celebrate two people coming together to form a new family unit.
Your friends and family have traveled to be with you and enthusiastically cheer you on down the aisle, so return the favor and provide them with a small thank you to take home at the end of the night!
How To Make and Customize DIY Soap
While there are a lot of options out there for wedding favors, something handmade is both budget-friendly and an extra special touch your loved ones will appreciate.
For something that’s both practical and pretty at the same time, consider incorporating this easy DIY soap into your wedding plans!
Here’s how to make it yourself.

Supplies Needed To Make DIY Personalized Soap:
Soap-making is much more simple than you would imagine, and everything you need is available at your local Michael’s or on Amazon.
One of the benefits of this project is that you can customize the scent and the colors to make it blend in seamlessly with your wedding theme.
Here’s what you need to complete this project:
- Glycerin soap
- Wavy soap cutter or straight soap cutter, depending on the look you want
- Soap stirring sticks
- Rose fragrance or fragrance of your choice
- Large glass bowl
- Loaf mold
- Pink soap dye or dye of your choice
- Silhouette mint custom stamp maker
- Low-temperature glue gun and glue sticks
- 2″ wide ribbon (this project uses this lace ribbon)
- 3/8″ contrasting ribbon/trim of your choice
- Paper flowers
- Cardstock in your choice of color (this project uses this gray)
- Basket or tray to display soap in
DIY Soap Tutorial
Just follow these steps and you’ll have your very own homemade soap!
There are lots of ways you can customize it, depending on the occasion. I’ll be demonstrating how to make mini soaps as wedding favors.
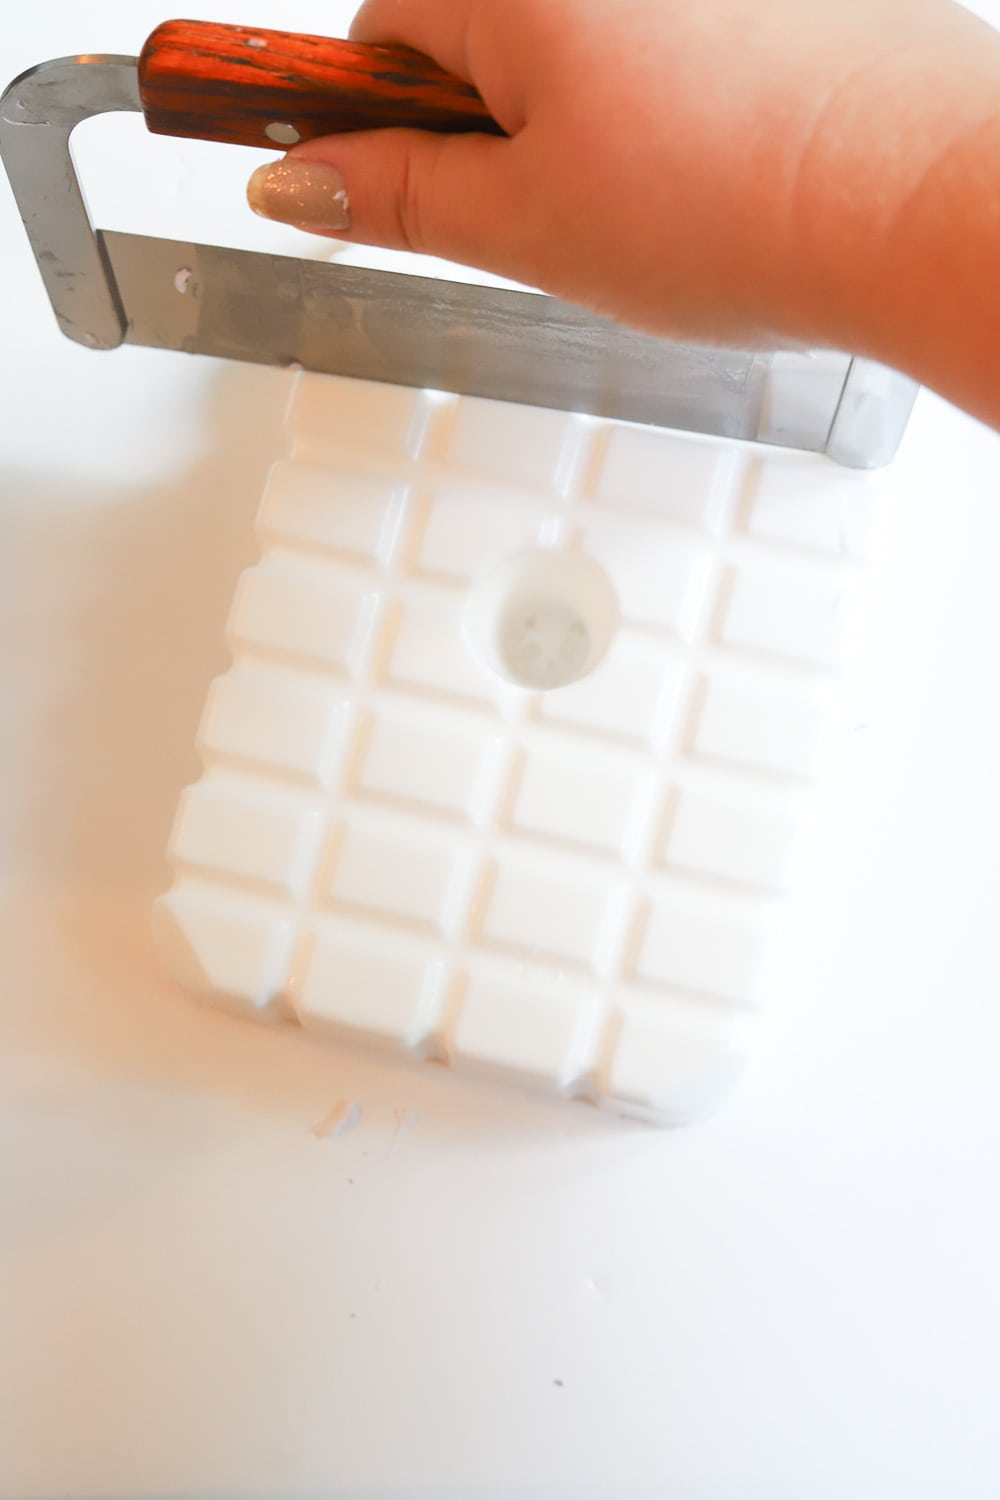
1. Melt The Soap
There are many different ways you can make soap, but the most simple is to use melt and pour soap.
When you are trying to calculate how much soap you will need, you can estimate that 3 pounds of soap will make about ten full bars.
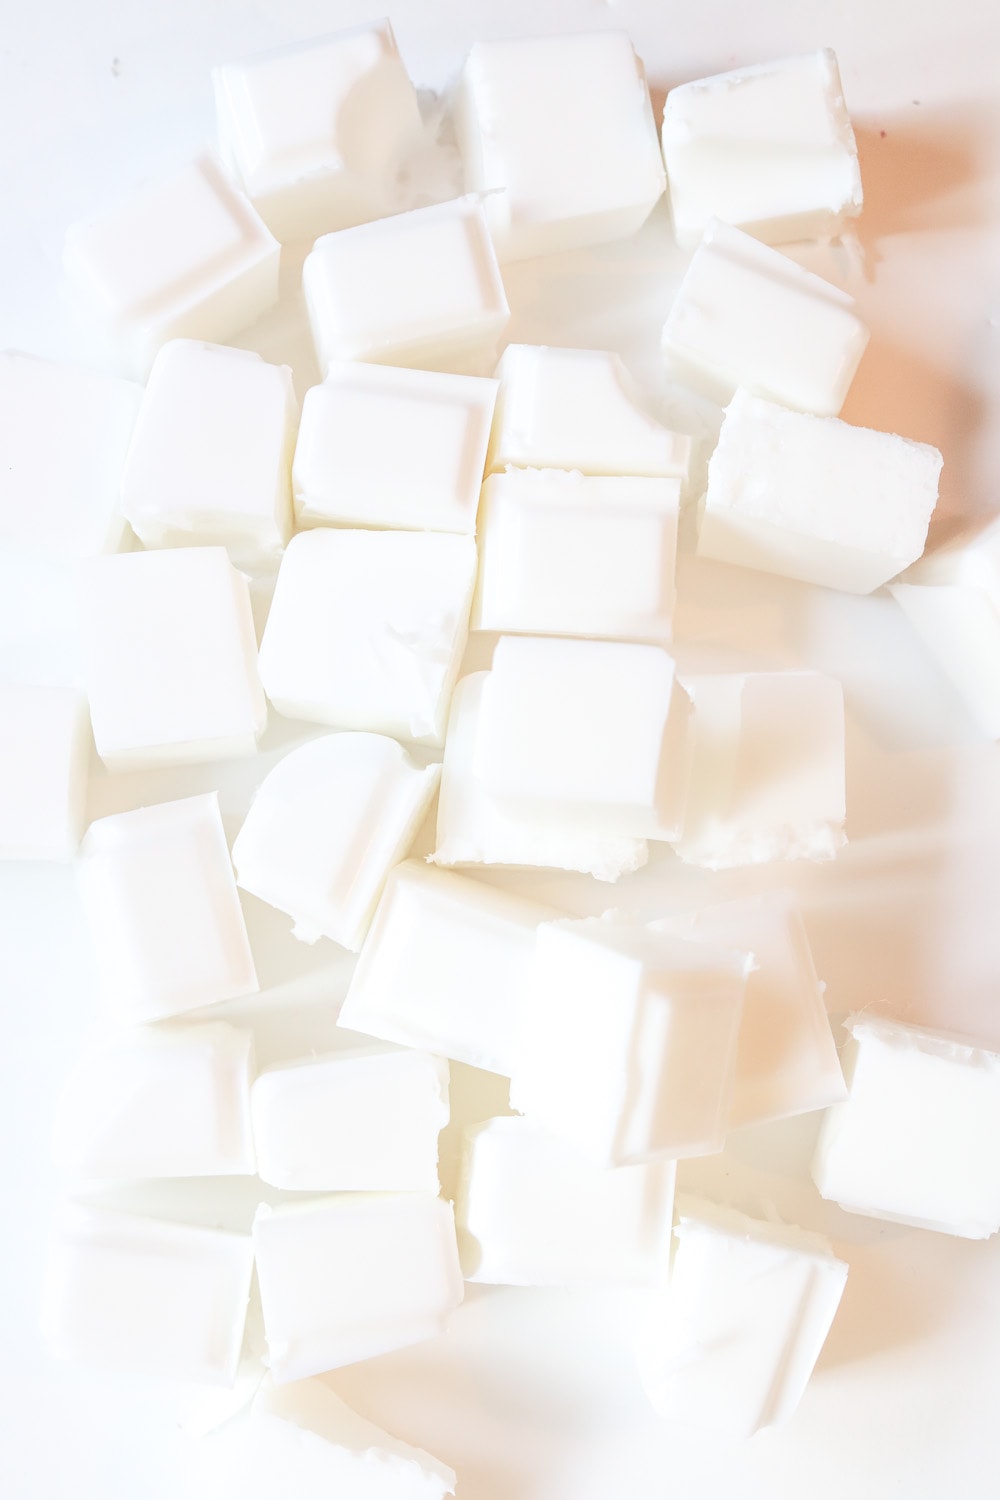
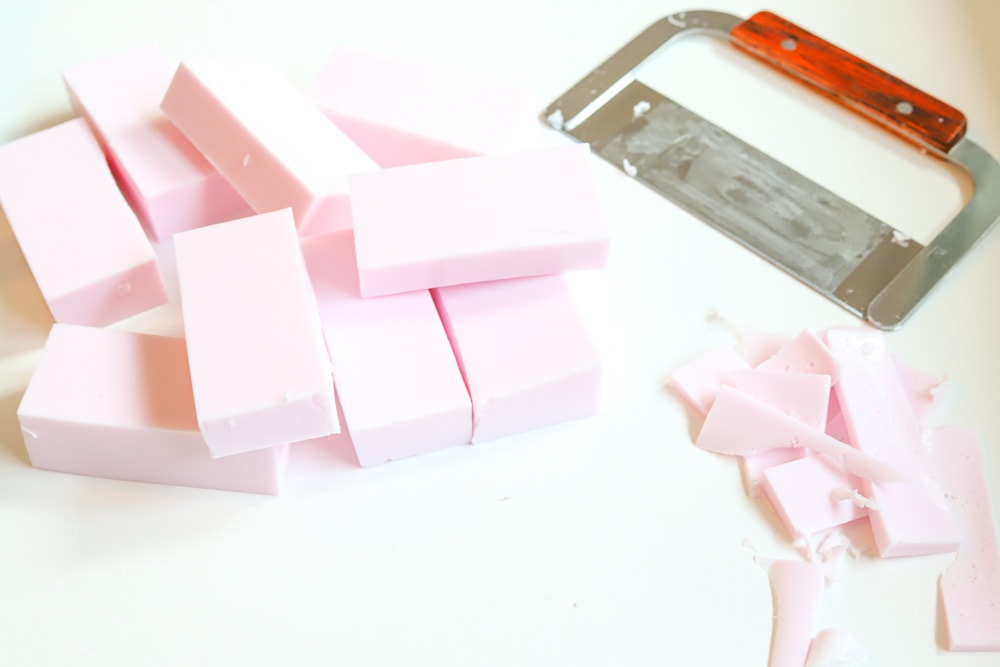
To melt soap evenly, you will need to cut it into smaller chunks—luckily the soap packaging shows you exactly where to cut!
If you are making full-sized bars of soap (like the ones pictured in this post), you’ll need to use 3 pounds at a time to fill the mold fully.

Cutting the soap makes a bit of a mess. I recommend cutting it outside or over a plastic surface that is easy to dump into the trashcan.
The photo below is what the white soap bits look like after you cut them all up.
Once your soap is cut, place it in a microwave-safe glass bowl and microwave it for 30 seconds, followed by 10-second intervals. Use the soap stirrers each time to make sure the pieces are melting evenly.
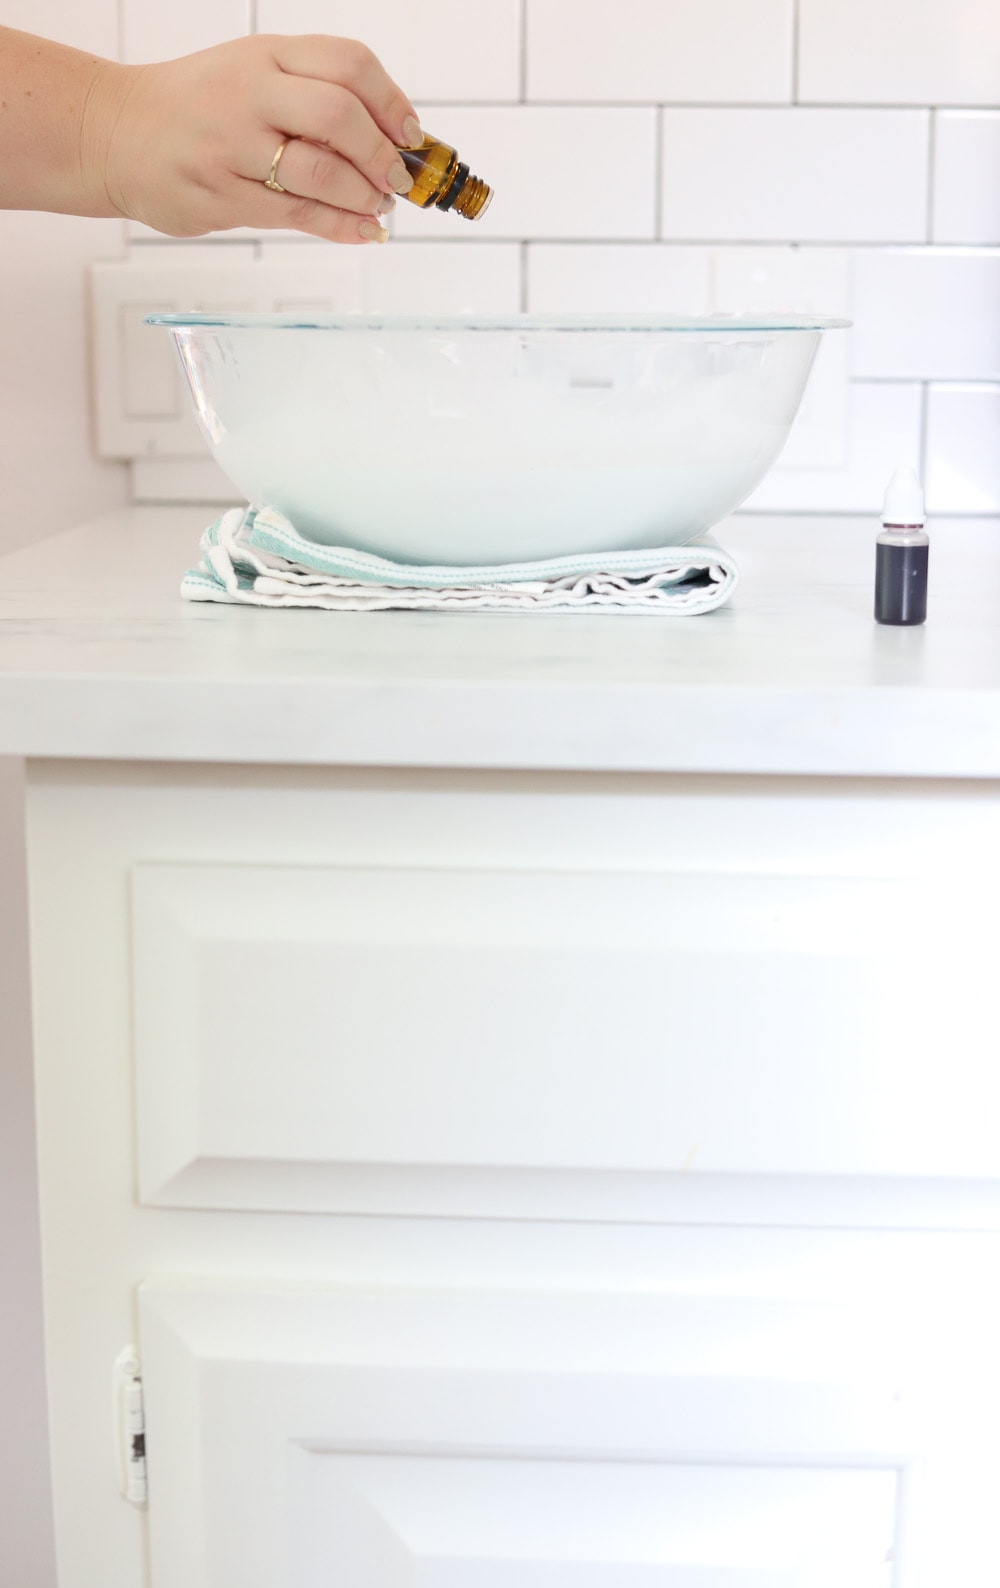
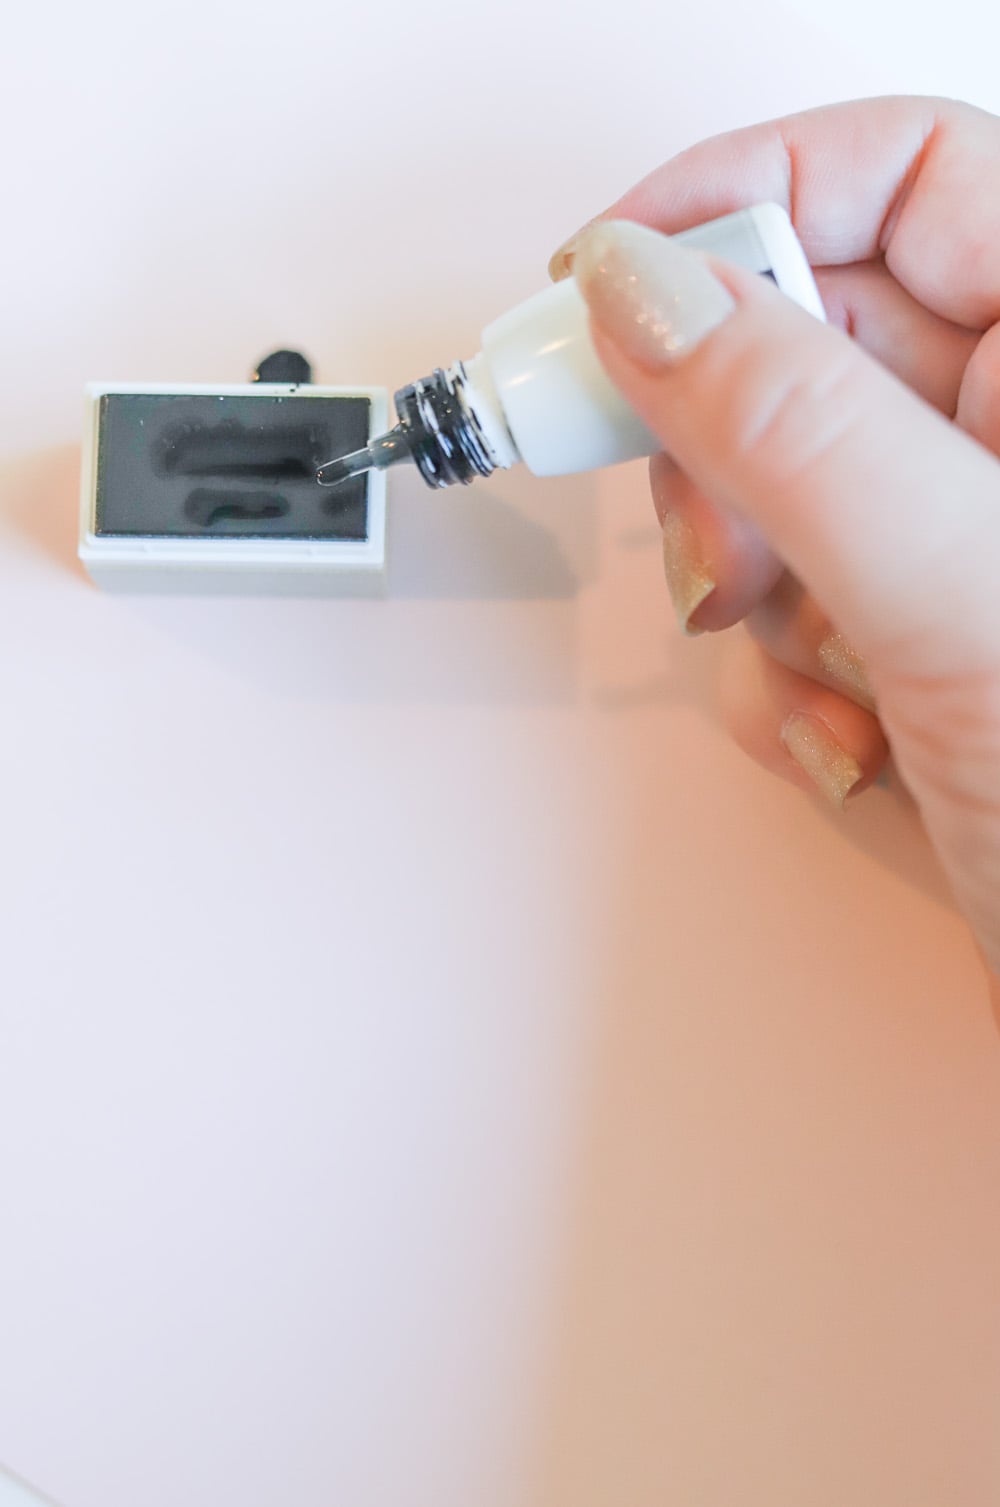
2. Add Color and Fragrance
After your soap is melted fully, it’s time to add your color and fragrance. You’ll need to work somewhat quickly since the soap begins to harden at room temperature.
A few drops of color go a long way, so start with a few, and mix it evenly with the stir sticks—remember, you can always go back and add more!
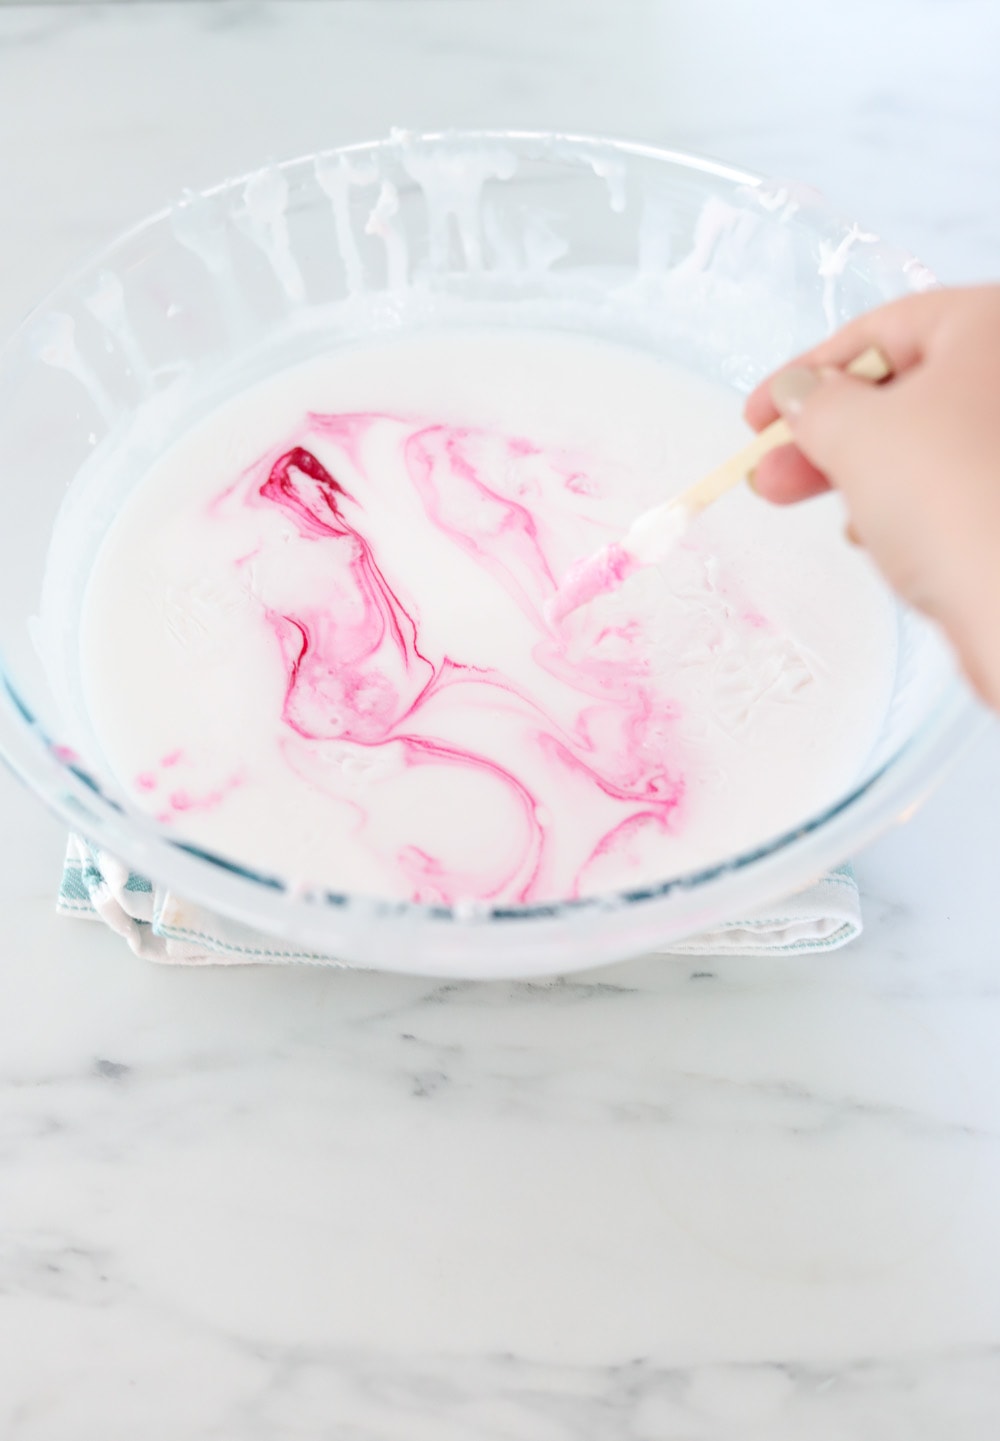
Add your fragrance the same way—a little at a time. Start with five drops and build up from there until it’s at the right scent level for you. Mix well with the stirrers to distribute scent evenly.
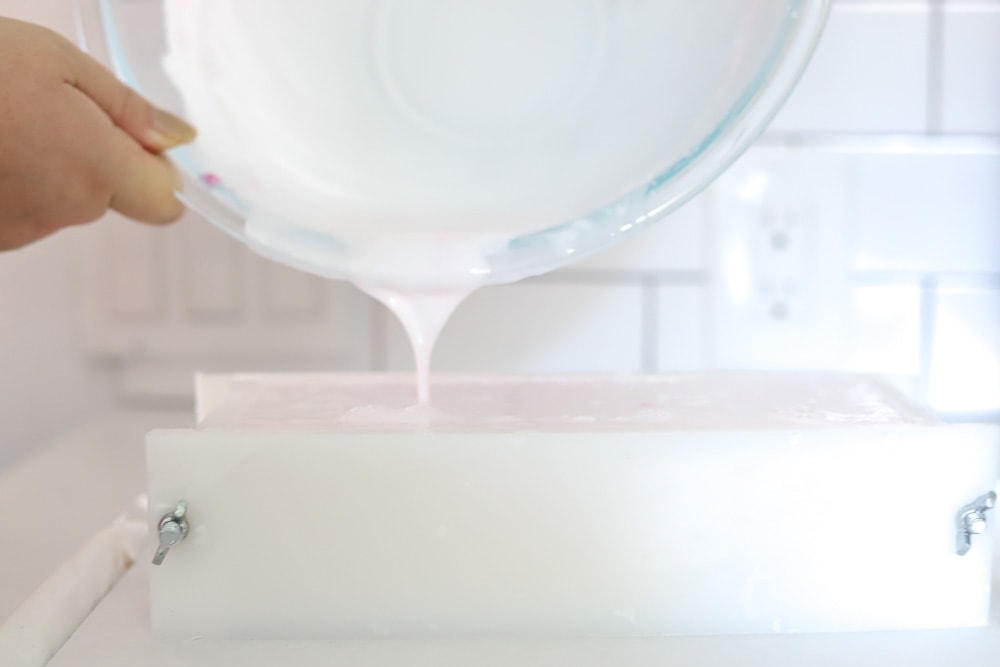
3. Pour Into The Mold And Let It Harden
Once your soap is uniform in color and the scent is mixed in well, pour your soap into the mold. With three pounds of melted soap, it should fill to the very top of the mold to create full-sized bars.
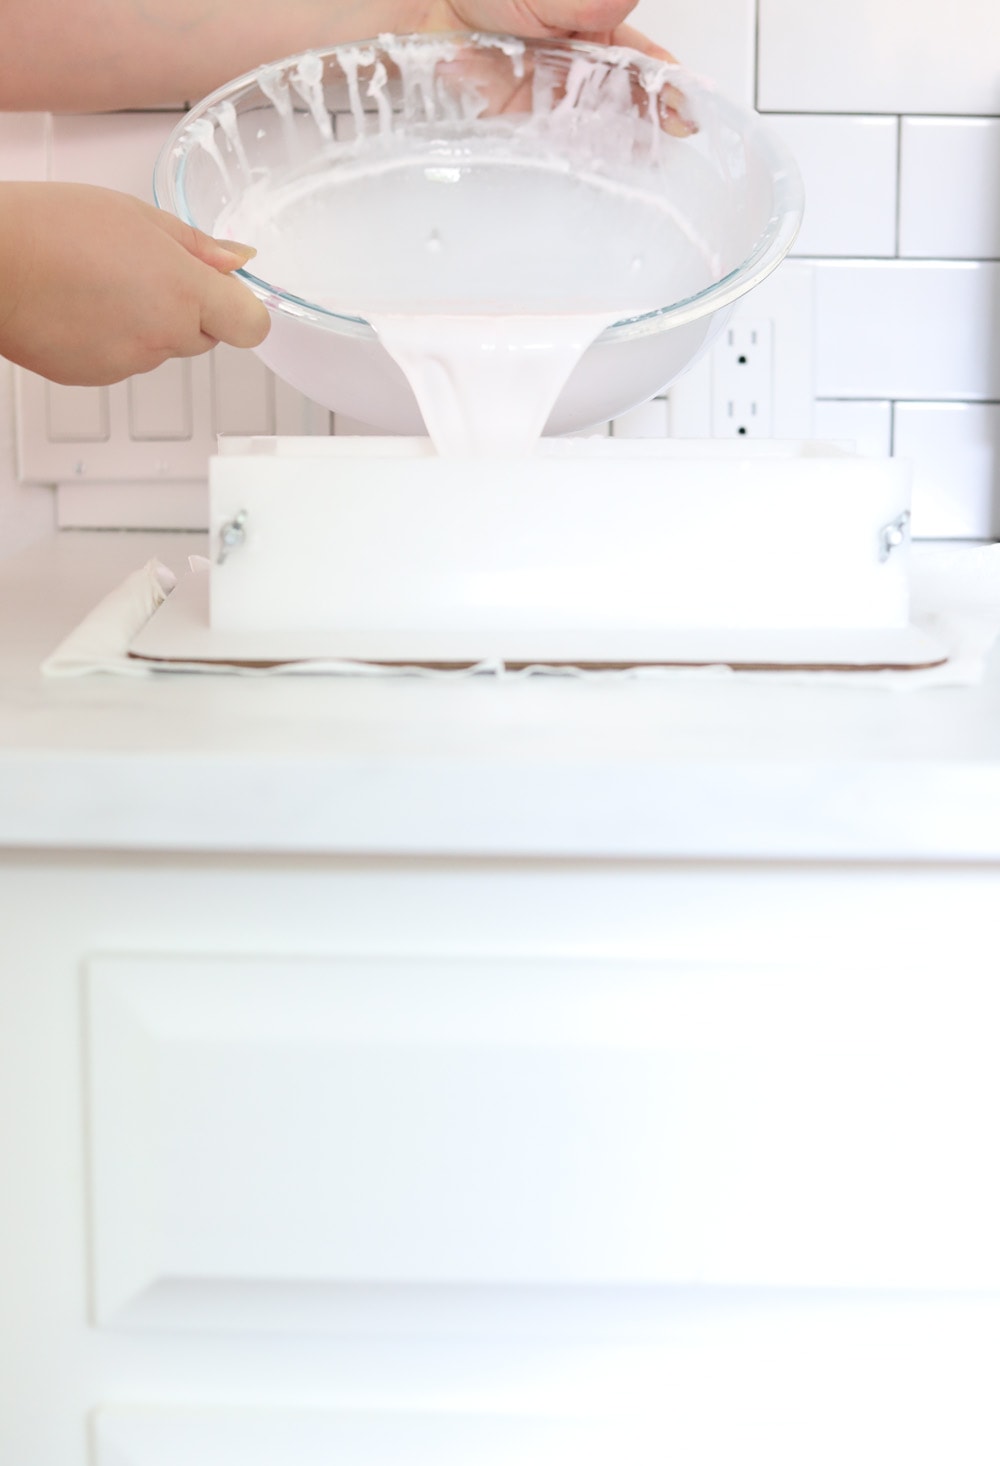
Let the soap harden completely.
This takes about an hour, so it can be helpful to have two or more molds to work with if you are making a large batch of favors.
Once the soap is hardened, remove the wing nuts from the loaf mold and deconstruct the mold entirely to take out the soap.
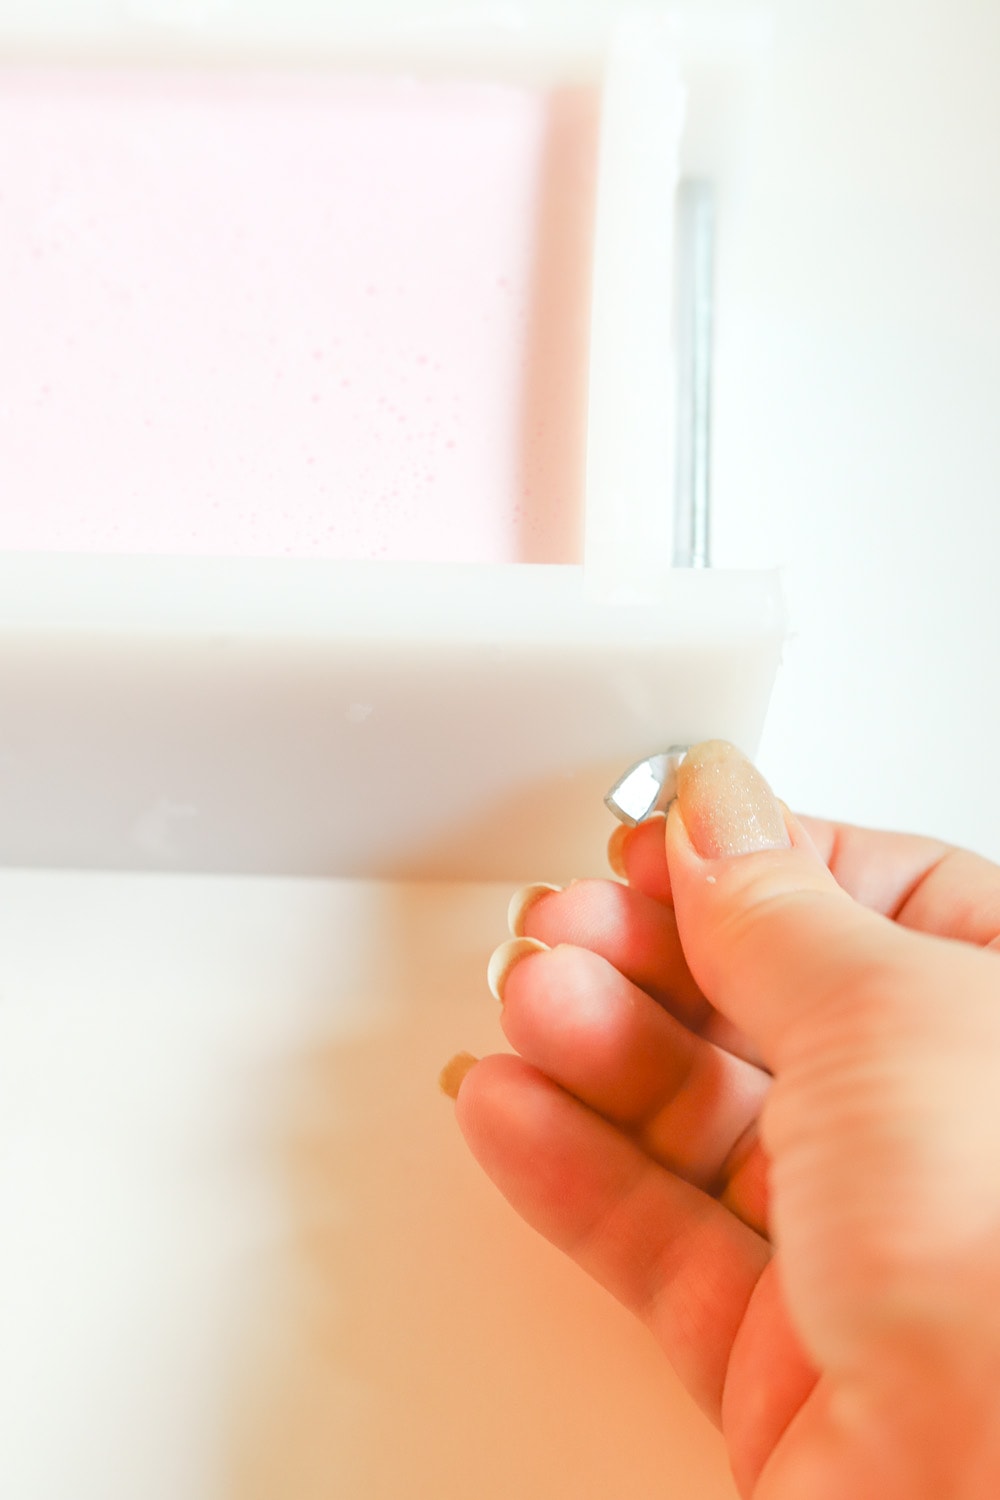
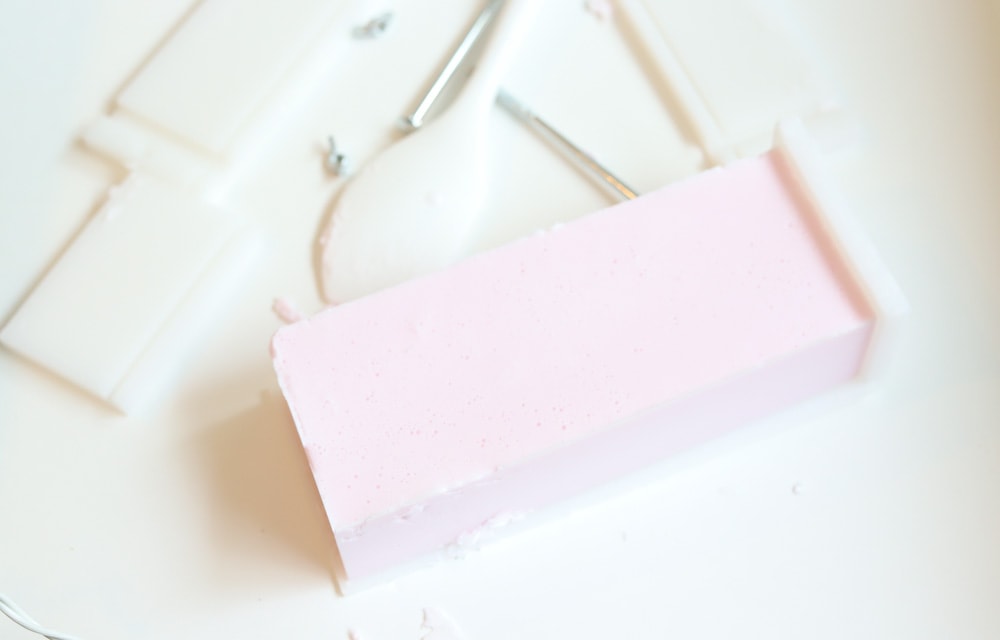
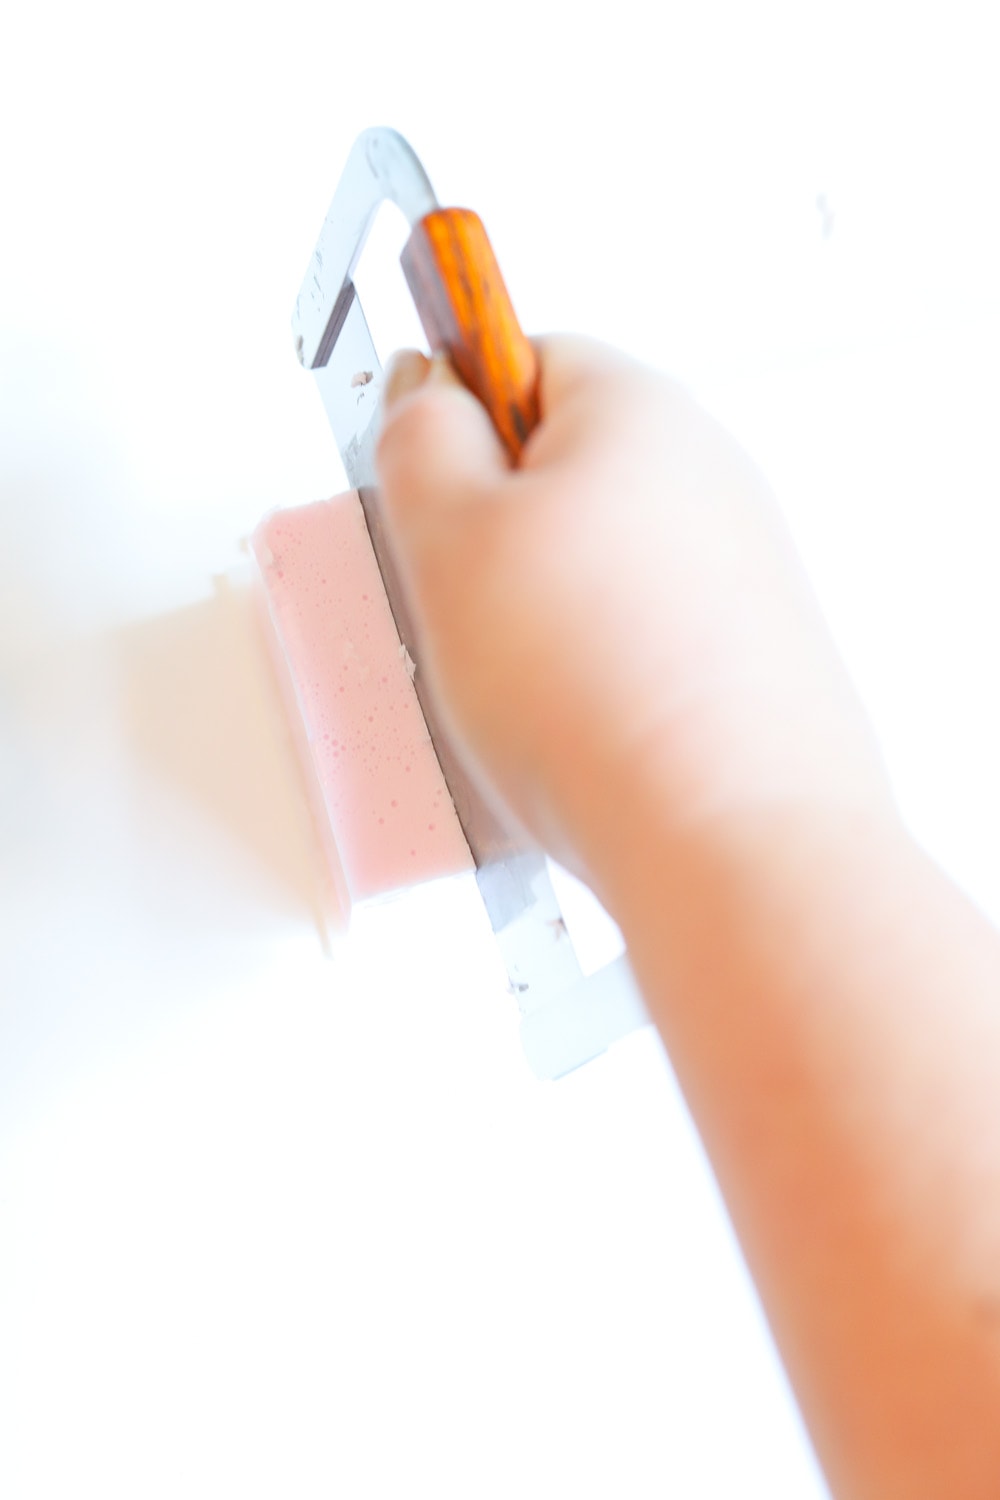
Cut the soap into 1″ thick sections, and trim any pieces that aren’t even. If you make a mistake when cutting, don’t worry! You can simply add that soap to the next batch, melt it back down and start over. It’s foolproof!
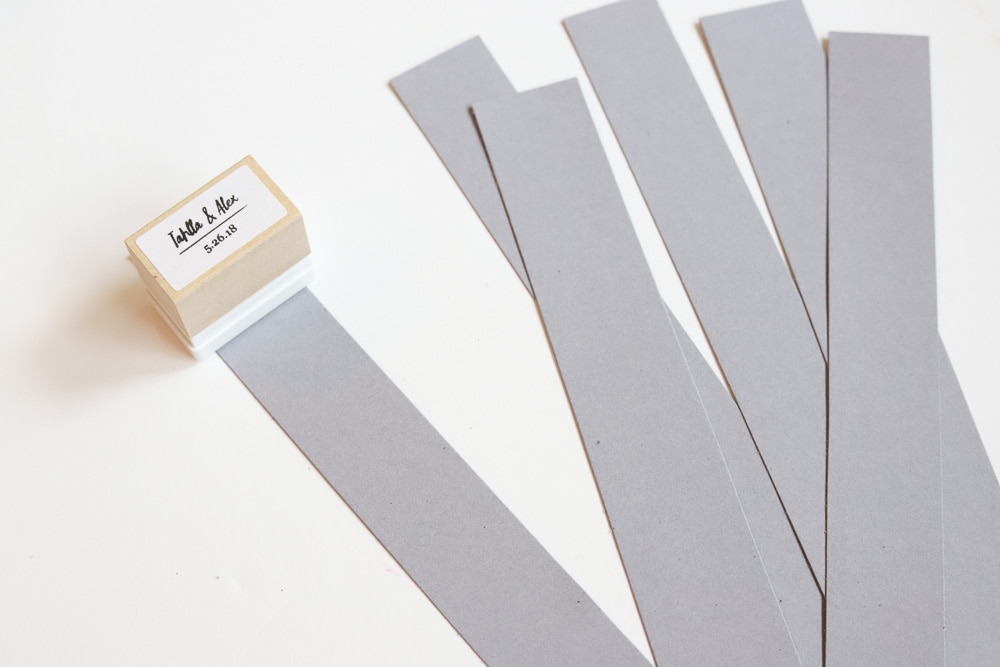
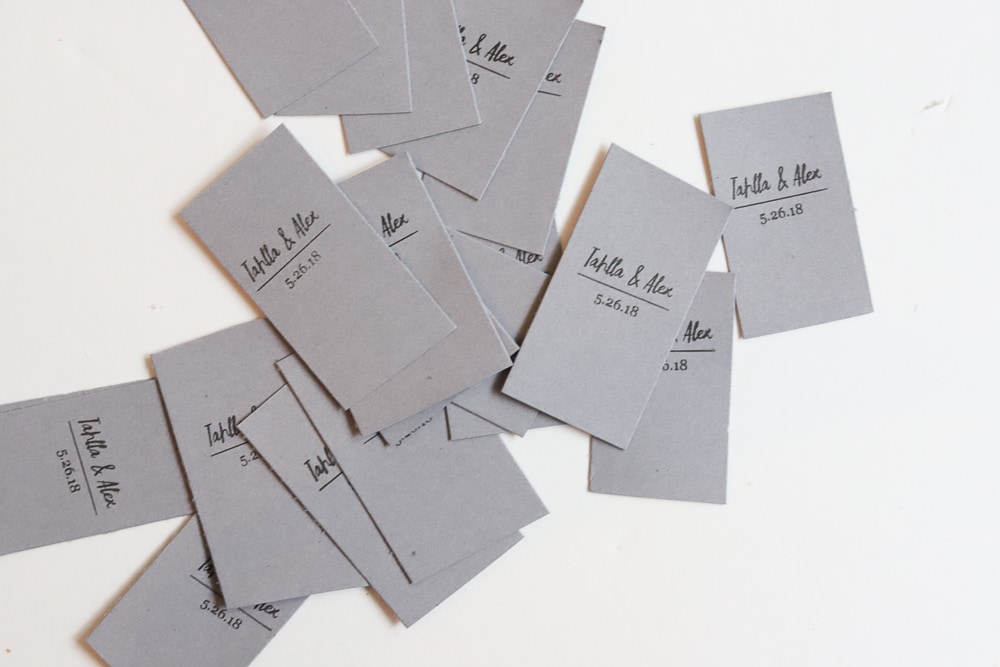
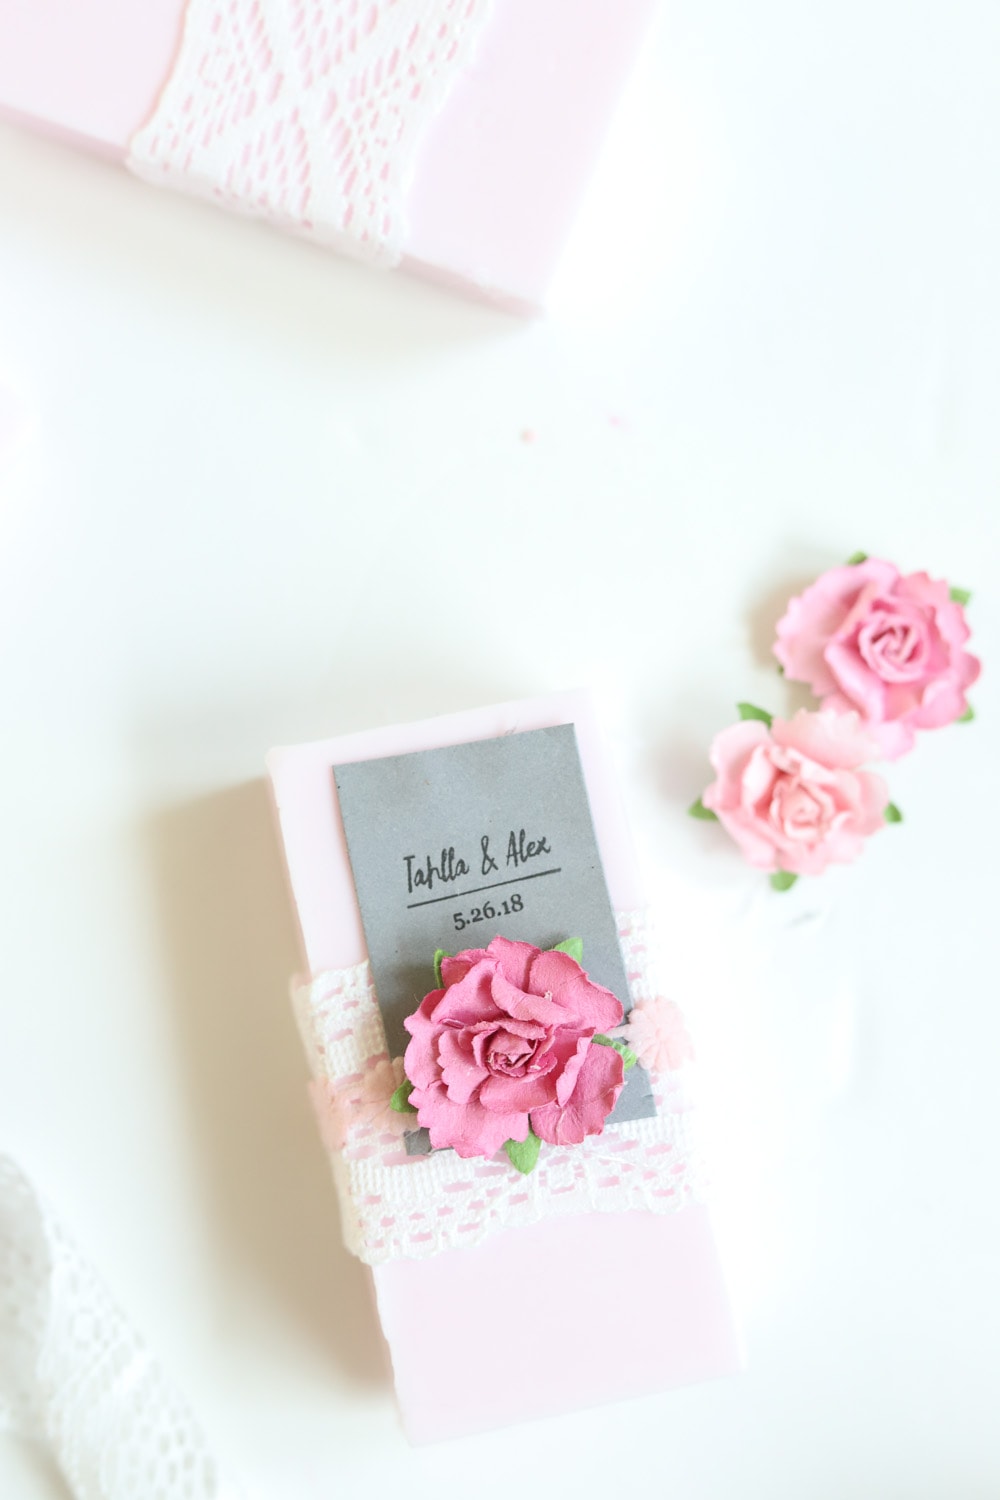
4. Make Custom Labels
The Silhouette Mint is an easy-to-use machine that lets you custom make your own stamps, right at home. Simply set it up according to manufacturer directions, and create a stamp in the Mint design software that’s included.
For this project, I used the 15 x 30 sized stamp and kept it simple with the couple’s name and wedding date.
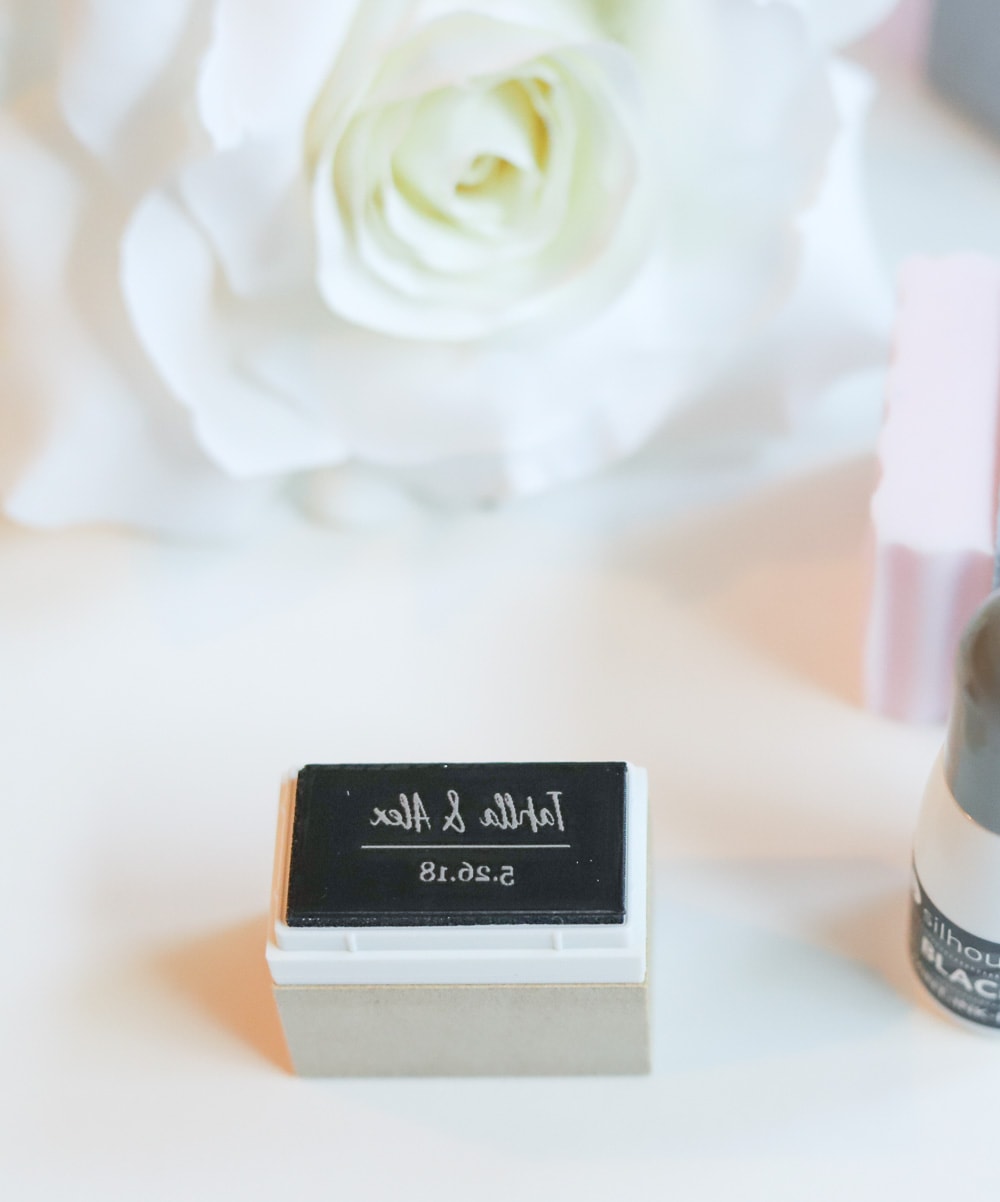
Print out your stamp and add the included ink. You’ll want to allow 10 minutes or so for the ink to sink in, and then remove the excess ink by stamping it out, until you get to a crisp, clean stamp image.

Cut your cardstock into 1″ strips and stamp the image several times, leaving about 1.5″ in between each stamp, then cut each out.

5. Assemble The Wedding Favors
Now you are ready to assemble the wedding favors. This is where it gets really fun!
Pull the wide ribbon across the soap bar, and secure in the back with a dollop of hot glue. Make sure you use a low-temperature glue gun as high heat will melt the soap.

As you can see in the picture below, I used a silicone finger protector to hold the ribbon in place as the glue dried. If you use hot glue on craft projects, you should invest in a few of these.

Next, add your stamped paper to the front, again using the glue gun to secure. Add the smaller ribbon on top and glue in the back once again. Try a few different ribbons for added charm!
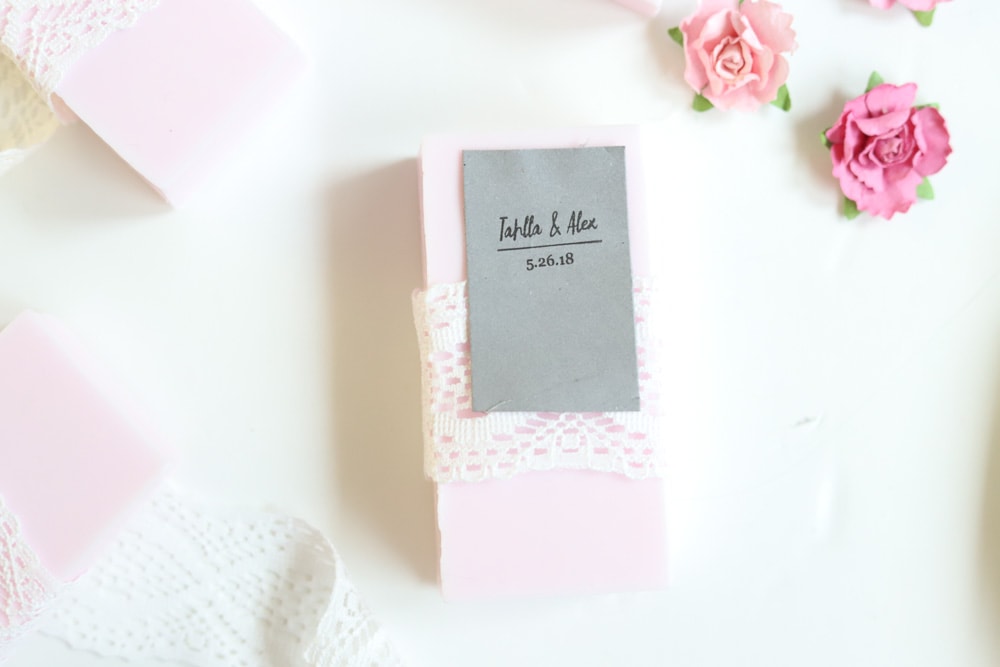
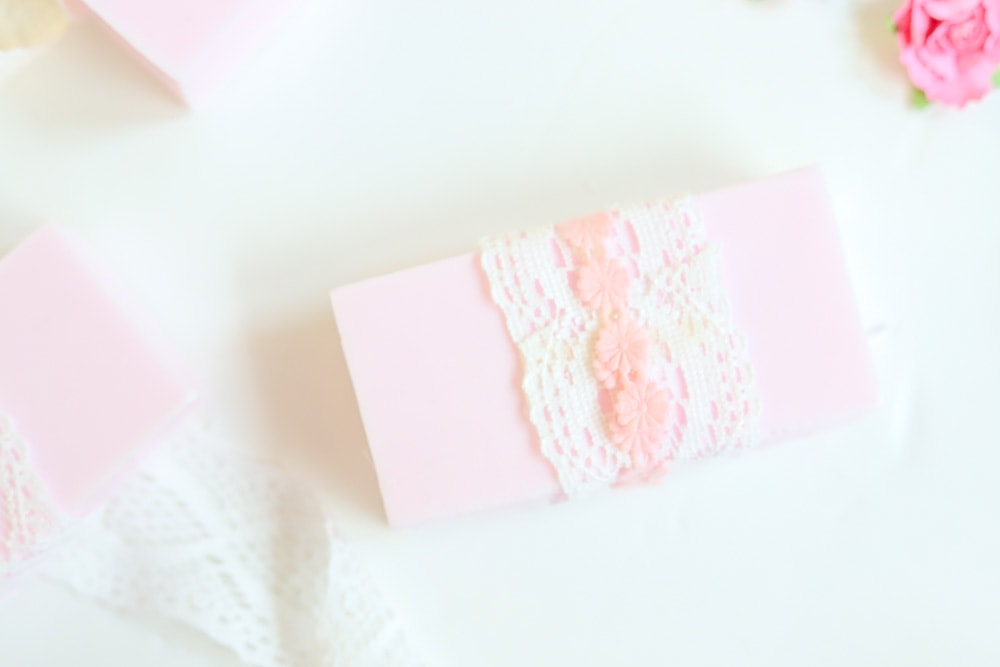
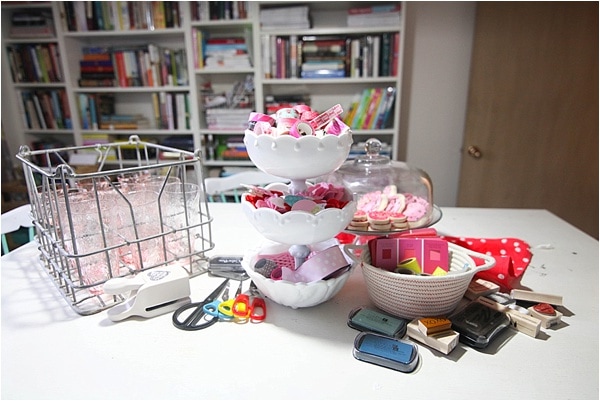
Finally, add the finishing touch with a paper flower. You can also use 3D scrapbook stickers or embellishments for this part too.
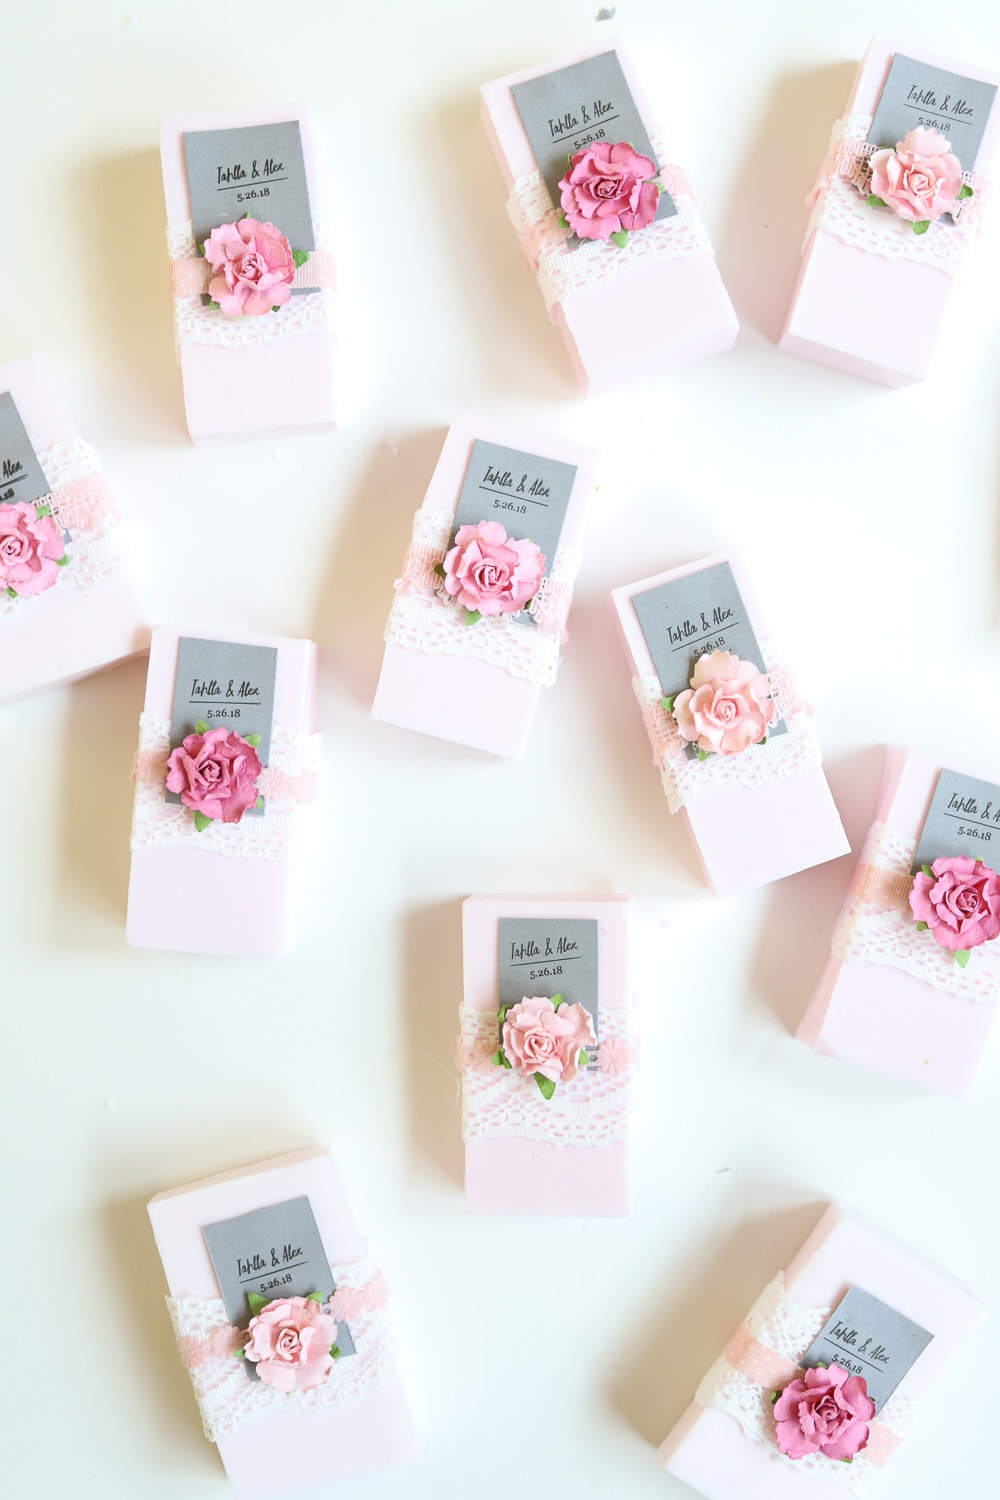
You’re done! Isn’t soap-making easy? Make sure you purchase a few trays to corral and display your favors in.
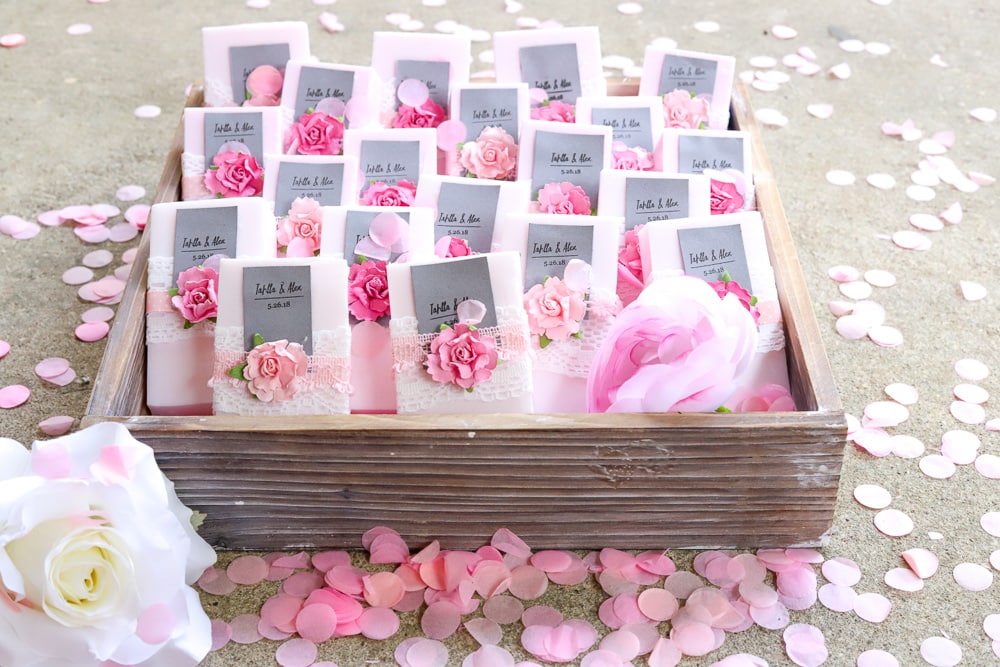

With a little sweat equity and creativity, you can have a coordinating wedding favor your guests will love!
More DIY Gift Ideas
Handmade gifts are the most thoughtful ideas you give. Here are some more things you can make.


This is really pretty for DIY wedding favors. Thanks for sharing at the Inspiration Spotlight party pinned and sharing. I’d love to try it, even though there aren’t any weddings coming up in our family (yet).
Thanks so much, Theresa! 🙂
What a beautiful favor for a wedding & practical to! Love it! I need a thumb tip cover like yours, I’m always burning myself with the hot glue gun.
Thanks so much, Jenny! And YES! The fingercaps are a must-have!
Wow, you are so talent. Your soap is so beautiful, I can almost smell it. Love the labels of the bride and groom and their big date. So creative.