How’d it Hold Up: A Look Back at My Most Popular Projects (Part Two)
This post may contain affiliate links. As an Amazon Associate I earn from qualifying purchases.
Over the past five years, I’ve amassed quite the collection of DIY projects. While it’s fun to see the project in it’s blogged state, it’s important to know how it has held up over time before attempting to recreate it. It’s been awhile since I posted Part One of How’d it Hold Up, but you can check it out right here, where I cover the projects:

I’ve added quite a few new projects to my DIY portfolio that I receive questions weekly about, so I wanted to address how the DIYs you all are most curious about has held up, like:
- DIY painted kitchen cabinets
- How to install a floating mantle
- Painted Concrete Rug
- Ikea Pantry from the Billy Bookcase
- Ikea Bookshelves Hack
Check it out!
DIY Painted Kitchen Cabinets Review
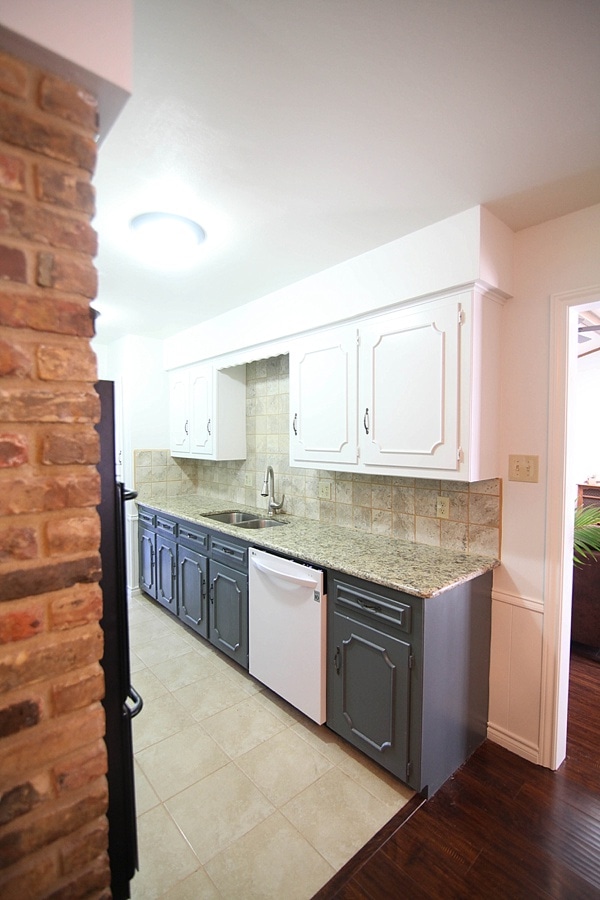
We painted our kitchen cabinets at our last house. After seeing pretty much every DIY blogger attempt it, I had always been curious about how painting kitchen cabinets would go. Since we needed a temporary fix to last us a year or so before doing a major remodel, I decided it would be the perfect time to try.
I planned to do the painting myself, but our construction crew gave us a killer package deal, and we hired out the work instead. They had painted dozens of kitchens and knew what they were doing much more than I did, so after carefully selecting my colors (check out the post for the details!) I was happy to hand the (figurative) paintbrush over to them.
I decided to do a two-tone cabinet with navy on the bottom and white on top, and they did the painting with oil paint and a paint sprayer. The finish was beautiful and I loved the color change. The old cabinets certainly looked much better and we were really happy with it. About a year later, however, the paint started to chip off in the corners and the old brown cabinet started showing. It wasn’t on every single cabinet, but more than half showed signs of wear.
Bottom Line…would I do this DIY again? YES, BUT…I would do it knowing that there is touch-up and maintenance involved. I also would do it with the knowledge it wouldn’t be my forever solution. In fact, we painted our new home’s kitchen cabinets (we want to do a full remodel in a few years).
How to Install a Floating Mantle Review
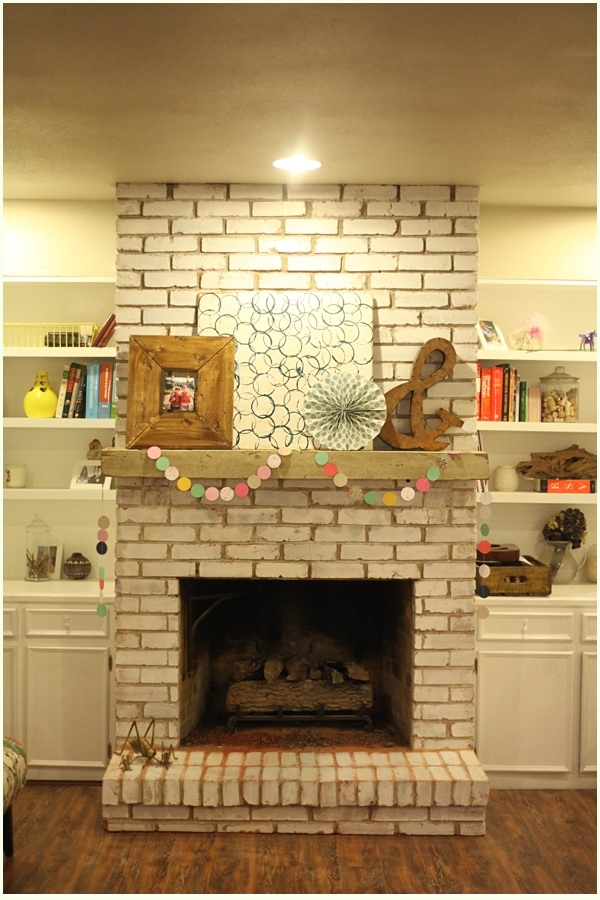
I love fireplaces, not just for the cozy warmth they can literally add to your home, but also for the focal interest they can bring to a living room. The last thing I wanted was a focal point that I hated, and unfortunately, the fireplace was more of an eyesore than anything else. I started the fireplace makeover by whitewashing the brick and then decided to give the mantle a makeover as well.
I had been lusting after a floating mantle, and after finding the perfect chunky wooden beam at an architectural salvage, I was ready to install it. Surprisingly, no amount of googling revealed how to make a wood beam float! So, after a few failed attempts, I did what any homeowner would do…I called my dad to help. 😛
Luckily, my father was able to figure it out and he and Scott installed it for me while I was out one afternoon (#blessed). Thus, one of my most popular blog projects of all time was born! I told my dad his hard work paid off when a pin with him installing the mantle went viral on Pinterest…he’s internet famous! 🙂
So, was the chunky mantle everything I dreamed it would be? YES! It was super sturdy…there is no way that thing was coming down. It was 100% solid! We moved from that home several years ago, but it held up great the 3 years we were there. Ironically, that house was listed on the market a year ago, and we went to go tour it. The mantle was still there, going strong and looking fine!
Bottom Line…would I do this DIY again? YES! In fact, keep an eye out…you might see this one replicated very soon! 🙂
Painted Concrete Rug Review

This project is the one I get the most questions about, and is now my most popular post of all time! It’s viewed thousands of times per week, and is also one of the projects I love the most!
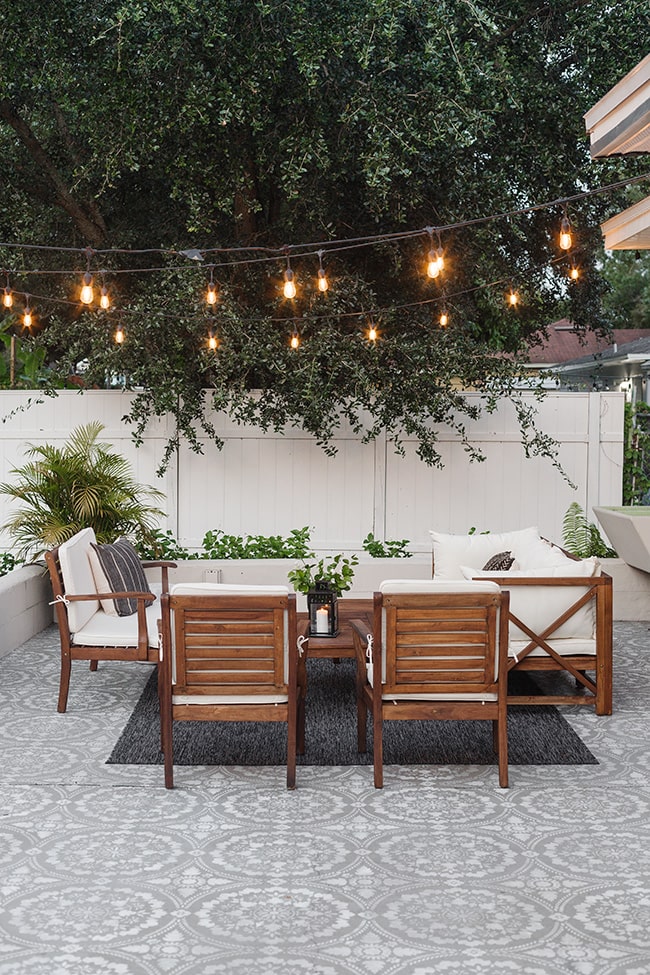
Our patio was very blah—boring concrete with not a lot going for it. The entire front of the house was kind of the same—dated, unexciting and lacking personality. I had been laid off and was on a tiny teeny budget at the time, so I decided to experiment with painting the concrete.
I debated for a long time about what I should paint, and finally, on a random Saturday morning I decided it was time to do the thing and we headed off to Home Depot. I purchased a brush, a gallon of concrete paint and some painter’s tape and went home to get to work.
It took me a solid afternoon to do, and the painted rug made me smile every time I walked in the front door. But, when we went back to see the house when it was for sale (same house as above!), the rug looked terrible. It was all splotchy and the color was faded. Scott happened to mention it to the realtor, and he explained that the couple that bought our house hated the painted rug and had tried several times to get it off and couldn’t. HAH!
Bottom Line…would I do this DIY again? YES! Just know that it’s somewhat permanent. This is another project that I am going to be re-doing, but with a twist. I can’t say what exactly because I haven’t decided yet. Maybe I’ll decide on a random Saturday again!
Ikea Pantry from Billy Bookcase Review

Everyone loves a good Ikea hack, and I’m no exception! I particularly love working with Ikea products because they are affordable and blog-wise, projects are easy to replicate. Our home was in desperate need of a pantry, and purchasing a pre-made one was quite expensive. I was, once again, working on a tight budget and wanted something better than the open shelving pantry we currently had.
While I love the idea of open shelving, I also practically knew that I was not organized enough to pull it off. Packages and wrappers don’t look as nice as lined jars, and it wasn’t logical for me to unbox every single thing in my pantry to make it look seamless.
I was wondering the aisles of Ikea one day and saw the Billy bookcase doors that were glass on top and solid on the bottom. Thus, the Ikea Billy Bookcase pantry was born!
We ran into a few glitches assembling the bookcases…as standard with Ikea. It’s a fun (?) way to experience couples skill building. ? Once they were assembled, I took over and filled the pantry up, putting pretty jarred items on the top where the glass was so they could be admired, and all the uglies on the bottom where they could be hidden. It was glorious!
Bottom Line…would I do this DIY again? YES! This one is a no-brainer. I wish our new house had a space to do this because our current pantry is super deep and awkward!
Ikea Built-In Bookcase Hack
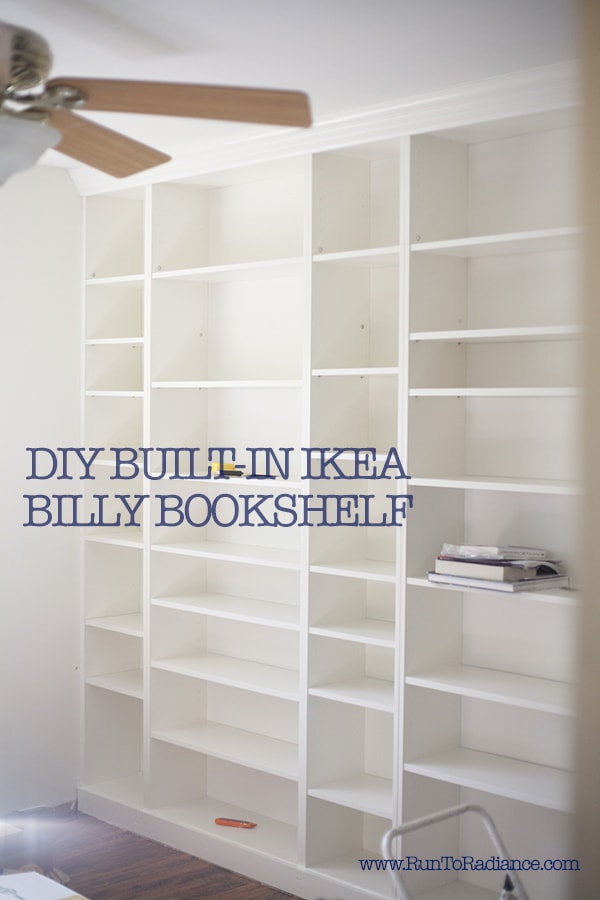
Confession: I LOVE to read. I have a serious book addiction! I’ve always joked that I like simplicity except when it comes to books and art supplies. #Kiddingnotkidding. I have quite the collection of books and needed somewhere to house them. I had long outgrown the small bookcase next to our fireplace and we desperately needed a solution.
Enter, once again, a fateful trip to Ikea. The Billy bookcases were affordable and simple, which I liked. Then, scrolling through Pinterest one night, I saw several Billy bookcase hacks where they were made to look like built-in bookcases (how does Pinterest know?!) and I was hooked!
We headed back to Ikea and purchased our supplies. Then, while I was out of town one weekend, Scott surprised me by assembling the entire wall of books for me! Talk about true love! <3 That bookcase was my baby! I was obsessed with arranging and re-arranging my books…nerdy, I know!
Bottom Line…would I do this DIY again? HECK YES. In fact, this is yet another DIY that we are replicating at the new house…otherwise, where would my stash books live? 🙂
So there you have it! Five viral Pinterest projects reviewed years later! What projects have held up the best for you?


I also painted my very old kitchen cabinets … the house had been remodeled in the 60s and when we remodeled our kitchen in 1987, we hauled them to the basement for storage there. In 2014, I figured out how to re-do our very dingy cluttered basement laundry area and the cabinets got pressed into use. I sanded and repainted them a mid tone blue and changed out the pulls. They looked great! The laundry / craft area did not get as much use as a kitchen but eventually I saw a few small chips. Generally speaking, they held up well and having an attractive and very functional laundry /craft / gift wrap room helped sell our house for top $$$.
I’d do it again. A year after selling the house, I still miss all that counter space and craft storage!