Build Your Own Shutters with Thompson’s WaterSeal + a Giveaway
This post may contain affiliate links. As an Amazon Associate I earn from qualifying purchases.

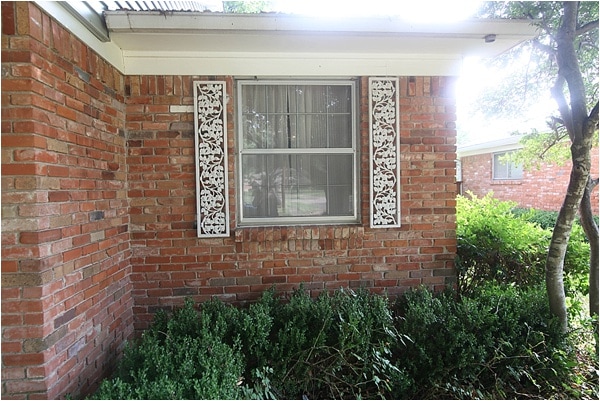
With all of the renovations we’ve done in the interior of our home to update it, we have had to put improvements to the front of our house on hold for a bit. While our main living areas have the look we love, our curb appeal has been lacking and lately we’ve been on a mission to improve it. Ever since we bought our house, I have hated the iron shutters we have on the exterior of our home with a passion. It was finally time to take them down and do some DIY shutters of my own!
Here’s a before shot:

Back in June I had the opportunity to meet with some wonderful people over at Thompson’s WaterSeal. You guys! They have some AMAZING products. I always connected Thompson’s with staining fences and outdoor decks, but they offer way more than that. When I told them I was thinking about building my own shutters, they were kind enough to send me a box of their stain to try.
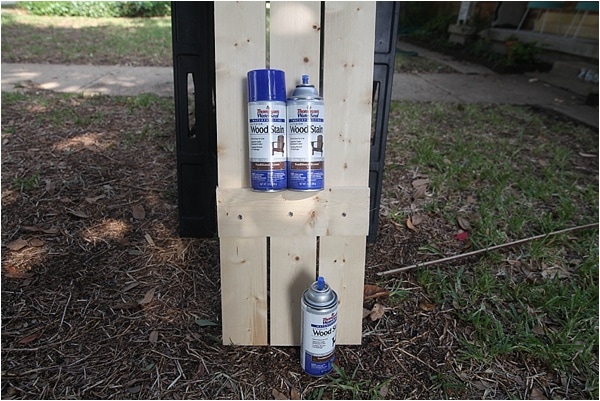
This isn’t just any stain though. This one is kind of a game changer. It is a spray-on stain. I hadn’t seen anything like that before, and I have to admit, I had some doubts. I knew Thompson’s had a great reputation and decided to give it a try. It couldn’t get much worse then these iron eyesores, right? (Spoiler alert—loved the stain!)
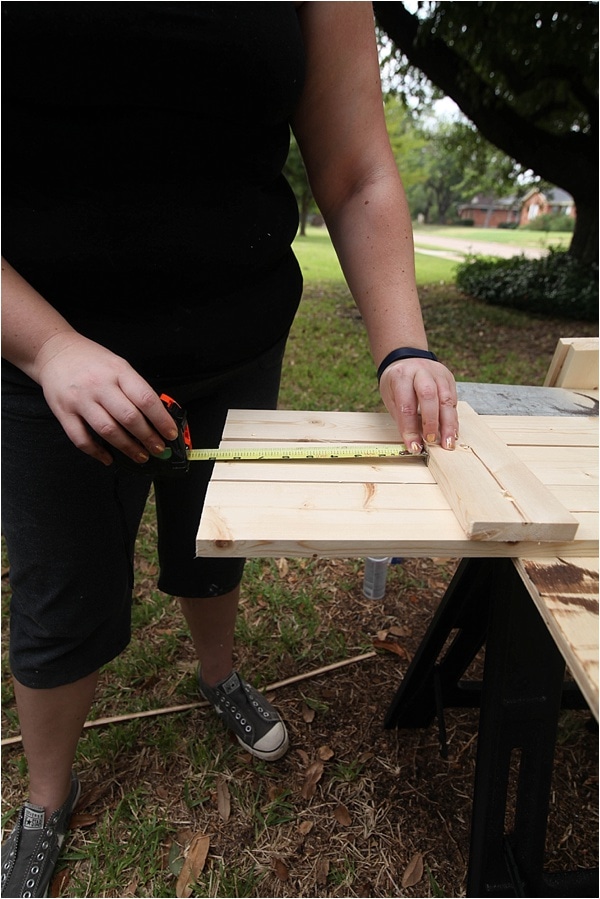
When it came to the actual shutters themselves, I knew I wanted a classic wooden shutter with three vertical boards connected by two cross beams, so after measuring our windows we picked up 1 x 4 wood and had Home Depot cut them down to size for us.
The process of actually building the shutters was pretty simple—we started out by creating a countersink in each crossbeam for the screw to go into the wood. Since we were building six shutters, we made 12 crossbeams in all.
Then we laid out three pre-cut boards evenly spaced with a 1/2″ gap in between each one, and put the crossbeam 8 3/4″ from the top and bottom. By the 4th one I was getting really good at guessing where 8 3/4″ was—I almost got it perfect by the end! 🙂
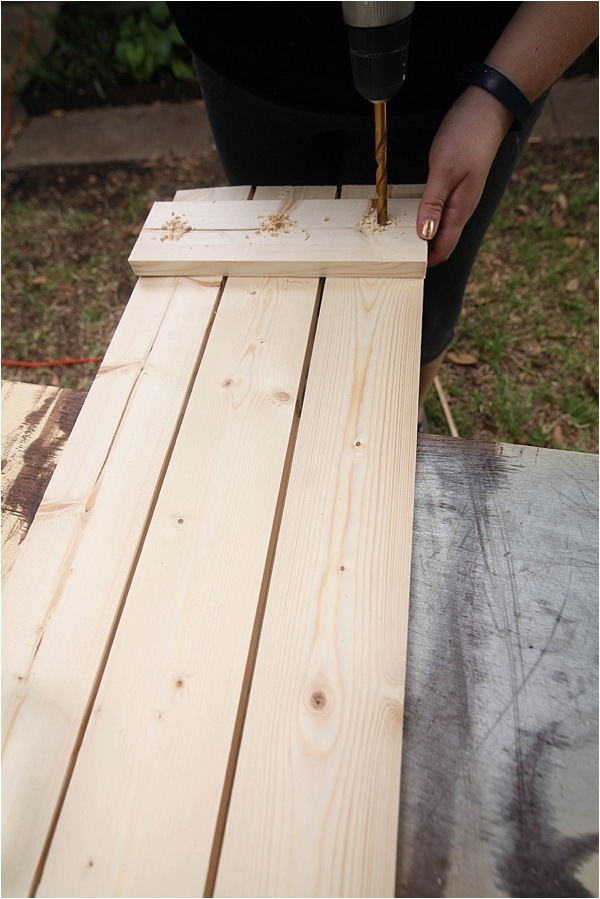
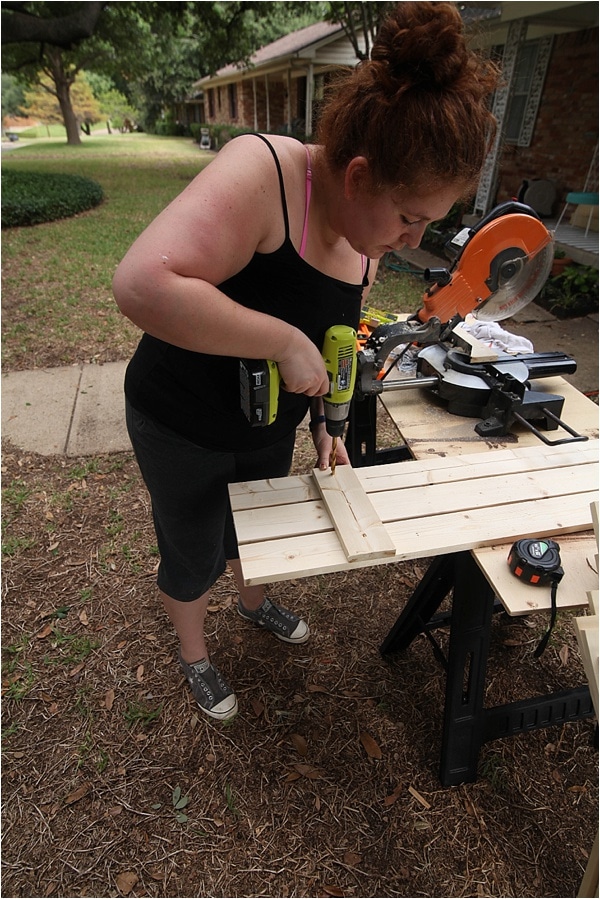
Then we drilled the screw into the grove we had created in the crossbeam, making sure to put plenty of pressure on it. If you don’t, they’ll start spinning around and could give you a crazy thorn or something (I speak from experience!). Once all six screws are secured, double check that the edges of the boards are all flat. If you need to, you can use a skill saw to trim the ends until they are even.

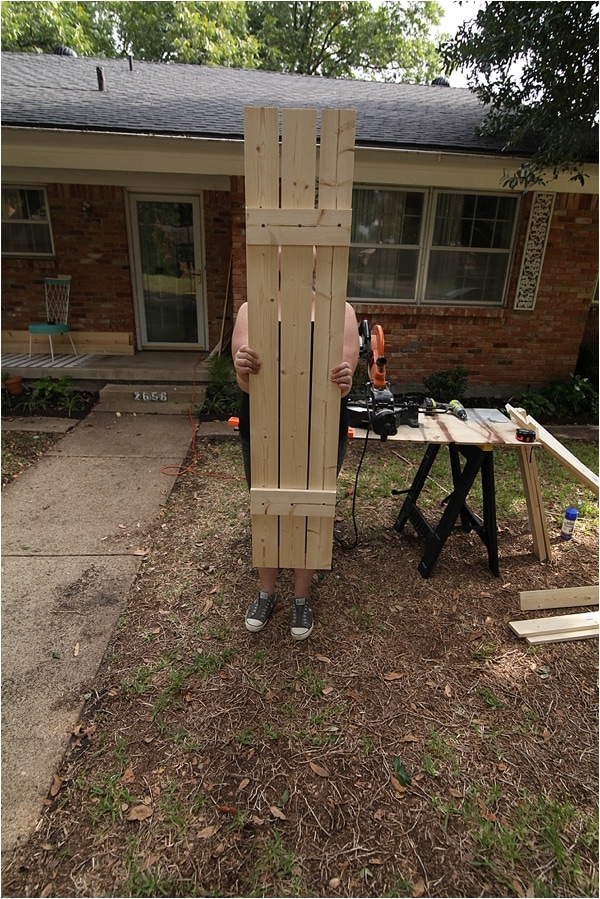
And that’s it! You’ve got a shutter. See? Easy! 🙂
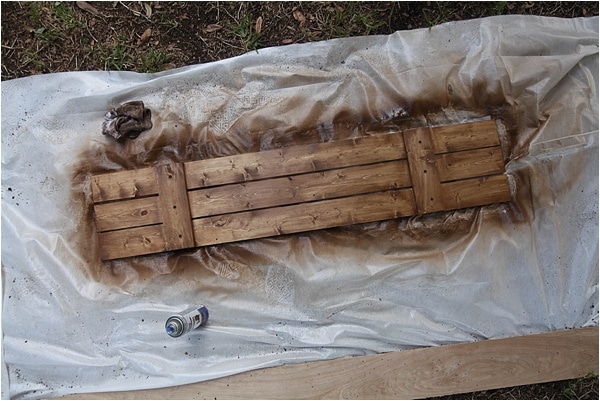
Next up: staining. Like I said, this was my first time using an aerosol stain so I wasn’t sure if I would like it or not. You guys. SO COOL. There are so many things I loved about this stain! I used the Thomposon’s WaterSeal Wood Stain in Traditional Brown. I love that I could spray at any angle—perfect to get in all the nooks and crannies of the shutters. I also appreciate the fact that it’s waterproofed and resistant to fading…because as much fun as making these shutters are, I want them to last for awhile! Plus…the color is just gorgeous.
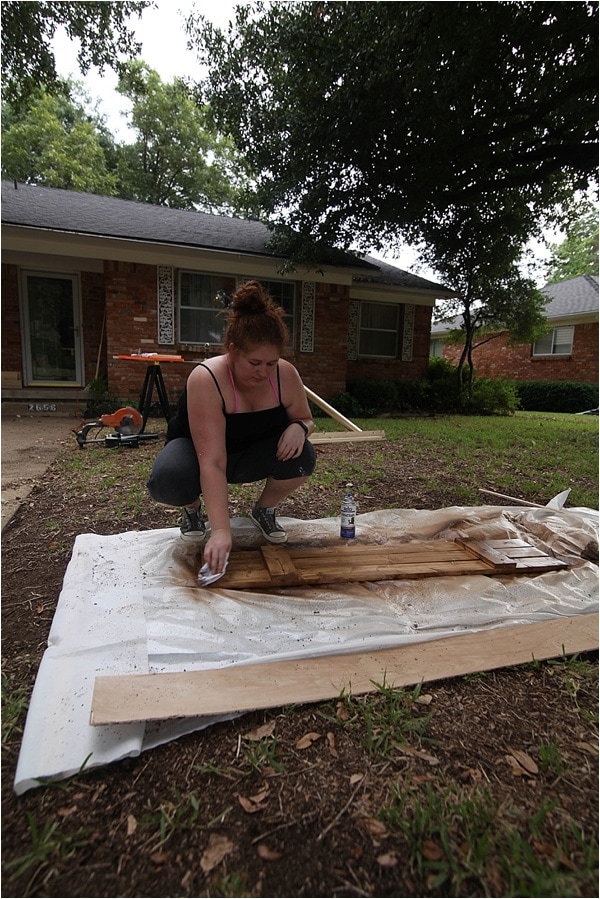
I did two coats of spraying, and wiped down with a cloth in between each time. Here’s how the shutter looked after the first coat:
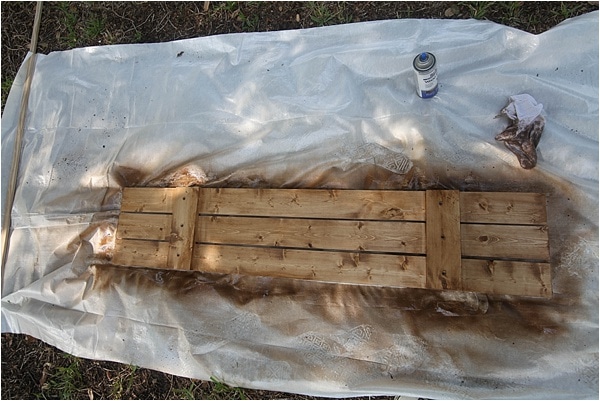
and the second:
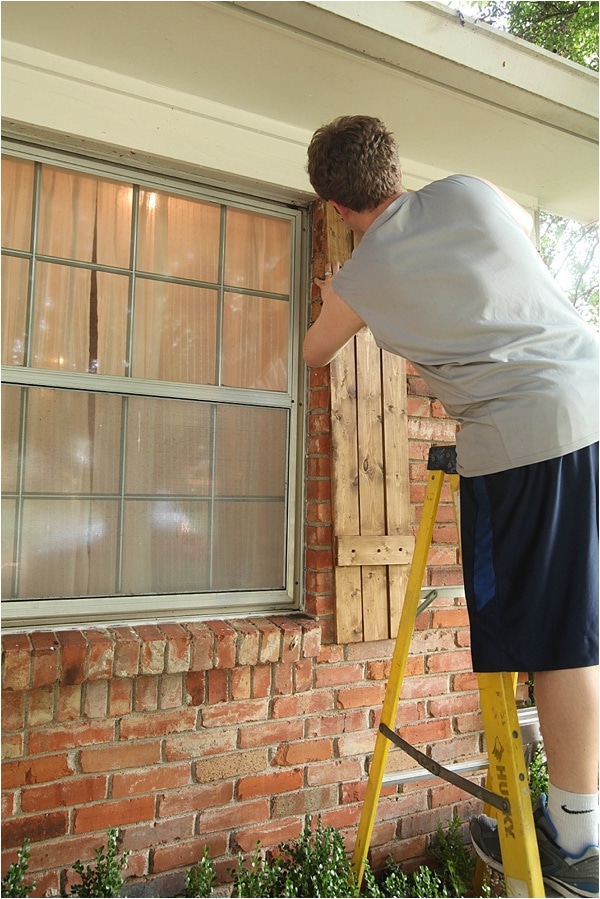
We were able to build and stain the shutters all within an afternoon. It really was much easier than I expected thankfully. Once they dried, it was time to hang them. Since we have brick we used a mortar drill bit and concrete anchors to install our shutters. But first..we had to remove the old iron shutters…finally!!

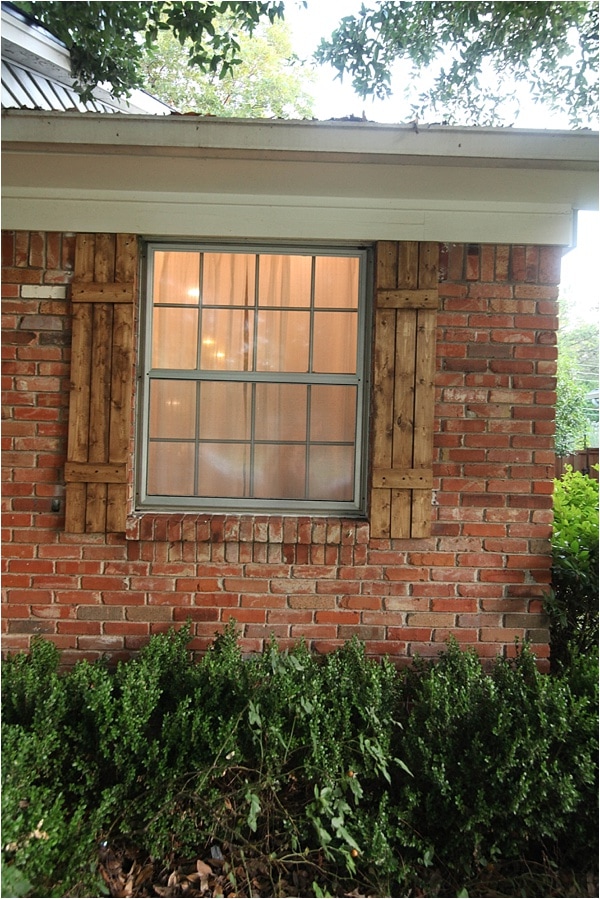
Such an improvement! I love them so much! I love the natural wood grain that you can see through the warm brown color—so glad I we finally got around to this project!

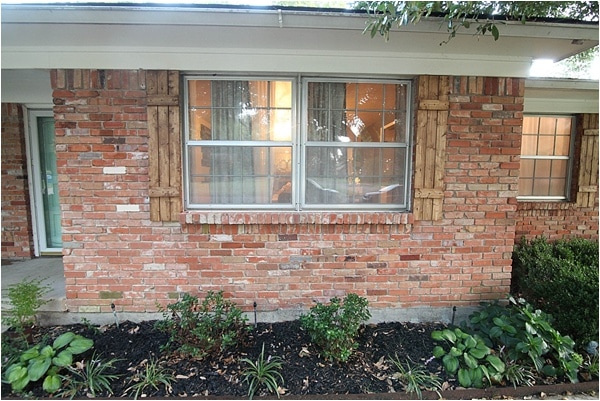

Just to refresh your memory, here’s a couple of before and after shots.
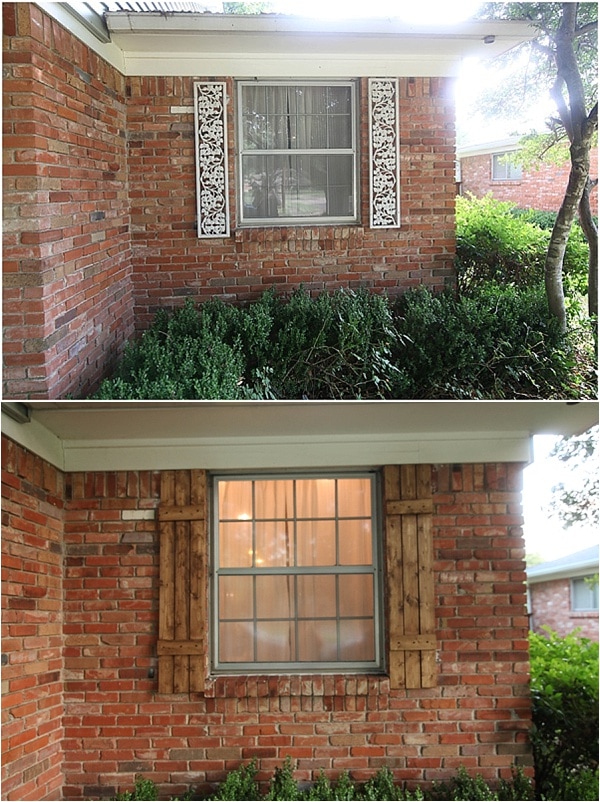

We have plans to remove that iron beam on the left side of the house soon too..stay tuned for that one! But enough about me, let’s talk about YOU. Are you itching to build shutters of your own now, or do you have a wood project you want to try staining? My friends at Thompson’s were kind enough to offer to send one lucky reader a case of aerosol stain to try for yourself! Yay!!!! Entering is easy—just leave me a comment and let me know what you would use it for, and you’ll be entered into the drawing.
This project was completed in partnership with Thompson’s WaterSeal, but all opinions are my own. I only partner with companies that I trust and admire and feel fully confident recommending them to you. Thank you for supporting the companies like Thompson’s that help fund my diy-drive! 🙂


I need to refinish a deck with something that will keep my boards properly sealed… It looks great!
Everything you do looks awesome! I’m impressed you have the time 🙂
It just makes a huge difference to a home’s curb appeal. Well done.
I would love to use that stain for some shelves I’m hoping to put up in my dining room!!! It’s beautiful!!
Ahhh this is super cool! Joel & I are aspiring to build some cool benches for our back patio using 4x4s and cinder blocks and this stain would come in reeeeaaal handy. Thanks for your inspiring posts!
oh you’re so fancy! love the new shutters.
Oh, wow, I didn’t know that Thompsons has a spray on stain. That’s a game changer! And your shutters look fabulous. I never though about making them – that’s a great idea!
this is AMAZING!! great job!
Nice job on the shutters. Great DIY! That spray stain looks interesting. I’ll have to find a project…Does it come in different colors?
I would use it for my outdoor furniture that my husband made but didn’t seal or paint!!! They aren’t going to make it for long if we don’t do something soon!
Those are beautiful. I love the look up against the brick, and how easy to DIY yourself! I want to make a large welcome post for my front entry and would love to stain it.
What a CUTE idea!! I love their stain!! I definitely have a few outdoor projects I could still use to stain! How fun!
Love them, they look awesome!
Debbie
I made shutters for my last house and love how much they added to the house. Yours turned out so great.
I love how these turned out! And this post answered a question I’ve had for YEARS about a decor piece I picked up at a garage sale…I never knew what it was, but it looks exactly like your iron shutters, so I’m thinking that. Problem solved 🙂
You are so talented! The shutters look very professional. I like the new look they give your house. And I’m interested to see what you do to replace the wrought iron post on the porch.
They look great! I love shutters 🙂
Your shutters are gorgeous! I love that spray stain – so easy to use!
Wow looks great.
I love upcycling things from old pallets, and this would be perfect! Right now I’m wanting to make a picnic style table!
We have a wood board fence, very long, that badly needs sealing to preserve it.
outdoor furniture!
Spray stain? Yes please! I have some furniture projects in my future and this would be awesome!
new deck rails. we are replacing some old ones.
I have my shutters to redo also. Texas sun gives them a beating.
I would use it for some Pinterest projects.
i would use it to redo my daughter’s lounge chair and table
Our deck is looking pretty rough and I think this would spruce it up quite a bit and make it look new again!
The shutters look great! I would probably use this on our deck or the front porch. They both need some major work!!
My bookshelf!
I would like to try the stain on our screened porch pillars …. love the shutters!
I love this – if you have a garden those rod iron pieces would be great for trailing blooming plants. Your new shutters are fantastic – updated the home. 🙂