DIY Concrete Countertops – Easy Step by Step Guide!
This post may contain affiliate links. As an Amazon Associate I earn from qualifying purchases.


Learn how to install DIY countertops in your own home. I’m walking you through the process of installing your own DIY concrete countertops step-by-step. Also, be sure to check out how we removed stains and maintained our concrete countertops.

Update On Our House Remodel
So much has (luckily) changed in our home since my last post. Our original plan was to keep the house’s existing cabinets on the back wall and add new cabinetry for the kitchen island. However, we had to change our plans – yet again.
Here’s why. The built-in spot for the fridge ended up being 2 inches too short for our fridge (which isn’t even that big). With the fridge built-in wedged between the dishwasher and a small load-bearing wall, there were only two choices:
1) Keep the existing stuff and just commit to buying tiny fridges for life.
2) Redo the ENTIRE kitchen cabinetry.
Since at some point we’d like to upgrade all of our appliances, we decided to go with option two. It’s obviously more work and cost upfront, but worth it in the long run. More demo and lots of wood chips and splinters later, our kitchen is actually completely empty. Not for long though!
I have an upcoming blog post about which cabinets we ended up going with and why, but that’s another day and another story. The REAL story and star of the day are these babies – our DIY concrete countertops.

Concrete Countertop Inspiration & History
Back in July, Scott and I spent a few weeks on a super fun southeast road trip where we stayed in a cabin in Asheville and visited Scott’s family in Georgia.
One day, we were strolling around Biltmore Village and came across this quaint little restaurant called Corner Kitchen, which I had heard amazing reviews about! We decided to skip the lunch wait and grab a spot at the bar, and here they were… gorgeous concrete counters.

We were getting ready to close on our first home, and up until this point had debated several countertop options.
My first choice was butcher block countertops because I LOVE how they look and the warmth and rustic charm they add. Unfortunately, they are extremely high maintenance and can harbor bacteria so we (sadly) crossed that option off the list.
The second choice was a smooth surface marble which I also really love, but knew we couldn’t afford. Our third choice was slab granite, and to tell you the truth – I don’t love that material. I know it’s the “in thing” to do these days, but I seldom run with the trends (unless I happen to like the trends.) So, we crossed it off the list too.
We were starting to run out of preferred countertop surfaces.
As my elbow casually leaned against the beautiful concrete countertop right there in Asheville, NC, a lightbulb went off in my head.
“Scott,” I leaned over excitedly. “Are you thinking what I’m thinking?!”
My sweet soulmate leaned in and exclaimed, “YES! We should totally order some drinks!”
So we did. But more importantly – we both fell in love with these concrete countertops.
Can I make my own concrete countertops?
Yes! Unlike other smooth surface countertop options, you absolutely CAN DIY your own concrete countertops. And that’s exactly what we did.
Many months and hours of research after that lovely lunch, we were standing in a dusty garage at Gray Gables. We were finally executing our plan and making our DIY concrete countertop dreams come true!
How To Install DIY Concrete Countertops
I’m going to walk you through the entire process of how we installed our concrete countertop surface. The process isn’t super hard, but it will take some time.
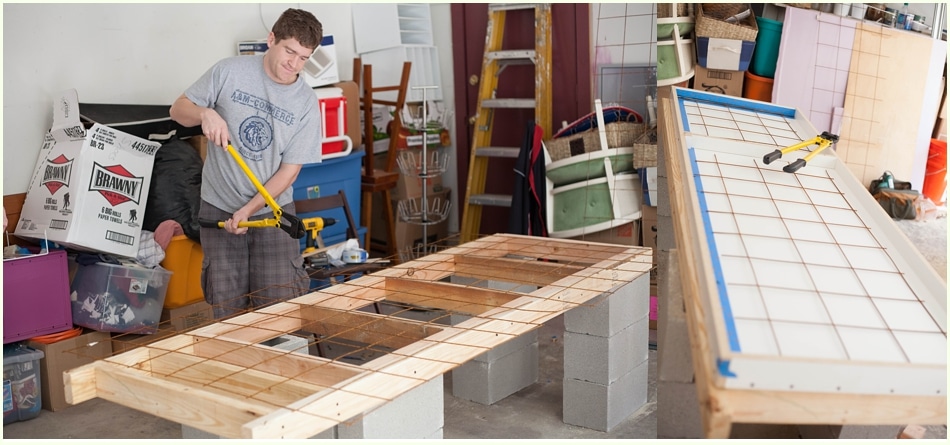
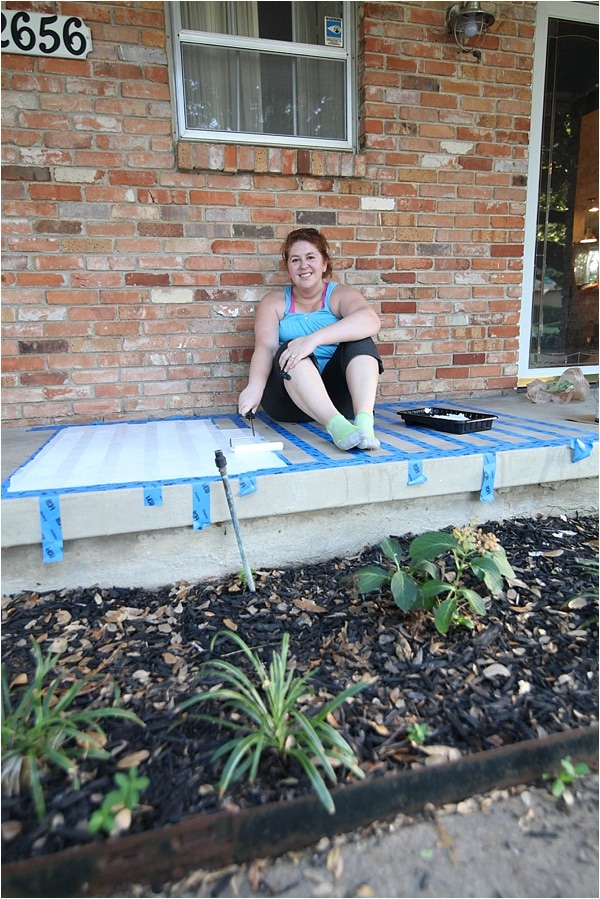
1. Create Countertop Molds
The first step was to create countertop molds. I’ve seen people do this a lot of ways, with some even skipping the molds altogether and just pouring concrete directly onto their existing countertop. I would never recommend doing that!
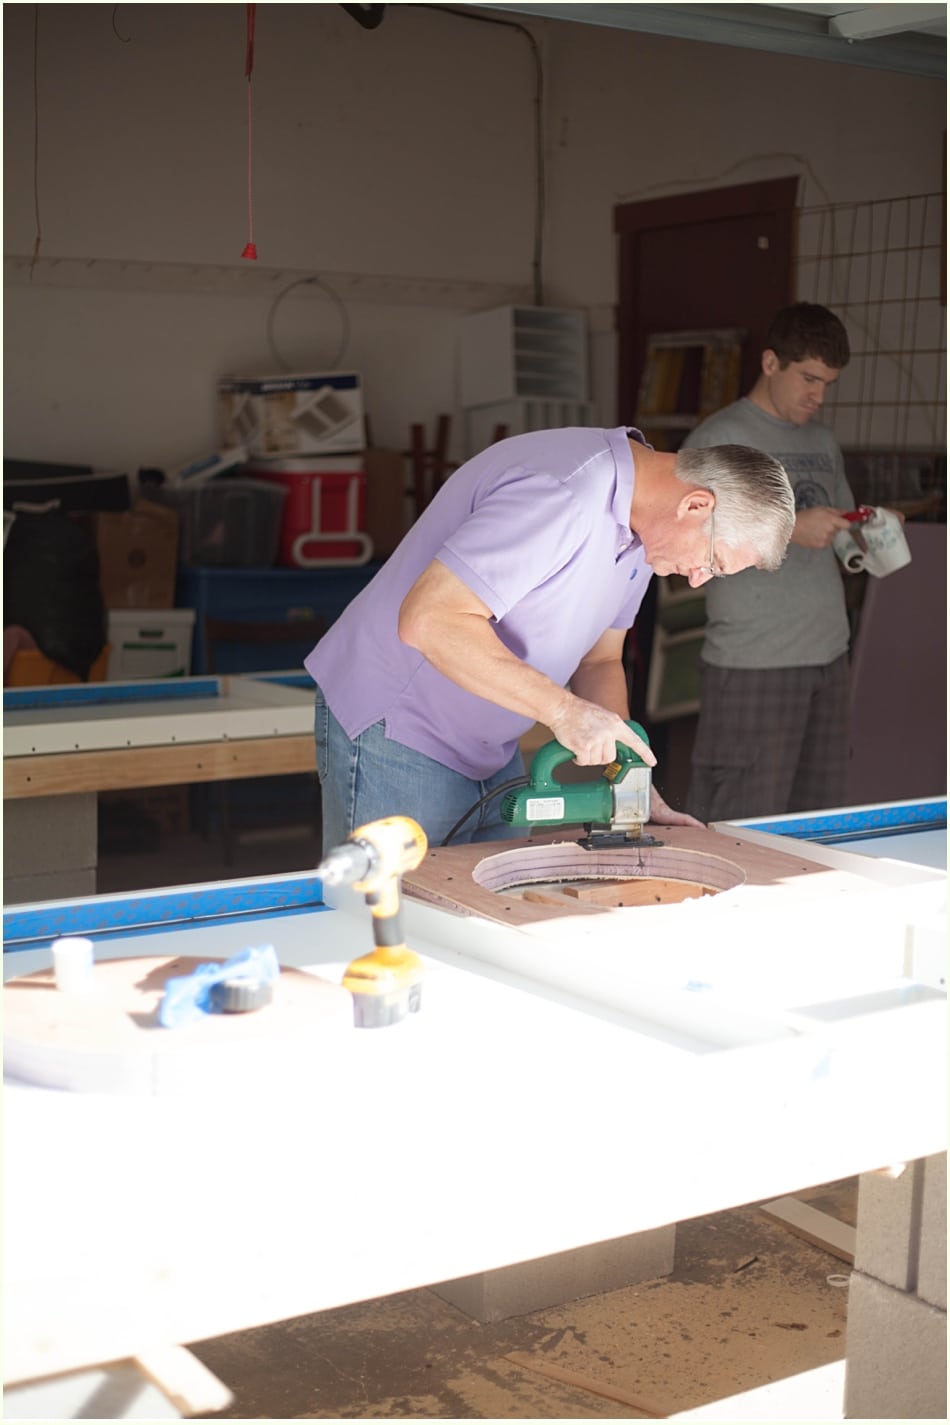
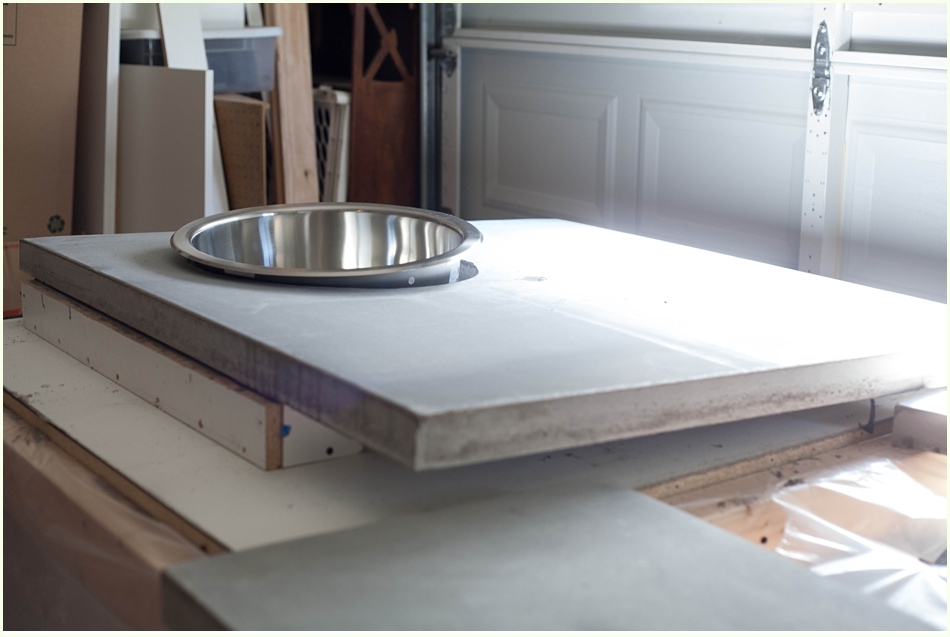
Even though it seems easier to not take the time to make molds, our cement counters turned out perfectly flat because we did use them. Scott’s dad even made an ingenious mold insert for our prep sink!
There are a ton of blogs out there that have done a great job giving step-by-step instructions on the process (like this one, this one, and this one in particular). However, I’ll give you a very quick rundown and you can refer to those other sites for more detailed information.
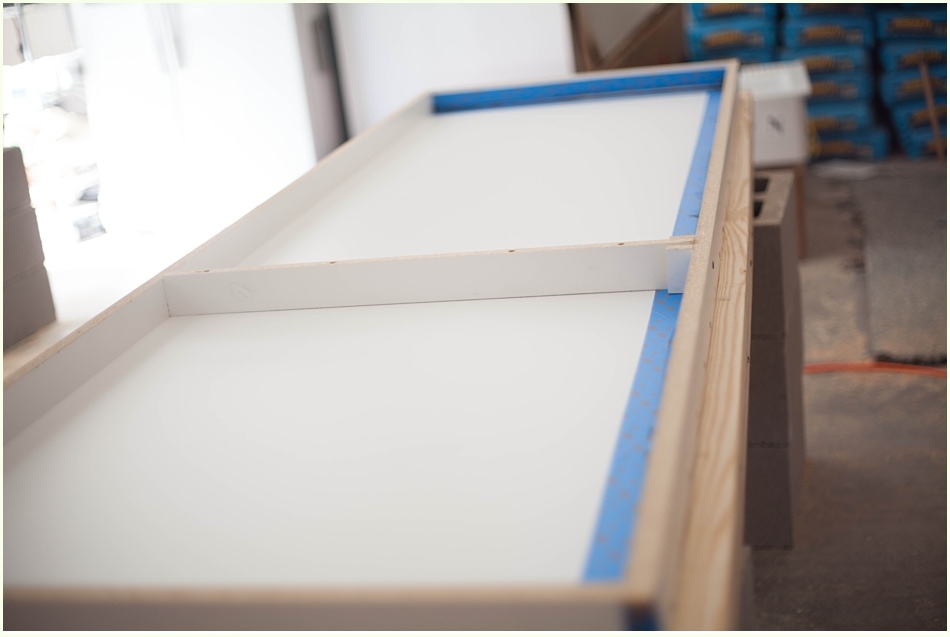
Measure your cabinets and add 3/4″ to account for overhang. Take Melamine-coated particle board that has a slick white surface (to give the final counter tops a very smooth finish), measure out your dimensions, and cut with a circular saw.
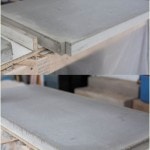
We needed to form sides for our countertop. To do this, cut strips of particle board (2 3/4″ wide or equivalent to the thickness you want) and attach one to each end of the particle board to be the edges of your mold. Set your molds up on saw horses or cinderblock stands as we did.
Wipe down the bottom of your molds to ensure there isn’t any dust or other particles there. That will be the top of your concrete countertops, so you want to make sure it’s smooth and clean.
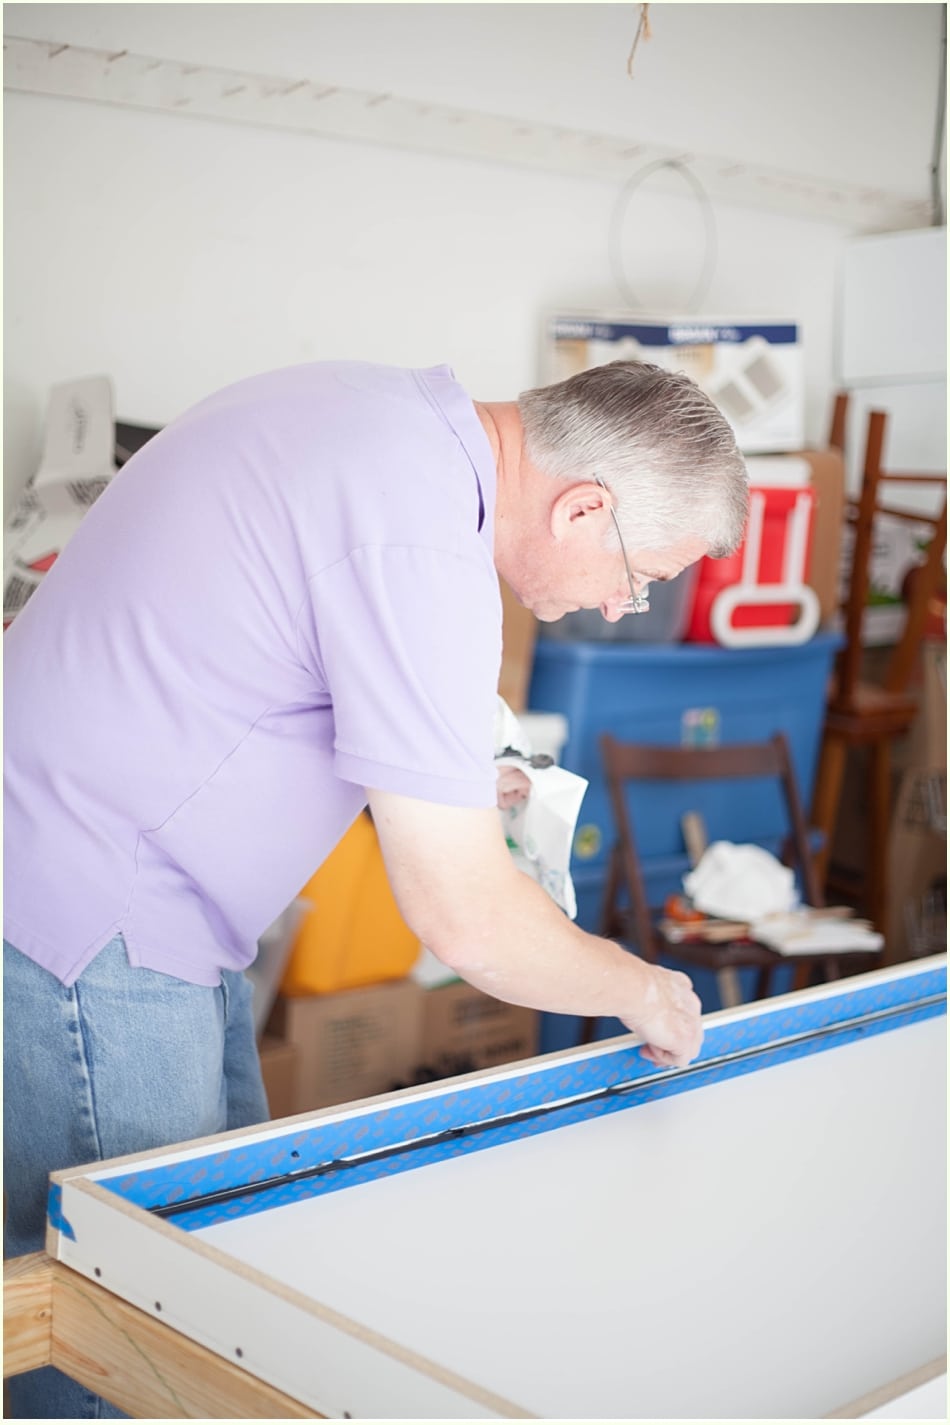
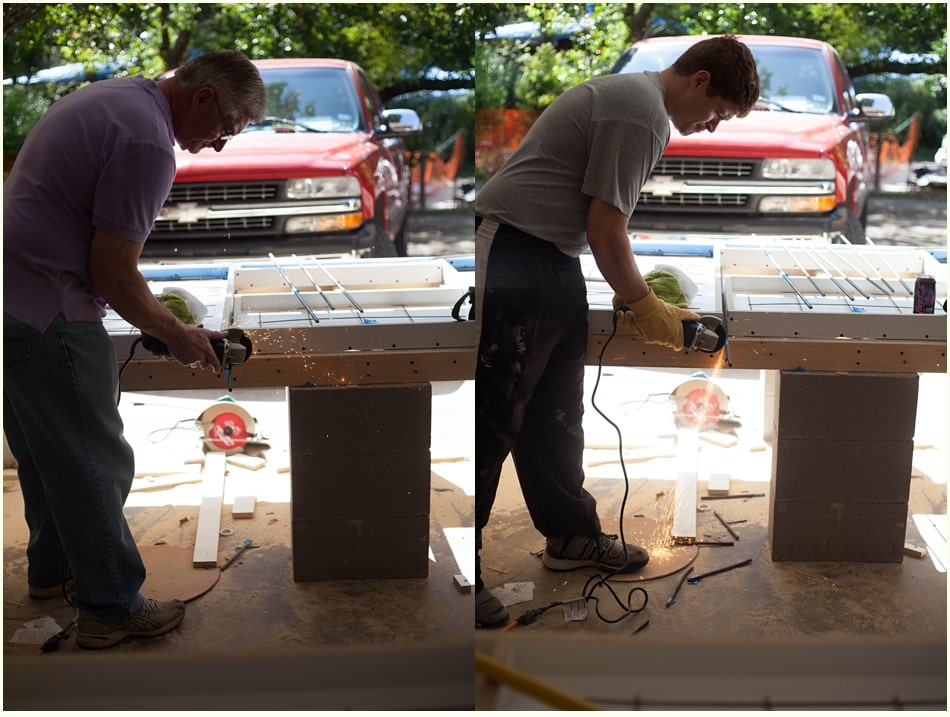
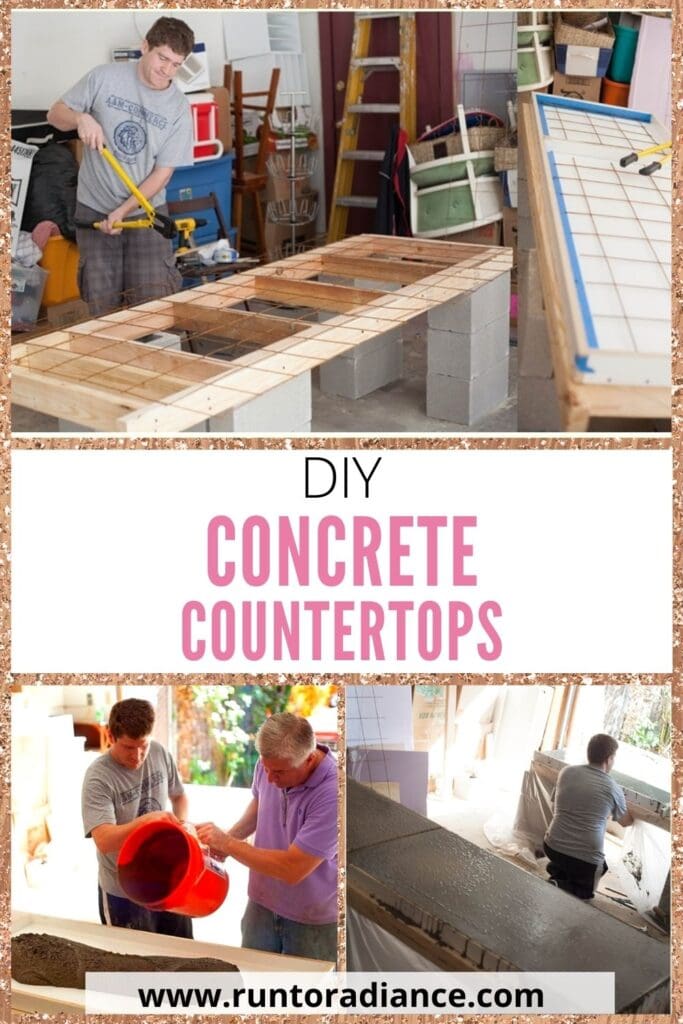
2. Pour The Concrete Countertop Form
After the molds were built, we taped and caulked the seams with silicone caulk, cut rebar, and began to mix and pour our concrete mix! We purchased Quickrete’s Countertop Mix which I HIGHLY recommend – it’s formulated especially for this!
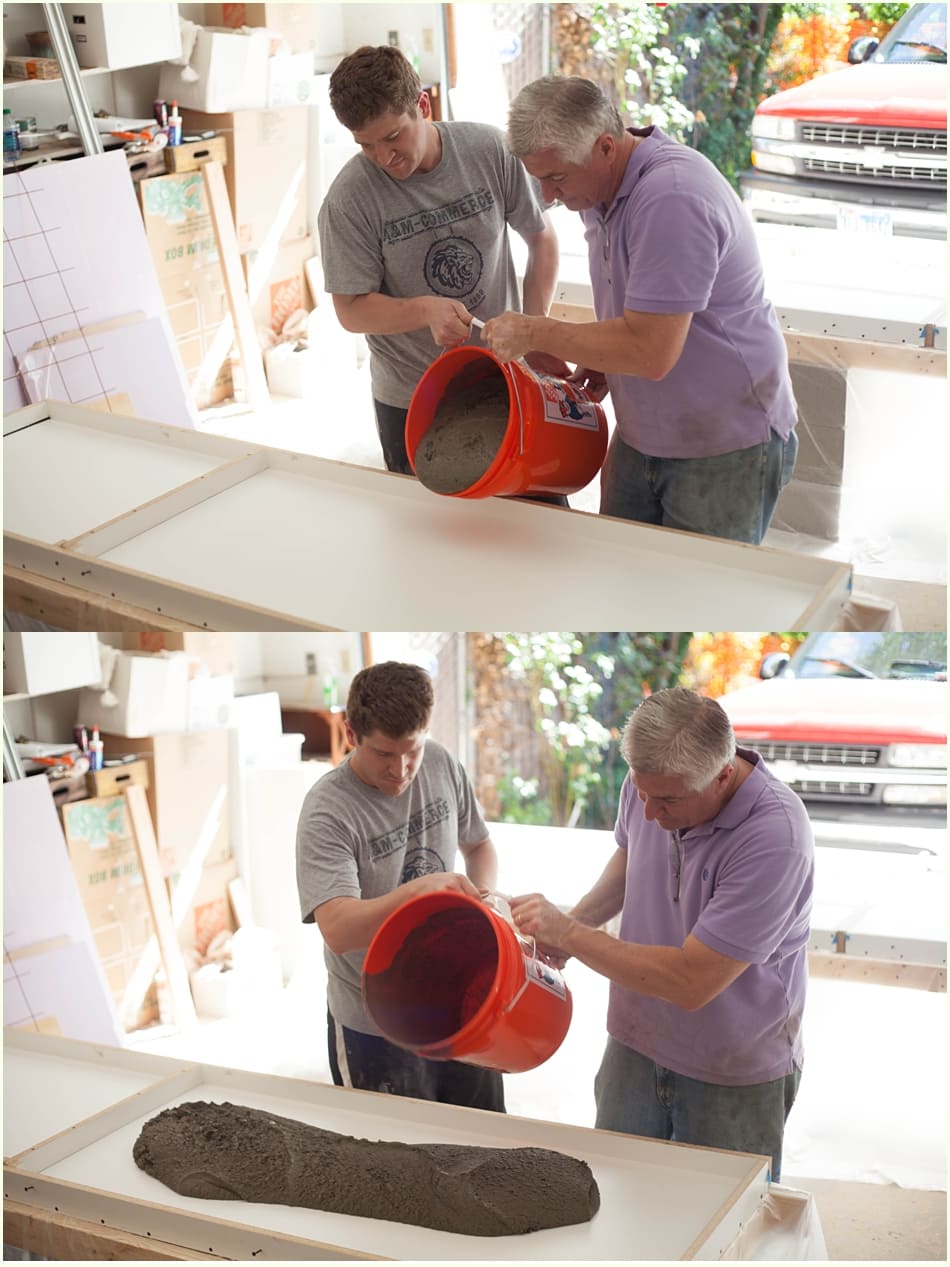
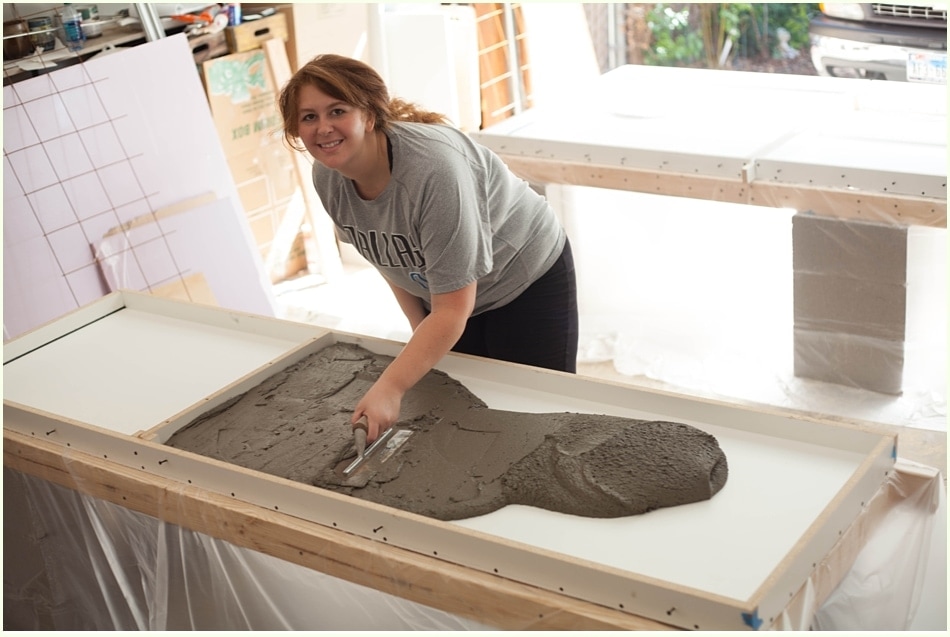
Scott and his dad mixed and poured while I leveled with the trowel until the forms were about half-full. Then we added the rebar and the guys poured some more concrete.
After leveling the top layer, I used a hammer (or you could use a rubber mallet) to bang on the bottom of the mold. Doing this brings the air pockets to the surface of the countertop.
Don’t skip this step because it prevents cracking in your concrete countertop! That was the hardest part – my arms were aching by the end!

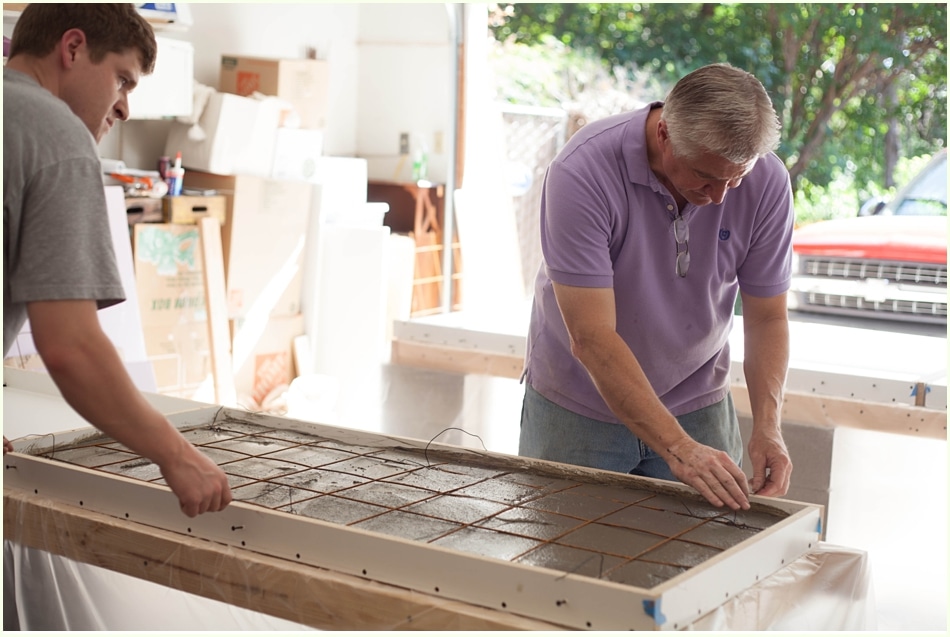
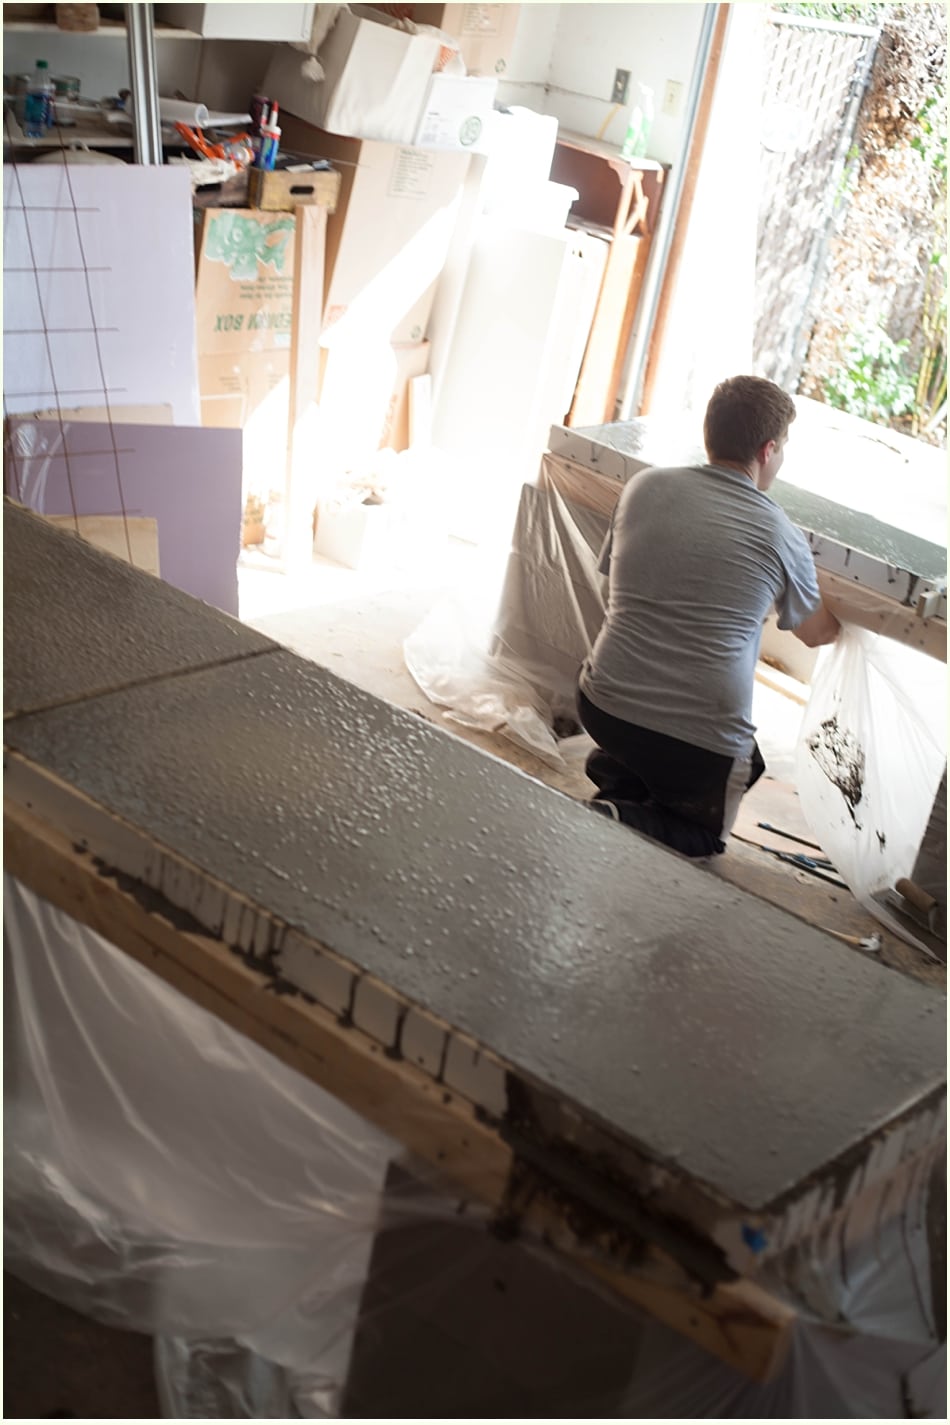
Notice all those air pockets in the photo above? That was 20 minutes’ worth of forearm agony, but worth it! Like labor pains 🙂
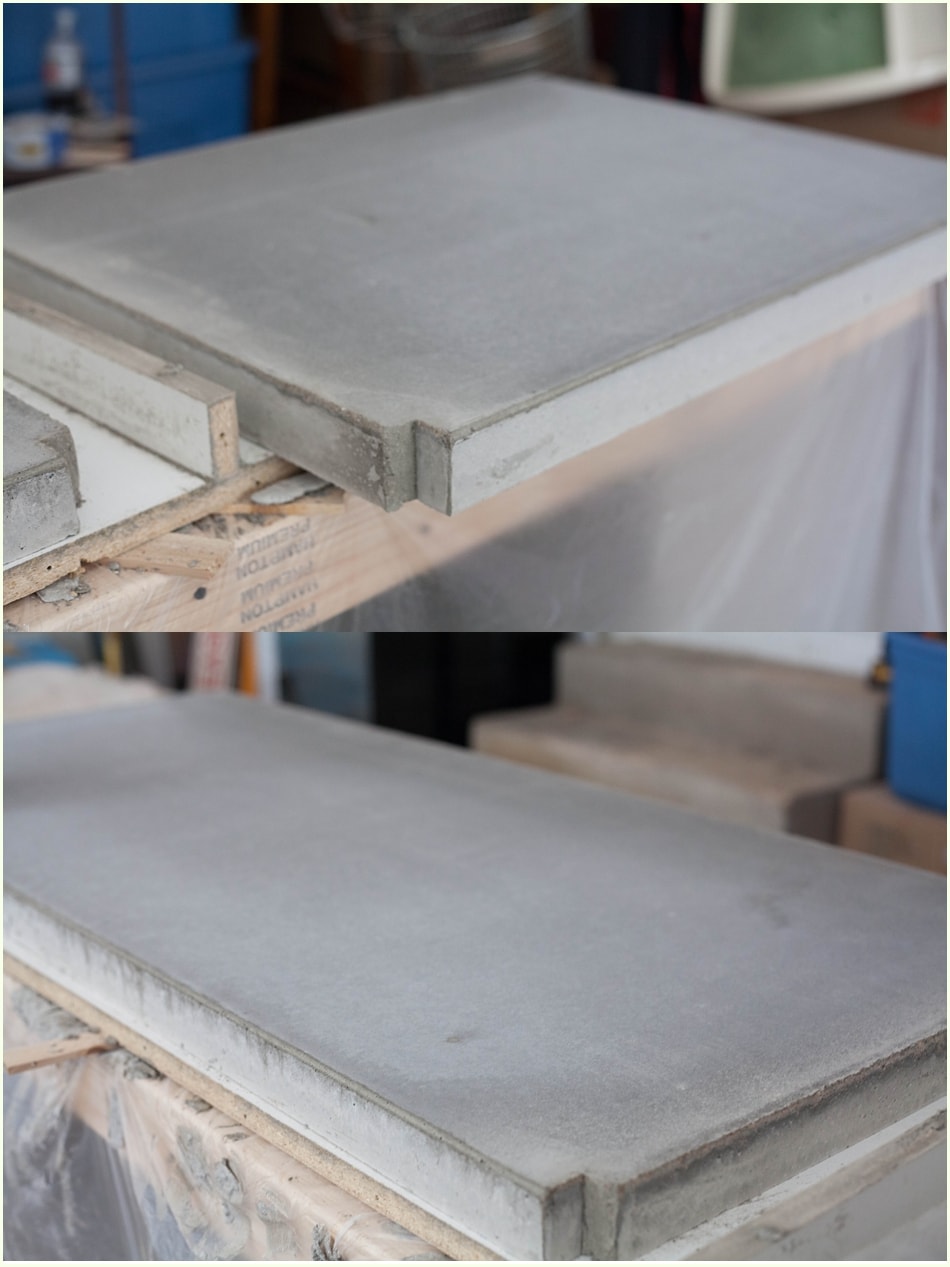
3. Allow Concrete Counters To Cure
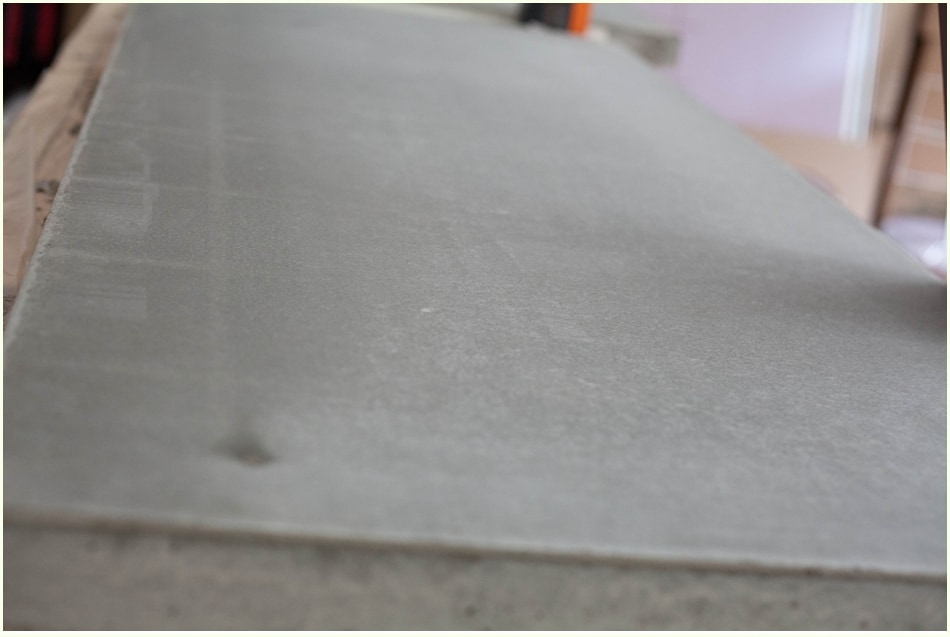
We waited about a week to de-mold, flip them and check them out. I’m in luuurveee!!!! The finished product is a perfect shade of gray (we opted not to dye or add any other materials for color) and perfectly smooth.
There is actually one small imperfection due to a small crack in the melamine, but I actually love it!
Next Steps For Our DIY Concrete Countertops
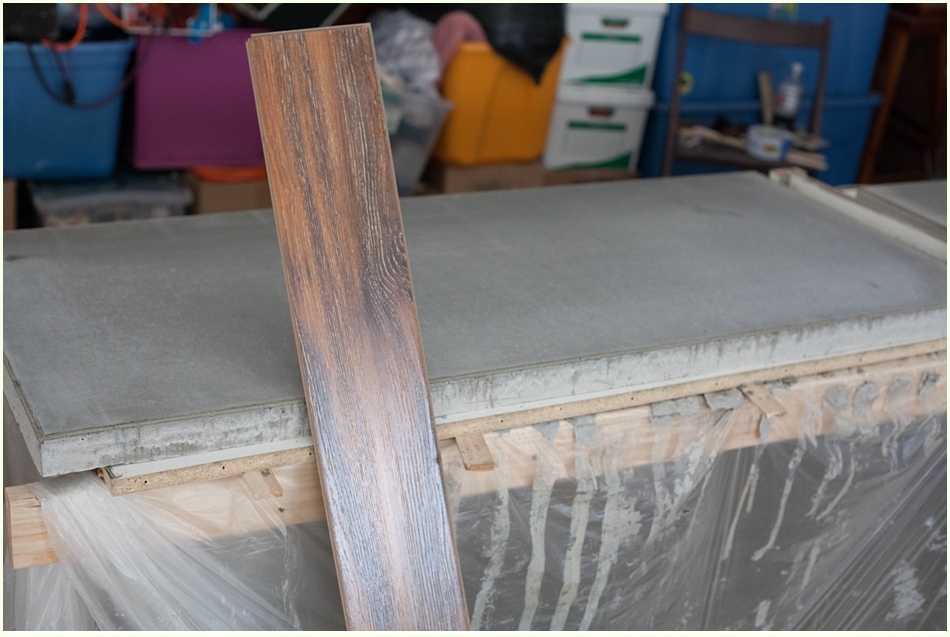
Our plan is to continue allowing them to cure for a little longer. Once our cabinets are in place, we’ll add the concrete tops and then do the sealing/waxing process.
Until then, I visit my concrete friends nightly to pet and speak lovingly to them. Or to hold up samples or our paint, wood floor, or backsplash to them. For real.
My Top Tips For Concrete Countertops:
- Lay plastic underneath all of your mold forms to make sure you don’t get dried concrete all over your garage (or wherever) floor.
- I would recommend doing this whole project in a garage or sunroom – basically somewhere outside of your house. It got super dusty and dirty.
- Spend as much time as you can hammering or shaking the molds to ensure all the bubbles are out.
- If you have a small imperfection when you de-mold… don’t stress – it adds to the Patina!
- Make sure your molds are on a perfectly level surface and continually check the surface during the process. It would be sad to have an un-level concrete countertop!
- Have fun!!! 🙂
FAQs For DIY Concrete Countertops
Here are some common questions that readers often ask regarding how to make concrete countertops.
Are concrete countertops less expensive than granite?
When comparing countertop prices to answer this question, compare numbers by the square foot. Granite countertops are often $50-$175 per square foot, installed.
Concrete countertops are actually pretty comparable (but slightly cheaper) in cost if you pay someone else to install them because they’re more time-intensive. The cost of concrete custom countertops could range from about $60-$135 per square foot, installed.
However, if you like DIY projects, you can definitely do this project yourself and save a lot of money because the materials are really pretty cheap. The cost is mostly in labor.
Check out this post to learn about countertop options and what the best countertop for you might be.
How much does it cost to make your own concrete countertop?
Once you remove labor costs, the price of making your own DIY new countertop is only $8-$15 or so per square foot. It’s a steal compared to paying for granite!
Are concrete countertops high maintenance?
Your concrete finished countertop will require some maintenance in the form of sealing them every year or so to prevent stains from appearing. While they do require maintenance, they don’t really require any more than granite or butcher block countertops do.
Do concrete countertops crack?
Yes, they can. The main cause of cracked concrete counters is not pounding out the air bubbles that were present from pouring the concrete.
Occasionally concrete countertops can develop hairline cracks as the result of natural shrinkage as the concrete continues to cure.
How hard is making DIY concrete countertops?
The process really isn’t hard or complicated to do. The hardest part is creating your mold… or was it pounding out the air bubbles? But when you look at it that way, making your own DIY kitchen countertops with cement is simple to do!
Once you install your countertops, you’ll need to seal them. If they start developing stains, be sure to remove the stains and reseal your counters.
Supplies
- Melamine coated particle board
- circular saw
- Quickrete’s Countertop Mix
Instructions
- Measure your cabinets, adding about ¾" on all sides to allow for overhang to determine the size of your countertops.
- Cut particle board strips to attach to the ends of the mold to create your countertip sides. Cut them 2¾" wide or as wide as you would like the thickness of your counters.
- Carefully wipe down the bottom of your countertop molds to ensure there isn't dust or debris that would mar your counter surface.
- Tape and caulk the seams of the mold.
- Cut pieces of rebar.
- Mix and pour the concrete. Fill the mold half-way. Add rebar, then pour the remaining concrete.
- Level the top layer of concrete.
- Bang the bottom of the mold with a hammer to make the air bubbles rise to the surface and help prevent cracks.
- Allow the concrete to cure for at least a week before removing the mold and installing your new countertops.
For More On Countertops:


I love this blog! I am going to enjoy watching it all come together! Thanks for sharing!
I love this, because we did the EXACT same thing to our kitchen a year or two ago.
I love my concrete counter tops! We did butcher block on our island for some contrast, but concrete everywhere else, formed/molded method as you did, and without dye or color.
What we did to get the bubbles out (and maybe save on the arm) was run an orbital sander on them like crazy.. the vibration did the trick.
I think you are a kindred spirit.. I don’t care for granite either!! Never have. 🙂
Amanda I love your blog! Your countertops are gorgeous! We definitely are kindred spirits! 🙂 I wanted to do butcher block so bad but we knew we wouldn’t be on point with the upkeep. 🙂 love your photography as well! I will definitely keep reading!
HOLY FUDGE!!!!!!! I HAVE BEEN STALKING…..(and I DO mean stalking) websites trying to find my OMG I LOVE YOU counter ideas……YOU HAVE SAVED MY SANITY! The husband and I just bought a insanely outdated (1973) house with some really FUGLY counters, we have now found our TO DO!!!!! Thanks!!!!!!
I am looking at DIYing my counter tops to cement. What are you planning to seal them with so they are water and stain resistant? By the way your counter tops look great!
Hi Kristi! We used several sealers but the one I was happiest with and would recommend is the one from Buddy Rhodes. 🙂 I will tell you it’s almost impossible to keep NO stains on it, it’s sort of like marble in that regard, but it creates a lot of patina. 🙂
We stumbled over here by a different web address and thought
I may as well check things out. I like what I see so now i’m following you.
Look forward to going over your web page again.
Do you recall how much this project cost you?….they look great.
About $700 total! 🙂
Howdy! Do you know if they make any plugins to protect against hackers?
I’m kinda paranoid about losing everything I’ve worked hard on. Any tips?
Very helpful blog….. I’m gonna try……is there a particular thickness I have to have??? Or can it be thin without wiring or rebates in it??? …… Say half and inch to and inch thickness
I would definitely do the wires in it…otherwise it will have no internal support and could crumble!
So i love, love your concrete countertops!!! How are they holding up? Would you recommend & would you do it again?!!
I’ll be addressing this in an upcoming post, stay tuned—or feel free to email me at [email protected] and i’ll give you the scoop. The short answer is yes, but with a few cautions. 😉
We also did concrete countertops and love them. There are so many amazing finishes you can get with a variety of cool techniques.
Here it is June 15, 2015. How are your contertops holding up and would you do anything differently? I am seriously thinking about doing this to our kitchen and need advice. Thanks!
I’ll be addressing this in an upcoming post, stay tuned—or feel free to email me at [email protected] and i’ll give you the scoop. The short answer is yes, but with a few cautions. 😉
I live in West Africa and am moving into a new apartment that has no kitchen. Yikes. I will take one of the rooms and make a kitchen out of it…and thought I’d like to try to do concrete countertops. You say there are few “cautions” so I’d like to hear them and know if I should go the route of concrete or not.
Thank you!
I’d also like to know how thick the molds were that you used. 🙂
Yeah, what was the cost estimate?
About $700 total. 🙂
I seriously love concrete countertops. They are unique, inexpensive, durable and fairly easy to do. Then they can be stained and sealed however you like. The possibilities are endless!
Hi Tania,
I just emailed you about being featured over at Remodelaholic, but sometimes my emails get caught in spam filters, so I wanted to leave a comment as well. Drop me a line at [email protected]. Thanks!
Good work. ?
We are in the middle of deciding on countertops for out DIY remodel. Big fun project that has our entire main floor under demo and construction! I am so curious how your counters are holding up and was wondering if you would share some photos of the patina that they are gathering? Thanks!
I was just thinking about inexpensive options to redo our kitchen counter top next year in our family cottage. A concrete counter hadn’t even crossed my mind until I stumbled upon this post. Thanks for the inspiration. It’s definitely a top contender.
Superb, what a weblog it is! This web site provides useful
data to us, keep it up.
That is a great tutorial, I have a small kitchen island that I am tired of the butcher block top and am thinking on doing this. Thanks for the tutorial!
Your projects are awesome. I LOVE the concept of your concrete counters but the amount of ads made it impossible to read on my phone(ads covered the whole project) and unbearabe to get through the article on my PC 🙁
If you have Google Chrome you can get an app called AdBlock. I have zero ads.
Good post. I learn something totally new and challenging on websites I
stumbleupon on a daily basis. It’s always helpful
to read articles from other authors and practice a little
something from other websites.
Wow I love Natural Stone tiles countertop
Awesome! I plan on doing countertops when I get to the kitchen project.
That doesn’t look like rebar in the photo. I think it is welded wire fabric. I’d guess 6 x:6.
These countertops look amazing. I love the industrial look. So modern, durable and artistic. Well done!