VIRAL Skeleton Hand Candle Holder (Dollar Tree Hack – 2 Ways!)
This post may contain affiliate links. As an Amazon Associate I earn from qualifying purchases.


I absolutely love Halloween decor – especially if I can DIY something extra spooky, on a budget! That being said, this skeleton hand candle holder might be my favorite Dollar Tree hack of all time!
And…it looks like many of you agree with me, since the video I made for this post went absolutely bonkers. 😱 With just under a million views, I think it’s safe to say this is a VIRAL craft!
Honestly, I knew this one was special when I dreamed it up in while wondering the aisles of Dollar Tree. So happy the masses agree!

You, too, can make these super spooky DIY Halloween decorations with just a few supplies, all available at the Dollar Tree!
Scroll on to find out how to make stunning DIY Halloween decor in 2 creepy variations! They both turned out SO cute and I will be pulling these out for years to come.
Don’t have a Dollar Tree near you, or prefer online shopping? No worries, I found similar items you can buy right off Amazon!
Mounted Skeleton Hand Lantern
I have made about 10 of these now—so easy and so cute. They really look high end and add to the spooky effect quite nicely!
✨ Watch the Video
Are you more of a visual learner? Here’s a quick (less than a minute!) video where I walk you through the entire project.
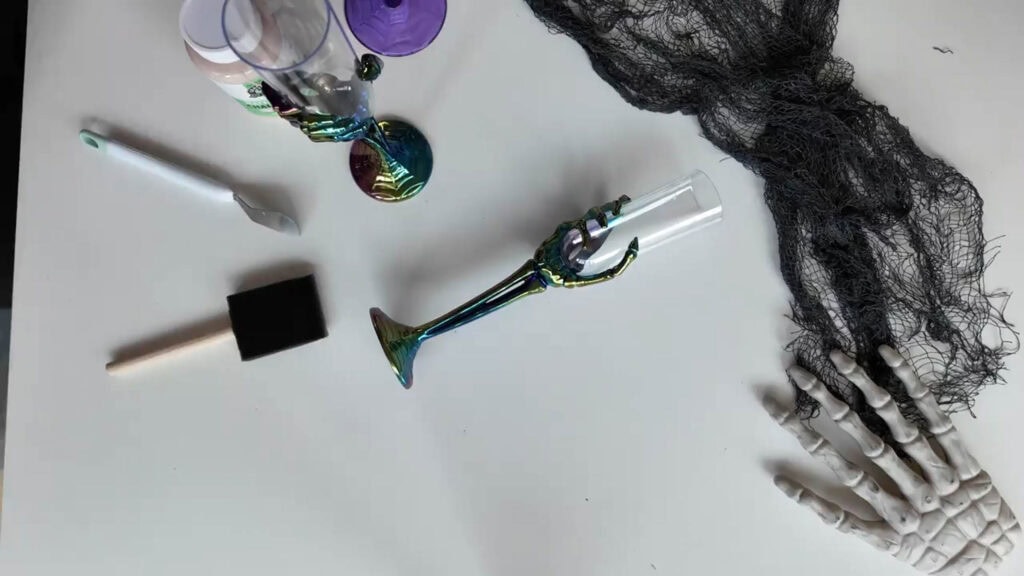
Supplies
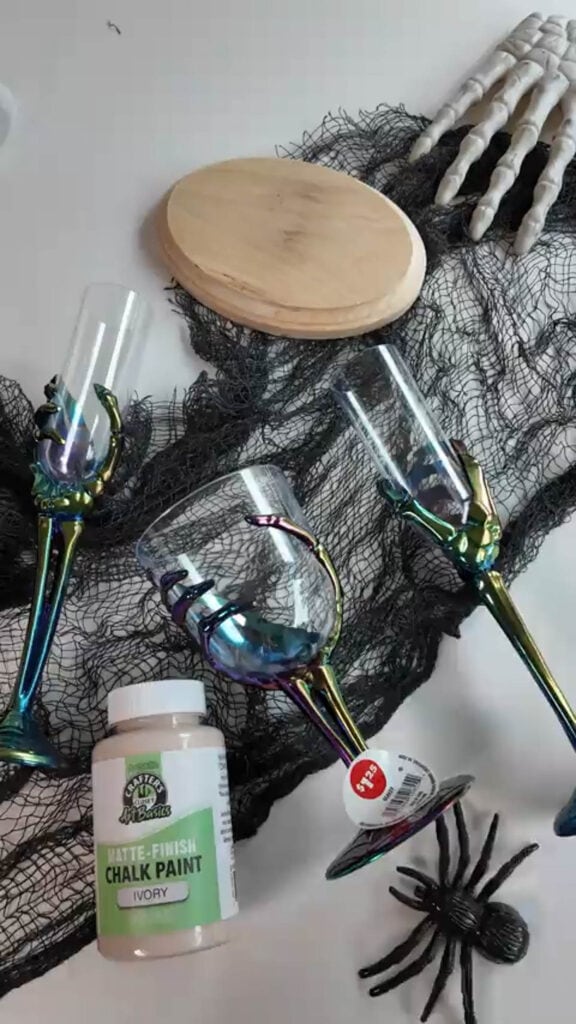
Here’s what you need to make this DIY skeleton lantern! I got everything at the Dollar Tree, but there are some similar options in my Amazon shop!
- Battery-operated tea light – I have to be honest here…I had a 50% success rate with the tea lights from Dollar Tree working. Some just wouldn’t turn on, no matter what I did. I also found it annoying to unscrew the lantern and manually turn on the candle every evening, so ended up buying these battery-powered tea lights with a remote instead.
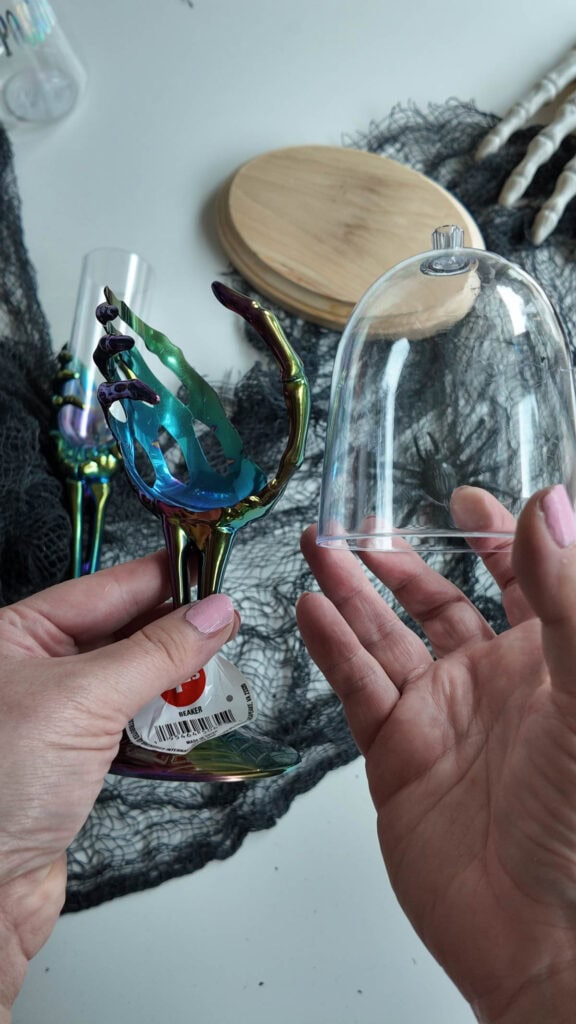
- Skeleton cups – Dollar Tree offers 2 different sizes—I used both the wine goblets and the champagne flutes for variation)
- Wooden plaques
- Ivory chalk paint
- Black craft paint
- Hot glue
- Lantern (found at Dollar Tree!)
- Command strips for hanging
Directions
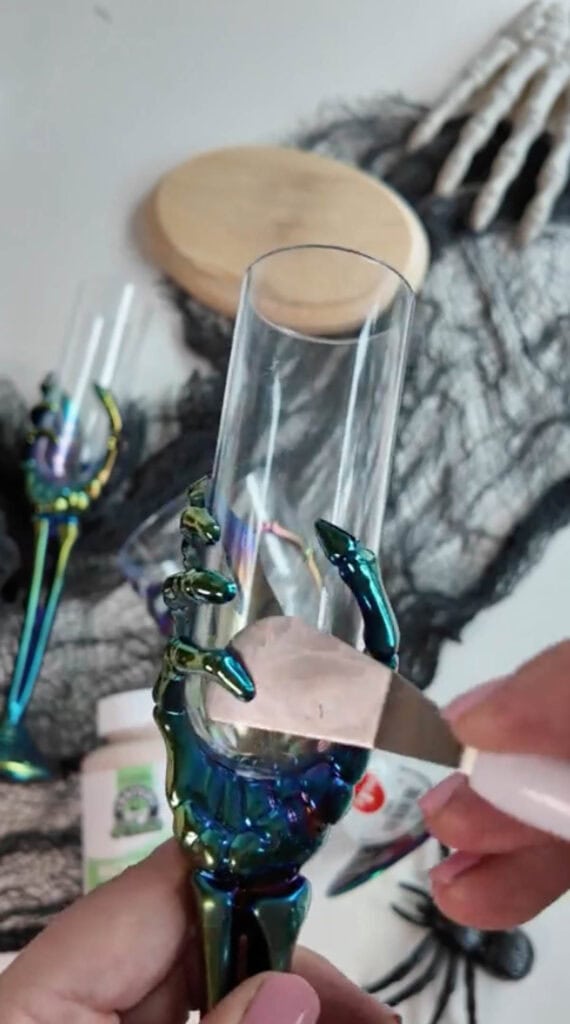
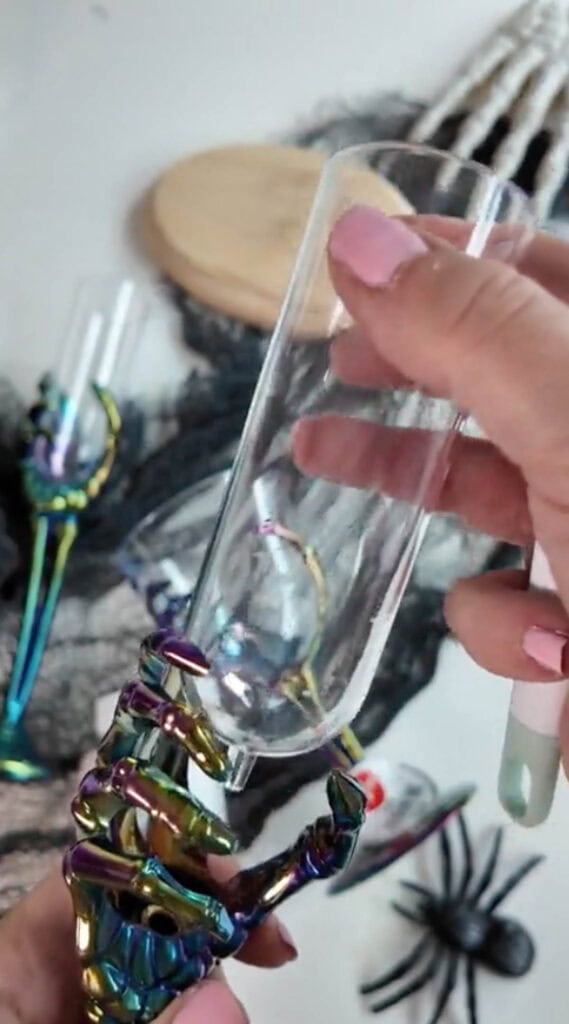
- Separate the cup from the skeleton hand using a craft spatula!
To do so, carefully slide the spatula between the fingers and the cup and then gently twist and pull on the cup until it comes loose.
This is the most time intensive part—definitely do not rush it or you’ll break the plastic fingers off.
If you do break a skeleton finger, it’s okay. You can reattach it with hot glue and then wrap some masking tape around it before painting.
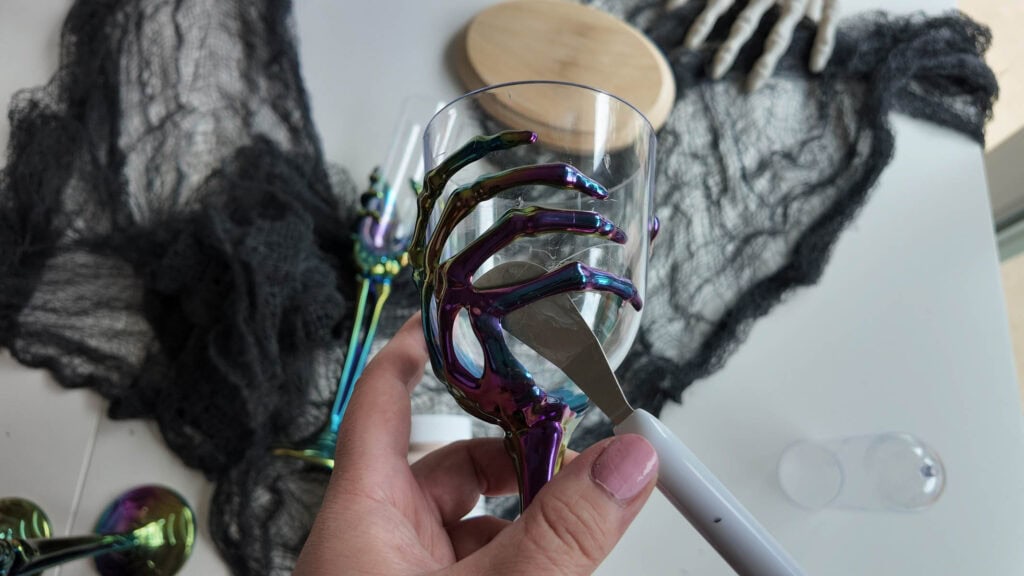
Pro tip: Don’t worry about scratching up the cup – you won’t be needing it!

Now, you should just have the skeleton hand portion – ready to be transformed!
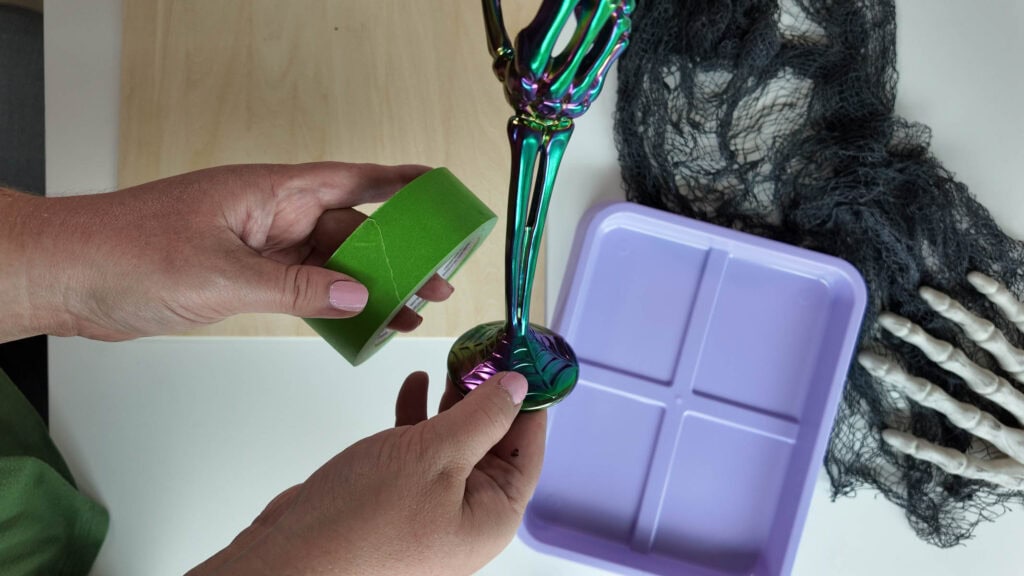
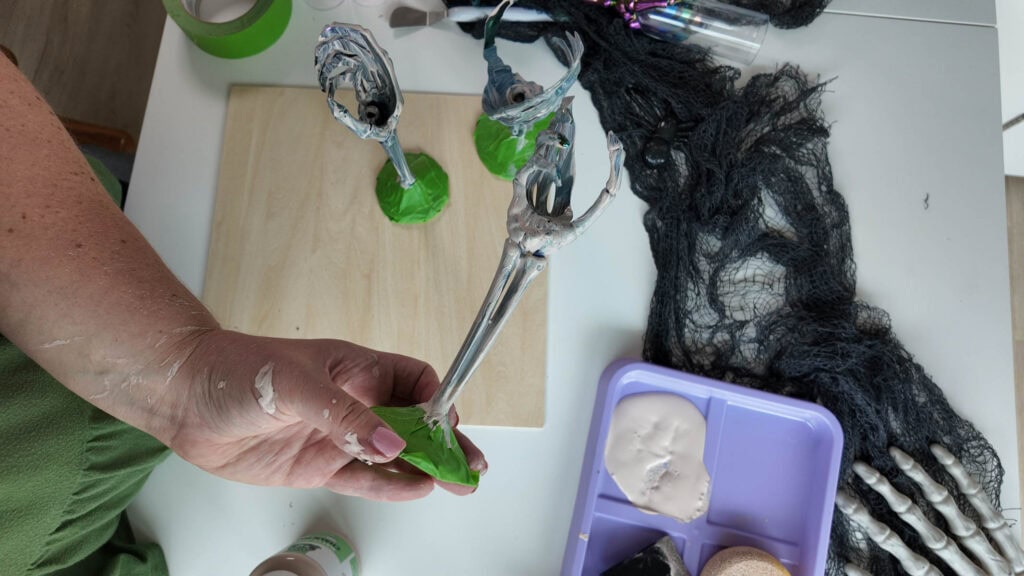
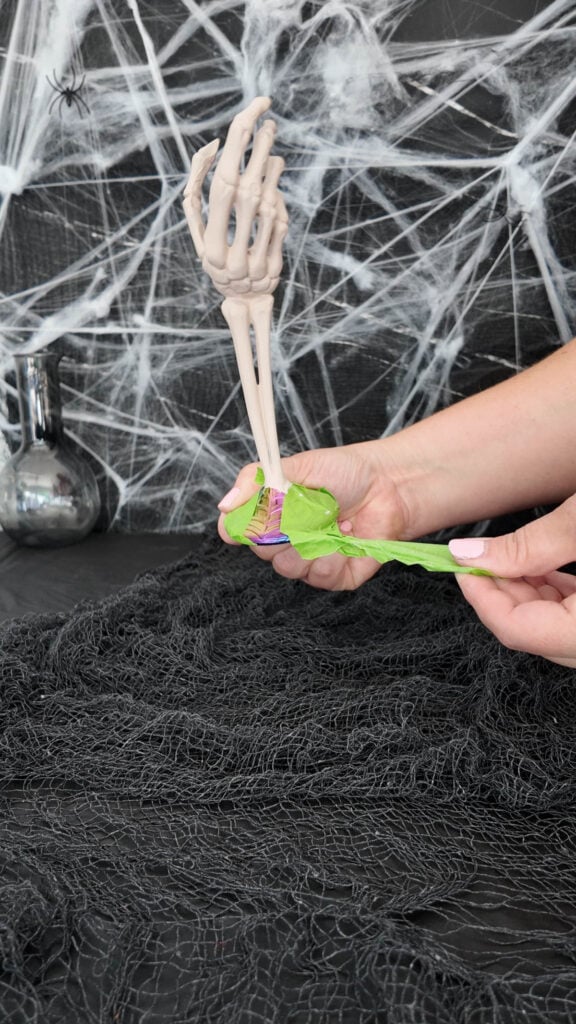
- Next, you’re going to paint the skeleton wrist and hand white!
Before painting, be sure to cover the base of the cup with painter’s tape to keep the white paint where you want it!
- Then, coat the skeleton hand with several layers of bone-colored chalk paint. Trust the process!
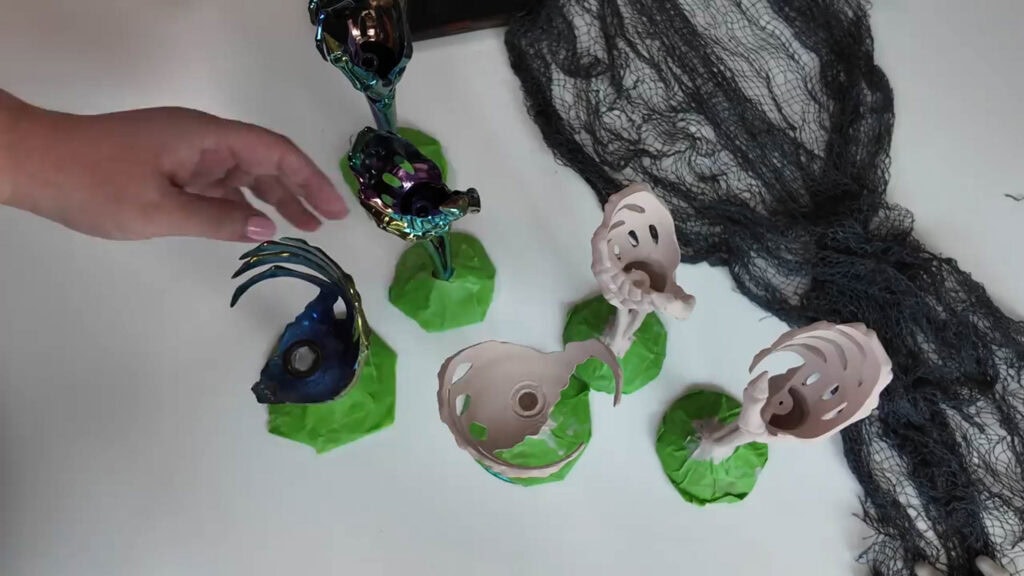
- Once the white paint is dry, remove the tape and paint the base of the cup with black paint!
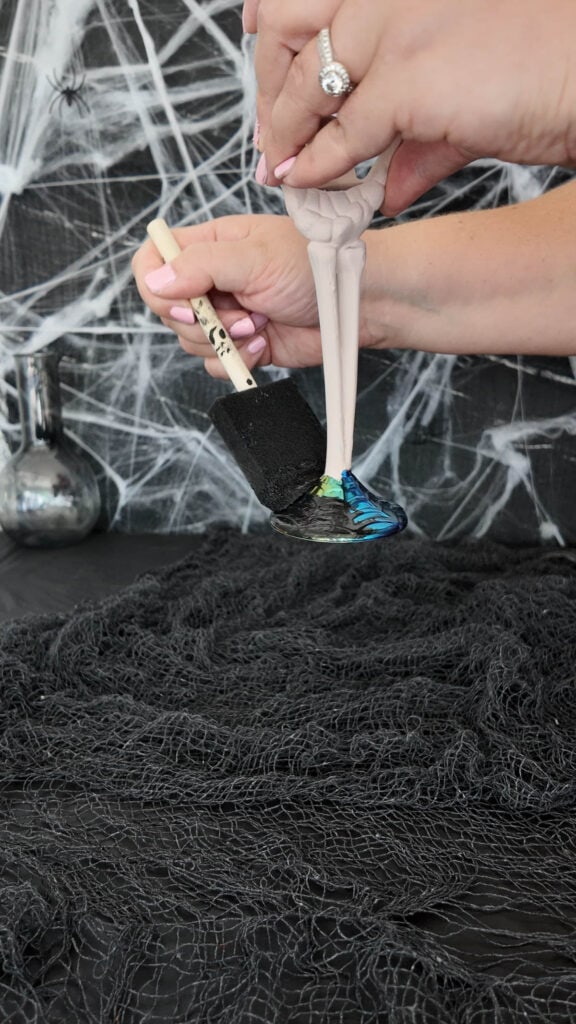
Allow skeleton pieces to dry.
- Meanwhile, you can paint the wooden plaques the same shade of black.
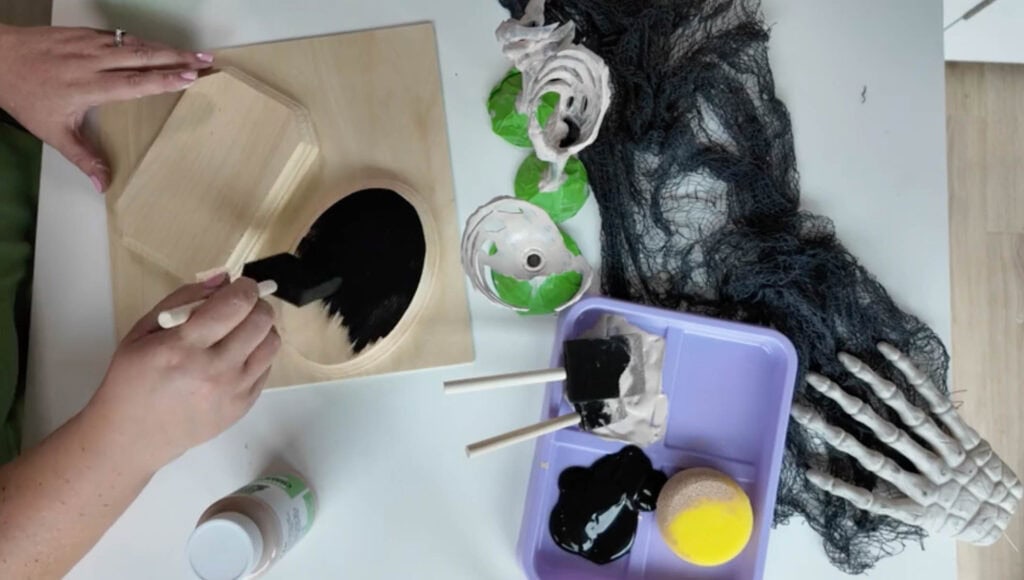
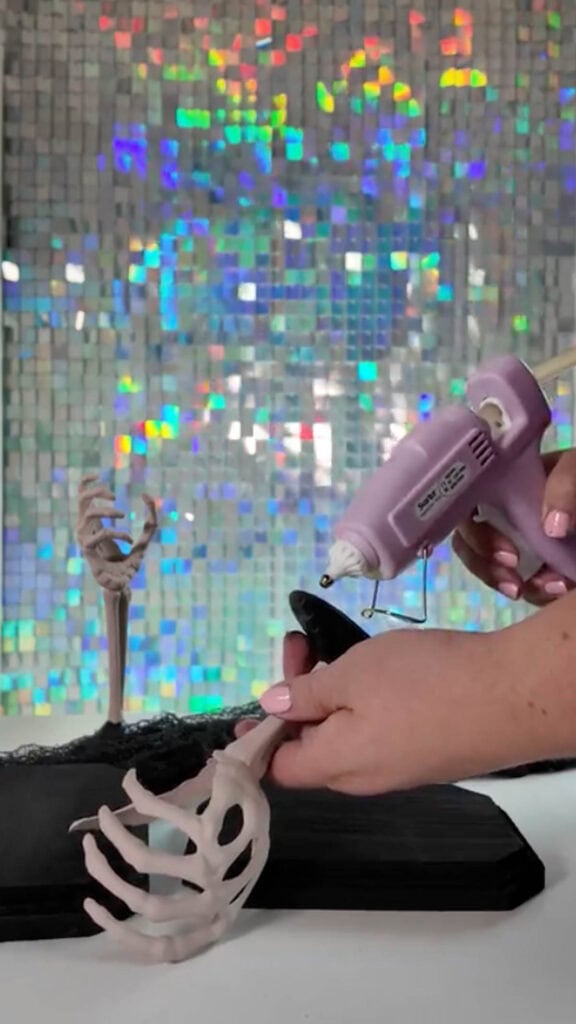
- Once everything is dry, you can add some hot glue to the base of the cup and glue it right onto the plaque. Set that aside.

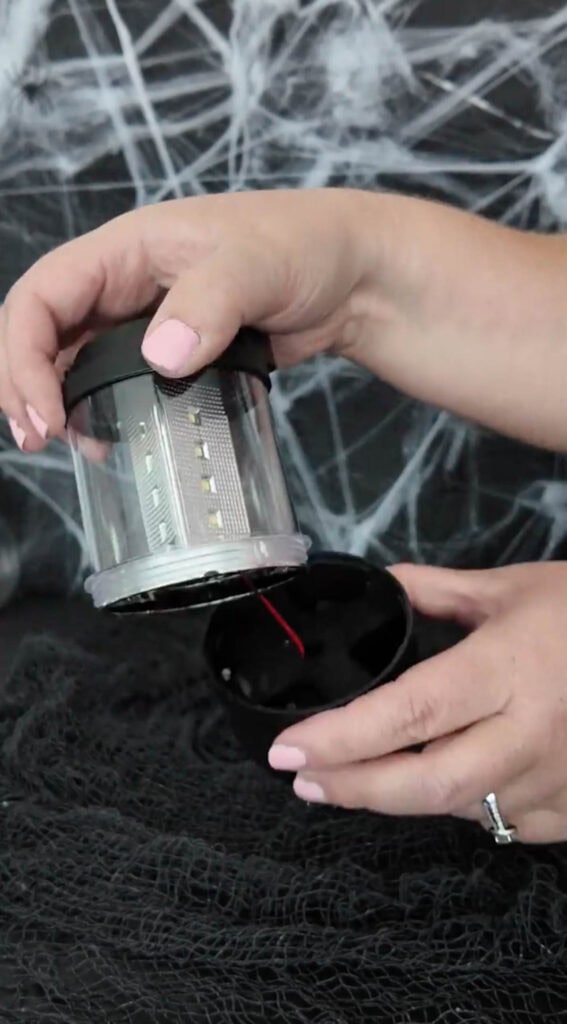
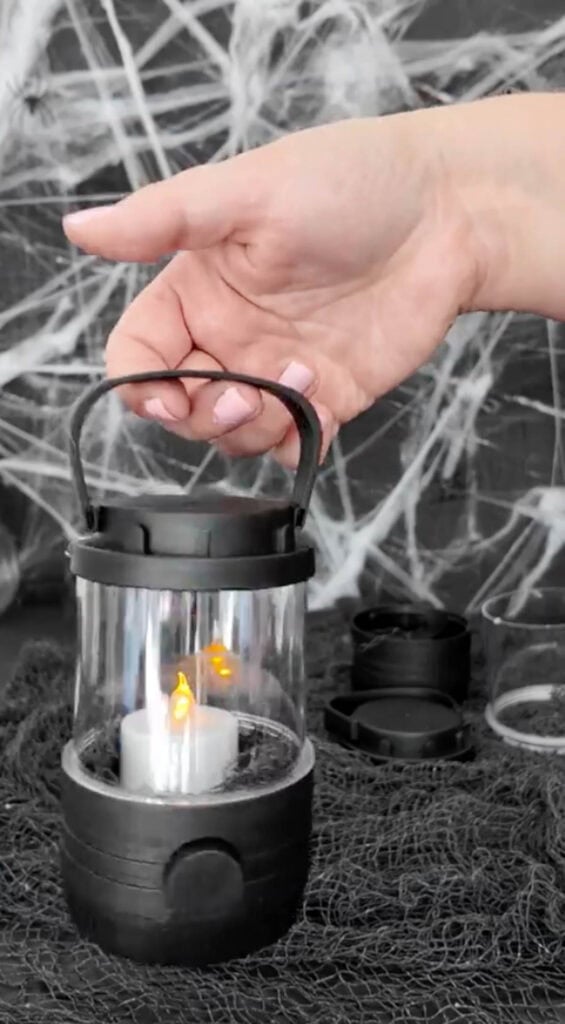
- Next, grab your mini lantern. You’ll want to remove the battery component from it to complete the next steps in your project!
I took the lantern apart and cut the small red wire that was attaching the battery component to completely remove it from the lantern.
The reason I did this is because when it had batteries in it, it became quite heavy and I was worried it would break the plastic skeleton hand.
Plus, flickering candles are way creepier!
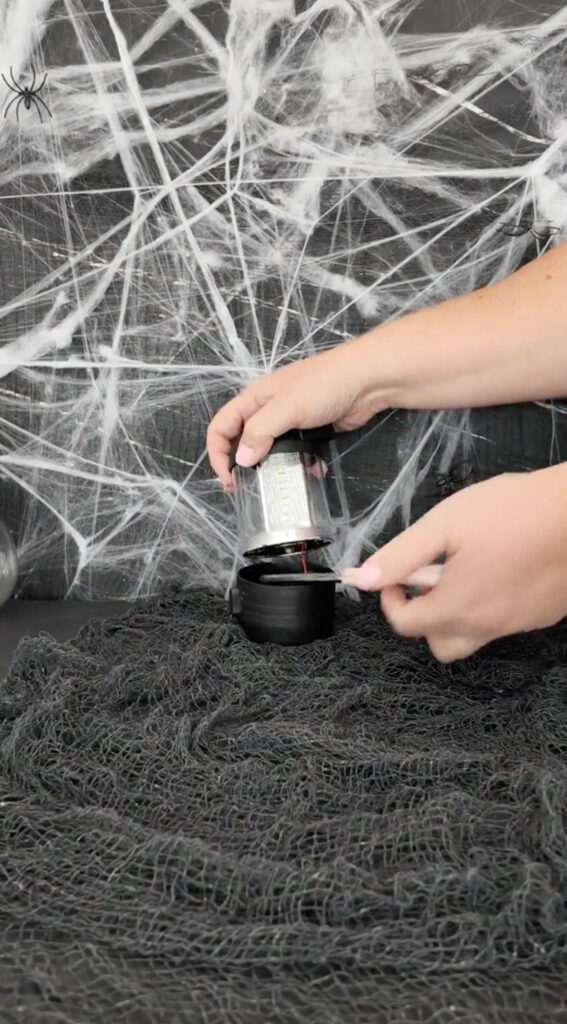
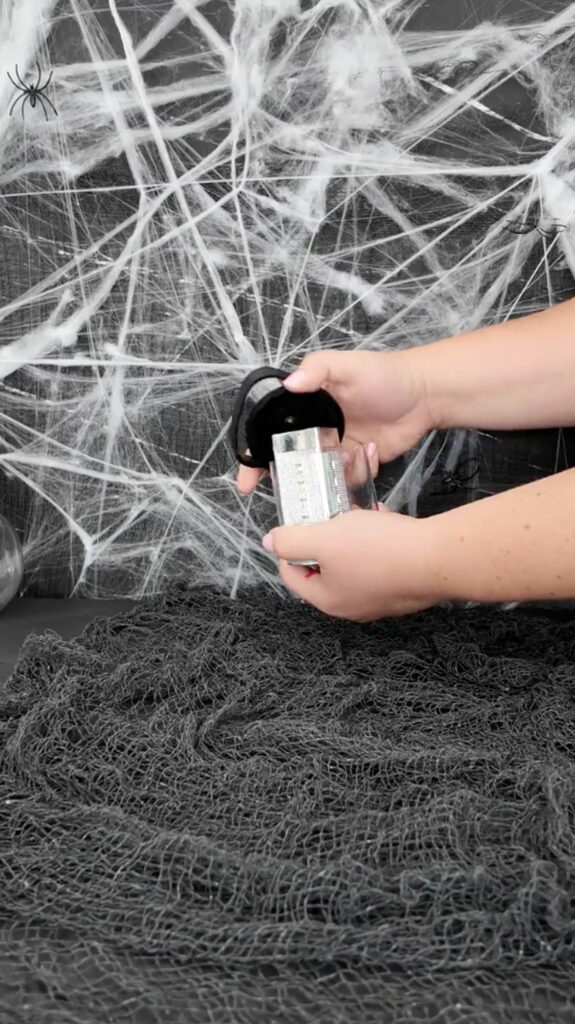
- Assemble the lantern back together (minus the battery) and add in a battery powered tea light. Hot glue the lid shut if necessary.
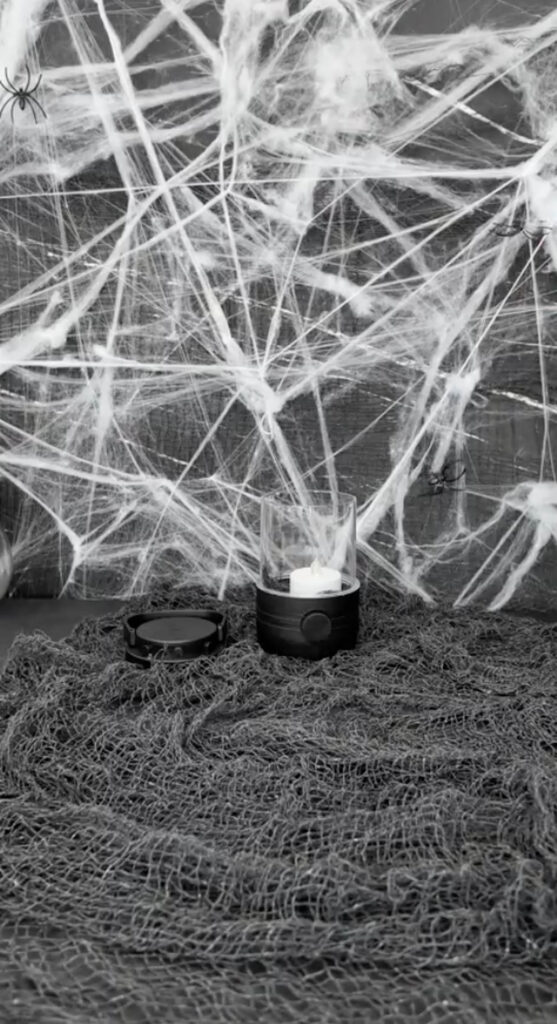
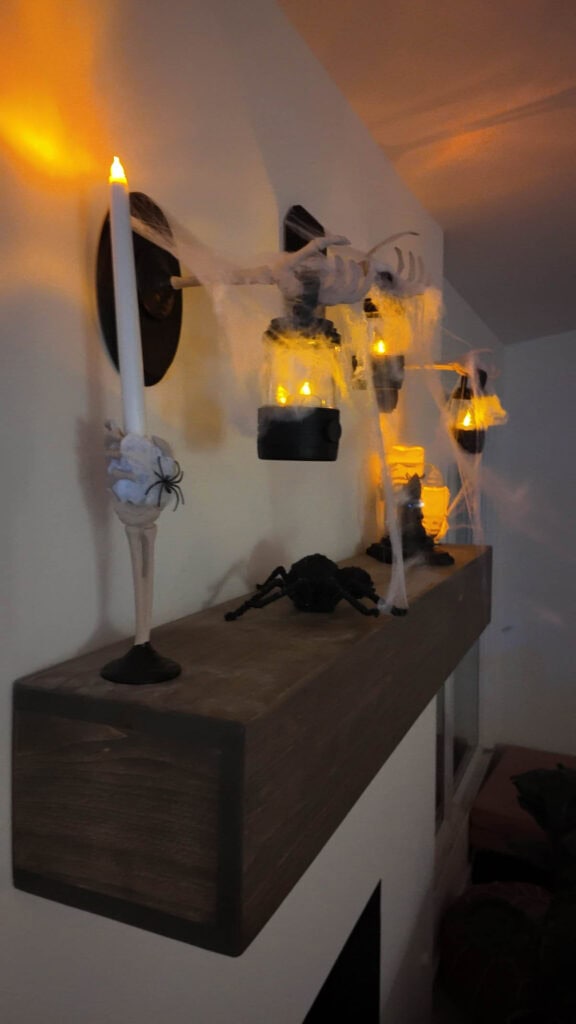
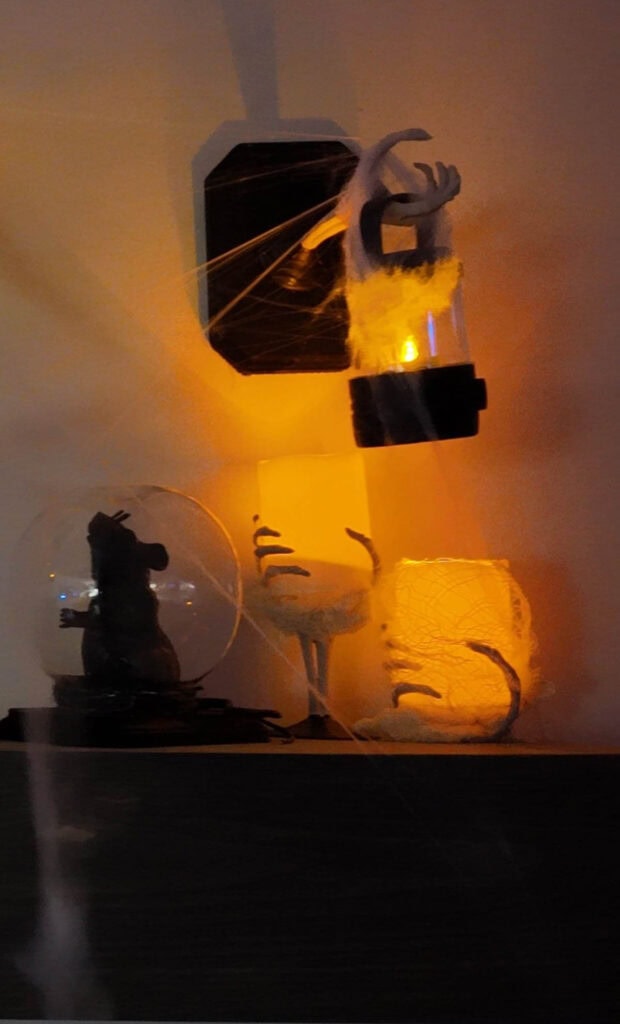
- Finally, mount the skeleton hand plaque on the wall with command strips, hang your mini lantern on the hand, and add some optional cobwebs.
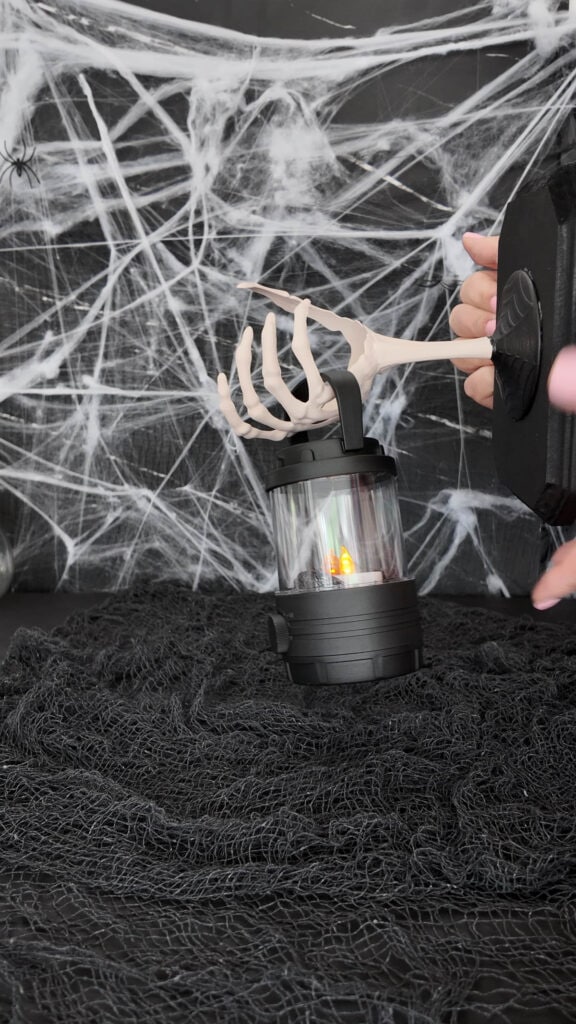
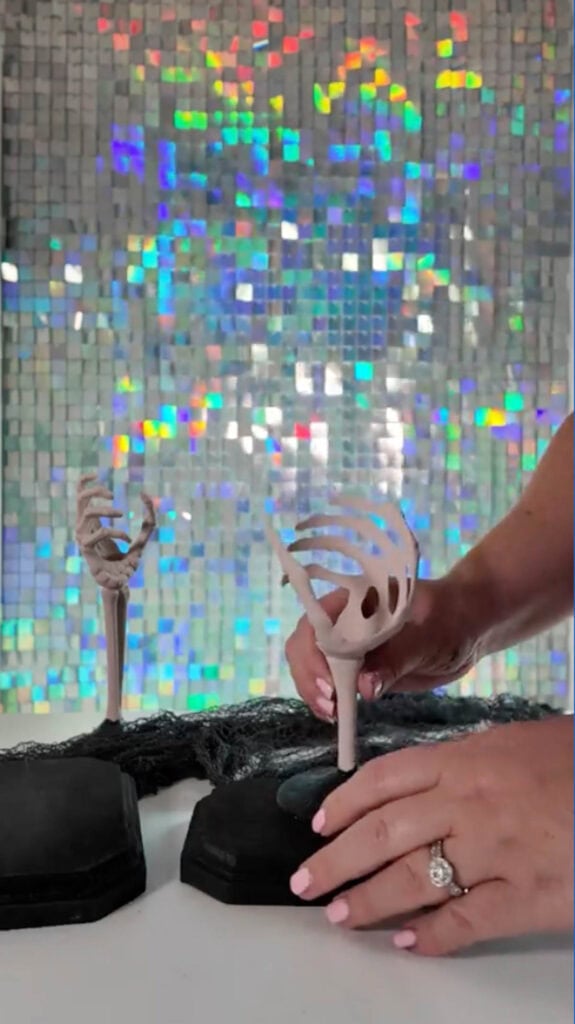
- Now, you’re skeleton hand lantern is complete!

Creepy, right?!
Skeleton Hand Candleholder
You can make this next DIY with the skinny or wide Dollar Tree skeleton hand goblets – your choice! I can’t believe these cups are only $1.25 each!
Check out all the details on this easy Halloween decor DIY below.
Supplies
Here’s what you need- I found all the supplies at Dollar Tree but linked similar items in my Amazon shop:
- Skeleton cups (Dollar Tree offers 2 different sizes)
- Ivory chalk paint
- Black craft paint
- Hot glue
- Battery-operated candles – taper or pillar-style
- Painter’s tape
Directions:
- First, you’ll need to separate the cup from the hand using a craft spatula.
Again, use your spatula to gently wedge between the skeleton hand and cup to loosen. After a little bit of work, you can twist and pull carefully on the cup until it releases.
- Cover the base of the skeleton hand decor with painter’s tape and paint the wrist and hand with chalk paint.
Same as above, you’ll want to do SEVERAL coats!
- Allow the paint to fully dry. Then, paint the base of the cup black.
- Once everything is dry, you can simply add battery-powered candles and display your new DIY skeleton hand Halloween decor.
Depending on the cup size you started with, you may have to experiment with candle sizes for the look you want!
I used a tall, tapered candle tucked in with some faux cobwebs in one of the thinner skeleton goblets.
I also used a flameless pillar candle in another wider style.
Now, your skeleton hand candle holder is ready to display!
Add some extra cobwebs and some plastic spiders for extra spook & enjoy!