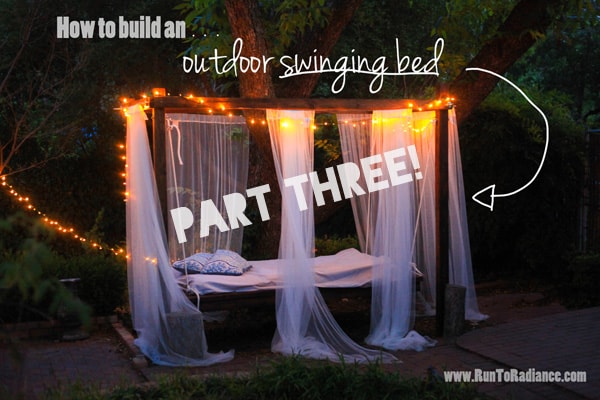
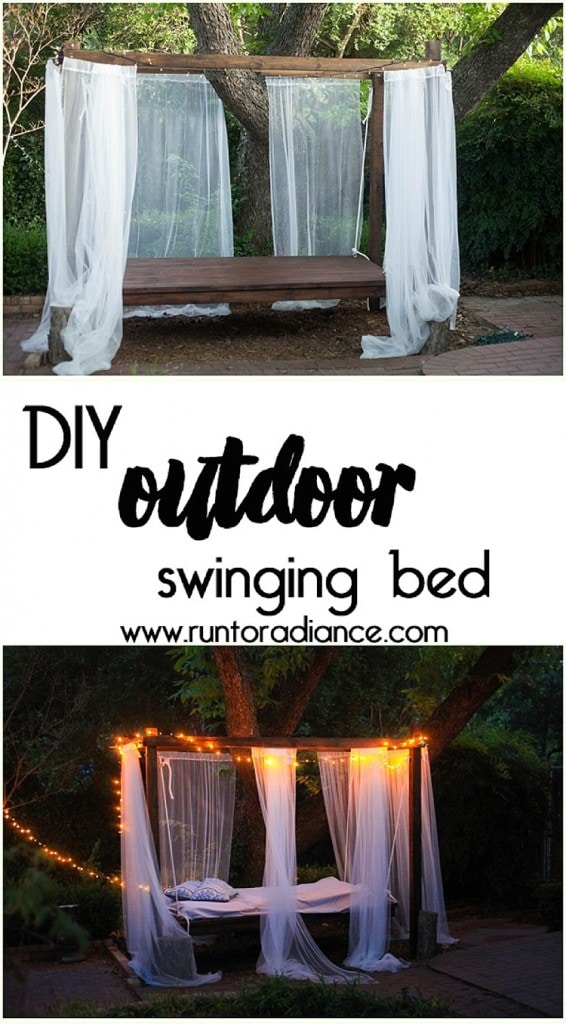
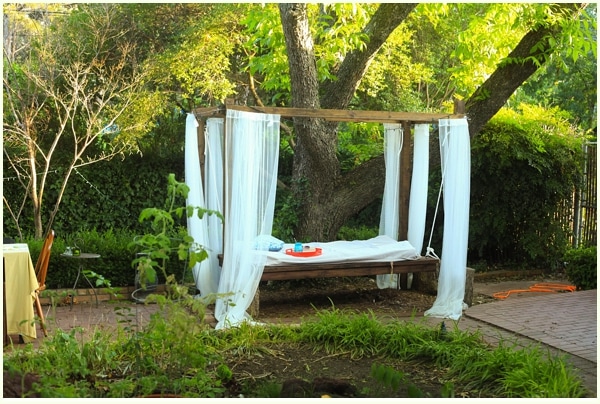
How to Build an Outdoor Swinging Bed- Part Three of Three
This post may contain affiliate links. As an Amazon Associate I earn from qualifying purchases.
How to Build a Hanging Bed- Part 3: Hanging the Bed
Building an outdoor bed had been a dream of mine forever, but I had no idea how to build a hanging bed! Luckily, it’s a lot easier than you would think…an outdoor swing bed is totally worth the effort! Although it isn’t hard, there are a lot of steps to this project, so I split the tutorial into three parts to avoid a super long blog post. If you missed it, you can check out part one of the tutorial here, and part two here!
Also, I was so excited to see this little ol’ blog featured on CNN Living yet again- this time for our hanging bed and backyard! If you haven’t seen it yet- you can check out the article here:
Hanging the Bed
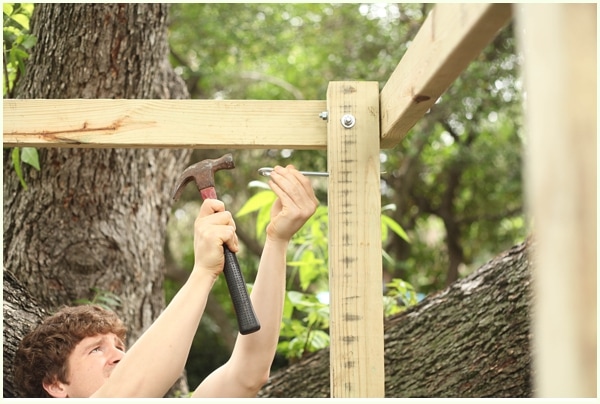
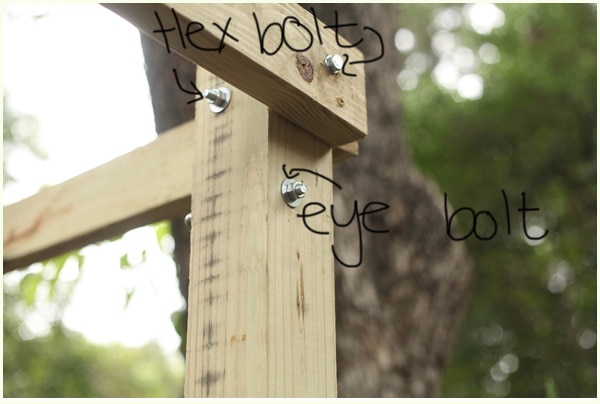
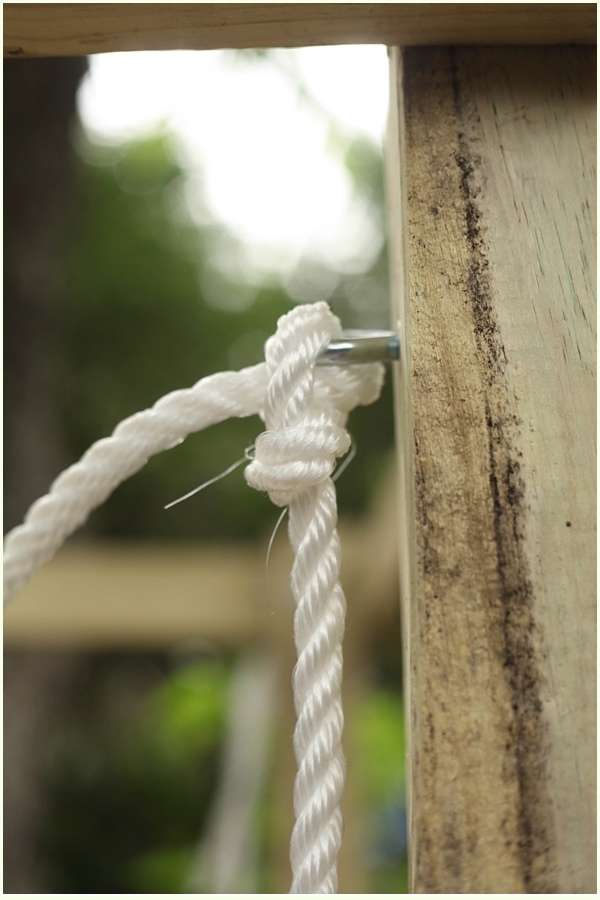
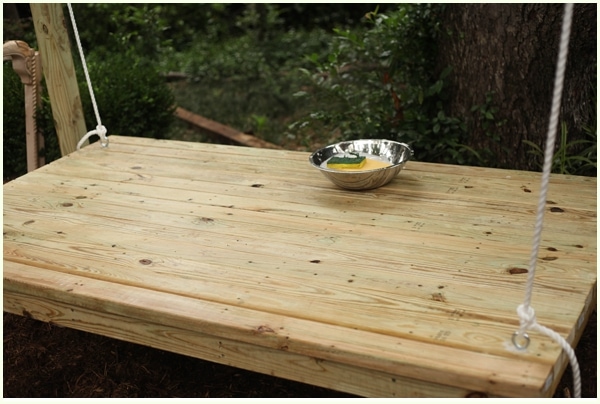
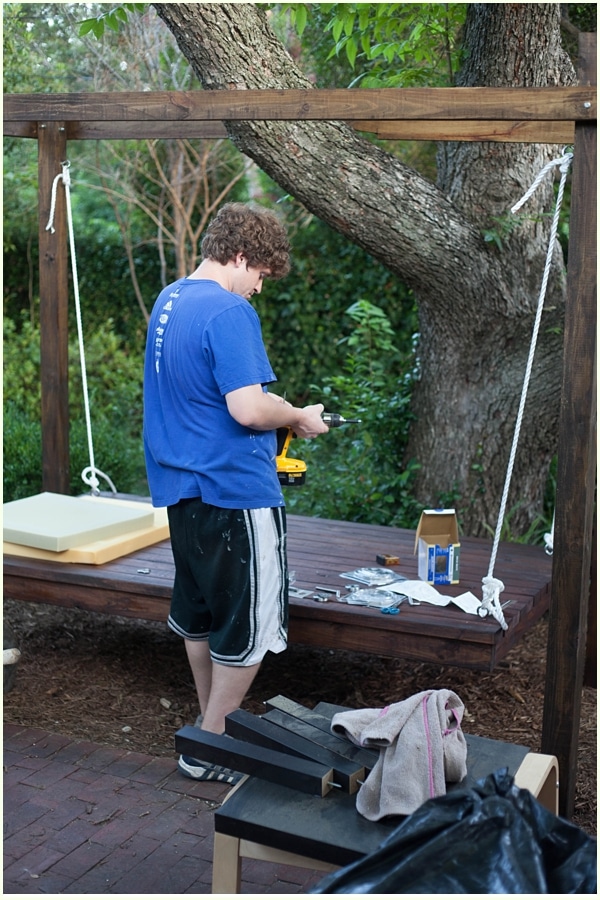
Back to the tutorial! So when we last left off you had your bed built, and the frame built and stabilized with cross beams. Now it’s time to actually hang the bed- but first you’ll need to install eye bolts on both the bed and the top of your posts. We used a 3/8 x 6″ Eye Bolt with Nut![]() that looked like so:
that looked like so:

Installation was very similar to the hex bolts we installed in the cross beams- we measured the height to make sure they were the same on each post, then marked the spot, drilled a pilot hole and hammered in the eyebolt. We slid the washer and then the nut on the other side and tightened the nut extra tight. No falling off please!
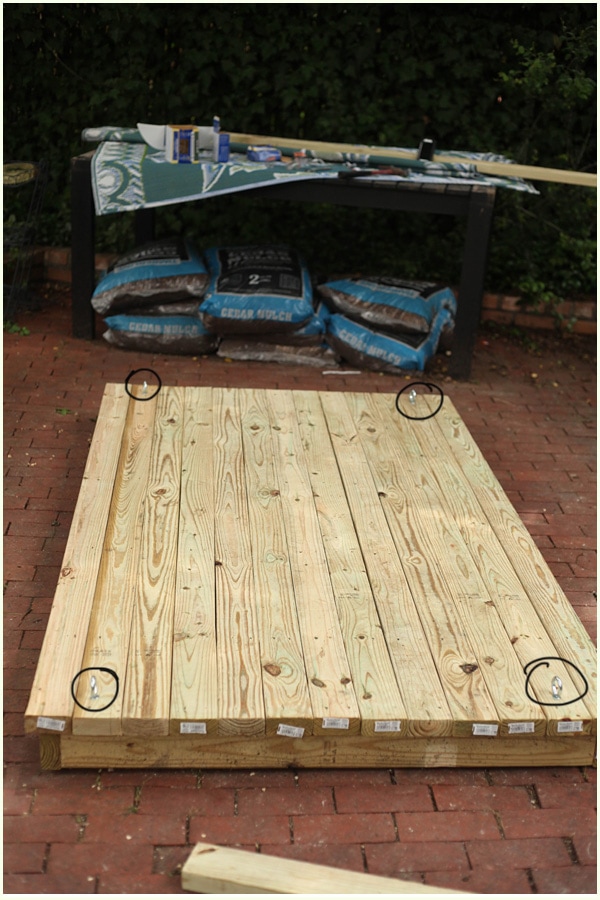
For the bed, we did the same, measuring to make sure each spot was even. We did ours several inches in on each side and hammered them in. We then flipped the bed on it’s side and I tightened the nut with a wrench while Scott held the bed in place. You want to make sure the nut is extra tight- this is super important!
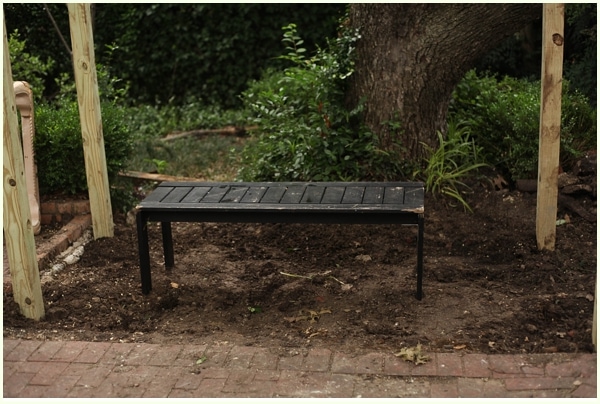
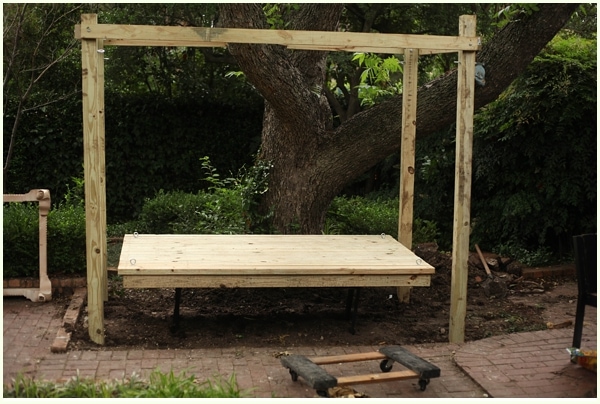
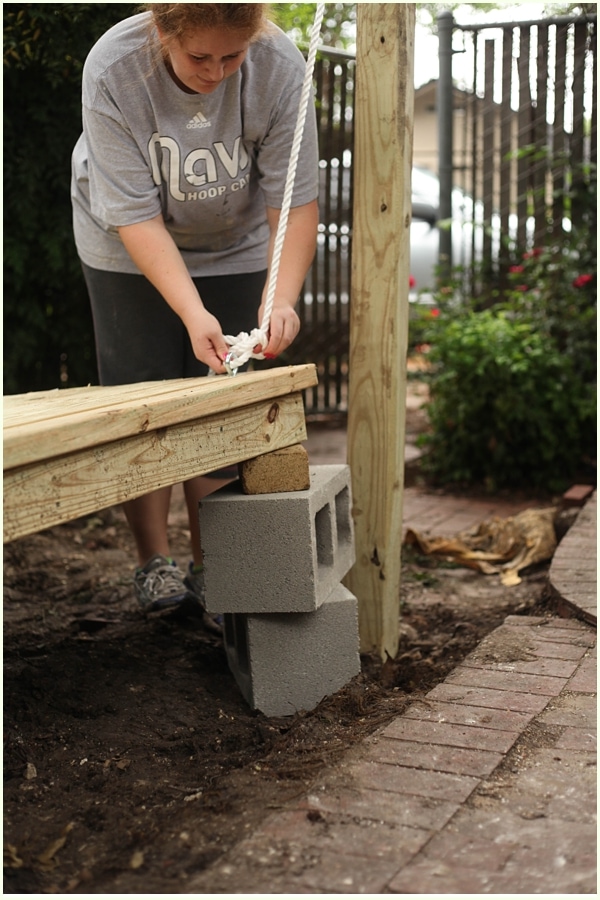
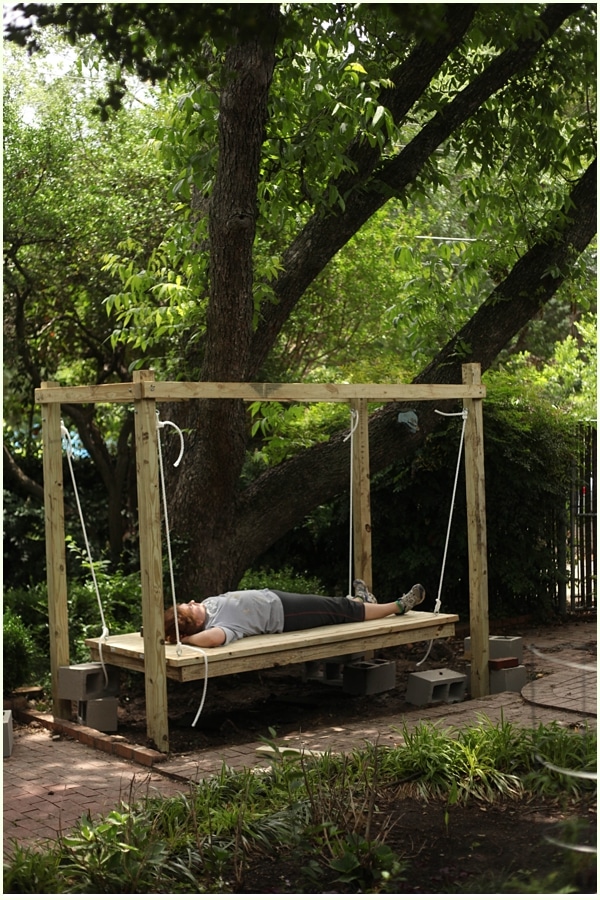
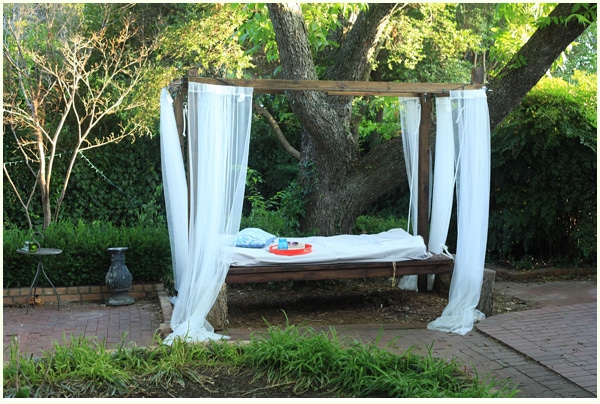
Now it was time for the hardest part of all…hanging the bed. Problem one- we needed to have it off the ground so we could tie the rope on to suspend it. Obviously holding it while I tied the rope was out of the question. We finally came up with the idea of using a bench we had from our outdoor dining set to hold the frame up while we worked on the ropes. We figured if it could hold 2-3 people, it could probably hold the bed up…and it did. 🙂 This also put the bed at the right height and allowed me to spend time to make sure the knots were tied properly.
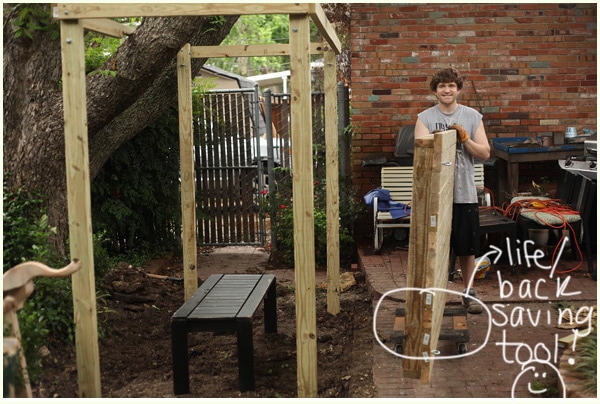
Challenge number two- getting the bed over to the frame. Ya’ll….this thing is HEAVY. I would guess 200 pounds at least. I couldn’t lift my side (although Scott totally could of course!). Luckily, we had this dolly from moving so we stuck it on there and carefully moved it over to the frame.
Attach the Hanging Bed Using a Bowline Knot:
First, though, let me tell you an embarrassing story…who doesn’t love those, right?
First of all, let me premise this by saying Scott and I go to Home Depot at least once a week. Minimum. They totally know us there, some people by name and others just as the crazy people who are remodeling their entire house. 😛 So we go to Home Depot to shop for some finishing touches for our swinging bed, and head for the ropes and chains section (can you already see where this is going) to figure out how on Earth we are actually going to find something strong enough to support this thing. I knew I wanted rope and not chains- I’m a sucker for rope- I love the texture and the look (see my previous rope centered projects here and here). I’m reading the back of the rope packages to see which would work for us and they all say the same thing “not intended for use of supporting human weight”. I told Scott what it said and told him it was probably a liability thing and surely if it supports 400 pounds per strand of rope (in our case since we are suspending it from 4 corners 1600)- surely it was fine.
My husband is very thorough and always wants to make sure he keeps us safe. I totally appreciate that because I am definitely one to just go with it and see what happens. He flagged down a Home Depot employee we recognized and said something to the effect of, “Hey man, we are building a swinging bed in our house and these ropes all say they aren’t used for supporting human weight. What kind of rope can we use to build a bed that will hold at least 2-3 people that are swinging or moving around?”
My face immediately turned bright red and I blurt out, “it’s for outside! It’s an outdoor swinging bed- not for a bedroom or anything!” The guy just stared at me and started to laugh and I wanted to sink into the floor. Now every time I go there I will have to sneak into the rope section because they think we have a thing for rope…we do just in a very innocent, decorative, non sexual, non 50 shades type way. Yikes. So there you have it- an embarrassing story. Not nearly my worst one- that would probably be the time I flashed the entire school when I was the lead in a musical (but at least I got a standing ovation…!). Maybe I’ll share that one another time! 😛
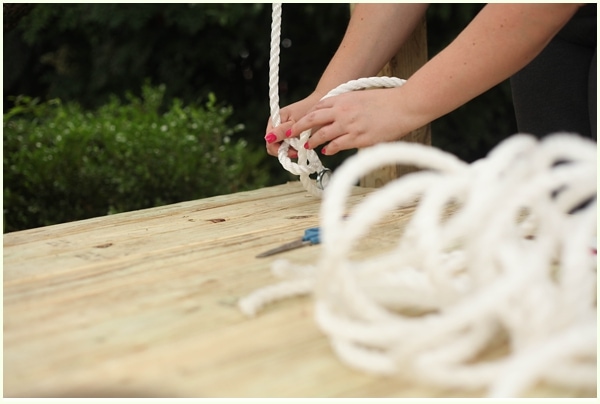
Now comes one of my proudest DIY moments of all time. I taught myself how to tie a Bowline Knot through using this awesome site. The Bowline is pretty ideal to use because the more weight that pulls on it the tighter the knot gets. I tied eight in all- four on the posts and four on the beds.
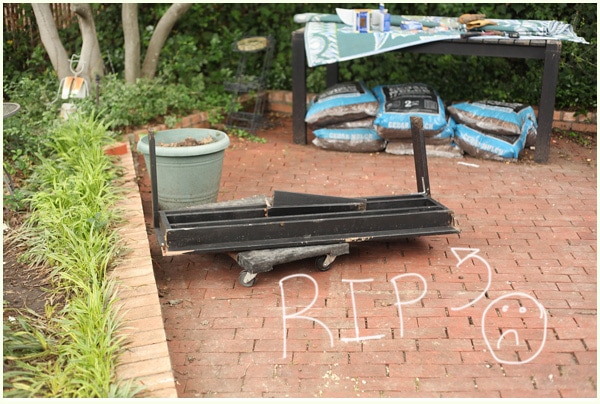
Then it was time for the moment of truth. Would it hold? Would the entire frame come crashing down? Would the knots stay in place? We were ready to find out- but first we had to get the bench out from underneath. This was something much harder then we anticipated…we couldn’t lift it up high enough to take the bench out and both of us were weary of crawling underneath it to get it…so we made a very tough executive decision and broke the benches legs 🙁 To be totally fair- it was something that was from the side of the street and was bowing out quite a bit anyways, and we were ready to move to chairs rather than bench but still sad. RIP Benchy, you totally saved the day. <3
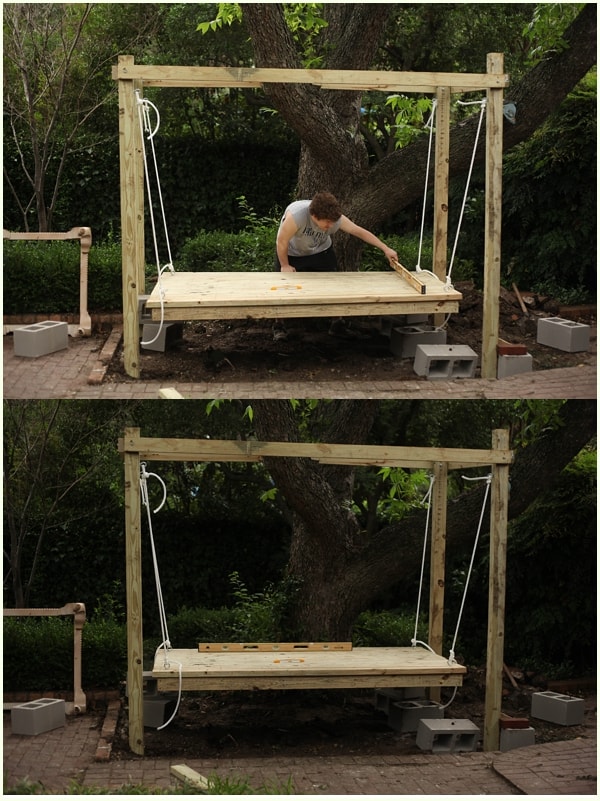
Use Level to Verify Hanging Bed is Straight
We held our breaths…and the swing held! Some of the ropes were a bit longer than others, so we employed a hybrid method using concrete blocks and Scott’s man muscles to raise all four corners up to the same height, using a level to check our progress.
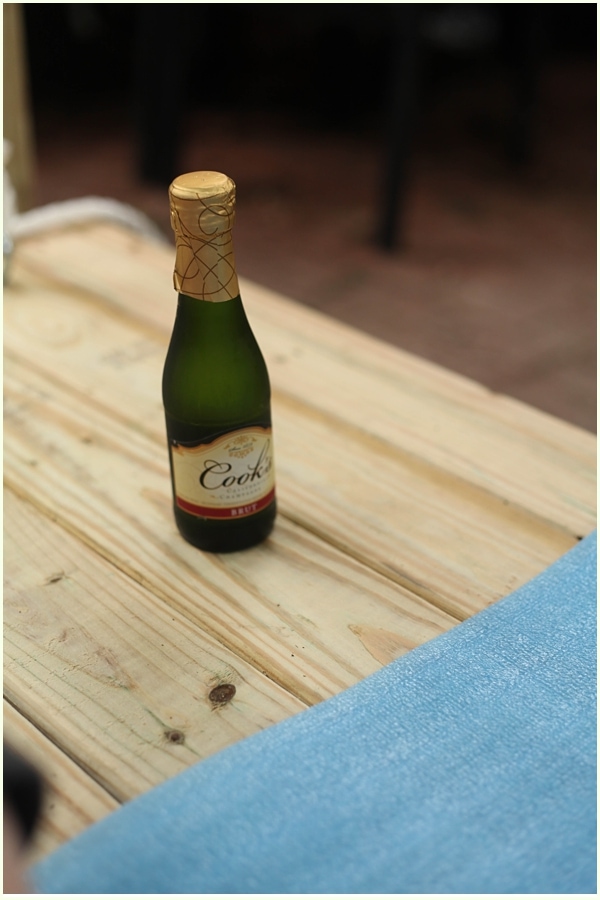
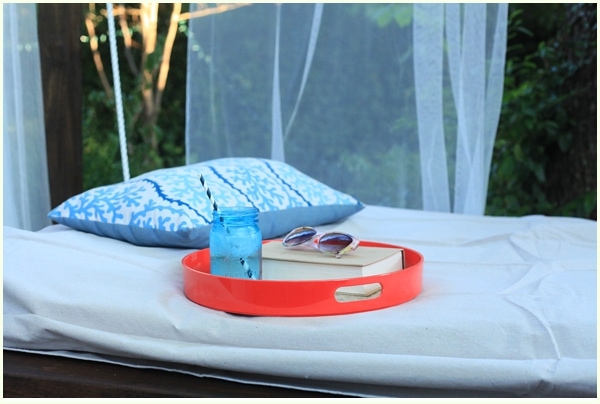
Once everything was all beautiful and wonderful…it was time to enjoy! I took my first catnap out there, swaying in the breeze- after celebrating with a mini bottle of champagne of course! 🙂
We also added some mulch beneath the swing- we went with Cedar because it is a natural bug repellant…which is a GOOD thing for me!! 😛

Prepare the Hanging Bed for Stain
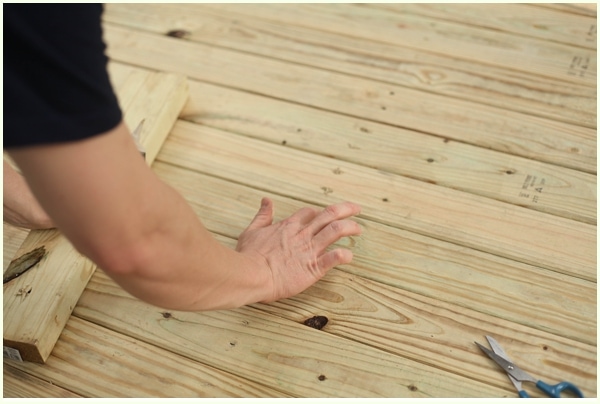
The next day, it was time to use wood filler to hide all the nail holes. Make sure you purchase stainable wood filler (we used this one here)![]() , and test it in a hidden place first to see how it matches up. We used an entire tube and went over every hole we could find.
, and test it in a hidden place first to see how it matches up. We used an entire tube and went over every hole we could find.
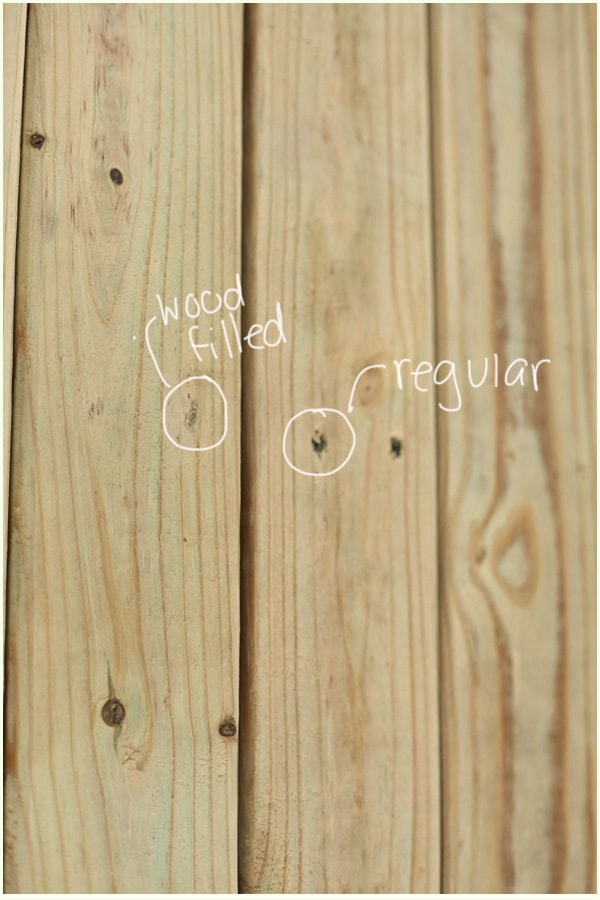
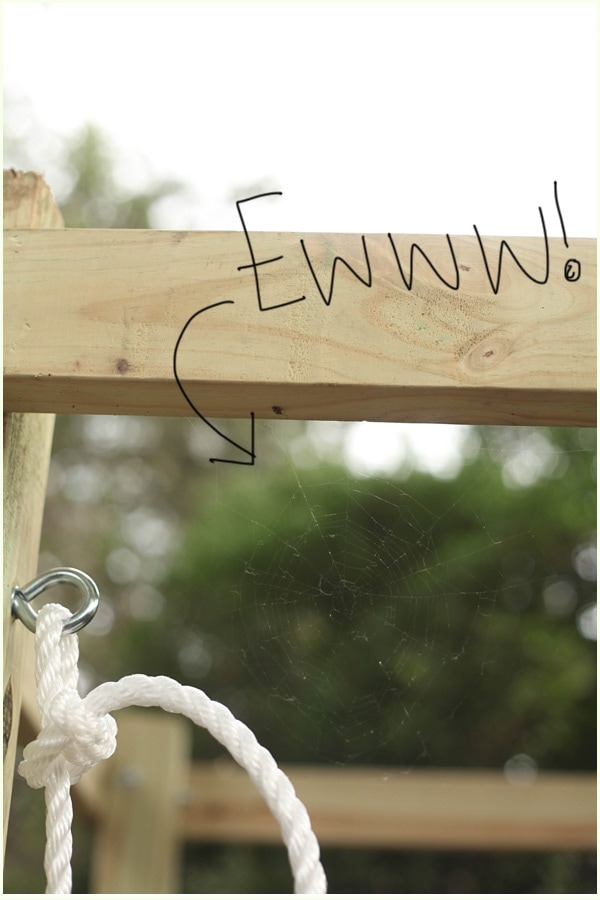
After allowing 24 hours to dry, we lightly sanded everything, and cleaned it with soapy water, rags and a teeny, tiny broom. 🙂
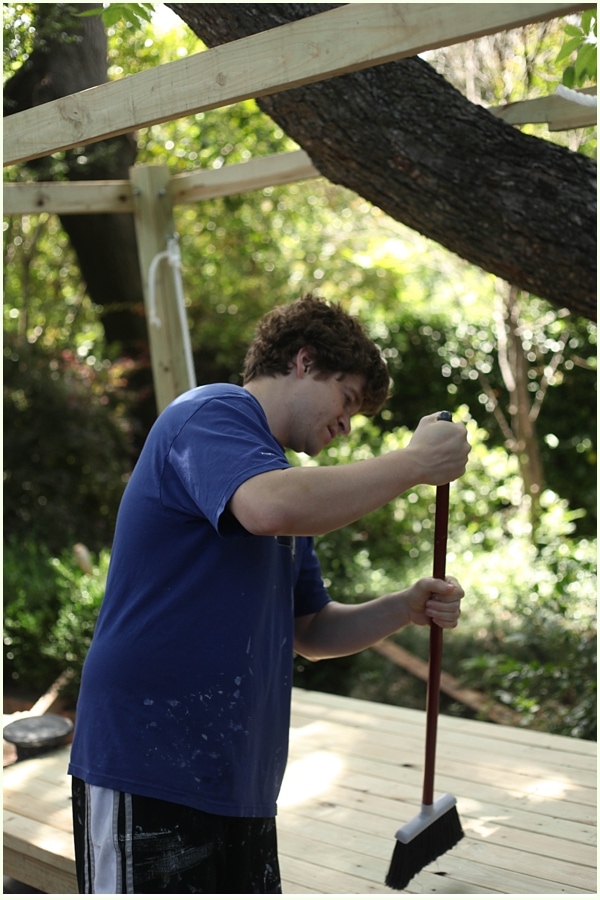
We (Scott) even had to use that teeny broom to remove a spider web that a very, very quick and ambitious spider had weaved in a 2 hour period somehow.
Once everything was so fresh and so clean, clean, we then applied this awesome wood conditioner![]() . DO NOT SKIP THIS STEP. I know it will be super tempting to just go straight to stain but you will be super sad if it comes out streaky and weird looking. Plus- the wood conditioner smells amazing!! We applied it with a rag, buffing and rubbing it in.
. DO NOT SKIP THIS STEP. I know it will be super tempting to just go straight to stain but you will be super sad if it comes out streaky and weird looking. Plus- the wood conditioner smells amazing!! We applied it with a rag, buffing and rubbing it in.

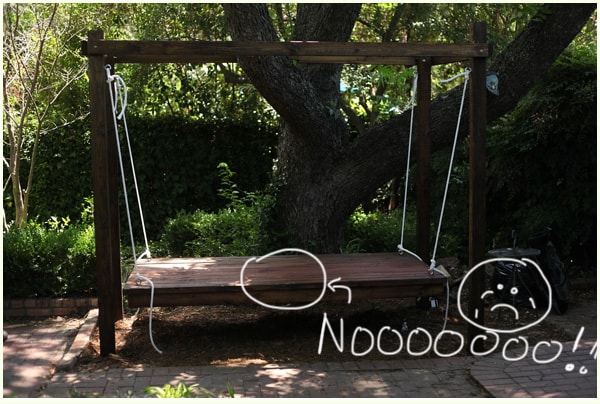
Any other Ron Swanson fans out there? Does Feed-N-Wax remind anyone else of Food-N-Stuff? 😛 It doesn’t take long for wood conditioner to dry, so by the time we did the last bit we worked in the same order we applied the conditioner to apply stain. We used Minwax’s Honey Stain![]() …and here is where I made the biggest mistake of the week. I forgot to shake the can…don’t forget this. Otherwise…well you’ll see what happens here in a minute. We had bought one of those fancy stain brushes after hearing everyone rave about it and I was disappointed in it…it took so long. I definitely prefer using sponge brushes (like the ones you can pick up for $1 or so in the paint section.) You can also use a rag. If you were smart, you would wear gloves and a mask. We did neither which resulted in being covered in stain and feeling nauseous. Not good!
…and here is where I made the biggest mistake of the week. I forgot to shake the can…don’t forget this. Otherwise…well you’ll see what happens here in a minute. We had bought one of those fancy stain brushes after hearing everyone rave about it and I was disappointed in it…it took so long. I definitely prefer using sponge brushes (like the ones you can pick up for $1 or so in the paint section.) You can also use a rag. If you were smart, you would wear gloves and a mask. We did neither which resulted in being covered in stain and feeling nauseous. Not good!
So here’s why you MUST SHAKE YOUR STAIN CAN….everything was going great- the stain was beautiful, la la la….then we get to the end and everything turned RED. Like an ugly purpley red. A very obviously different from the rest of the swing red. See?
So then what happened?
We bought another can of stain and Scott restrained the entire thing after summer school while I was at work. Poor baby. But that red had to go- way to take one for the team!
Use Weather Seal to Prevent Water Damage to Outdoor Swing Bed
After letting that dry for 24 hours it was time to weather seal it. Since we used treated wood it would have probably been okay to skip this step but we didn’t want to risk it so we got a weather sealer that was in a spray can![]() . We used two cans, one for each layer, and did two coats. It was really easy.
. We used two cans, one for each layer, and did two coats. It was really easy.
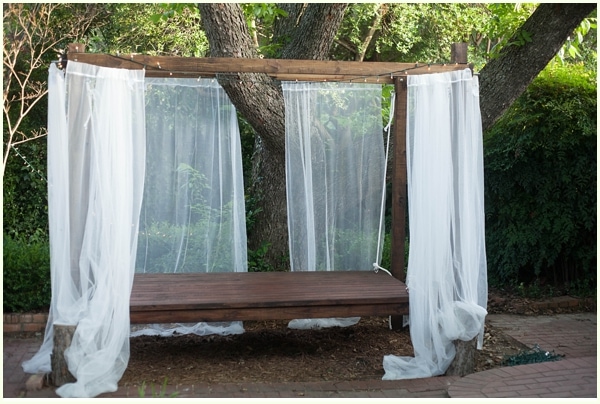
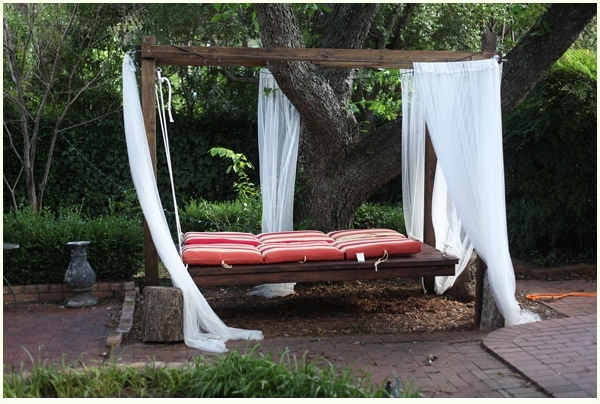
Decorate and Enjoy
Then, after that dried, 24 hours later (see how many days this process takes??? Cray cray!!) we could finally hang the curtains. We used this curtain wire and these curtains, both from IKEA. Like most things from IKEA….it was a process to install. Scott did it and it took him several hours, but he is brilliant and got it done. We have two curtains in the front, one on each side and two in the back. We also added some log stump side tables that I had picked up awhile back.
Everything was gorgeous, we were fairly protected from bugs, the swing was not red (yay), and no one had fallen down and hurt themselves. Yay. So far so great…but for weeks we were missing a crucial element….cushions. As comfy as it was to lay and swing…it is still a wooden platform and is only comfy for so long. I had thought of all kinds of ways to solve this- sewing my own outdoor custom cushion, buying an outdoor mattress, using a regular twin mattress wrapped in one of those waterproof things…but all of those were either super pricey, or kind of gross to me.
So for weeks…nothing. Finally, one day it hit me- what about using outdoor lounge chair cushions? Could they possibly be the right size? Guess what….they are! Two lounge cushions side by side are almost exactly the same dimensions as a twin mattress. So then the hunt was on for two affordable, adorable lounge cushions…much easier said than done. Since it is considered “end of season” now, they were either sold out or only had one. Finally, after weeks of looking we happened to be running into WalMart for the first time in 6 months or so- and there they were. Two matching lounge chair cushions marked down to $20 each. The problem was…they were red, which was not what I was imagining. Regardless, they were a great deal and would do the job, so they came home with us.
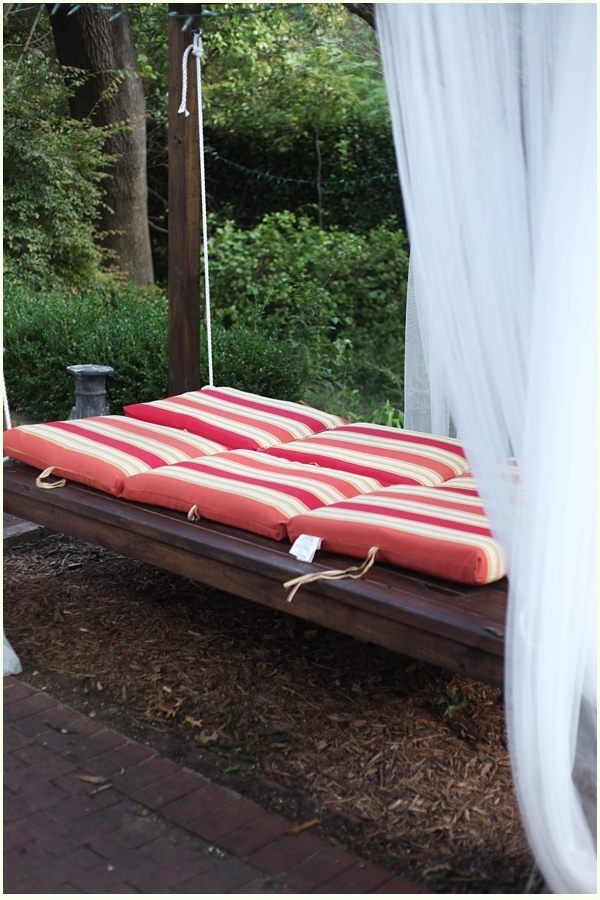
I was going for a serene getaway and the red just totally clashed in my opinion. So I did the best thing I could think of- purchased a canvas paint drop cloth and covered the cushions with it. It’s not waterproof so it needs to be removed when it’s raining so I really didn’t sew it on- just tucked it under the lounge cushions.
So that’s how you do it! 🙂 If we can do it…so can you guys! 🙂 A month later, and I still love it out here. I’ve enjoyed being out here with friends, family and my husband- whether it’s drinking wine and telling stories, or being immersed in a good book…there’s no place I’d rather be. 🙂

")

Also, this little known media site wrote a nice piece about us and the outdoor swinging we built:)

Anyone else have an outdoor space they can’t get enough of? I want to hear it! 🙂 Share, share!
 Here are some more posts I think you’ll love!
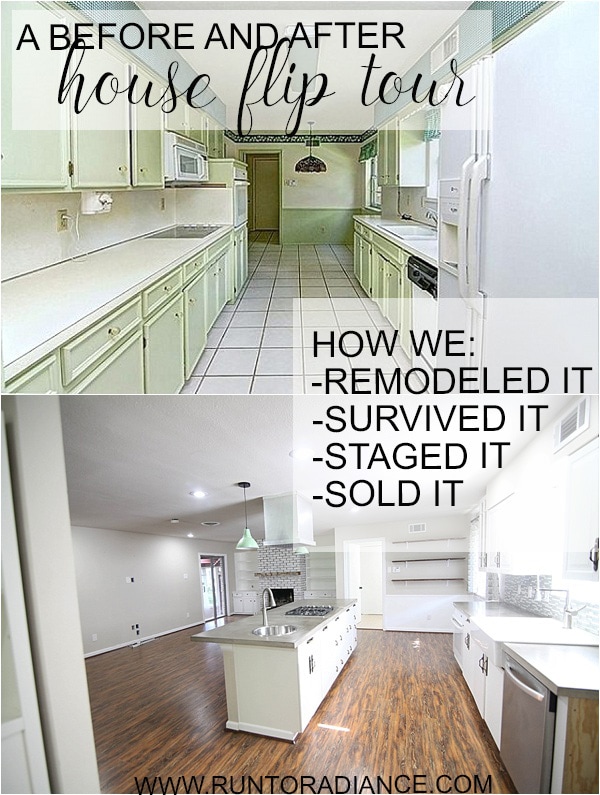
how to gracefully survive while living in a remodel
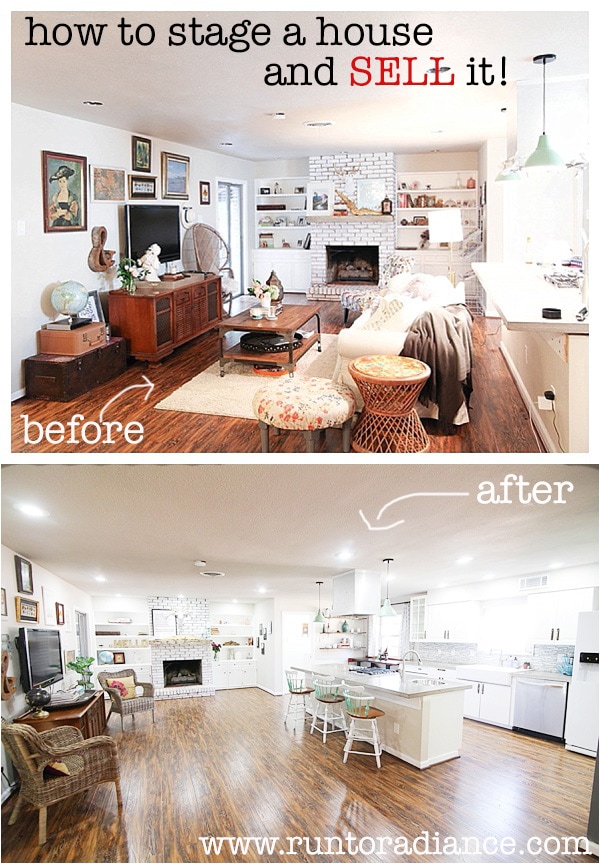
how to stage your house and sell it fast!


I love this!!
Me, too! Just one question: is there a way to brace the bed, so if you didn’t want it to swing, it wouldn’t?
(Sorry to invade the Reply space, but couldn’t find where to leave a Comment!)
Greetings! Very helpful advice in this particular post!
It’s the little changes that make the most significant changes.
Many thanks for sharing!
Magnificent goods from you, man. I have understand your stuff previous to and you’re just too wonderful.
I actually like what you have acquired here, certainly like what you are stating and the way in which
you say it. You make it enjoyable and you still take care of
to keep it wise. I cant wait to read much more
from you. This is really a tremendous website.
I’m really enjoying the design and layout of your site.
It’s a very easy on the eyes which makes it much more enjoyable
for me to come here and visit more often. Did you hire out a developer to create your theme?
Fantastic work!
For an outdoor bed mattress, I use an inflatable camping mattress..
I love this! Obsessing on having one built that looks kind of like these: https://11mulberry.com/2018/08/09/porch-swing-bed/ but now that I’ve seen the DYI version I think my husband should be able to make one and save lots of money!
Wow. So much effort for such a GHETTO result.