How to Make Homemade Cronuts (Two Ways)
This post may contain affiliate links. As an Amazon Associate I earn from qualifying purchases.

Have you all heard of the Cronut craze? I happened to stumble upon it last week when reading about a pastry that has driven New York City to it’s knees. This is no ordinary morning treat friends- this one had people lining up hours before the bakery opened and sparked a frenzy on the black market- people standing in line to get a coveted cronut were selling theirs to other hungry New Yorkers at $40-50 a pop- a huge mark up from the $5 selling price. Vowing to fight the black market and insure all New Yorkers had a fair chance to try a Cronut, pastry chef Dominique Ansel cut the max from six to two Cronuts to people. Of course there is arguments about who actually invented the Cronut, but regardless- there’s no denying he’s one of the most popular men in NYC right now!
What is a Cronut? Simply put, it’s a hybrid Croissant- Donut. It has all the flaky, delicious layers of a croissant, but the shape, portability and flavorings of a donut. Cronut.
The day I found out about the recipe, I immediately decided to make my own Cronut. Why not? We don’t really have a booming Cronut market here in the Dallas area, and so what if I had never made a homemade croissant, or donut, let alone a cronut? Everyone has to start somewhere! 🙂 So I decided to try it two ways. Plan one- which was to make my own homemade creation from start to finish. Plan two- the back up – was to buy a roll of pre made Pilsbury croissant dough.
Making a croissant is not an easy process. It took three days from start to finish, and a TON of rolling/folding dough. I would recommend not do to this if you had just had a killer/awesome workout session with your personal trainer. Ow. No worries- the show must go on and I persevered!
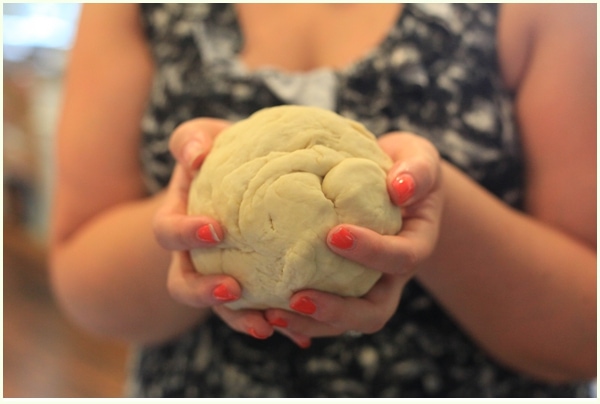
To start off- I found a great classic croissant recipe and tweaked it a bit to make it more “cronut friendly”. (See the bottom oft this post for recipe) It was a long process starting with combining the ingredients in my Kitchen Aid mixer bowl, then allowing the dough hook to do it’s kneading magic- I can’t imagine doing that by hand! After pulling the dough out it then needed to sit overnight, tightly covered by plastic wrap.

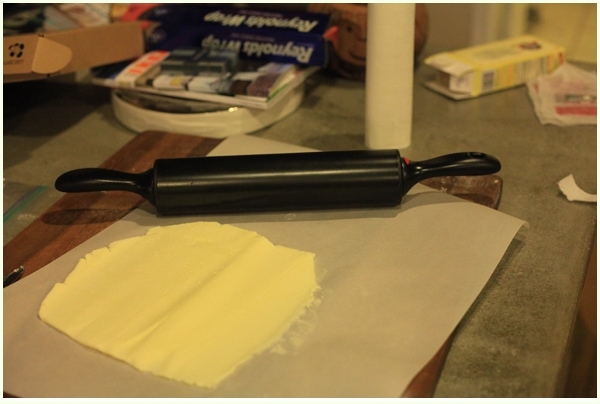
On day two, I laminated the dough which consisted of cutting butter into 1/2″ strips, placing them between two sheets of parchment paper and rolling them flat to form a cohesive square that was approximately 7.5″ x 7.5″.
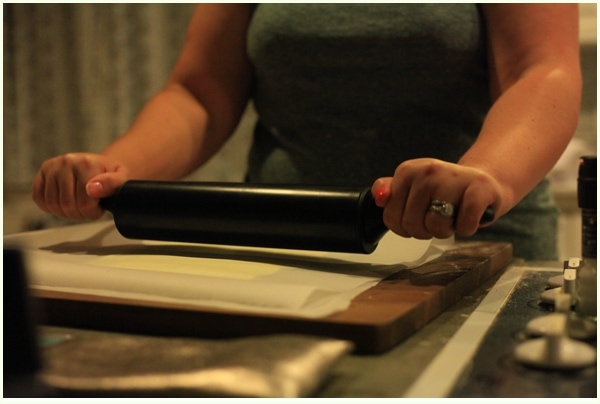
The butter was then placed back in the fridge, and out came the dough from the day before, which I had to then roll out to a 10.5″ x 10.5″ square. This required about 10 minutes of continual rolling with a few breaks thrown in for flouring the board, rolling pin and dough. It’s really important that the dough does not stick to the surface and that you get it to a square shape. For me, this required rolling it a bit longer and wider, then trimming the ends and placing the trimmings back into the middle of the dough, which I then gently pounded in.
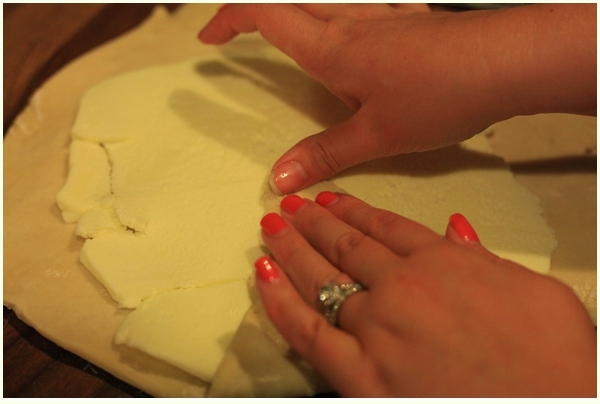
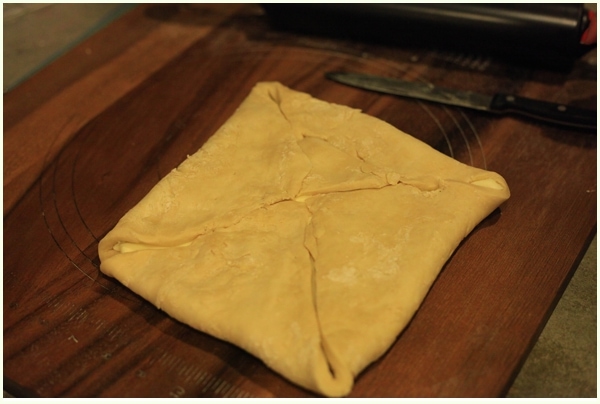
After your dough is in a square, you then take your butter and place it on a diagonal inside your dough. The edges of the dough are folded to the middle to meet one another to completely conceal the butter. This step is called laminating the dough and it was pretty fun- I liked the adorable envelope shape! Who wouldn’t want an envelope full of butter? 😛 It’s important you pinch the seals to the envelope tight so the butter can’t escape…because it will try. 🙂
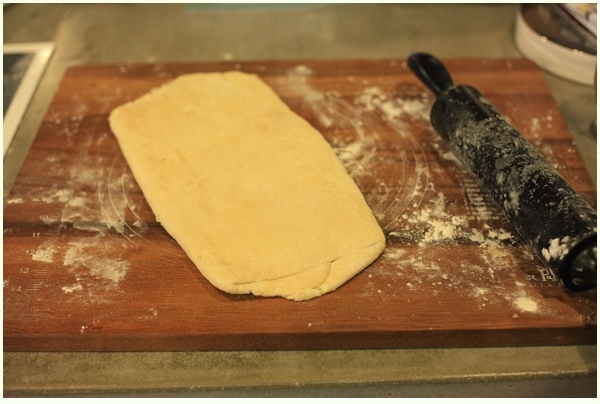
Flour the dough (and the pin and board!) and start to elongate your dough. You are going for a narrow long piece now. Mine ended up being about 8″ x 18. It is important that you stop to check and make sure the butter isn’t escaping out the seams of the envelope- continue to pinch and reseal as needed.
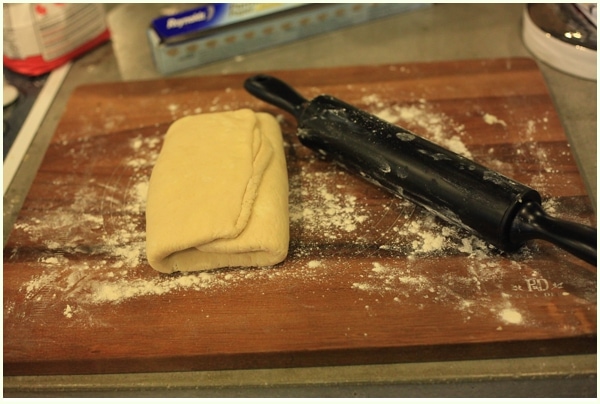
At this point, you will fold the farthest end of the dough towards the middle and the bottom towards the middle to create a 3 fold. Like so:
Place the dough on a plate and cover tightly with plastic wrap. Place into the fridge for 20 minutes. Then, take out your dough, flour your dough, surface and pin, and roll out the dough back to the 8″ x 18″, then repeat the folding process again creating thirds, and placing back in the fridge.
Repeat this again, ending on with your third folded piece covered TIGHTLY with plastic wrap…you do NOT want your dough drying out at this point!! That would be super sad!
Place in the refrigerator overnight.
The next morning, take your dough out, again flouring the dough/pin/board. Roll the dough back out to 8″ x 18″. It’s almost cronut time!
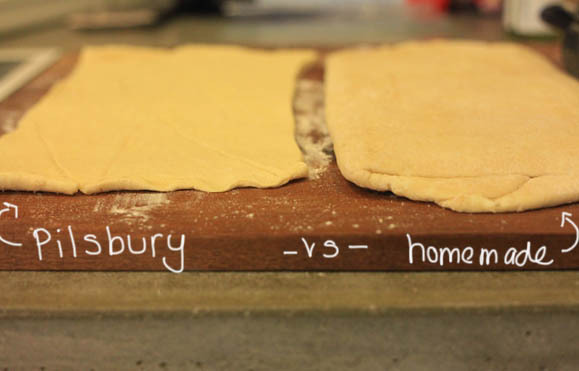
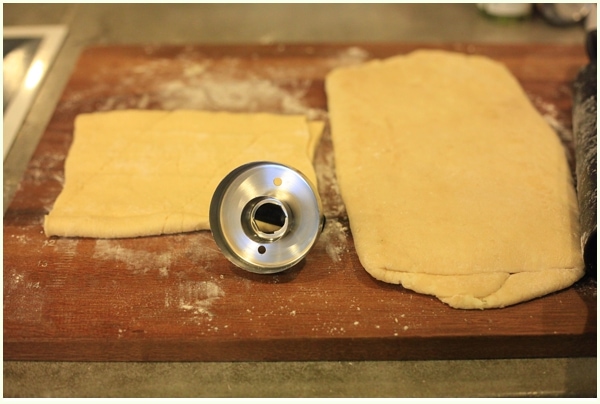
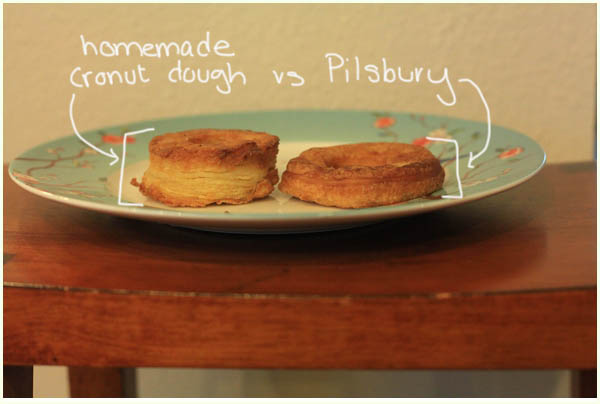
Here’s where method two comes in- using a can of pre made croissant dough from Pilsbury. Open the can, and find the seam of the dough. It’s a straight line, not the perforated triangles. Carefully unroll the dough. For comparison, here’s the two side by side.

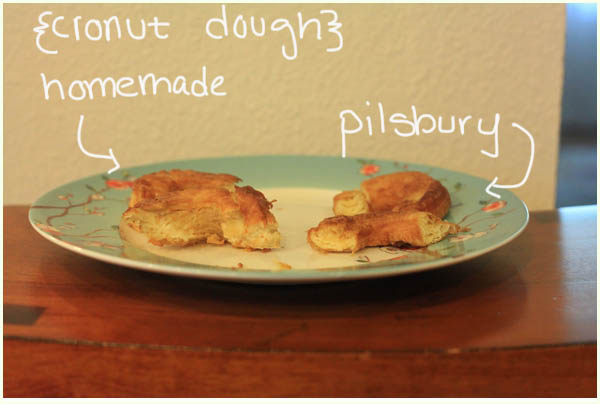
Their dough was much softer and thinner while mine was a heartier feel that was almost twice the height.
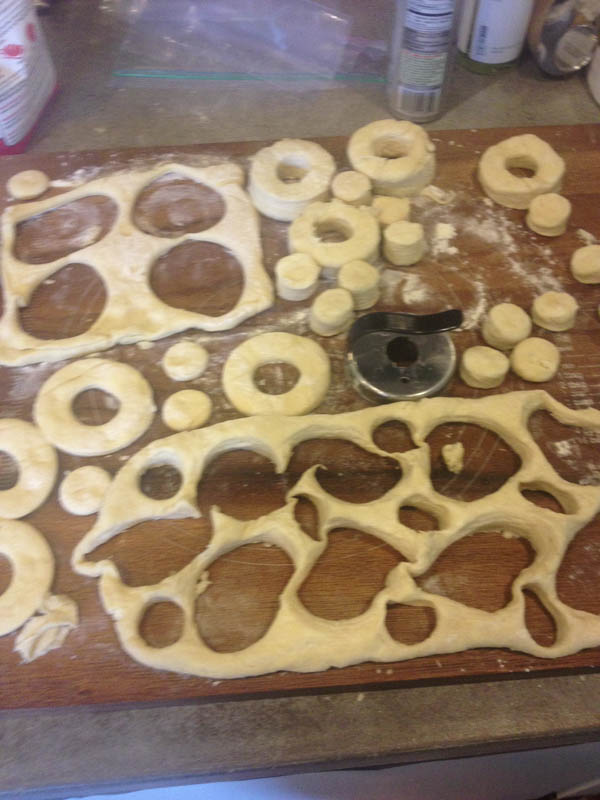
Now the really fun part! Time to cut out the donut shapes! I ordered this adorable biscuit/donut cutter from amazon. The center part comes out, so you can cut either donuts, or biscuits. 🙂 Of course for our purposes we left it in…until we used just the center part to cut a bunch of donut holes out of the remaining dough!
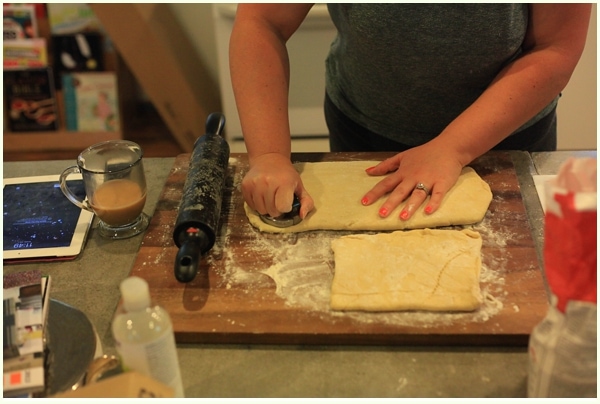
Tip – hand wash the cutter before you use it (and after). I recommend giving it a spray of non stick cooking oil which makes prying the dough out a lot easier. I used a butter knife around the rim to help me get mine out. I have to admit, I was super proud when I was able to take a look at the dough more closely and see all the flakey layers already there. Success!
Here’s a quick iPhone shot of the donut/ donut hole shapes all cut out of the dough:
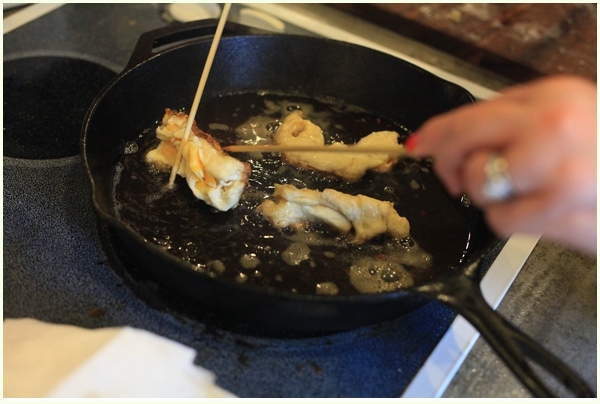
This is where our first (and luckily only) major disaster of the Cronut experience occurred. I have never fried anything in my life, so I assumed heating oil would be the same as heating water. I put about 2″ of grape seed oil in our dutch oven, placed the lid on it and left it for about five minutes until Scott grabbed my arm and pointed across the room at the pot where smoke was pouring out the seam under the lid. I took the lid off and suddenly my eyes and throat were burning and I couldn’t breathe. Our house was FILLED with smoke and we were both frantically waving dishtowels trying to direct the smoke towards the open windows. I don’t know if this is what we were supposed to do or not but it seemed to work and after 10 minutes we could breathe again. Lesson learned…don’t assume you know how to heat oil….! 🙁
Sadly, that was all the grape seed oil I had specially ordered- but we had canola oil which we used instead. We filled a cast iron skillet with about 2″ of canola, put it on medium heat and did NOT put a lid on it. 😛
Also sadly I forgot to take a picture of frying the donuts, but here’s a picture of us frying the croissant dough “Scraps” . I used wood skewers to get the dough in and out of the oil, and to flip the dough. I put each donut in for about 45 seconds per side and did about 3 at a time. I placed them immediately on a plate lined with paper towels and then covered the Cronuts with more paper towels to get as much grease off as possible. 🙂
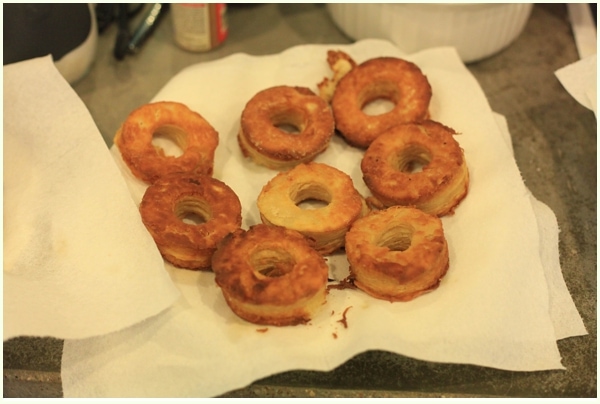
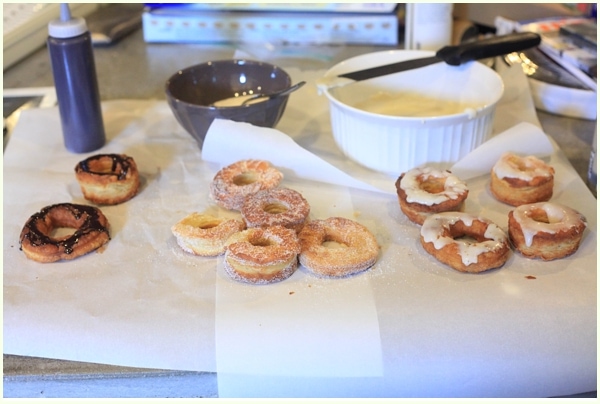
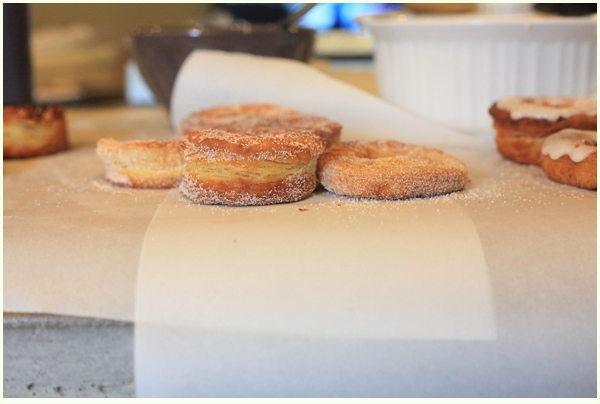
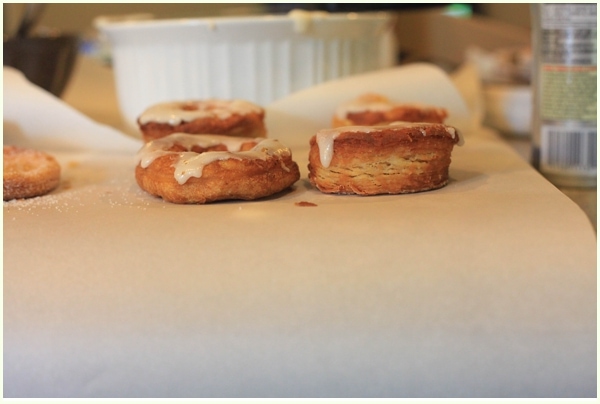
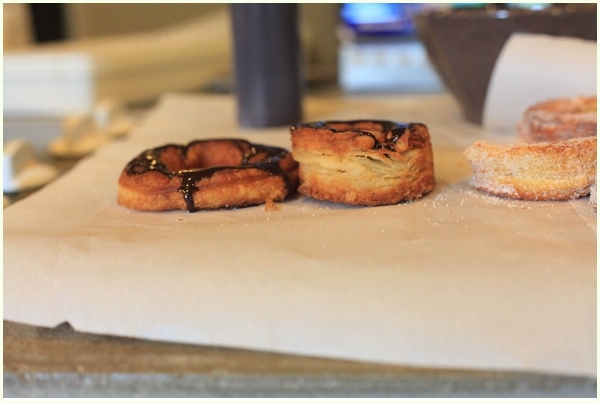
Here are some of our beautiful Cronuts! This is about the right color that we were shooting for- a light golden brown.
I did a side by side comparison with my dough vs the pre made Pilsbury dough. Both fried beautifully, but once again mine was significantly thicker with more layers.
Once all the frying was done, it was flavoring time! We did a chocolate donut using a homemade chocolate syrup (recipe here), a cinnamon sugar coating, and a homemade vanilla glaze (recipe here but adding the additional milk and corn syrup as suggested in the reviews/comments.)
I mean…ya’ll. Look at this deliciousness happening. Y U MMM

Then…the best part of the entire three days. Time to eat these guys and see what the hype is all about!

")
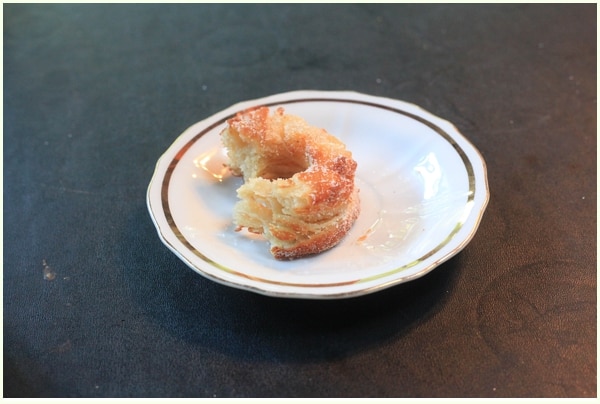
And the verdict? THEY WERE AWESOME. Seriously y’all- a million times better then a donut. I am not kidding!! They were crispy on the outside, flakey and soft on the inside and each layer was perfectly cooked. Both Scott and I’s favorite was the vanilla glazed cronut.
As far as Pilsbury vs me…we both did a blind taste test and both picked the homemade dough hands down. However- for a 2o minute process vs 3 days it was a very nice alternative if you want to try a Cronut without a giant commitment. I would urge you though- try the homemade- you won’t be disappointed and you will feel so proud!
And so very full.
And hyped up on sugar. Oh yes…it is good.
What do you all think? Have I inspired you to try the Cronut? What pastry would you wait in line for 3 hours for or buy on the black market? 🙂
Cronut Recipe:
Makes about 8 Cronuts and 20 Cronut Holes
Time: Approximately 3 days
Follow Classic Croissant recipe found here, stopping before the section titled “divide the dough”
Once your dough is prepared and rolled back out, use a donut cutter to cut Cronuts out
Meanwhile, heat about 2″ of grape seed (or Canola) oil on medium in an uncovered cast iron skillet or dutch oven
When oil reaches 375 degrees, carefully place 3 Cronuts at a time into the pot, using skewers or tongs to flip about 45 seconds per side
Place Cronuts on a plate lined with paper towels and carefully blot/cover top of fried Cronuts with paper towel, removing excess oil
Then coat with your choice of glaze/flavor and enjoy! 🙂


Yum! These looks amazing! Thank you for linking up to last week’s Tasty Tuesday. I have pinned your recipe to the Tasty Tuesday Pinterest board. I hope that you’ll join us again this week.