How To Frame A Puzzle & Cute Framed Puzzle Ideas
This post may contain affiliate links. As an Amazon Associate I earn from qualifying purchases.


Looking for a way to decorate that’s just as fun to make as it is to look at? Framing puzzles is the latest decorating trend, so learn how to frame a puzzle so you don’t have to break apart that hard-earned jigsaw masterpiece.

Read on for tips on how to frame a puzzle and remember it forever. You’ll also find some inspiration on which puzzles to start off with.
Get Your Puzzle Ready to Frame
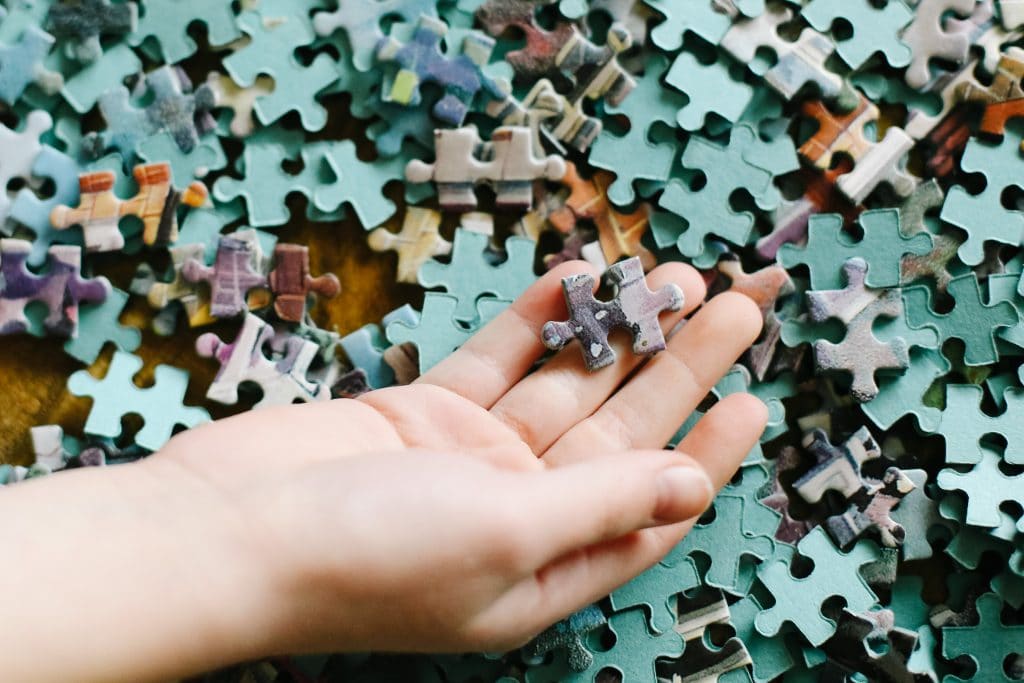
The first step is to make sure you complete your puzzle on a piece of cardboard or a flat surface. This way, you can move it around when needed. It also makes it easier to flip over and move around when it comes to gluing it down.
Next, you’ll need to decide if you are going to use glue or not. Gluing a puzzle is the most common option, but there are a few alternatives!
Option One: Glue The Puzzle
This is the most common method to get a puzzle ready to frame. In my experience, it’s best to use a liquid glue to make sure you can spread it evenly, but there are also sprays available if you feel confident!
Here’s how to glue a puzzle, step by step:
- Choose a clean, flat surface to work on, such as a table or countertop. Place wax paper or a plastic sheet underneath the puzzle to protect your surface from glue drips.
- Gently slide the completed puzzle onto your protected surface. Now’s the time to make sure all those pieces are properly aligned and tightly connected.
- Pour a small amount of puzzle glue directly onto the center of the puzzle. Use a foam brush or sponge applicator to spread the glue evenly over the surface. Work in long, smooth strokes, moving from the center outward. Make sure to cover the edges and fill in between the puzzle pieces!
- Allow the glue to dry completely according to the manufacturer’s instructions (typically 1–2 hours). For best results, let it dry for at least 24 hours.
- If you want extra durability or a glossier finish, apply a second layer of glue after the first one has dried. Repeat the same spreading technique to ensure even coverage.
Quick Tips for Gluing a Puzzle
- Use the right glue. Puzzle-specific glues, such as Mod Podge Puzzle Saver or other brands, work best. These are designed to dry clear and flexible, preserving the puzzle’s surface.
- Try a spray. You can also use a spray adhesive – just make sure to look for archival-quality sprays to avoid yellowing over time.
- Place wax paper underneath to protect your work surface.
- Apply a thin, even layer with a sponge or applicator to avoid clumping or streaking.
- Use a foam brush or sponge applicator for smooth coverage.
- Make sure your entire puzzle is coated with glue. Otherwise, you risk pieces falling out once you hang it up, which will ruin the overall effect.
- If the glue starts to clump, add a little more glue and smooth it out.
- Allow the glue to dry completely before moving the puzzle (24 hours for best results).
Do You Glue The Front Or Back Of A Puzzle?
Don’t risk flipping your beautiful puzzle upside down: just add the glue right to the front! Just make sure you use the right kind of glue so it dries perfectly clear.
Pros and Cons for Gluing a Puzzle
Pros:
- Provides a secure, permanent solution
- Protects the puzzle’s surface from dirt and wear
- Creates a glossy finish that enhances colors and details
- Widely available and affordable
Cons:
- Messy and requires drying time
- This method is irreversible—the pieces cannot be separated afterward
- If applied unevenly, it can cause warping or bubbling
Option 2: Use Adhesive Puzzle Sheets
Alternatively, you can frame a puzzle without glue by using adhesive puzzle sheets.
These peel-and-stick sheets hold the puzzle securely together without the mess of glue, but they can have their downsides, too.
Here’s how to do it:
- You’ll need to assemble the puzzle on a flat surface where it won’t need to be moved. Check that all the pieces are tightly connected and properly aligned.
- Peel off a small corner of the backing from the first adhesive sheet, aligning the exposed sticky edge with the back of the puzzle.
- Slowly peel away the backing while pressing the adhesive sheet firmly onto the puzzle. Use your hands or a flat tool to smooth it out and avoid air bubbles.
- Use scissors or a craft knife to trim any adhesive sheet overhang for a clean finish.
Tips and Tricks for Using Adhesive puzzle Sheets
- Clean the back of the puzzle before applying the sheets to ensure they adhere properly.
- Align the first sheet carefully, as repositioning can weaken the adhesive.
- Smooth out air bubbles with a flat tool, like a credit card or squeegee.
- Trim excess adhesive sheets for a neat finish.
- Use multiple sheets for larger puzzles, overlapping slightly for full coverage.
Pros and Cons of Puzzle Sheets
Pros:
- Quick and easy to apply with no mess
- Provides a strong hold without needing glue or drying time
- Reversible—puzzles can often be separated later if desired
- Great for beginners or those who prefer minimal effort
Cons:
- May not hold as firmly over time, especially for heavier puzzles
- Can leave air bubbles if not applied carefully
- More expensive than glue
Option 3: Laminate the Puzzle
Use a clear laminating sheet or self-adhesive laminate to cover the surface of the puzzle. This method seals the pieces together while protecting the surface.
After laminating, the puzzle can be mounted on backing and framed like a photo or poster.
If you don’t have a laminating machine or are looking for a more budget-friendly solution, you can also use clear contact paper!
Apply it to the front and back of the puzzle to hold it together. This method is less permanent than glue and can be undone if needed.
I will say that the contact sheets often are not as clear as the laminating pouches, so it does’t look as nice, but it’s an option in a pinch!
Here’s how to do it:
- Place the completed puzzle on a flat, clean surface. Ensure the pieces are firmly connected, and the edges are smooth.
- Peel off a small section of the laminating sheet or contact paper backing.
- Align the exposed adhesive edge with one corner of the puzzle. Then, slowly peel back more of the backing while pressing the adhesive onto the puzzle. Use a soft cloth or squeegee to smooth out bubbles as you go.
- Once the puzzle is fully laminated, use scissors or a craft knife to trim any overhang for a clean finish.
Tips and Tricks
- Choose high-quality laminating sheets or contact paper to avoid wrinkles.
- Apply slowly and evenly, smoothing out bubbles as you go.
- Start from one corner and work your way across the puzzle for even coverage.
- Use a squeegee to press the adhesive onto the puzzle.
- Trim excess laminate or contact paper carefully with a craft knife.
- For larger puzzles, overlap laminating sheets slightly to cover the entire surface. Just make sure to smooth out each section to prevent wrinkles or air bubbles!
Pros and cons
Pros:
- Provides a protective, waterproof layer over the puzzle
- Holds pieces together securely without glue
- Easy to clean and prevents dust buildup
- Affordable and readily available materials
Cons:
- May cause bubbling or creasing if not applied correctly
- Some laminates or contact papers can yellow over time
- Not as durable as glue or adhesive sheets for long-term displays
Option 4: Put the Puzzle Directly on the Frame’s Backing Board
Lastly, you can carefully slide the puzzle onto a backing board and frame it without attaching it, though this method may risk shifting if the frame is moved.
Here’s how to do it:
- Assemble the puzzle on a surface similar in size to the frame backing you are using. Make sure all the pieces are firmly connected, and the edges are aligned.
- Place parchment paper or a flat surface under the puzzle to make it easier to slide. Carefully lift one side of the puzzle while gently guiding it onto the backing board.
- If you used parchment paper, pull it out slowly once the puzzle is in position.
Tips and Tricks
- Assemble the puzzle on a surface similar in size to the frame backing to make the transfer easier.
- Use parchment paper or a flat, rigid surface (like a cutting board) to slide the puzzle into place.
- Add spacers or a matte board inside the frame to prevent shifting.
- Handle the puzzle gently to avoid dislodging pieces.
- Consider using clear acrylic or glass to keep the puzzle secure once framed.
Pros and cons
Pros:
- No adhesives required, preserving the puzzle in its original form
- Fully reversible—pieces can be reused or reassembled later
- Quickest and cleanest method
- Works well for temporary displays
Cons:
- Pieces can shift or fall apart if the frame is bumped or moved
- Requires precise handling and may not work well for large puzzles
- Offers no protection against dust or damage unless a cover is used
FAQs and Troubleshooting
How To Hang A Puzzle Without A Frame
Many people decide to put their puzzles in framing, but it’s certainly not a requirement. You can simply attach command strips or double-sided tape to the back of your puzzle. Then, just press it firmly onto the wall.
Just be sure that for whatever process you choose for gluing, use plenty of glue or adhesive backing to hold it all together well before mounting!
What Size Frame Do I Need For A 500 Piece Puzzle?
If you do decide you want a frame, you need to make sure you get the right size. Generally, 500-piece puzzles will usually range in size from 18.3″ x 13.3″ and 19.3″ x 14.3″. However, size varies.
So it’s best to measure your puzzle once it’s completed to ensure you get the right size – the box measurements aren’t always exact.
To measure: You’ll want to make sure that your puzzle is completely flat before measuring. Try rolling over it with a rolling pin to be sure – then measure exactly with a tape measure.
Then, according to your measurements, purchase a frame that fits!
Note: Puzzles don’t always match standard frame sizes, so when needed, aim for a frame slightly larger than your puzzle rather than smaller. Trying to cram a puzzle into a too-small frame might end up damaging it or disrupting the adhesive. You can always add matting to a large frame.
What Size Frame Do I Need For A 1000 Piece Puzzle?
The most common sizes for 1000-piece puzzles are between 26 x 19 inches and 27 x 20 inches. However, the same rule shared above applies. It’s always wise to take exact measurements for your puzzle.
Cute Ideas for Inspiration
Now you know the ins and outs of how to frame a puzzle, why not get some inspiration? Here are some of my favorite hanging puzzles.
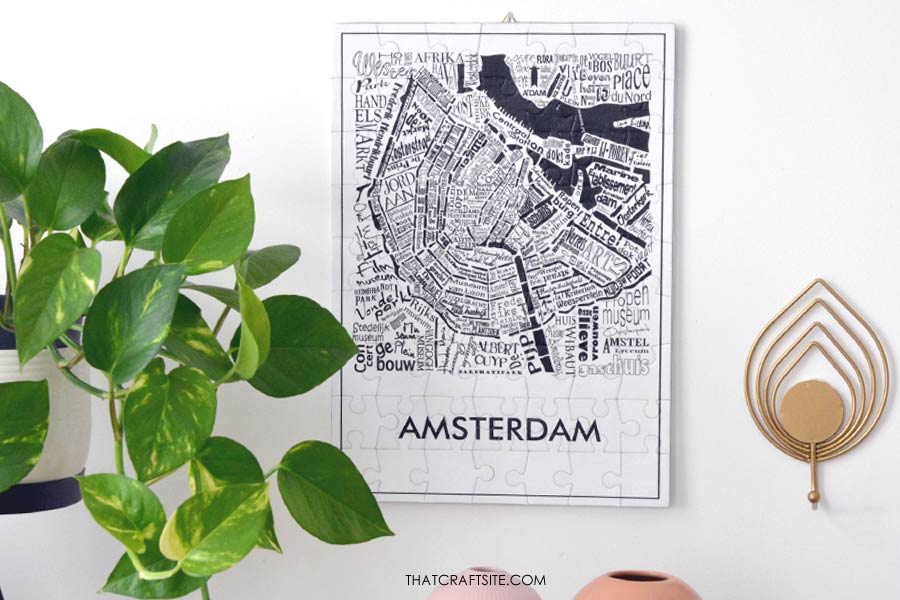
A Favorite Location
Remember your hometown, favorite vacation destination, or current city with a travel puzzle for the area. In the case of this map of Amsterdam puzzle, the larger piece sizes give it a chunky, 3D feel.
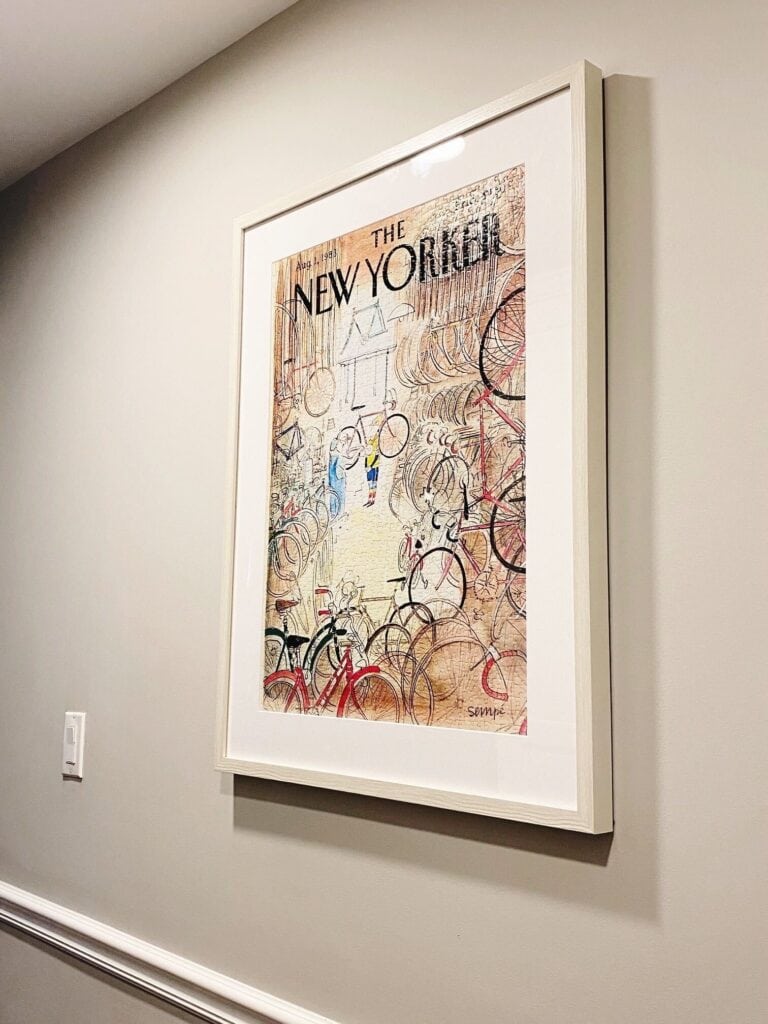
The New Yorker
The New Yorkers’ iconic front page is artwork enough for us all. This puzzle looks dynamic and vintage, perfect to frame and hang as a statement art piece.
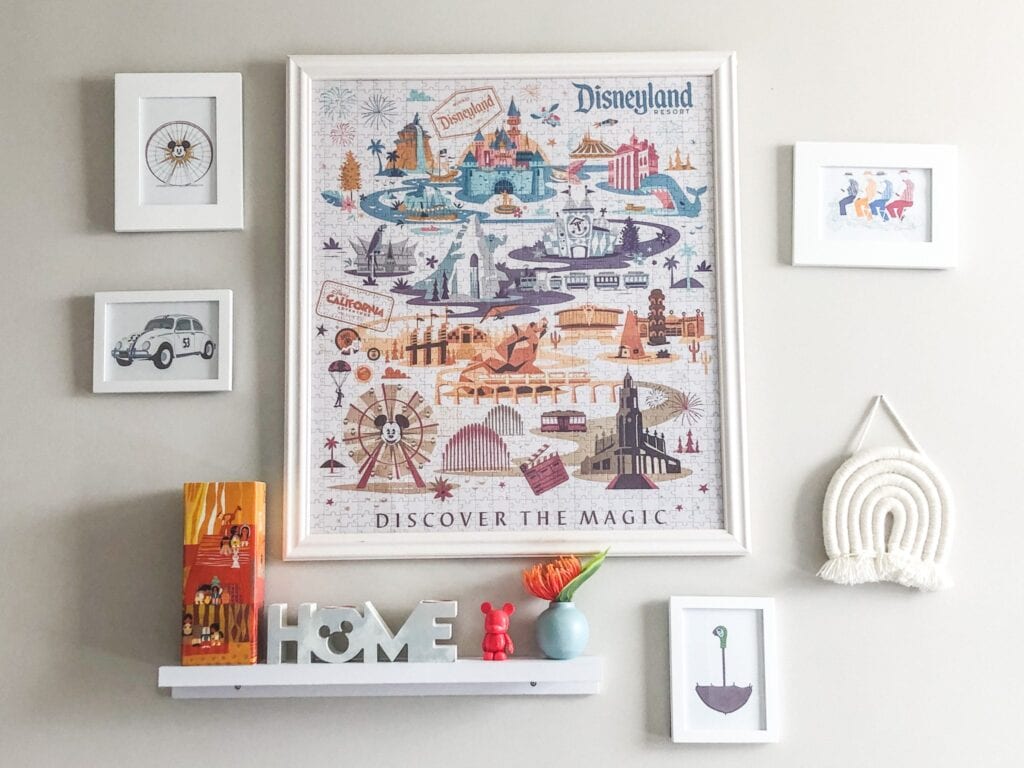
Disneyland Magic
Thie vintage illustrated map is perfect for any Disney fan who is always planning their next trip. This large puzzle also looks like it would be just as much fun to put together as it is to hang!
While this exact puzzle is only found secondhand, this vintage Disney movie inspired puzzle is super cute too.
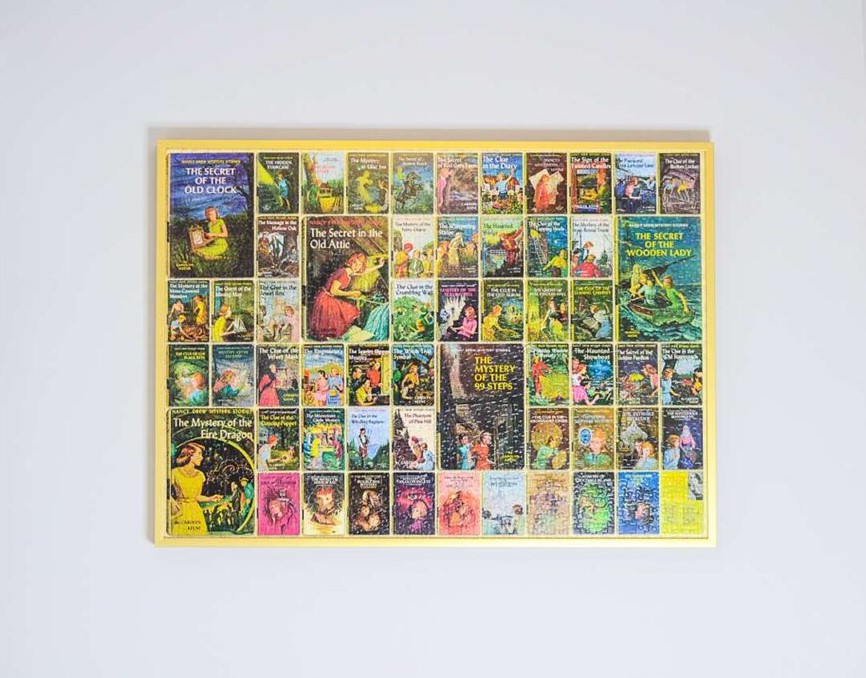
Favorite Literature
This one’s for the bookworms! I love all the vintage Nancy Drew book covers here on this jigsaw puzzle; it’s the perfect way to make art from some of everyone’s favorite classic reads.
Custom Photo Puzzle
This is the perfect type of puzzle to deem worthy of framing in your home! Just order a custom photo puzzle online, put it together with your family, and follow the steps above to get it ready for display!

Puzzles to Get You Started
Ready to get started? I’ve found some gorgeous puzzles that would look stunning on your wall.

FAQs and Troubleshooting
1. What if my puzzle doesn’t fit a standard frame?
If your puzzle doesn’t match a standard frame size, consider getting a custom frame from a local frame shop or an online service.
For a budget-friendly option, you can use a floating frame, which accommodates various sizes and gives a modern look. You can also trim the backing board to fit a slightly larger frame while centering the puzzle with a matte board.
2. How do I remove air bubbles in the adhesive?
To remove air bubbles, use a flat tool like a squeegee (or DIY options like a credit card or a ruler wrapped in a soft cloth).
Gently smooth out the bubbles from the center of the puzzle outward, pressing firmly but carefully to avoid damaging the surface.
3. Can I reuse the frame for another puzzle later?
Absolutely! To reuse the frame, carefully disassemble it, remove the puzzle, and clean the frame and glass or acrylic.
You can use the same backing board if it’s in good condition or replace it for a fresh start.
4. Do I need to use glass or acrylic in the frame?
Using glass or acrylic is optional but highly recommended. It protects the puzzle from dust, fingerprints, and fading over time.
If you prefer a matte look, choose non-glare acrylic or glass for a professional finish.
5. How do I prevent the puzzle from warping while gluing?
Warping can occur if the glue is applied unevenly. To prevent this, work on a flat surface and apply glue in thin, even layers.
Place a sheet of wax paper over the puzzle and add a flat, heavy object (like a book) while it dries to keep it from curling.
6. Can I frame a 3D puzzle?
Yes! For 3D puzzles, consider using a shadow box or acrylic display case that can fully enclose the puzzle while showing off its depth. This protects it from dust and allows for creative displays on shelves or mantles.
7. What if the puzzle shifts inside the frame?
If the puzzle moves inside the frame, you can add spacers between the puzzle and the edges of the frame. Foam board cut to size, or double-sided tape behind the puzzle can help hold it securely in place.
8. How can I fix a puzzle piece that’s missing or damaged?
For a missing piece, try contacting the puzzle manufacturer—they often send replacements. If that’s not an option, print an image of the missing section, cut it to size, and glue it in place.
For damaged pieces, use clear tape or glue to repair them from the back.
9. How do I clean a framed puzzle?
To clean the frame, use a microfiber cloth with glass cleaner (if using glass) or a damp cloth for acrylic. Avoid spraying directly on the puzzle.
For the puzzle surface, gently dust it with a soft, dry cloth.
10. What’s the best way to hang a heavy framed puzzle?
Use sturdy hanging hardware like D-rings, sawtooth hangers, or wire. For heavy frames, wall anchors ensure secure placement. Use a level to hang it evenly.
11. Can I frame puzzles with irregular edges?
Yes! For puzzles with unique shapes, floating frames work well, as they allow the edges to remain visible. Alternatively, use a custom matte board cut to fit the puzzle’s outline, leaving the irregular edges exposed for a creative display.
12. What lighting works best for displaying a framed puzzle?
Soft, indirect lighting is ideal to avoid glare and fading. Place the puzzle in an area with consistent lighting and consider using UV-protective glass or acrylic to prevent sunlight damage.
Check out related posts
Feeling extra crafty? Once you’ve finished hanging your puzzle, you can crack on with these other craft projects:
- Mother’s Day Gift for Grandmas: DIY Framed Footprints
- Color Blocking Craft Ideas – Painting Utensils in 10 Minutes
- Easy DIY Essential Oil Candles