How to Demo Like a Pro
This post may contain affiliate links. As an Amazon Associate I earn from qualifying purchases.
Being the expert demolition artists we are at this point, we’ve learned a lot of good and a lot of bad ways to do things. Since our bathroom is the fifth room we’ve torn apart, we feel like we are finally getting a good process down and doing things correctly. Here are some helpful tips that will hopefully help stop you from making a lot of mistakes – learn from our blood, sweat and (many) tears!

While it may seem tempting to get a crazy itch to demo something NOW while you are in the mood- planning is your friend! Clear the room of everything unless it’s secured in a box or a bag. Things get dusty quick. Make sure you have some way of sealing off that area from the rest of your house – you don’t want yourself and your family breathing in all that debris. In this case we are able to close the door and walk away, but in a more open area you might have to hang tarps, nail up temporary sheet rock or hang temp doors.
Make sure you have all supplies you need on hand – giant extra strength construction bags are your friend!!! Do not try to throw your construction debris in a regular trash bag…it will end very sad for you (and your bag). Invest in gloves, goggles and masks…you never know what’s in your walls and you probably don’t want it in your skin/lungs/eyes. J
Locate all your tools – sledgehammer, crowbar, etc and set aside so they are ready to go.
If you are lucky like us and are planning on tearing out the floor anyways after you finish then you can skip this step. If, however, you have nice carpet/floor you want to keep safe cover it with tarps…better safe than sorry.
Obviously, if you have kids make sure they have somewhere to stay out of the way. I would suggest either putting them with a friend/relative or trying to conquer your demo during nap time. For your fur friends…keep them outside if possible. Their little paws will thank you.
Know exactly where you are going to take your debris. Will you rent a pop up dumpster? Do you have a truck to throw it in and haul off to the dump? Will you throw it out front for bulk trash? (Make sure you check your city’s policies on this – many cities will not pick up large construction debris but will take construction bags).
Plan your outfit. You laugh but your clothes will get dirty and you will be sweaty and covered in sweat. I would suggest wearing something that you would be okay throwing away if possible. A long sleved flannel shirt and sweatpants work great and cover your arms/legs from any flyaway drywall. 😉 Although I am sure you won’t hurt yourself…it never helps to have some bandaids and hydrogen peroxide handy just in case.
Also- I would make arrangements for dinner that night. You will be tired. The last thing you’ll want to do is go out or cook something – so crock pot something, have cold cuts ready or plan on getting yourself some take out!
*Use your discretion if you need to have your walls tested for lead paint or your insulation tested for asbestos. Better safe than sorry if you are worried!*

(Even though it may seem from my post that our bathroom demo was very whirlwind and sudden – we had been planning/prepping for it for months…we just started 3 days ahead of schedule) One of us got a little excited! 😉

Leap out of bed with excitement. Hooray! You get to rip up something! Before you start- take a few before pictures…you’ll regret it if you don’t!
Whether you are working by yourself, with a spouse or with a tv crew (I am jealous of you, Bath Crashers!) make sure everyone understands what’s going to happen. Don’t both swing at the same wall at the same time in a small place because…well you could hit your friend in the head. Ow.
If you are going to be ripping a wall with electricity in it- turn that breaker off in the electric box. No electrocutions allowed!
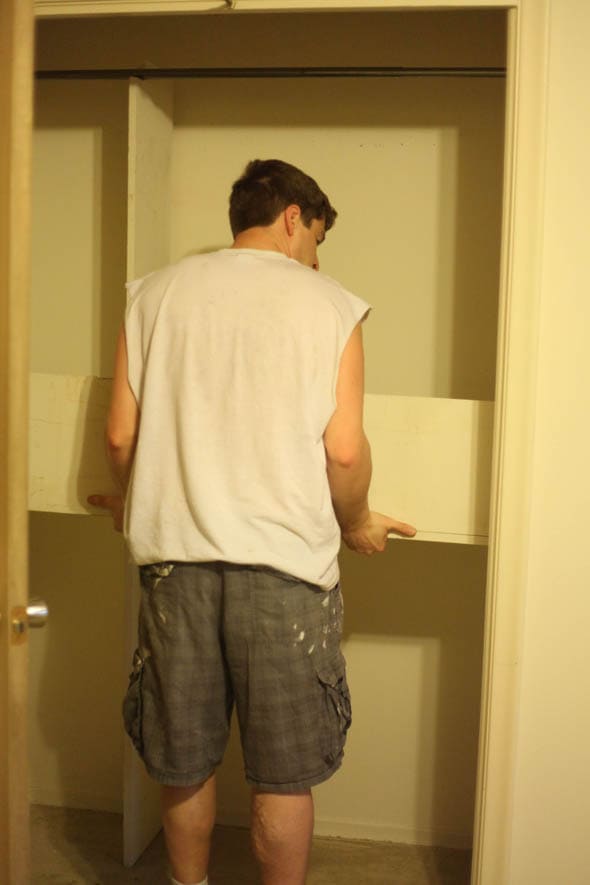
I recommend starting at the top of the room and working down. In our case we started with the closet in the adjoining bedroom and removed the shelves up top .
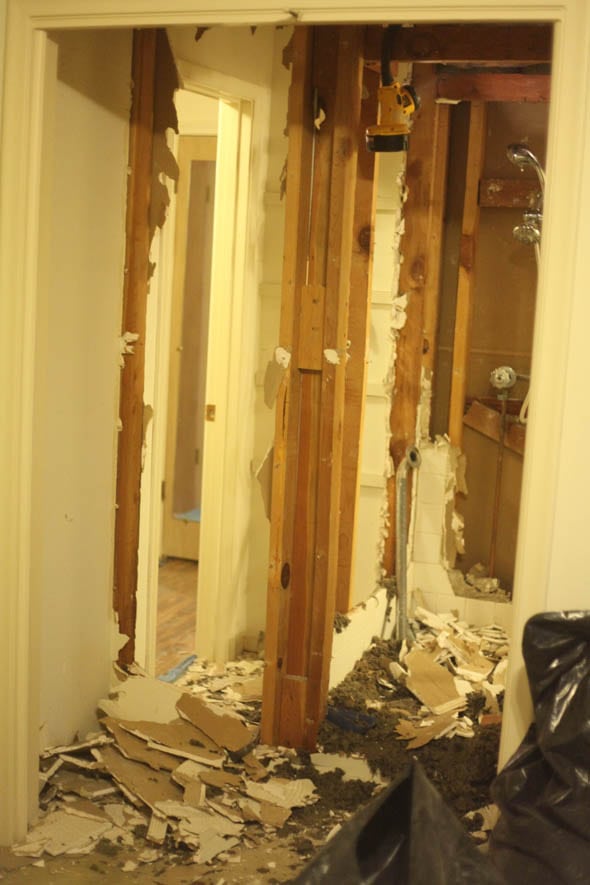
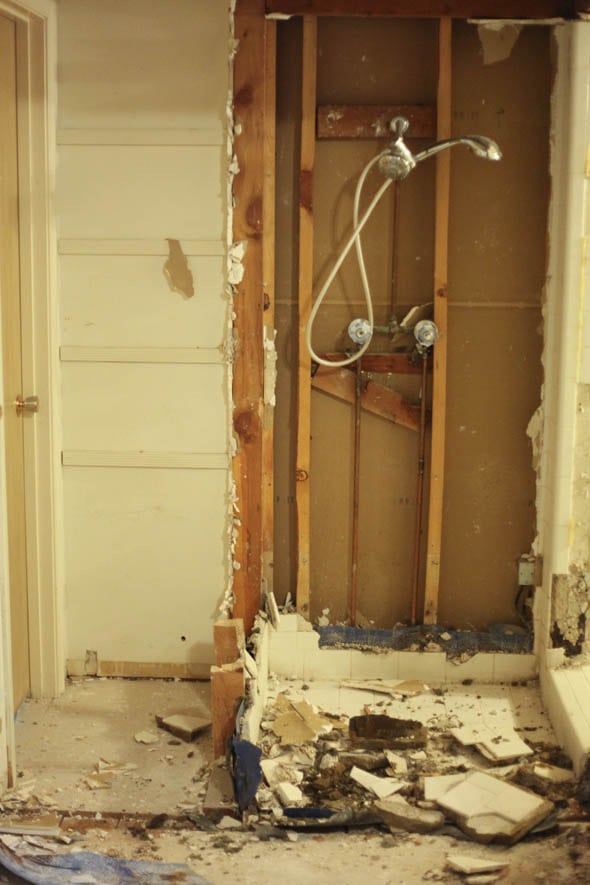
Then we started the fun part…ripping out the drywall starting from top to bottom!
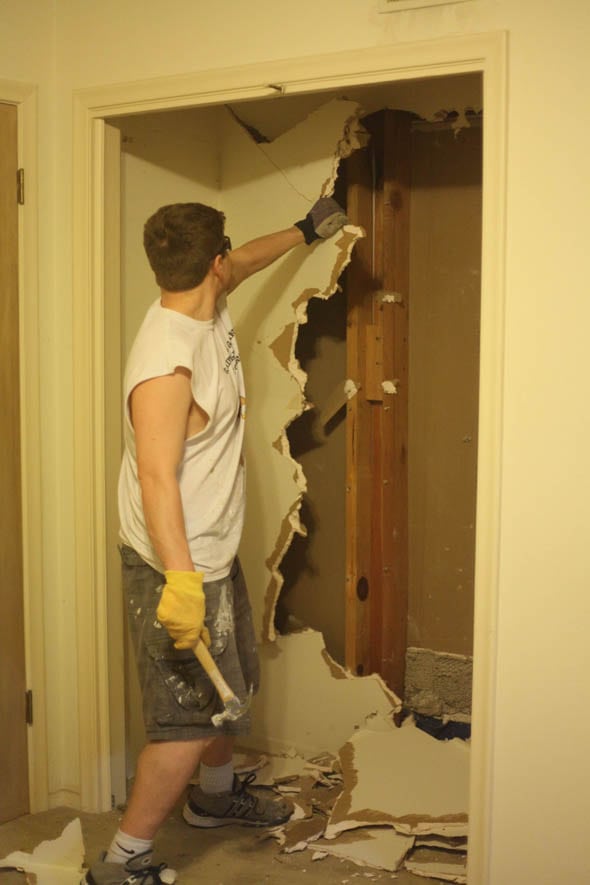
As you get down to the studs of your house watch out for nails. Almost every post in our house had a nail sticking out of it in a weird angle. The ones we are keeping up we used a saw za to cut the nails off. For any boards you are removing, nail the nails down so they aren’t sticking up – that way you, or your trash man, won’t cut themselves, and get tetanus. Boo tetanus!
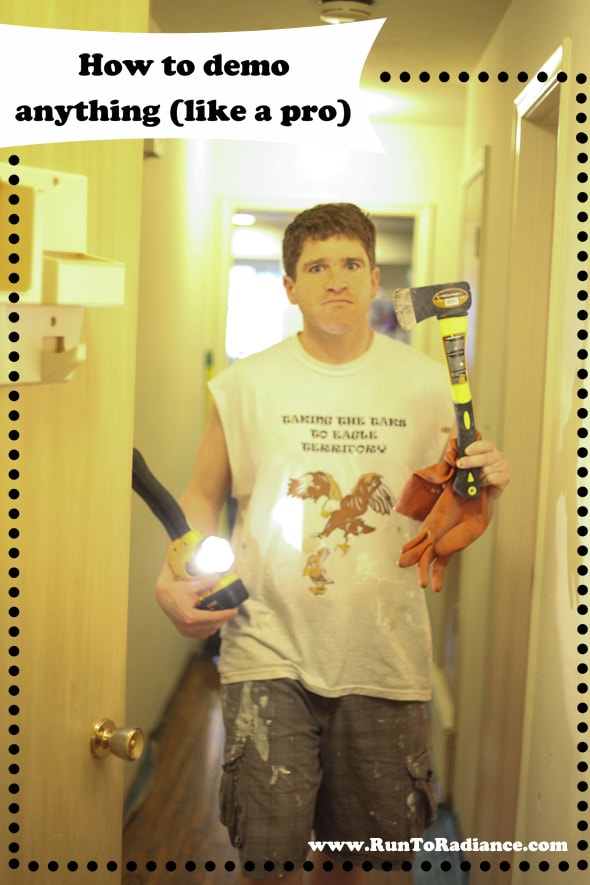
Make sure at some point you have someone snap a photo of you looking like a total B.A. holding a hammer next to a smashed wall. Sort of like “Oh yeah, I did that. That was me.” Hot stuff 😉
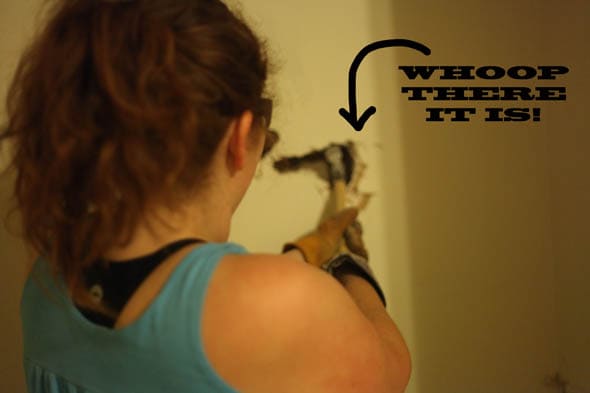
Whoop there it is. Indeed. Final word to the wise- be prepared for the unexpected. We had no problem ripping out most of the bathroom but we did spend about 30 minutes on this super rusted, screw stripped handicapped rail. Yikes. Patience friends…or brute man strength. Whichevs!
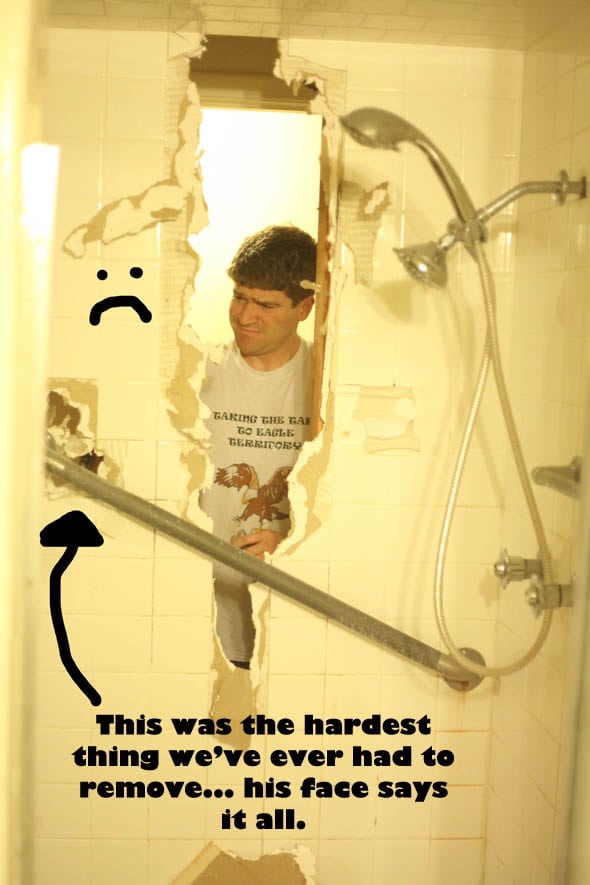
Brute man force won for us. 🙂

Leave yourself enough time in the day to clean up. While it’s tempting to leave it and “get it tomorrow” – trust us you will be sore (or super eager to rebuild!) the next day and the last thing you’ll want to do is spend an hour cleaning.
The best way we’ve found to clean is picking up the big pieces by hand and then using a flat edged shovel to scoop the debris into a bag. We take turns between scooping and holding a bag open because by this point, your arms really really hurt.
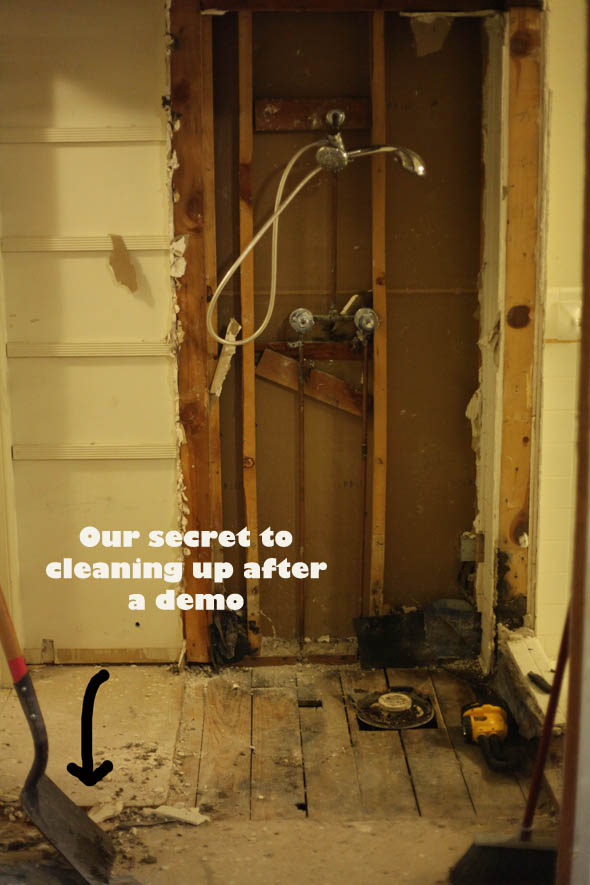
Use a shop vac once you have gotten everything you can off the ground. Keep a careful eye out for nails, dirt and wood pieces and use a Swiffer or mop afterwards to make sure you get any sharp pieces.
We make it a rule in our house that our dogs aren’t allowed in our demo areas even after we’ve cleaned. I would make the same rule with our kids as well. Until we have installed our new floor over the sub floor- I don’t want to take any chances! When Scott and I are in the demo room we both wear thick soled tennis shoes and are very careful about watching where we walk.
When you are finished in the room for the day, make sure you seal off any open areas once again. This may mean taping a tarp to the ceiling, surrounding wall or simply shutting a door. Yay doors!
Congrats – you demo like a pro! Or at least like a semi-pro 🙂


Thanks for these demolition tips. Sealing off the area that’s being demolished from the rest of the house seems like good advice. I’m planning on working on my kitchen, but I don’t want any dust getting into my dining room or living room, so I’ll take measures to seal that area off to prevent a huge mess.