Hall Bath Remodel Update
This post may contain affiliate links. As an Amazon Associate I earn from qualifying purchases.
Believe it or not, it’s been almost two months since I posted about our crazy weekend demoing of our (was a jack and jill and will soon be a hall) bathroom. There has been a ton of progress made but it hasn’t excited me to blog about it because…well frankly I don’t really understand completely what’s happening. My genius husband re-plumbed our bathroom and taught himself through the internet, books and his new friend at Home Depot (hi Brian!). I am seriously impressed. It’s only taken him a few weeks to do and nothing is leaking! Yay! I got him to help me understand the plumbing piece so I could pass it along- when we do our master bath remodel we will be way more confident about sharing step by step processes (since we will actually know what’s happening!) but for now here are some basics of what has been happening. So when we last left off, our scary nasty shower looked like this post demo:
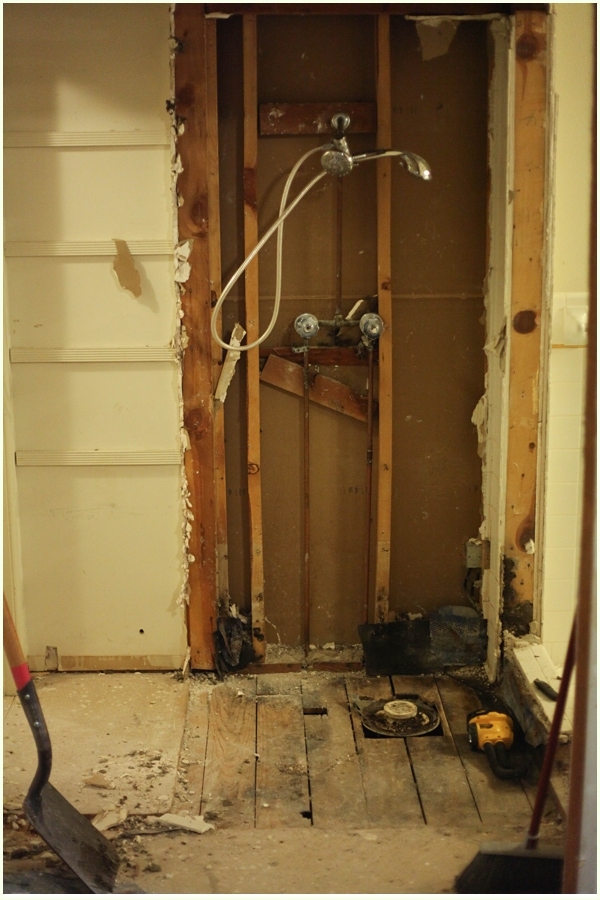
Since we are converting this bathroom from a jack and jill into a hall bath, the floor plan called for us creating a new entry in the old linen closet (you can see the area in the photo above on the left hand side showing where the closet was). This means that where the shower was we had to have a walk way, so we moved the shower into the room next door, taking the closet from that room (which is where I am standing in the photo above). This allowed us to take our shower from being a creepy, embarrassing 2 x3 short little stall to a lovely 5 foot bathtub/shower combo. YAY for tubs. 🙂
Of course to do that, we (Scott) had to move plumbing and draining systems. We had to cut two holes into the subfloor like so:
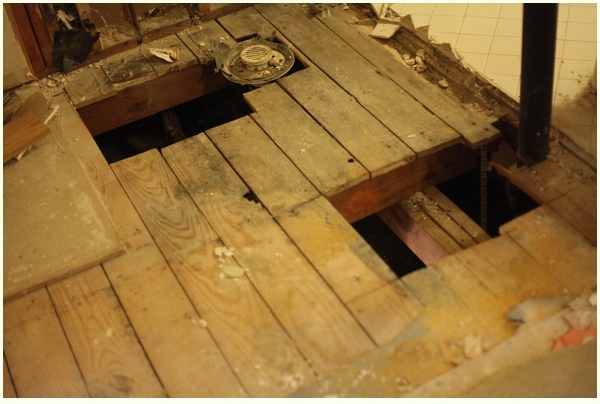
The hole on the left next to the old shower drain is where the water supply for the old shower was, which had to be cut and redirected to the new water supply. This is also where the main drain throughout the house ran through. The whole on the right is where the new drain for the new bathtub and the new water supply will be.
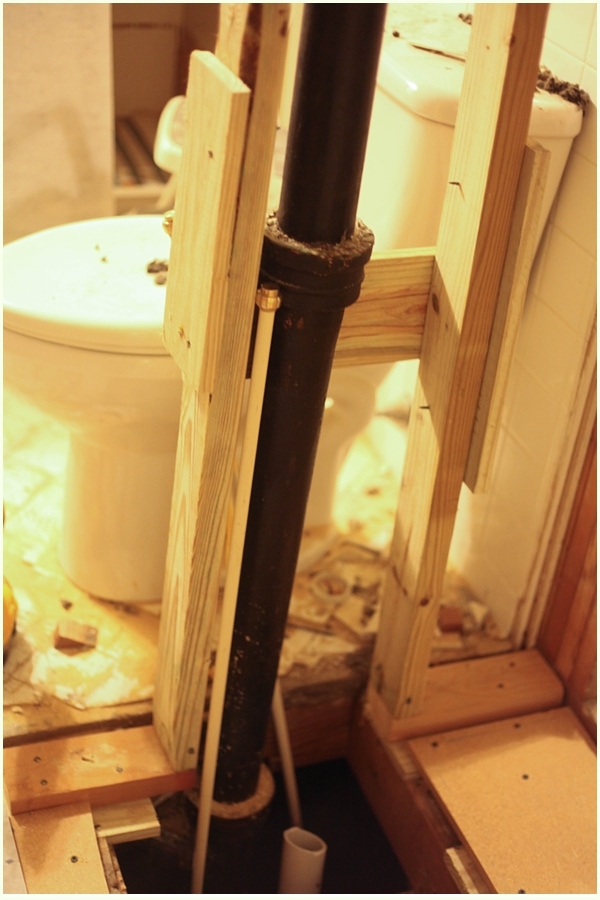
Scott had to cut the main drain, which was made of cast iron. He used a reciprocating saw with a special cast iron blade. He had to make two cuts initially to cut out the piece we needed to tie in the new drain. He was really sad when he figured out he had to make a third cut to make the gap even bigger. He said he was nauseated and dizzy after an hour of sawing. Boo that!
He had to cut the gap so he could close off the part going to the old drain with a rubber boot and tie in the new drain with PVC piping, which allows our new shower to tie into the main drain system.
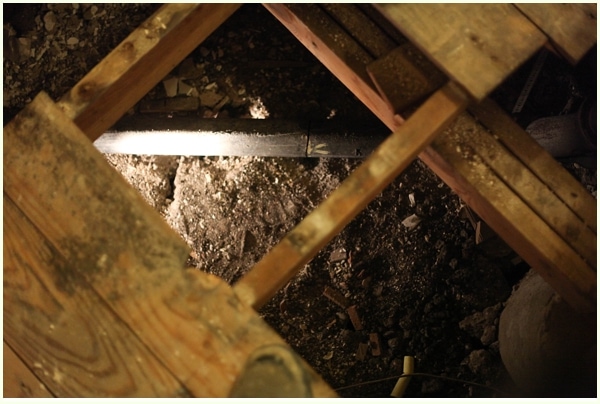
After dealing with that chore, he then climbed into the crawl space and worked on disconnecting the water supply for the old shower.
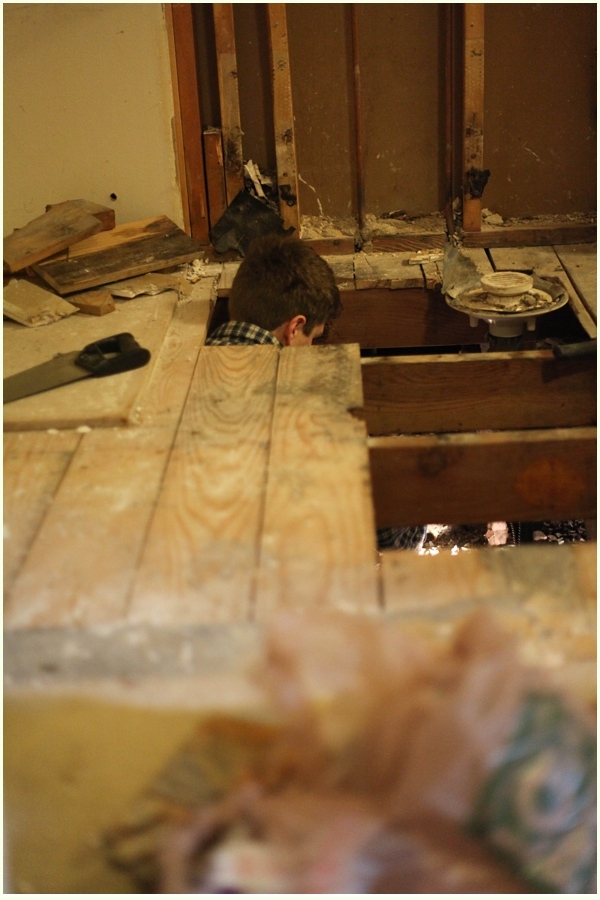
He said this was much easier then cutting cast iron! After shutting off the water supply to our house, he used a pipe cutter tool to cut the water supply pipes for our old shower so we could cap them off.
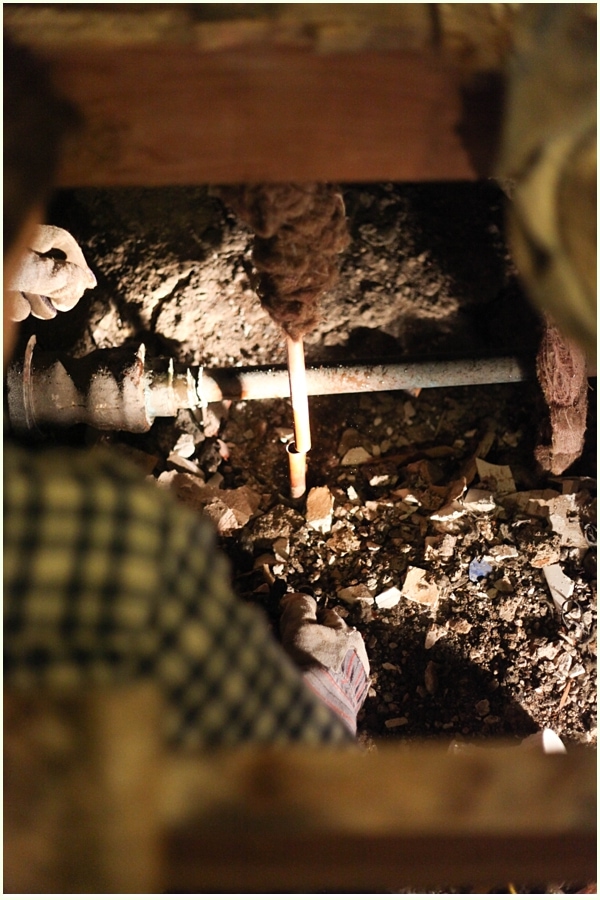
After this he was able to pull the cut pipes and the shower head/knobs off the wall. YAY. Bye bye ugly shower forever!!! 🙂
Look at that face. Hottest plumber everrrrrr <3 <3 <3 🙂

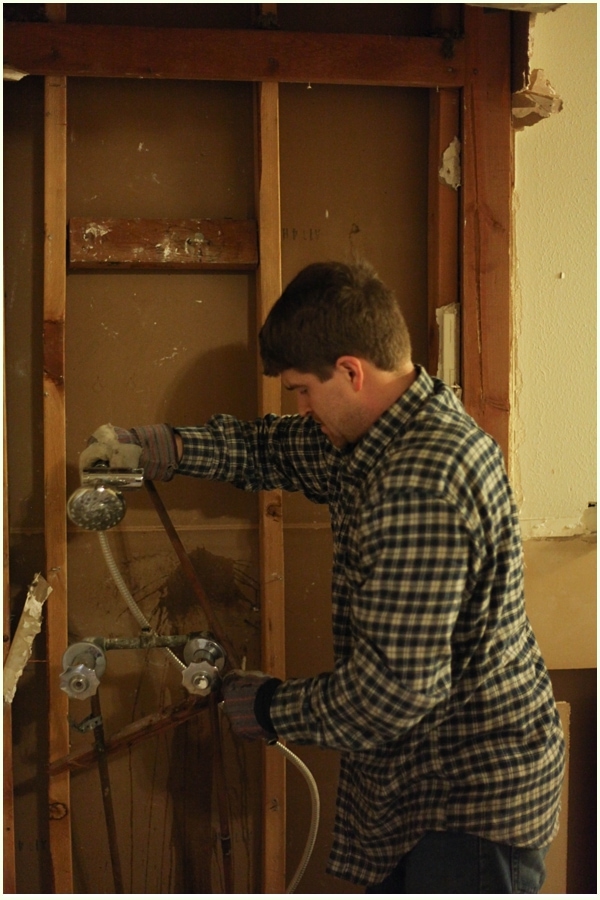
Then he rerouted the new shower pipes going up on either side of the vent stack which is where the new shower head will be located in front of. He build a wall for them and rerouted the hot and cold water to come up. I learned that hot water is always on the left and cold is always on the right. Yay learning! The bonus about the wall is once it is drywalled it will provide privacy for whoever is on the toilet in case they get walked in on. (This has happened to me and it’s horrifying!) Yay privacy!
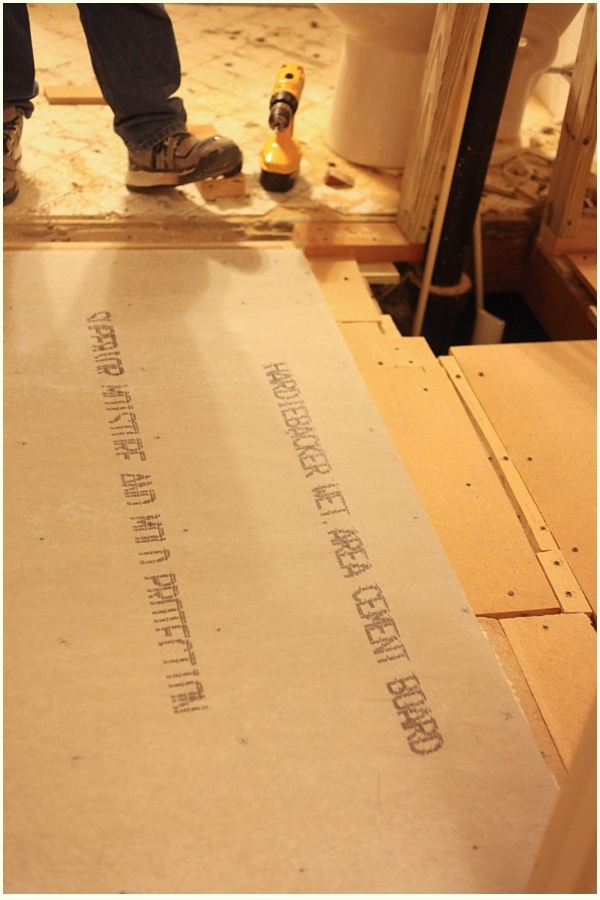
Now that the plumbing is all re-routed (it was much more complicated then I am able to explain…I am giving the 5 minute summary of a 6 week process), we were able to lay the subfloor down. We repaired the holes in the floor and used 1/2″ particle board to lay on top of the floor. Fun story about our particle board- we got it all for free! I dragged Scott to JoAnn’s Fabric one day to get some supplies for a project. He was a good sport but I was really disappointed because the store was remodeling and it was SUPER tiny. Outside, next to the dumpster they had stacks and stacks of 1/2″ particle board in perfect condition that they didn’t need. They said we were free to take it and it was trash…whaaaat?! Okay! 🙂

Typically this is where you would stop when laying subfloor in a home but because it is a wet area (bathroom, duh) we took the extra precaution of laying hardiboard down on top of the subfloor so no water damage would occur.
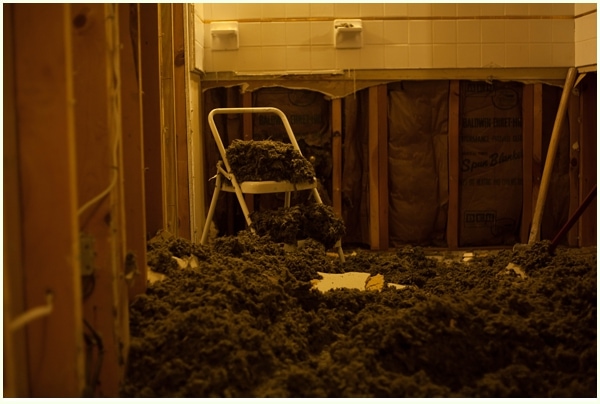
In the meantime, the room next-door looks like this…welcome to our house 😉

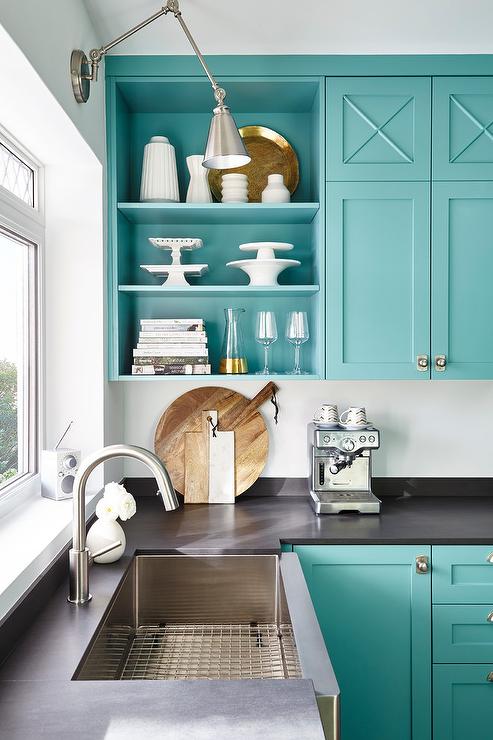
In the meantime I’m patiently waiting for our bathroom to start looking like this. 🙂 We’re getting there!


Aren’t you thankful for a pier and beam house?! Can you imaging trying to do all that plumbing work in a concrete pad? We live in a pier and beam house now and if we ever build a house we will totally do it again. It makes repairs, access, and running cable soooo much easier. Plus it has some give for the kids when they crash and burn, unlike concrete and tile. =P
Looking great Tania!
Chione yes! We have been talking about how we will never want to buy another slab house again- love pier and beam!!
wow! i am thoroughly impressed by your plumber! can’t wait to see the final product! 🙂 also I learned a new word “re-plumbed.” I like! xox
Howdy! I’m at work surfing around your blog from my new iphone 4!
Just wanted to say I love reading through your blog and look forward to all your posts!
Keep up tthe outstandingg work!
Howdy! I could have sworn I’ve been to this web site before but after looking at many of the
articles I realized it’s new to me. Anyhow, I’m certainly happy I discovered
it and I’ll be book-marking it and checking back frequently!