Adding a Butler’s Pantry
This post may contain affiliate links. As an Amazon Associate I earn from qualifying purchases.
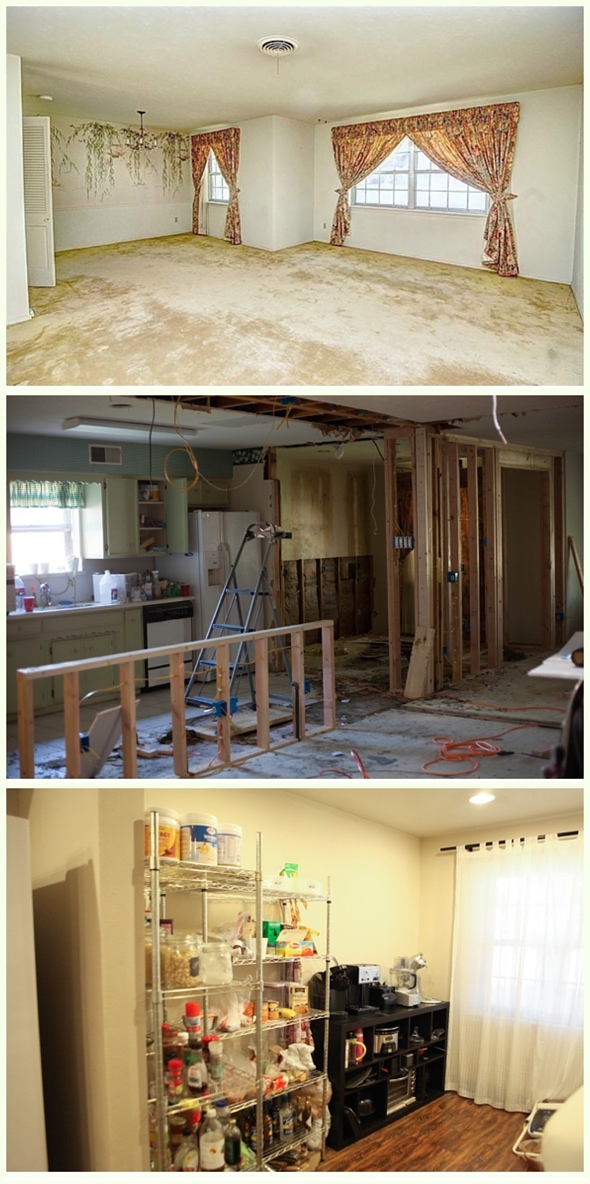
This is the story of humble beginnings. When we bought this house the floor plan was confusing, spaced awkwardly and didn’t function well for what we needed. The only open room in the house was the formal dining and the formal living…and it looked like so:
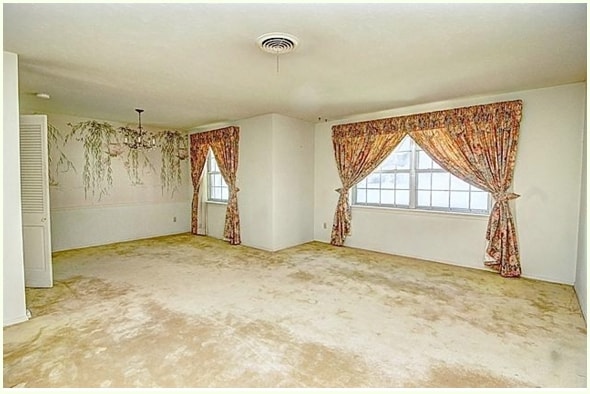
The problem was…we didn’t want/need a formal living room. And the regular living room was tiny and wood paneled and scary- so we decided to expand the kitchen into the “dining room” (marked with interesting wallpaper that took my mom 6 hours to remove…thank you mom!). We knew we wanted more room in our kitchen because one of the things we hated most about our previous house was the lack of counter space. Maybe I should rephrase that- it wasn’t that we didn’t have counter space – our kitchen was a 9 foot long galley style- but rather we had very little room due to all the appliances we have.
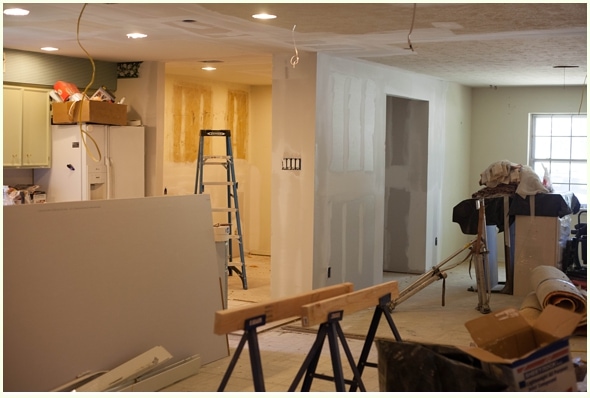
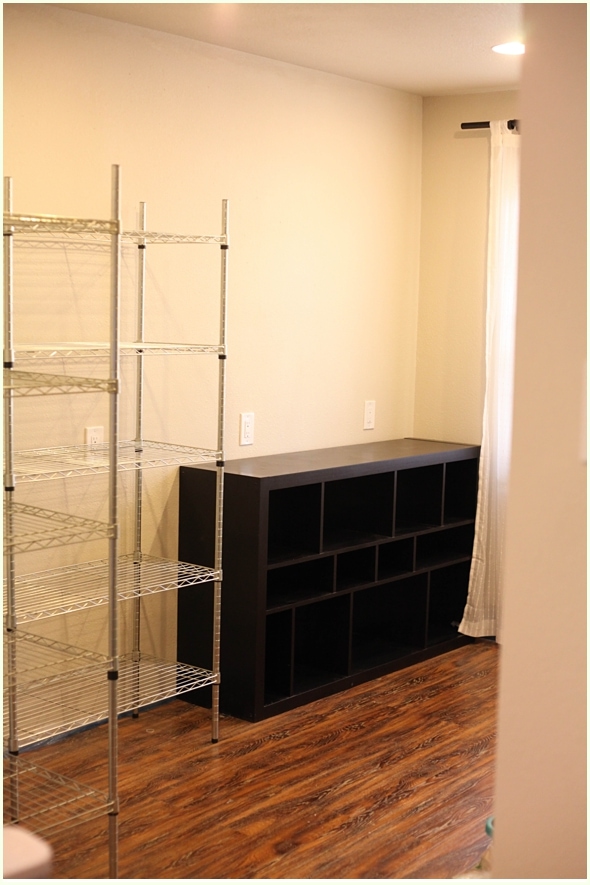
So we moved forward with making the kitchen longer, even though we weren’t sure what we would actually put in there or how we would set it up. And for months – it looked like this:
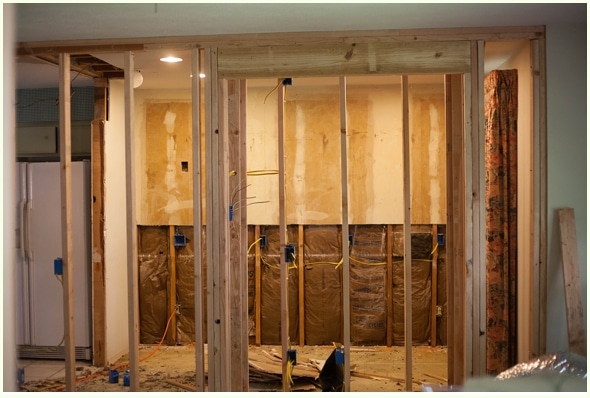
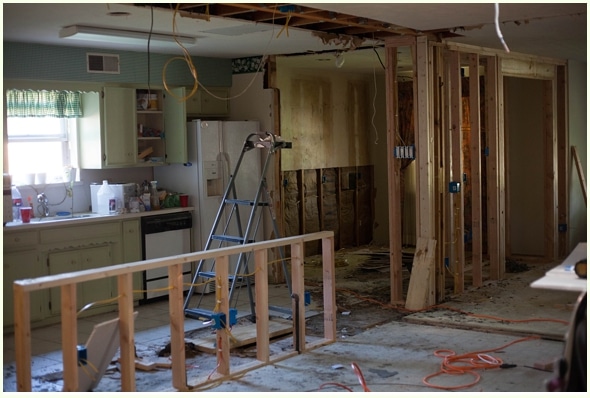
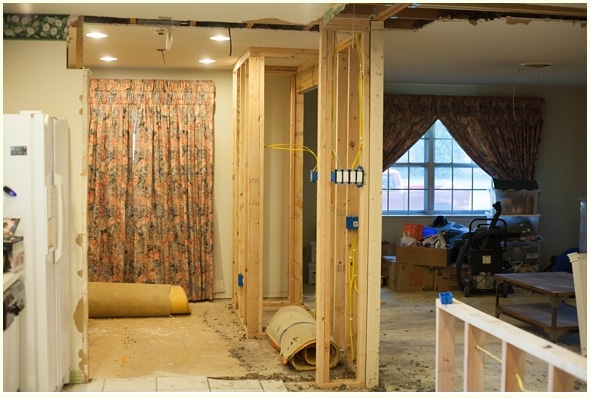

We were going off of faith that we would figure it out before it would be time to actually add anything into the kitchen. The indent that you see in the photo above is for a little nook we added into the dining room. I have big plans for that little nook – either for tablecloths and stuff or for a wine/coffee bar…or both…we will see. 🙂
So, back to the kitchen…I’m definitely a girl who likes to cook and make what I can fresh. One of Scott and I’s favorite things to do together is to make meals – anything from an unfussy grilled cheese to a multiple step cuisine challenge. Along with that has come a Vitamix, a Kitchenaid mixer, a Crockpot, a coffee pot, a Keurig and a recently-ish acquired toaster oven (so we could cook when we didn’t have a kitchen). And there’s even more miscellaneous appliances floating around our kitchen!
When we were designing the layout for this kitchen we knew we needed to solve the appliance dilemma. Our kitchen is extremely open and clutter is unsightly, so we knew we didn’t want to leave our appliances out on the counters. So at first we thought we would just build a cabinet to host them all and keep them out of sight. For me, this included hiding the microwave – the fewer appliances out, the better. But after the practice we had during the remodel of hauling a crock pot and toaster oven room to room to room…we knew we didn’t want to have to do that on a daily basis.
Finally, after days of nonstop, obsessive brainstorming (it was driving me crazy) the solution came to me. We could have two kitchens – one that was “pretty” and where we did our cooking and prep work, and another one that would be “ugly” and hidden away and house all of our appliances, linens and seasonal dishes. When I was describing my idea to someone they said, “oh yeah, like a butler’s pantry.” I nodded but made a mental note to google what on earth a butler’s pantry was. According to Wiki–
A butler’s pantry or serving pantry is a utility room in a large house, primarily used to store serving items, rather than food. Traditionally, a butler’s pantry was used for storage, cleaning and counting of silver; European butlers often slept in the pantry, as their job was to keep the silver under lock and key. The wine log and merchant’s account books may also have been kept in there. The room would be used by the butler and other domestic staff; it is often called a butler’s pantry even in households where there is no butler.
In modern homes, butler’s pantries are usually located in transitional spaces between kitchens and dining rooms, and used as staging areas for serving meals. They commonly contain countertops, and storage for tableware, serving pieces, table linens, candles, wine, and other dining-room articles. More elaborate versions may include refrigerators, sinks, or dishwashers.
So theoretically this is where Mr. Carson will hang out between serving me tea and keeping tabs on those sneaky servants. 🙂 Pretty cool. Turns out my “original” two kitchen idea wasn’t really that original at all. Boo. 😛
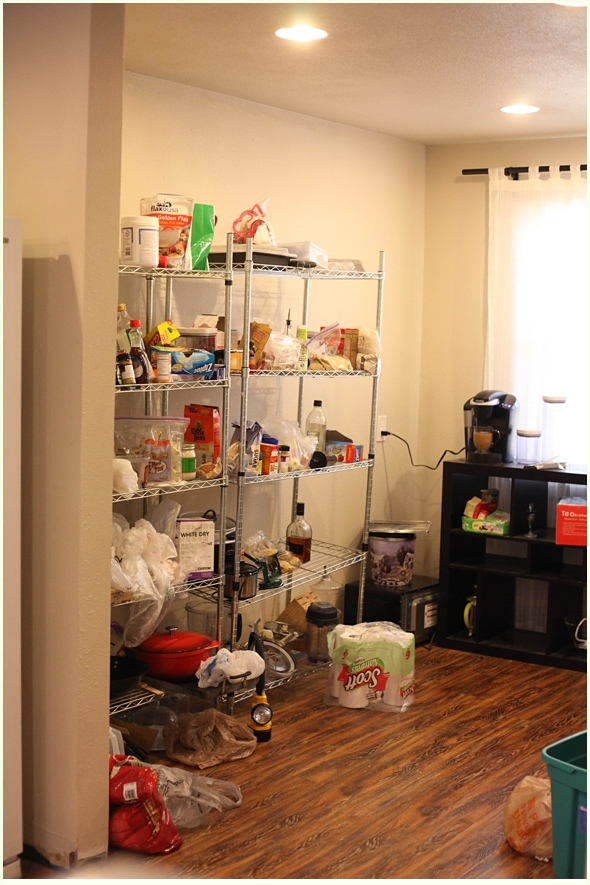
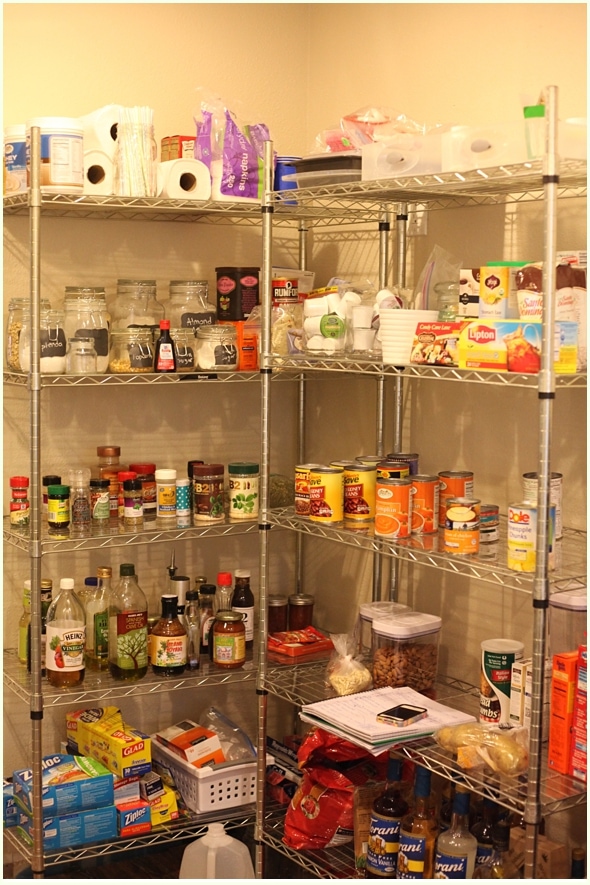
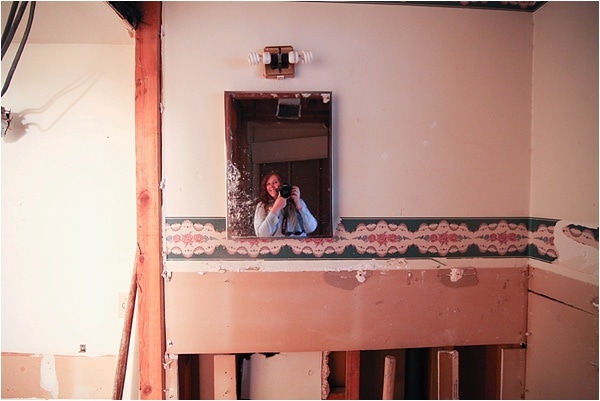
For a long time, this pantry was a storage room for our painting supplies. I won’t lie to you – they are still there. :O There was also no organization – we had all our pantry food heaped in random piles and shoved on shelves. Don’t judge too harshly – we were living in 100% chaos with every room in shambles.
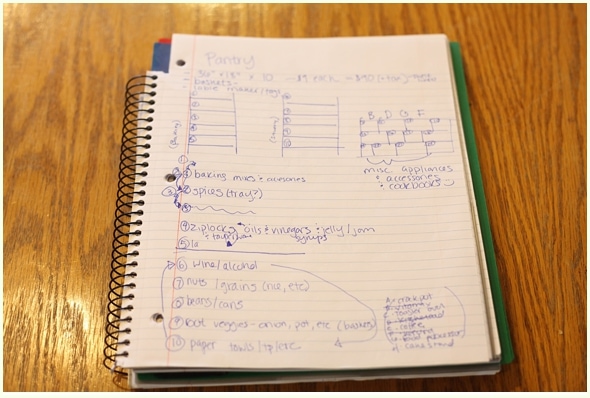
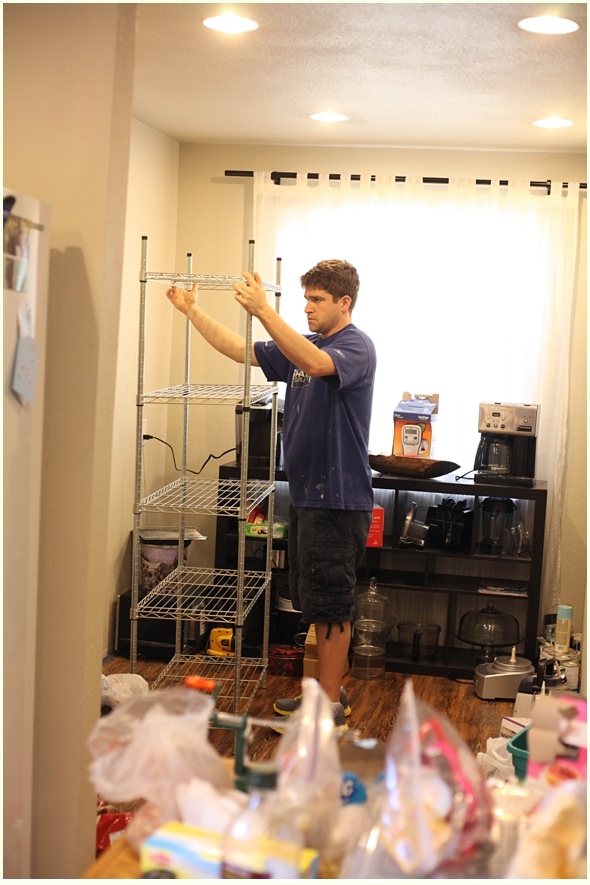
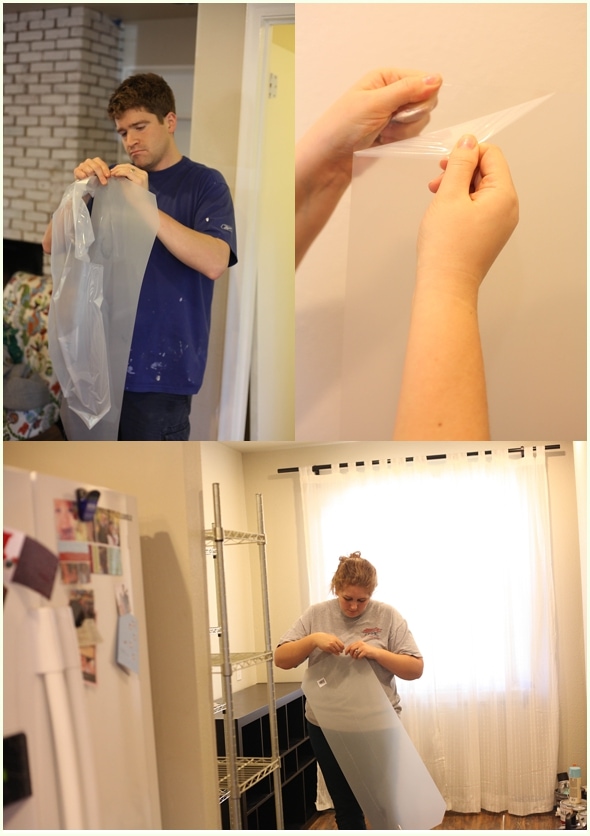
Eventually, I couldn’t take it any more…as soon as we finished our kitchen I got to work on the pantry! I started by making a diagram of what I was imagining and then moved everything out of the pantry and started from ground zero. One of the shelves was put together upside down so I recruited my handsome honey to fix that for me.

After that I began the slow process of putting everything back where it belonged, and came up with a “furniture arrangement” that made much more sense.
We had owned these shelves for a while, they were from walmart and I think cost about $50 each. But they were a pretty close match for the Metro Shelves from Container Store…which worked out really well because it solved the main problem with our shelves! Stuff was constantly falling through the cracks and spilling on the floor, but when I was at Container Store studying their shelves, I noticed they sold these handy little plastic shelf liners that were designed to fit their shelves and create a hard surface for things to sit on. Wouldn’t you know it…they fit our shelves perfectly! 🙂 The bonus is that once you remove the plastic backing from both sides these little guys are actually almost completely invisible!
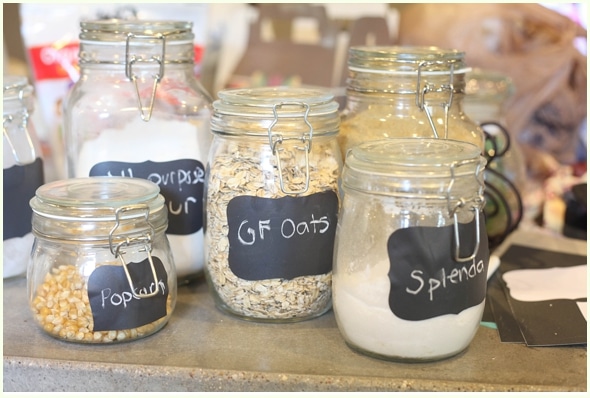
I picked up some Martha chalkboard labels for the jars I keep our staple items in. (FYI Hobby Lobby sells their own chalkboard labels for like $2 if you are looking for any!). I am just really into chalkboard stuff these days! So fun!
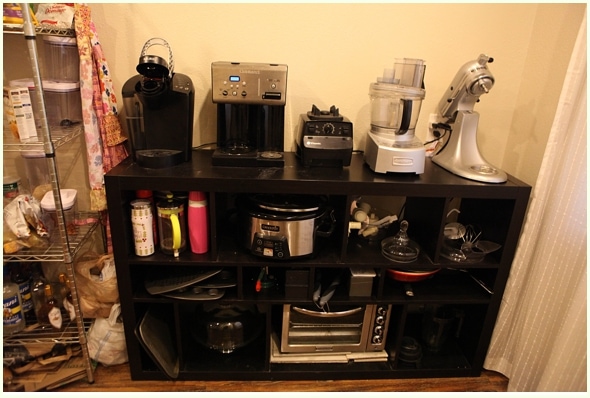
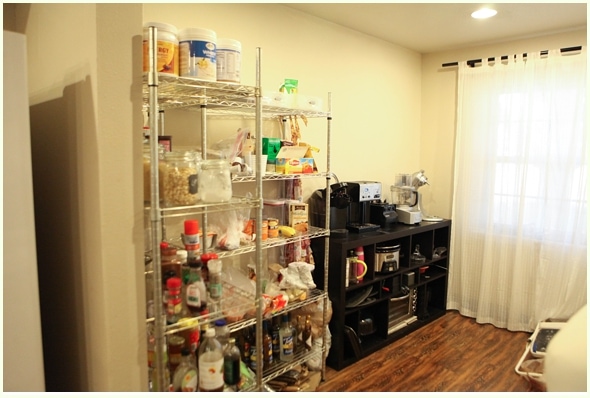
After the food items were up it was time to tackle the appliances. I used this Ikea tv stand (which is now a kitchen stand, thank you!) to house our appliances. It worked out pretty nice, each has their own little space with various baking/cooking/rarely used items in the shelves beneath. Everything is plugged in back here so when I want to make smoothies or something I just take the Vitamix container out into the kitchen, add everything I want and take it back and blend it in the pantry. No lugging around heavy appliances, not stuff all over our counters…so nice!!
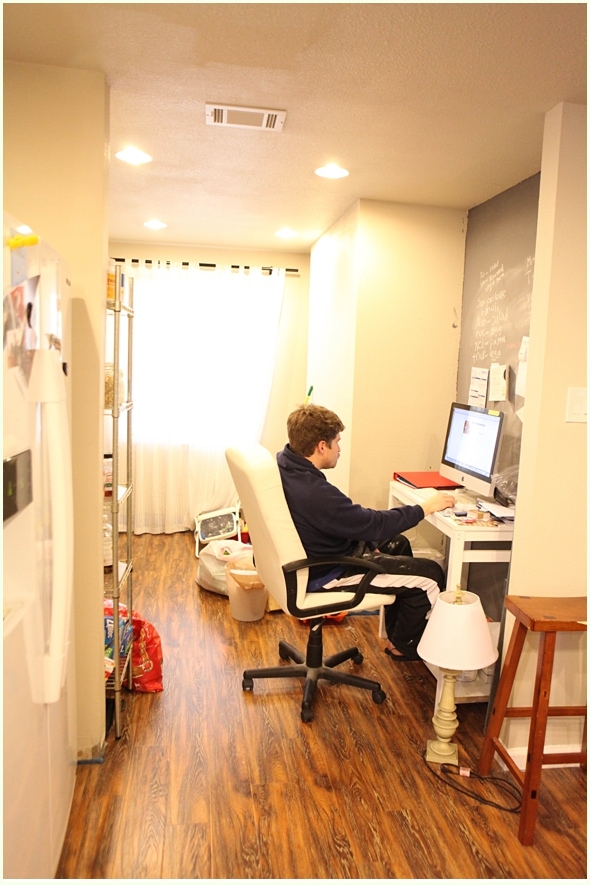
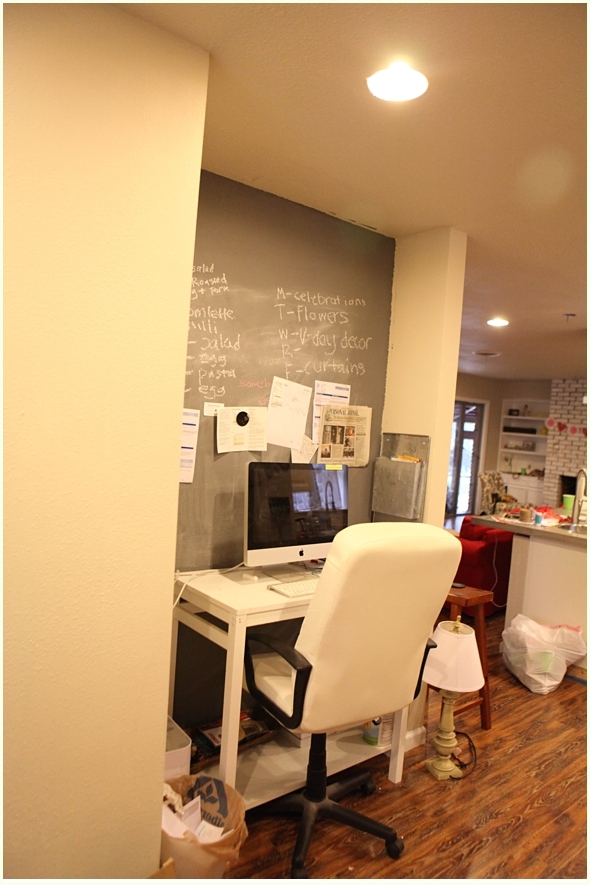
We also decided to create a little home office nook in our pantry! I painted the wall with magnetic paint (so ridiculous to use and took me like 8 coats but I love it!!!) and chalkboard paint. This is where I blog from and edit photos. Eventually it may move into the library/craft/photography/room that we are going to create- but for now I am happy to be in the kitchen. 🙂
So this is where we are at today. Definitely not done. I want to add actual kitchen cabinets and countertops to the wall along with shelving for our cookbooks (whenever I find the box they are in :P) . I also want to get a little more creative with our food storage- not sure what that will entail – maybe rolling carts (one for baking, one for grains, etc) or maybe something totally different – we’ll see. Either way…HUGE improvement from before!!! 🙂
And just for fun…here’s a before/during/after….what a change!!!! 🙂 (and yes….we did throw away those curtains. :P)
3 Comments