Brutally Honest DreamBox 2 Review
This post may contain affiliate links. As an Amazon Associate I earn from qualifying purchases.
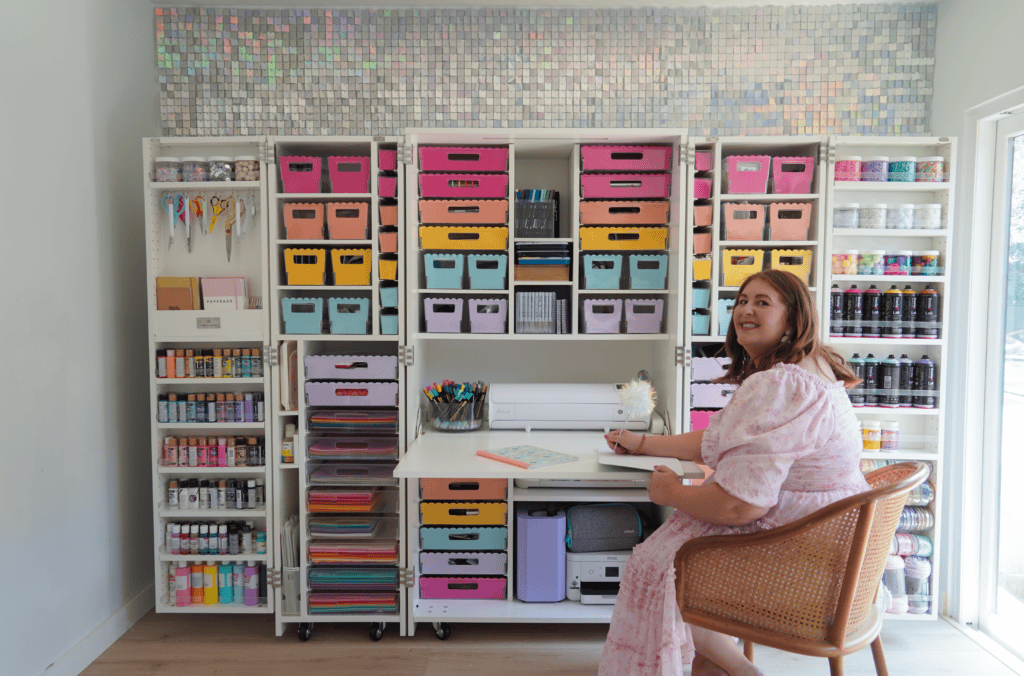
What if I told you I had the solution to all your craft room organizing woes? Because I do! Meet my newest crafty BFF, The DreamBox 2 from Create Room!
If you are sick of spending more time searching for craft supplies than actually using craft supplies, this piece of furniture may be exactly what allows you to get your time—and sanity!—back.
But, as lovely as the DreamBox 2 is, it’s not the right option for everyone.
Today, we’re digging into everything you need to know about this craft storage solution, including delivery, how hard assembly actually is, and how much stuff truly fits inside.
Disclosure: Create Room gifted me the DreamBox 2 in exchange for this review. Huge thanks to them! That being said, all opinions are 100% my own. This post also contains affiliate links. If you find this information helpful and decide to purchase, please consider doing so through my link! And make sure to use promo code RUNTORADIANCE for the best savings possible!
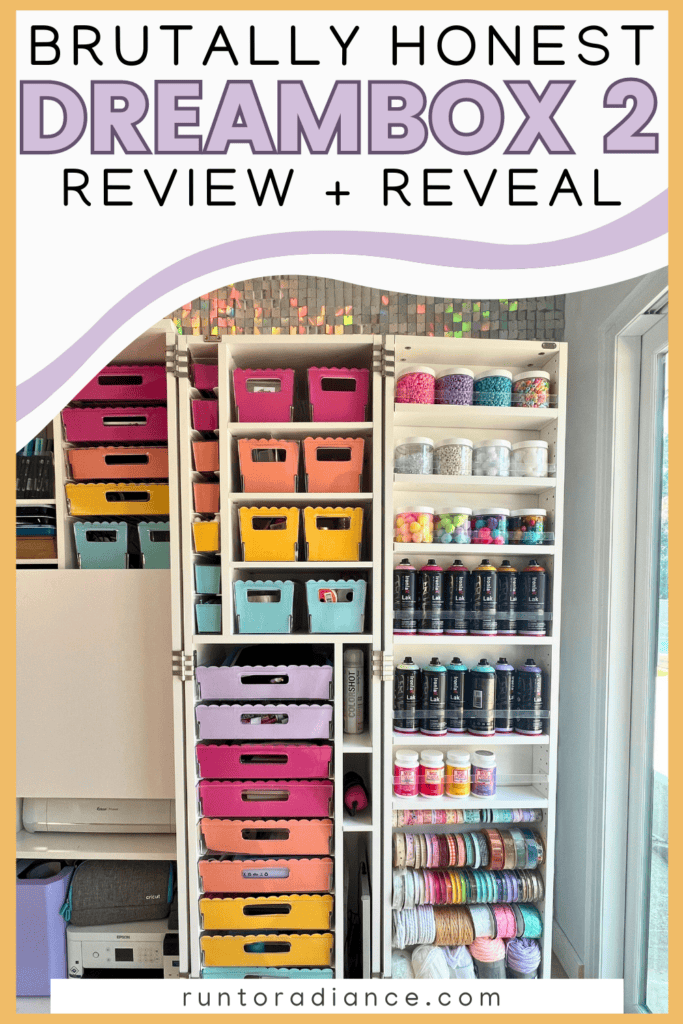
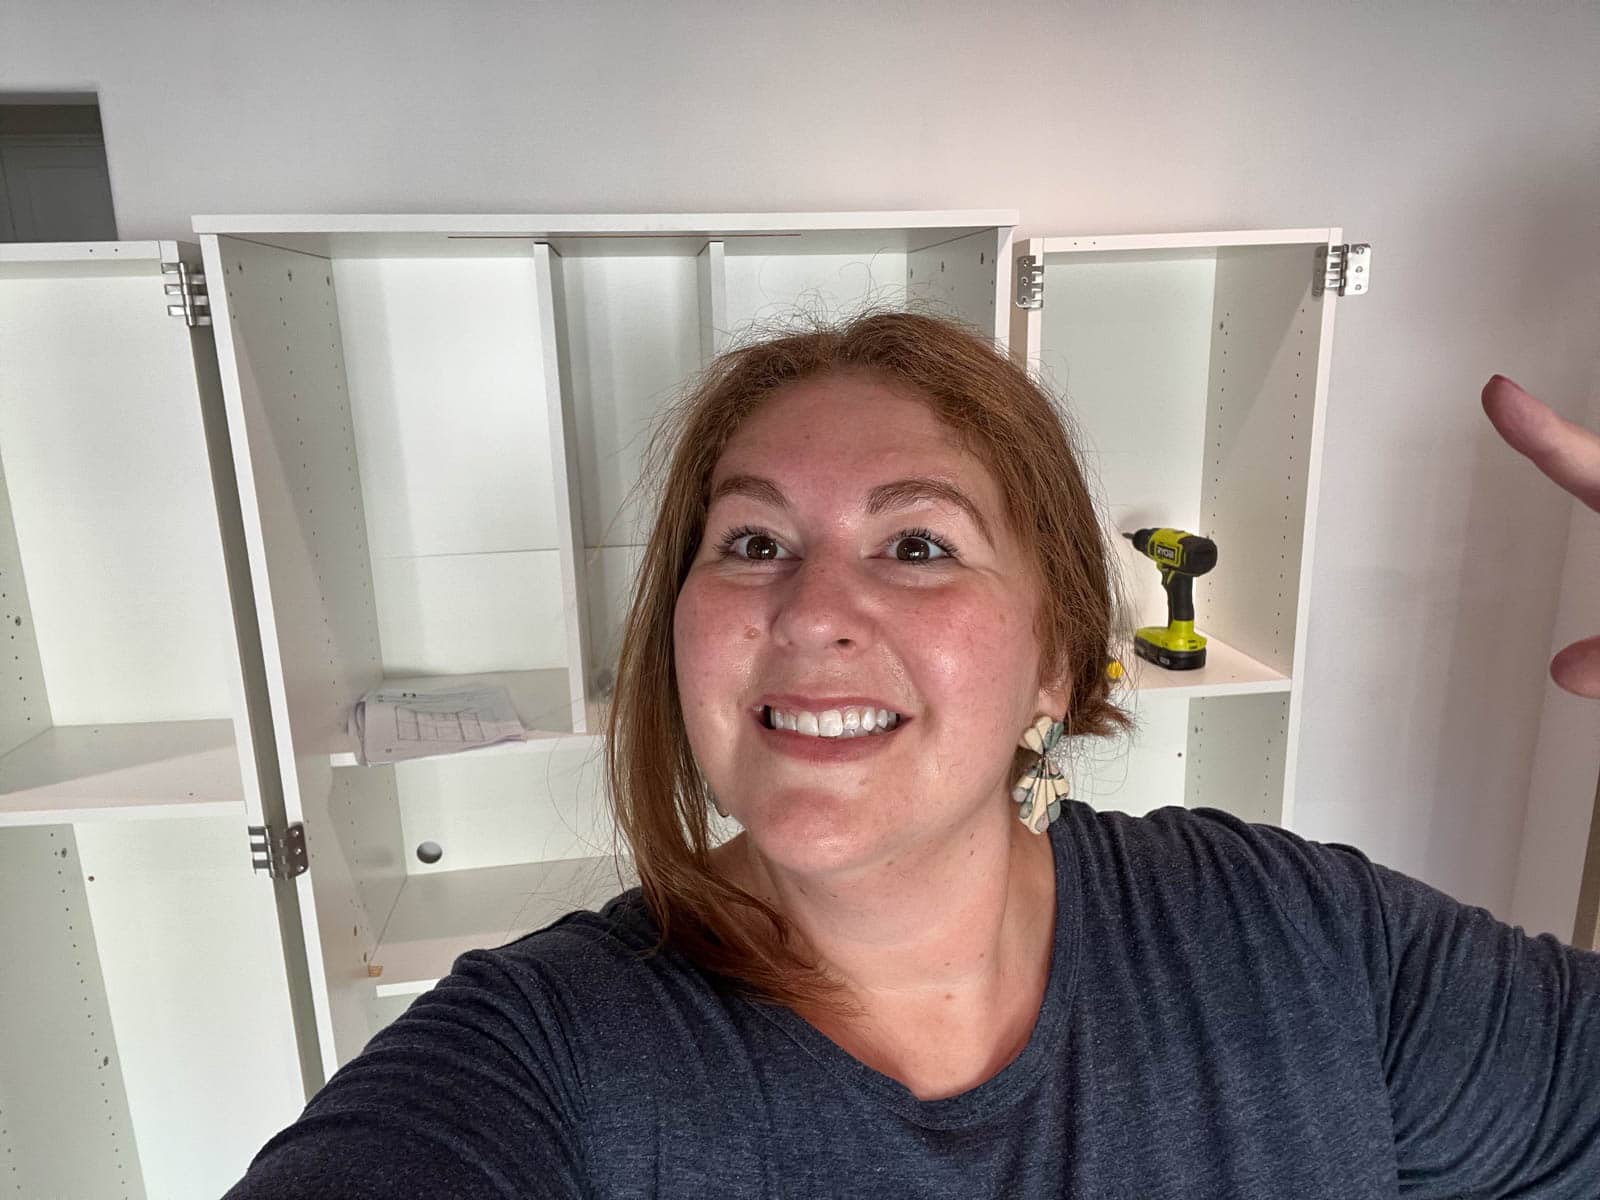
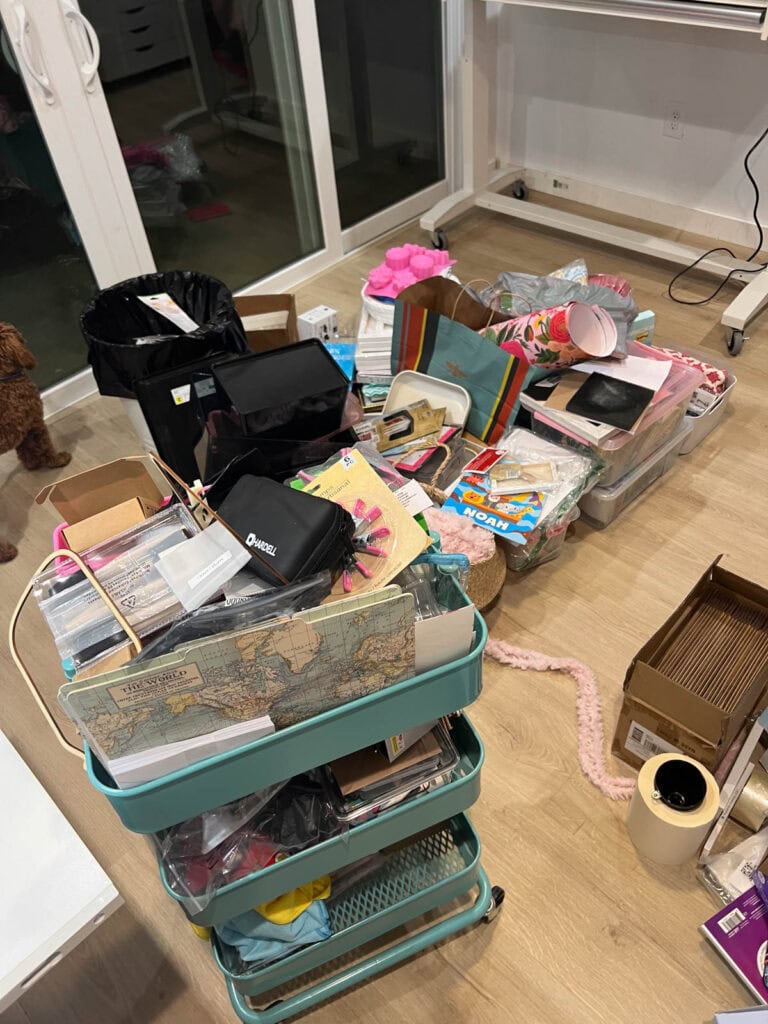
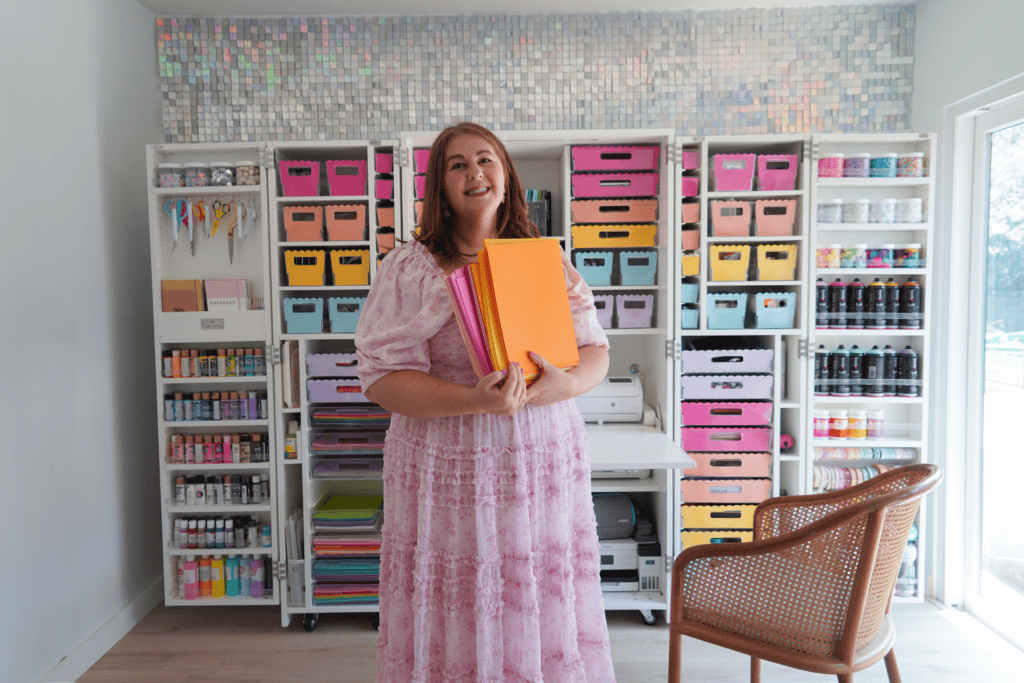
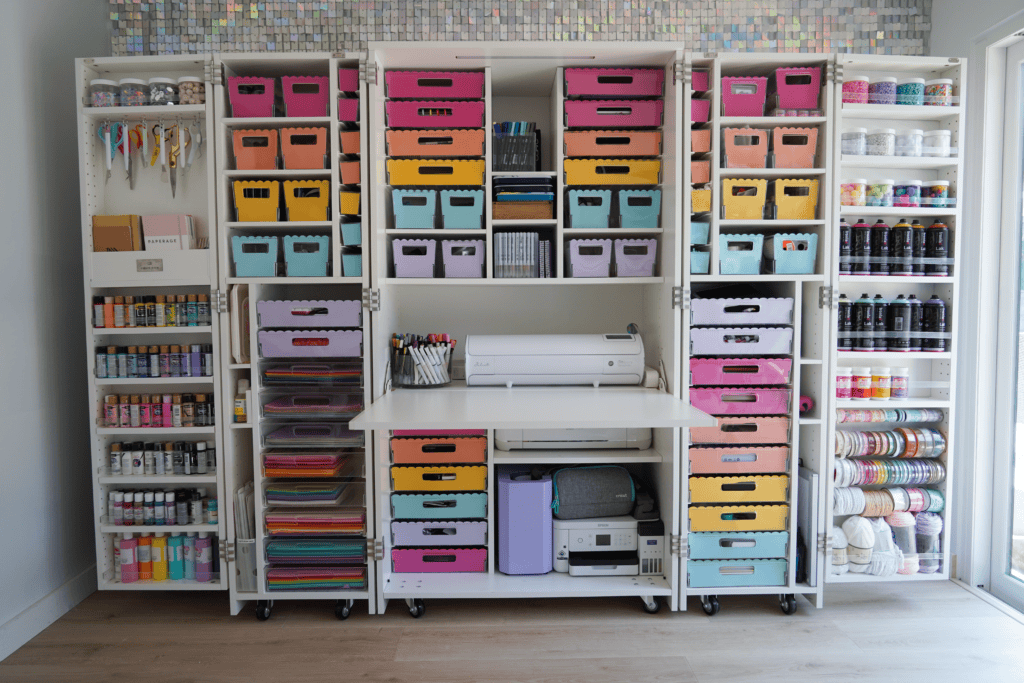
I wasn’t kidding when I said we’d dig into all the info you could possibly need…there is a LOT to cover here! And, as you can see from the photo above, I went a teeny bit extra with mine. 😉
Let’s get to it!
Table of contents
Watch the Video! 🎥
If you are more of a visual learner, I put together a video of my entire DreamBox 2 story here!
I cover different information in this post, but the video does give you a good idea of the process and what to expect if you order this craft storage solution.
What is a DreamBox?
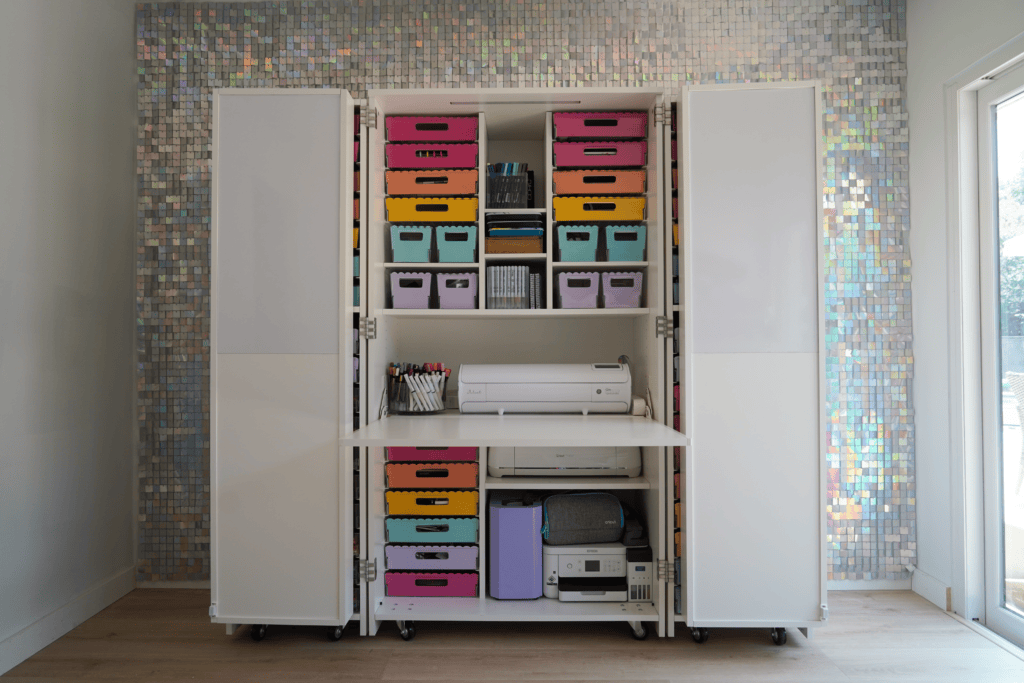
The DreamBox 2 is a customizable storage and organization unit designed specifically for crafters. It’s essentially like having an entire craft room in one compact piece of furniture.
The DreamBox is designed to maximize your storage and house as many craft supplies as possible (and believe me, I put it to the test!).
It can hold a ton of supplies without taking up too much space in your home.
With multiple configurations, including shelves, drawers, and compartments, it’s perfect for organizing everything from paper to paints to cutting machines and sewing supplies…and everything in between!
The best part? When you are done crafting (or need to hide your supplies from sticky toddler hands!), the entire box folds safely away in about 10 seconds.
And yes, that includes the desk, too!
So, this effectively lets you have a craft room anywhere in your house: the empty spot in your living room, the corner of your bedroom, your mud room, etc.
No wonder they call it a “dream” box – this setup is totally dreamy!
By the way, this is the second version of the DreamBox, hence the “2” at the end. This version took a ton of customer feedback and built an even better product.
I haven’t ever used or seen the 1st version in person, so I’ll solely be discussing the DreamBox 2 here!
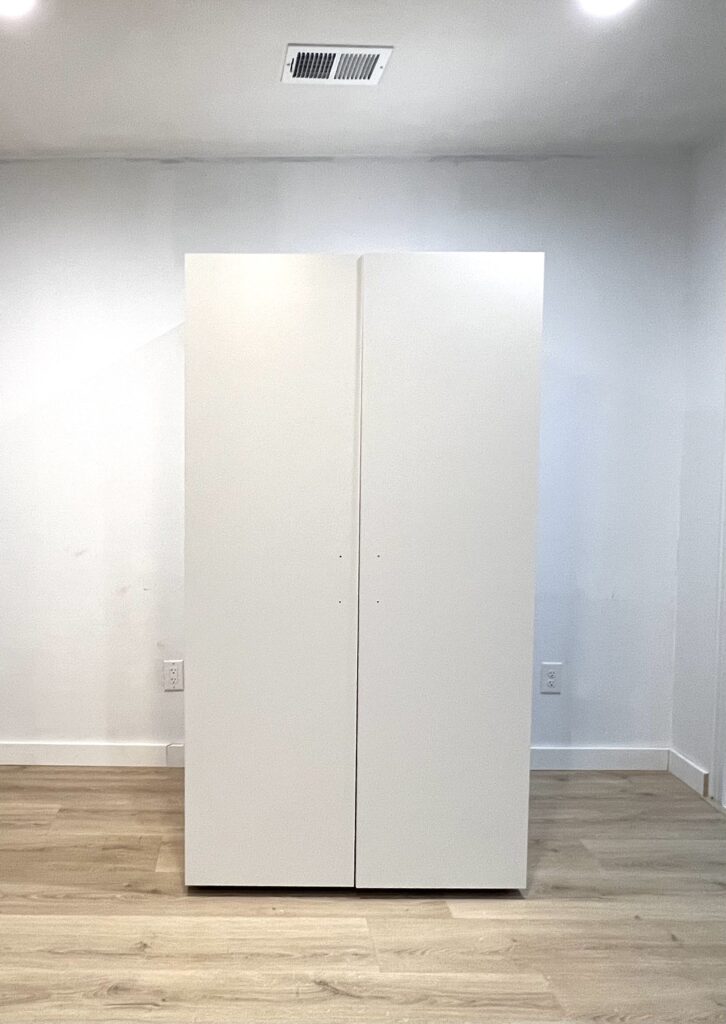
How big is the DreamBox 2?
When folded, the box is a respectful 5′ 11″ tall, 3′ 4″ wide, and 2′ 11″ deep.
But don’t be fooled…when you open it fully, this thing is huge at a very impressive 9′ 2″ wide!
If you don’t have a full nine feet to spare, don’t worry. Create Room thought of that, too!
Thanks to the smart design, you can set the 4 outer doors at different angles and access all your supplies in a space as small as 69″—just under 5.5 feet.
There are several other options in between, too, allowing you to make this piece work in practically any space.
How much does the DreamBox 2 cost?
I’ll be very upfront here: this is a splurgy piece of furniture.
The base version with no upgrades clocks in at $2,599.
Once you start customizing and adding upgrades, the price can quickly skyrocket into the $3000 range.
This price point makes this purchase an absolute splurge. For the right situation, I believe it’s 100% worth it. But, only you can really decide that for yourself!
You do have the option of paying all at once or opting for a payment plan with Shop Pay. The interest will depend on the plan you select, but most people who qualify (via Shop Pay) have the option of 6 months with zero interest.
Want to save some cash? Purchase through this link and use code RUNTORADIANCE to save several hundred dollars off the DreamBox.
Why I chose the DreamBox
My story is probably very similar to most of you! I love creating. Crafting brings me so much joy, and I used to have an entire craft room for my creative pursuits.
But then…we had a baby. And another baby. And started 2 businesses. The craft room was now a nursery, so my husband (who is also self-employed) and I only had one office in our house….and it wasn’t pretty.
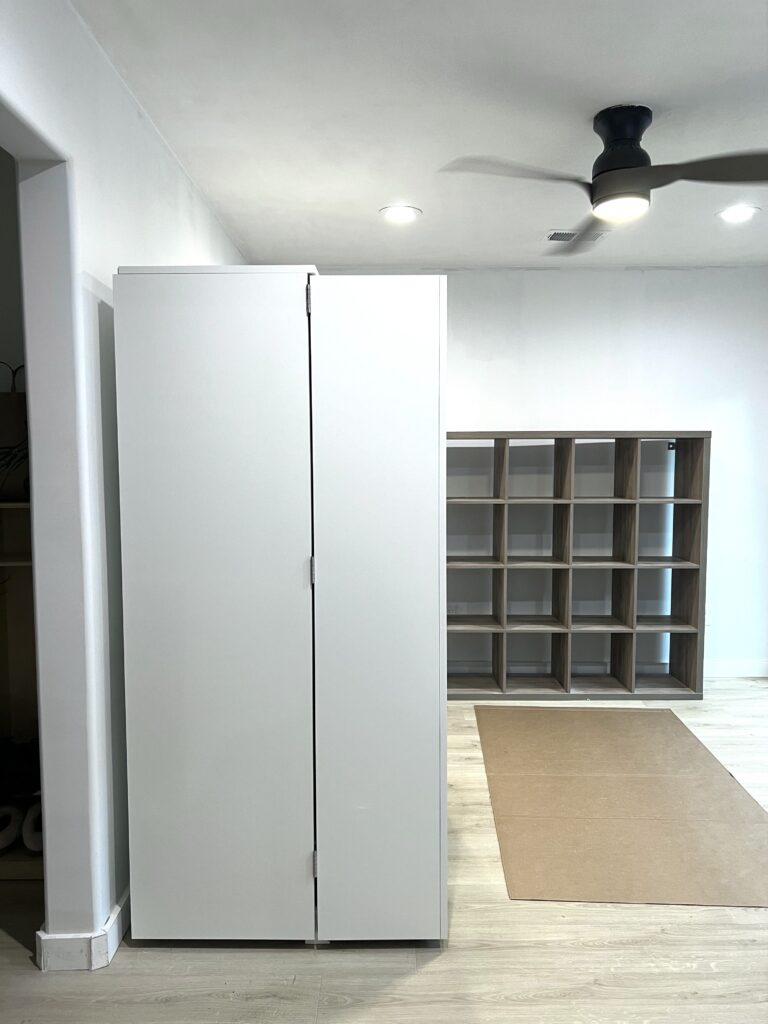
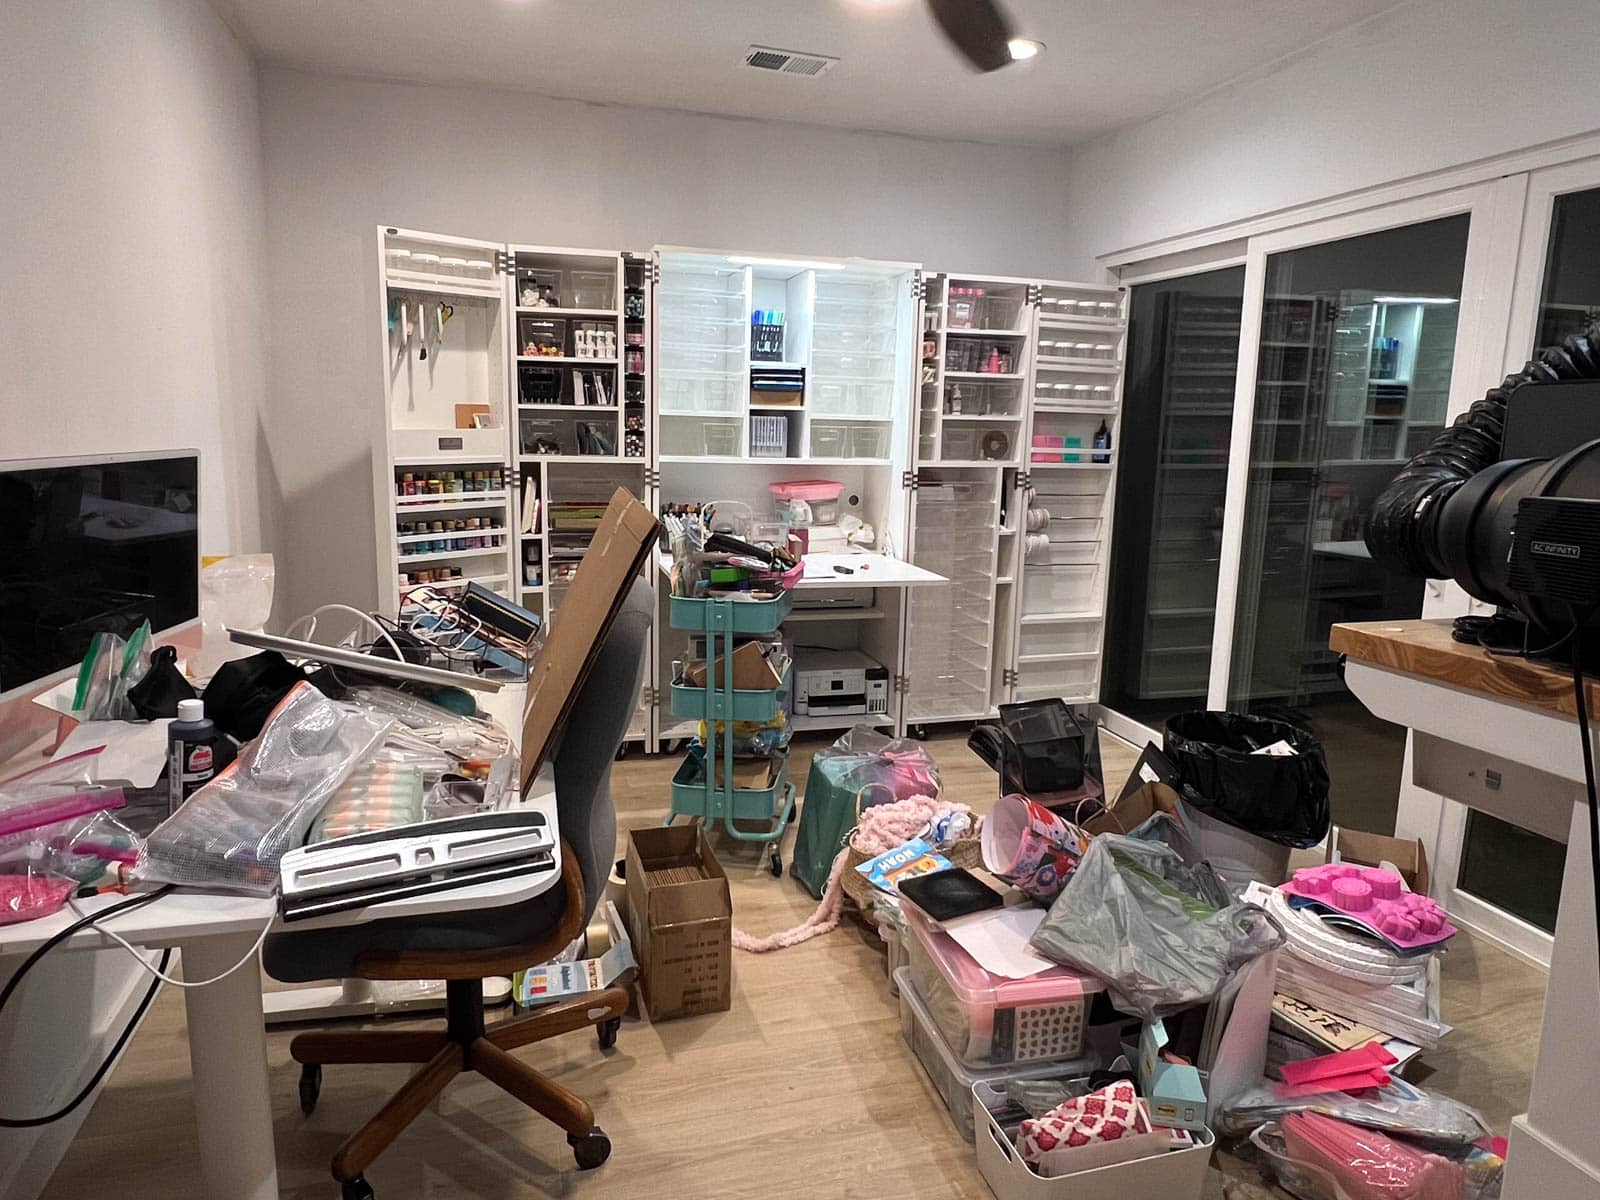
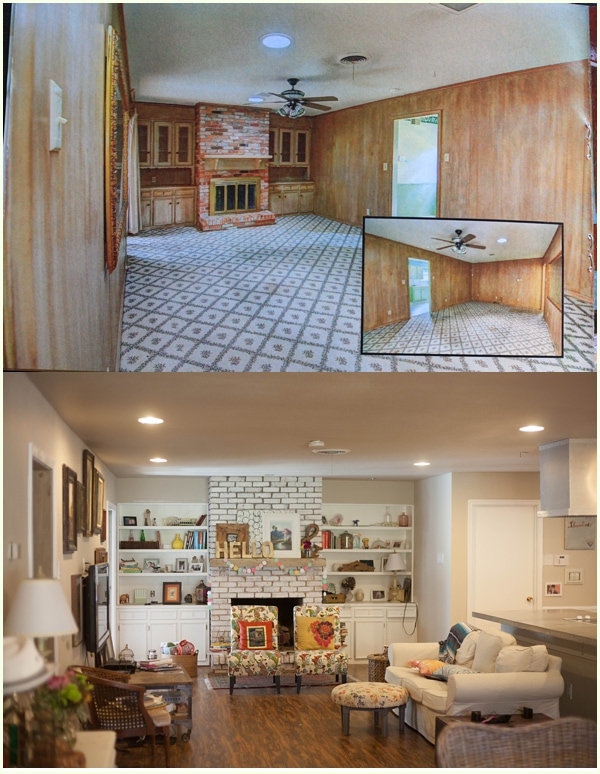
Thankfully, we recently finished a sunroom addition to our home, and I called dibs on it for my office.
It was my big chance to finally set up things in a functional way—I was spending more time digging in bins for craft supplies than actually crafting!
Being able to close up any potential mess (and hide temptation from children!) was the number one reason I begged Create Room to send me a DreamBox!
Not only do I have 2 young kids, but the sunroom is in a high-visibility area of our home. It leads out to the patio and pool, and we entertain frequently, so I can’t have it looking like a train wreck all the time.
Although, now that I have it set up, I never want to close it—it’s too pretty! 😂
Ordering the DreamBox
Ordering is done on the Create Room website, and you’ll have the opportunity to sort through a decent amount of upgrade options.
Handy Tip: Plan Ahead!
Before you order, I highly encourage you to sit down and envision how you want to use the DreamBox, and what you want to fit inside. The accessories and options for upgrading can be almost overwhelming if you don’t have a clear idea of what you want to fit within.
For example, do you plan to keep a desktop in the space? If so, you may want to consider the Short Divider Upgrade Kit, which allows you to have more height to your desk area.
Or, if you know you have a lot of machines like cutters and printers to house, you may opt to have fewer totes and more shelves.
While you can always go back and add on smaller accessories, it’s much easier to have the general build of your box correct the first time—otherwise, you’ll have to take it apart and rebuild!
Not sure where to begin? Some of the more popular accessories and options to add on are the deluxe crown lighting, shaker-style doors, and the DreamBox pre-assembly.
However, I skipped all of the above! 😇 For me, the name of the game was storage and function—I needed to fit as much stuff as possible into my DreamBox!
The upgrades I selected were:
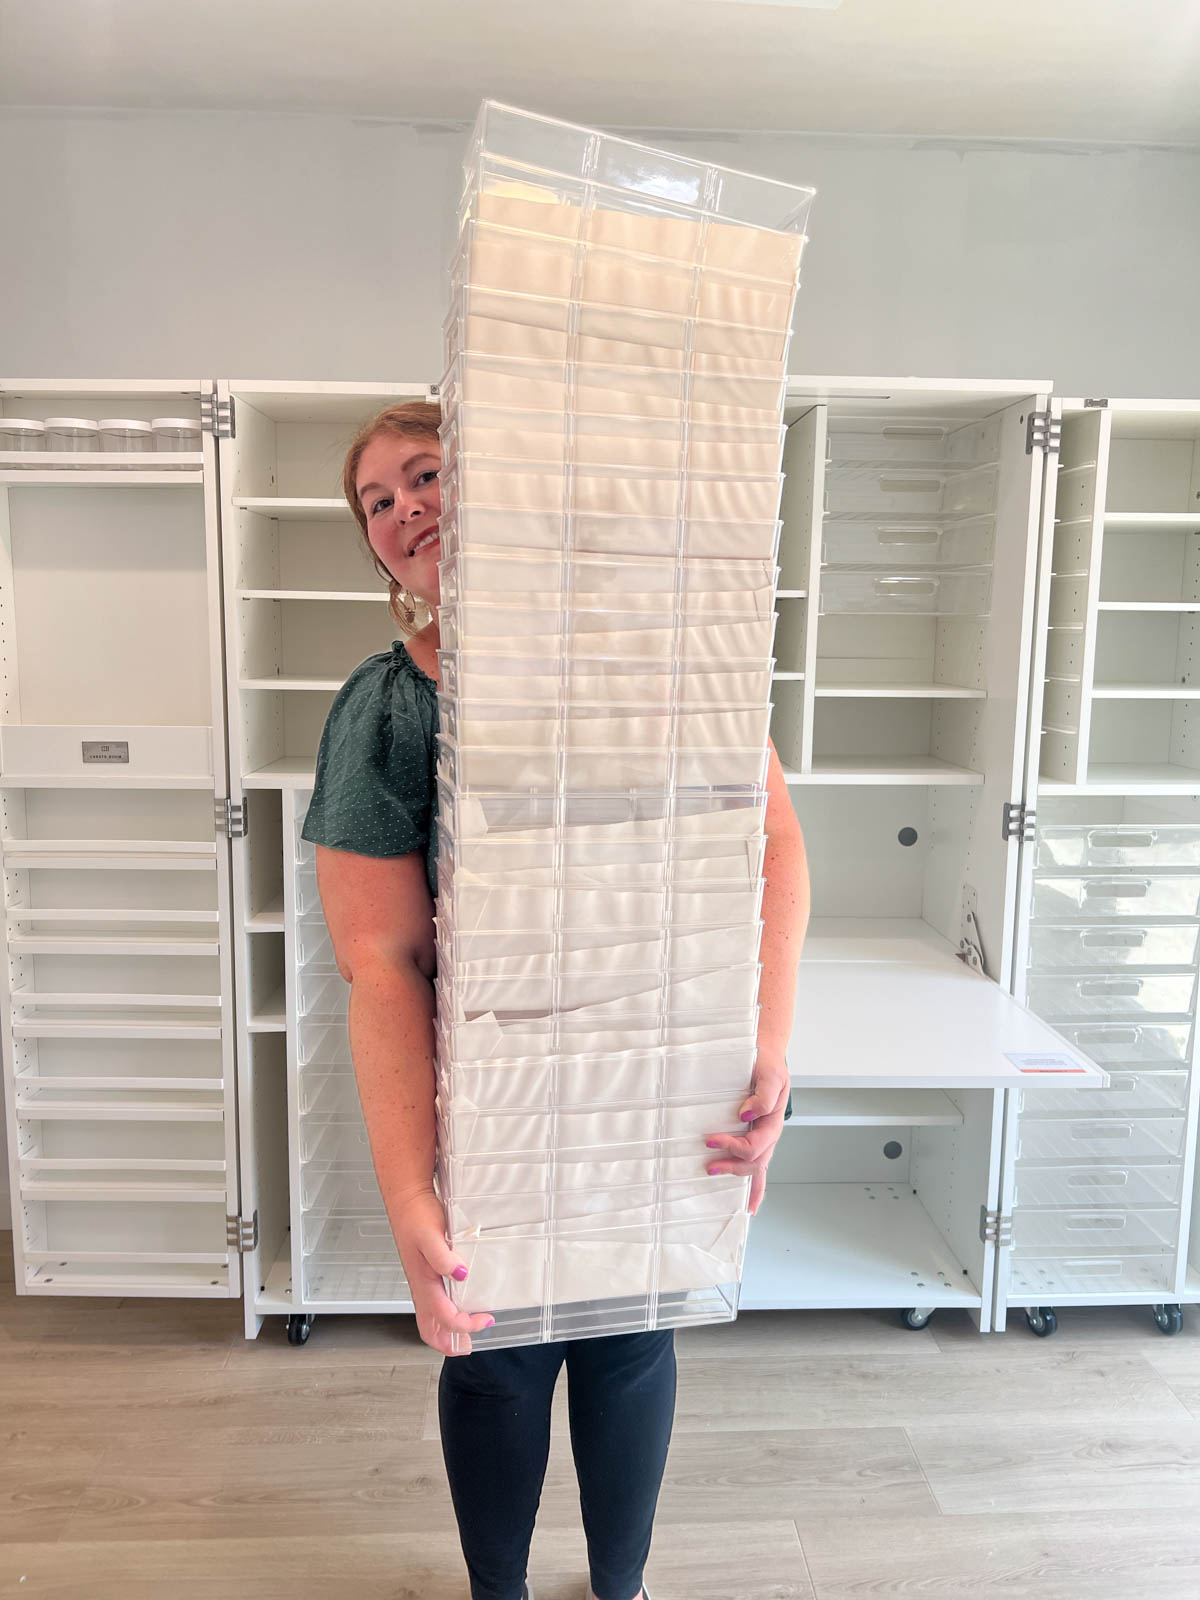
- Full Tote Upgrade – This nearly doubles the amount of clear bins (totes) you receive. With the Half Tote package (included in your DreamBox 2 purchase), you receive 43 clear totes. With the $300 Full Tote upgrade, you’ll get 72. If you have a lot of supplies, this is the number one upgrade I’d recommend!
- Swing Door Upgrade Kit – The outermost doors are called swing doors, and I wanted to absolutely pack them with function. This kit added 8 clear jars, 4 rods, 2 shelves, and 2 additional guards (to keep items from sliding off the shelves when you close/open the doors)
- Clear Acrylic Guards – I loved how the clear acrylic guard with the Swing Door Upgrade looked, so I reached out to Create Room and asked if I could order more. They were absolutely worth the cost!
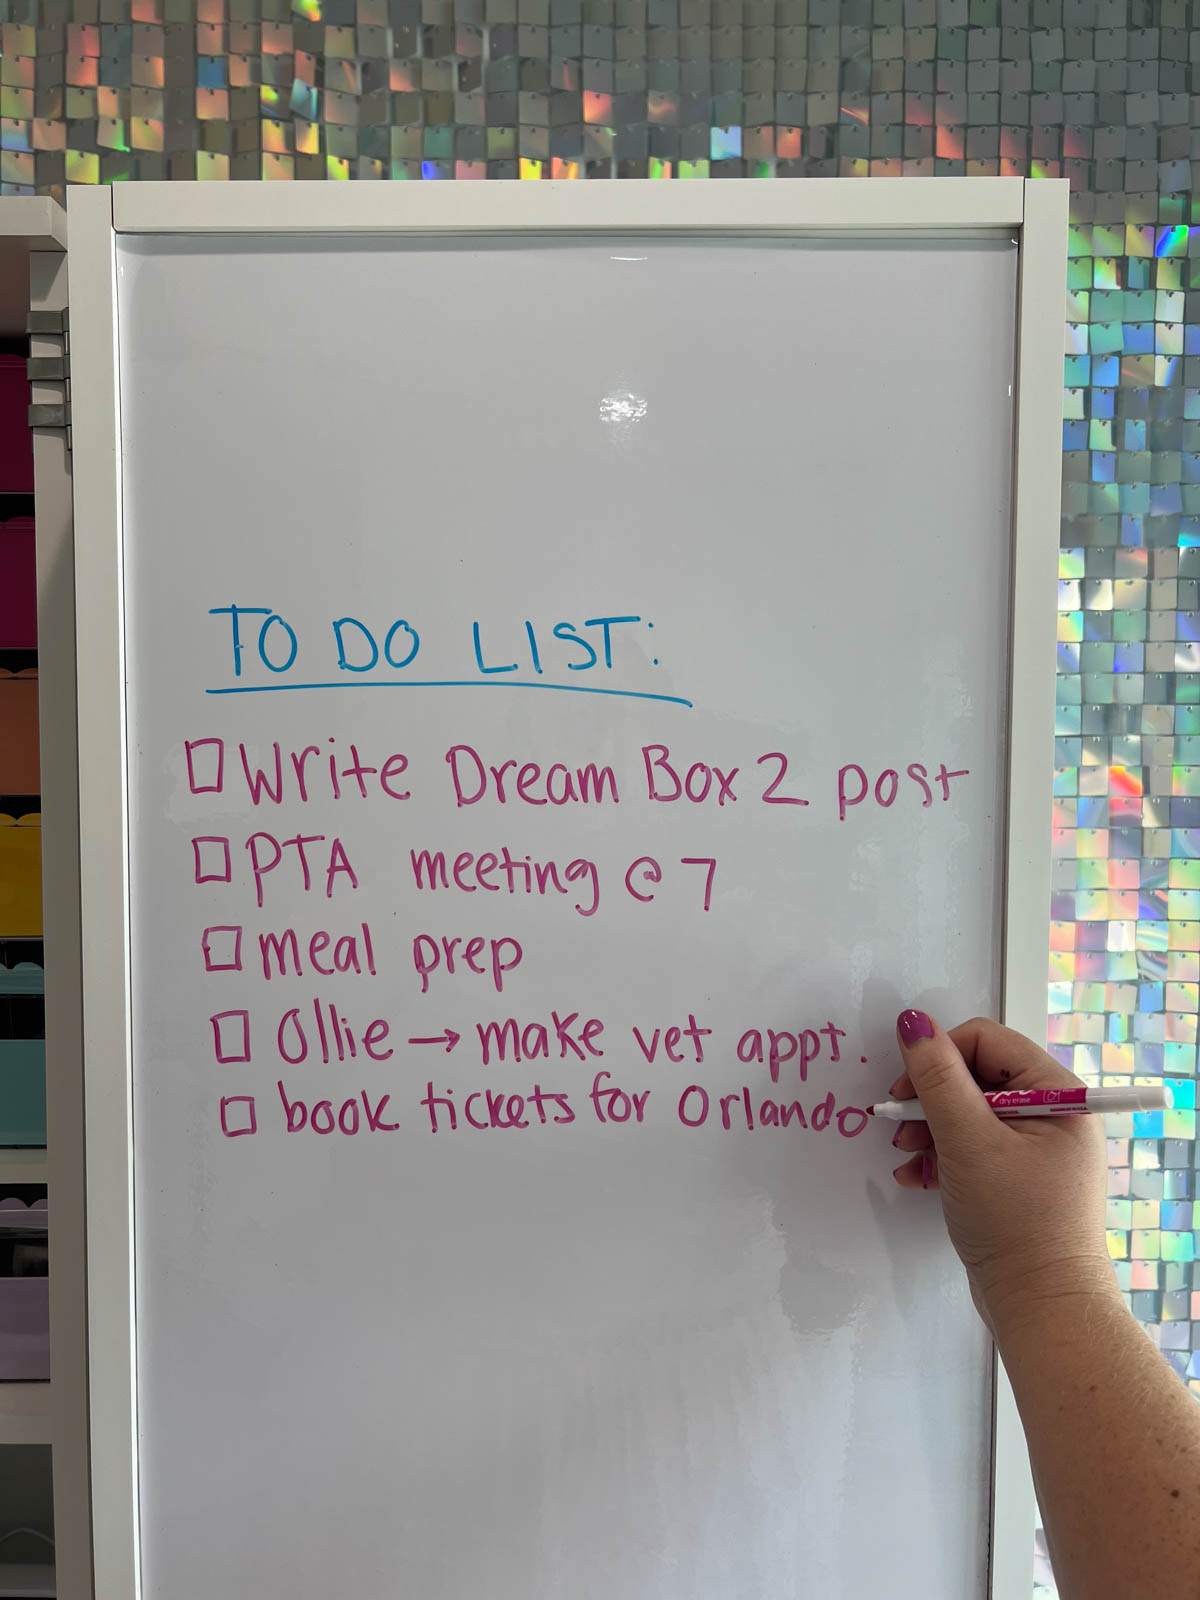
- Whiteboards – I am a HUGE whiteboard fan. I love doodling my thoughts and to-do lists and this upgrade makes that super easy. For $50, you get two, which is enough to either fully cover the back of one swing door, or cover the top half of both (which is what I did). They are also magnetic, which is great for even more function!
Delivery
Once you order, you’ll get an estimated delivery range. Delivery times vary, but as you get closer to the date, you’ll get a phone call from the delivery company with an exact time frame.
I HIGHLY recommend you find a way to be at your home that day and have a buddy with you! You’ll definitely want help hauling all the boxes inside!
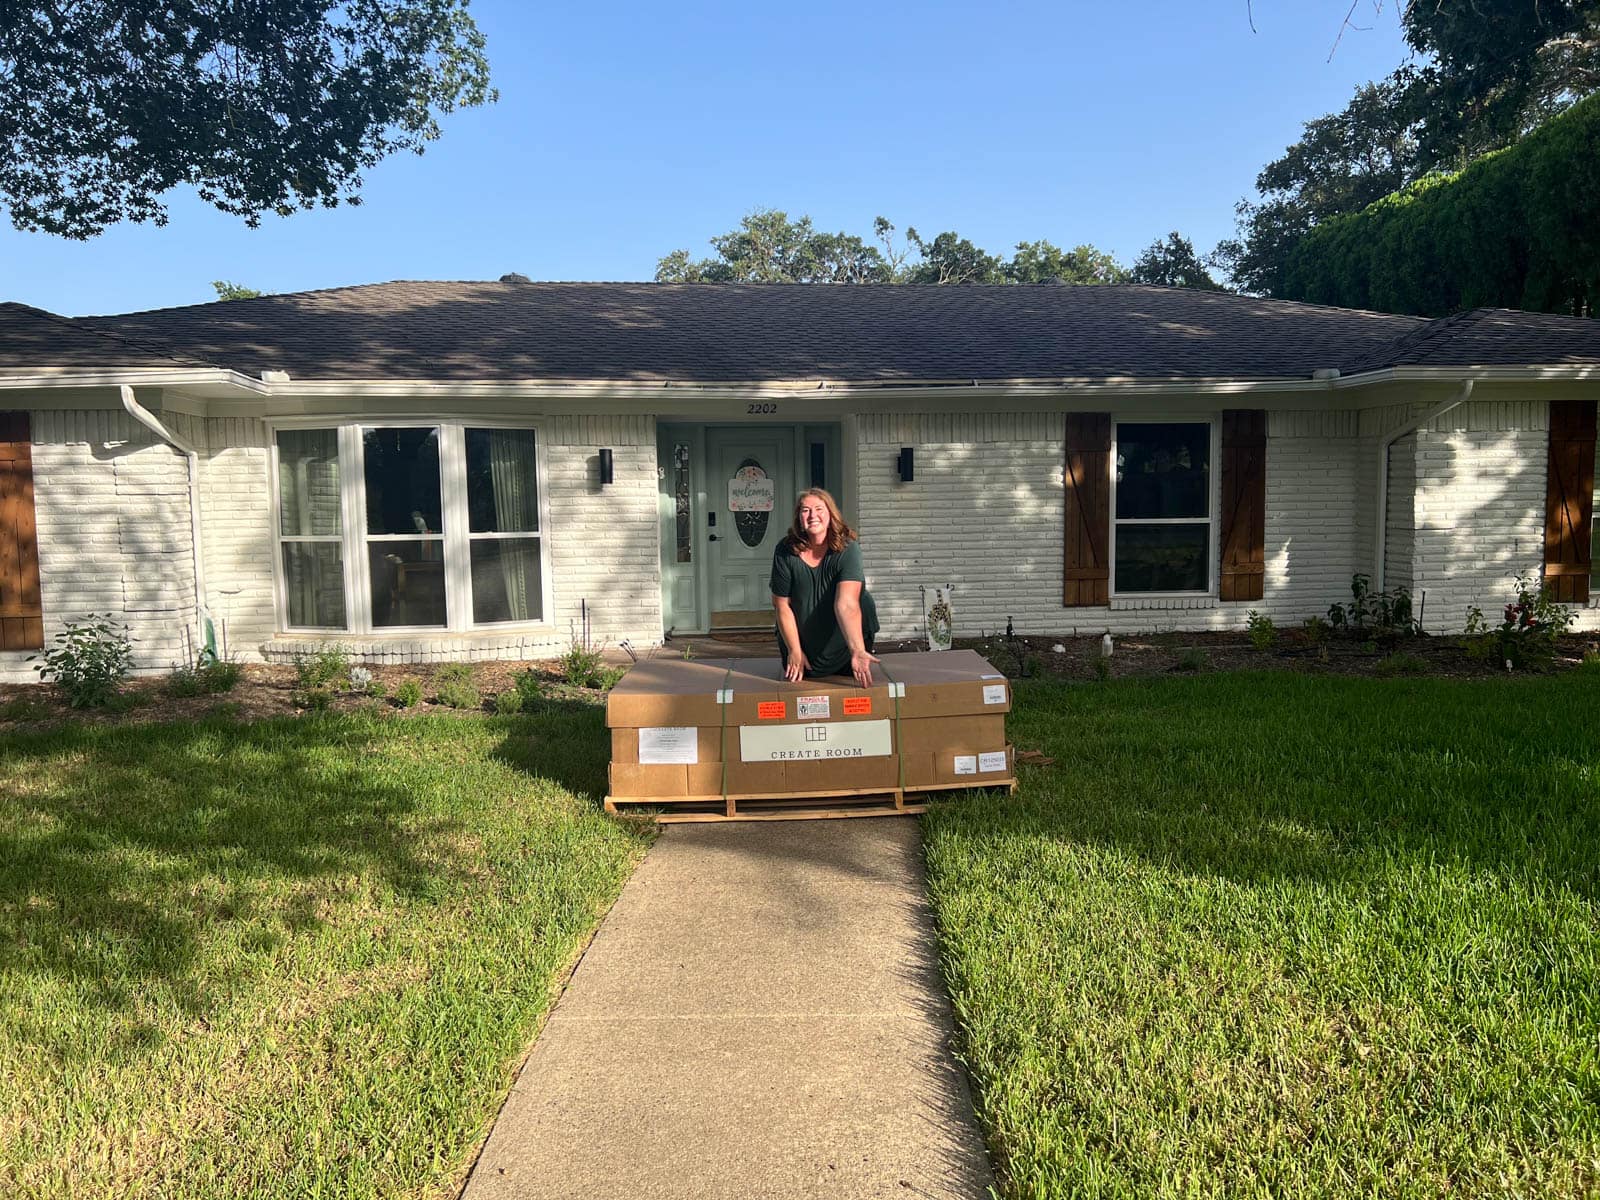
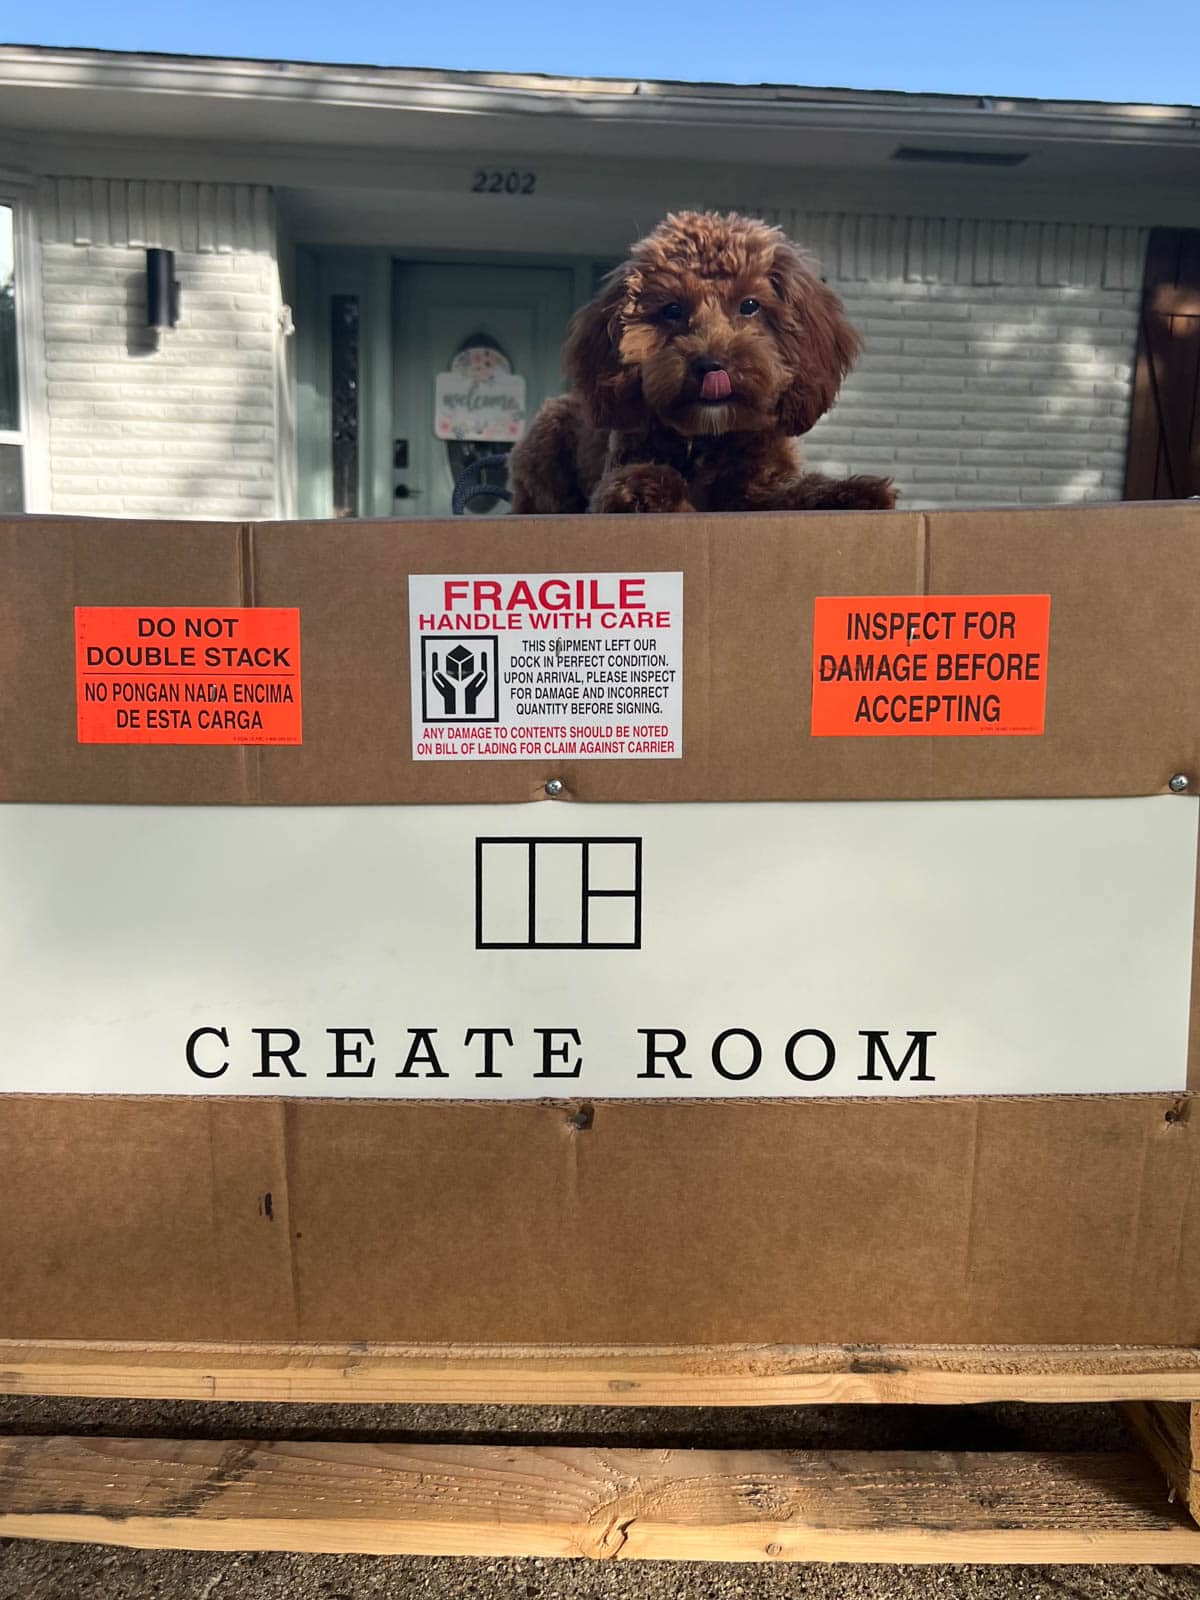
The delivery process was super smooth and easy!
I was told by the company to expect it as a driveway delivery, but because of how our driveway is set up (it’s down a narrow ally and up a slight hill), the driver asked if we would be okay with a front yard delivery instead.
That actually was WAY better for us—no hauling up boxes up the garage stairs, yay!
The driver was totally professional and very kind. While it isn’t expected or required, we did tip him and send him off with a cold bottle of water. It was over 100 degrees here in Dallas that day!
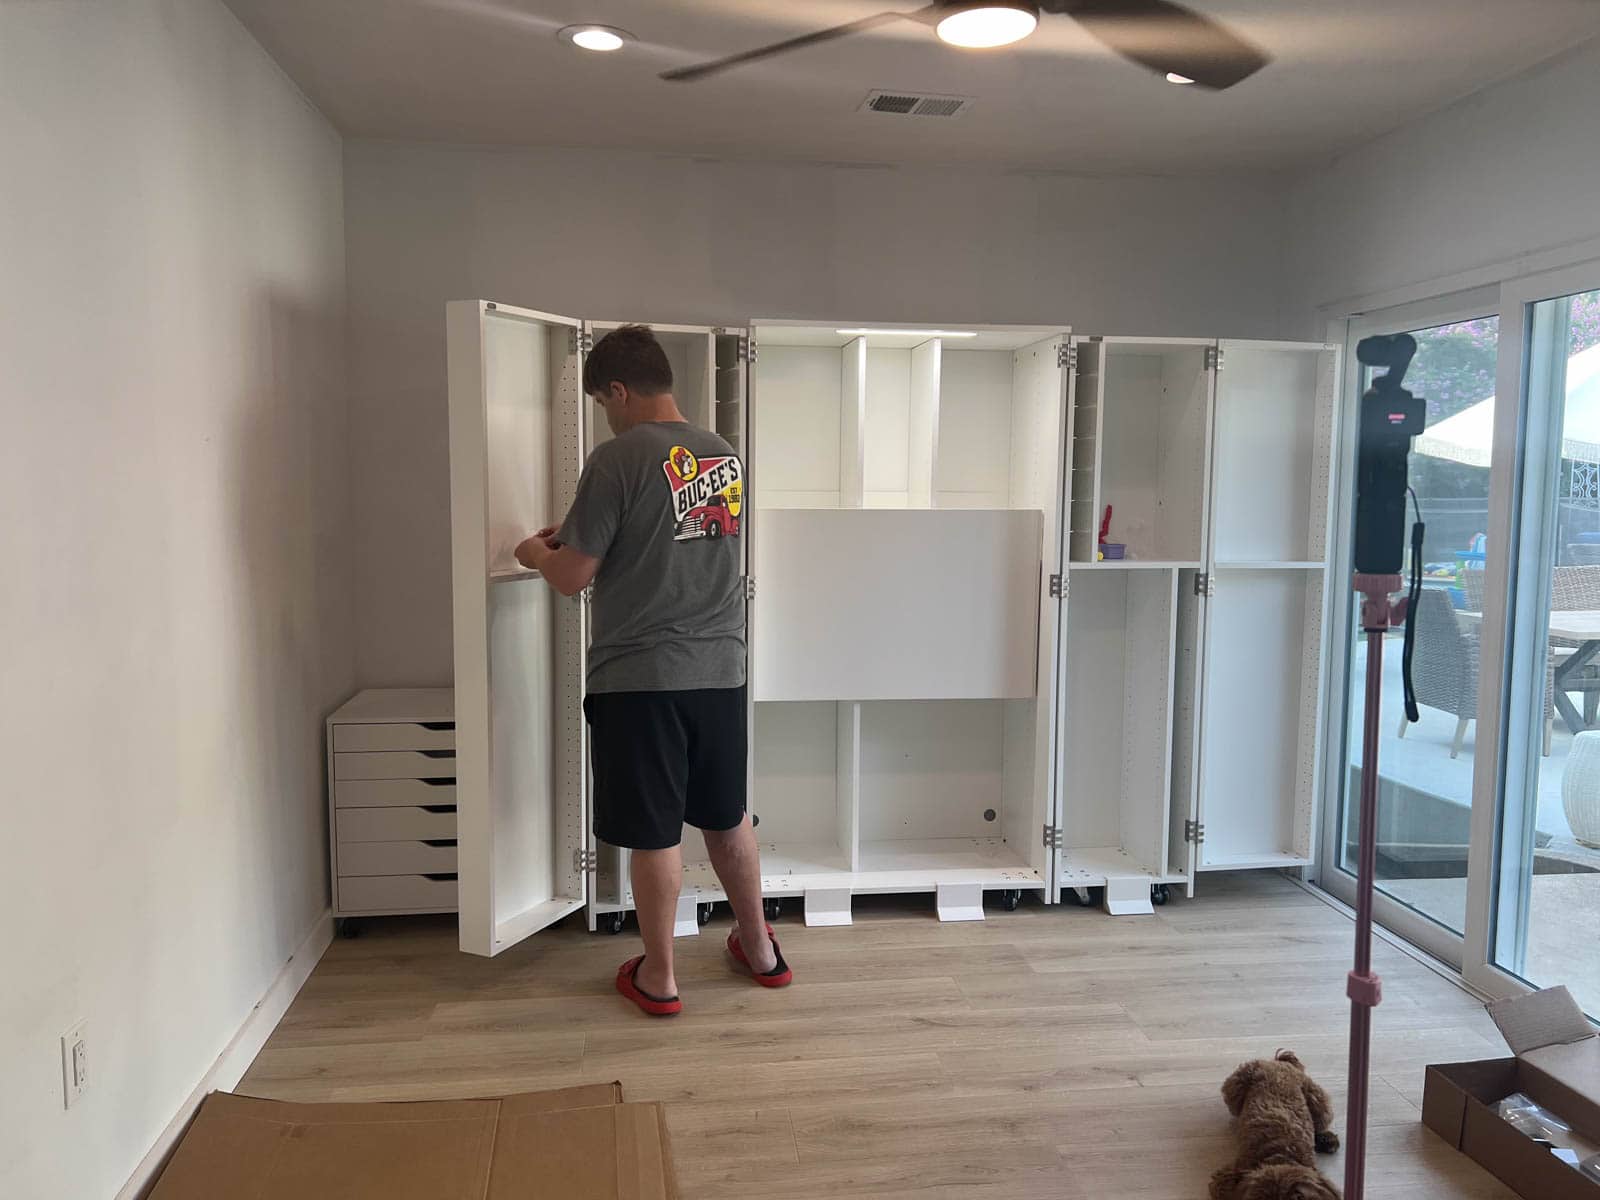
Assembly
Here’s the thing you are probably most curious about: how bad is assembly really?
Honestly, in my opinion, not bad at all!
I went with the DIY option rather than the pre-built upgrade because I wanted to see how hard it really was. I noticed most review posts selected pre-built, and I really wanted to review the actual building process.
Plus, honestly, I would rather save my $400 for craft supplies. 😉
How hard is it to assemble the DreamBox ?
If you have ever assembled any kind of flat box furniture (like Ikea) before, you can absolutely do this!!
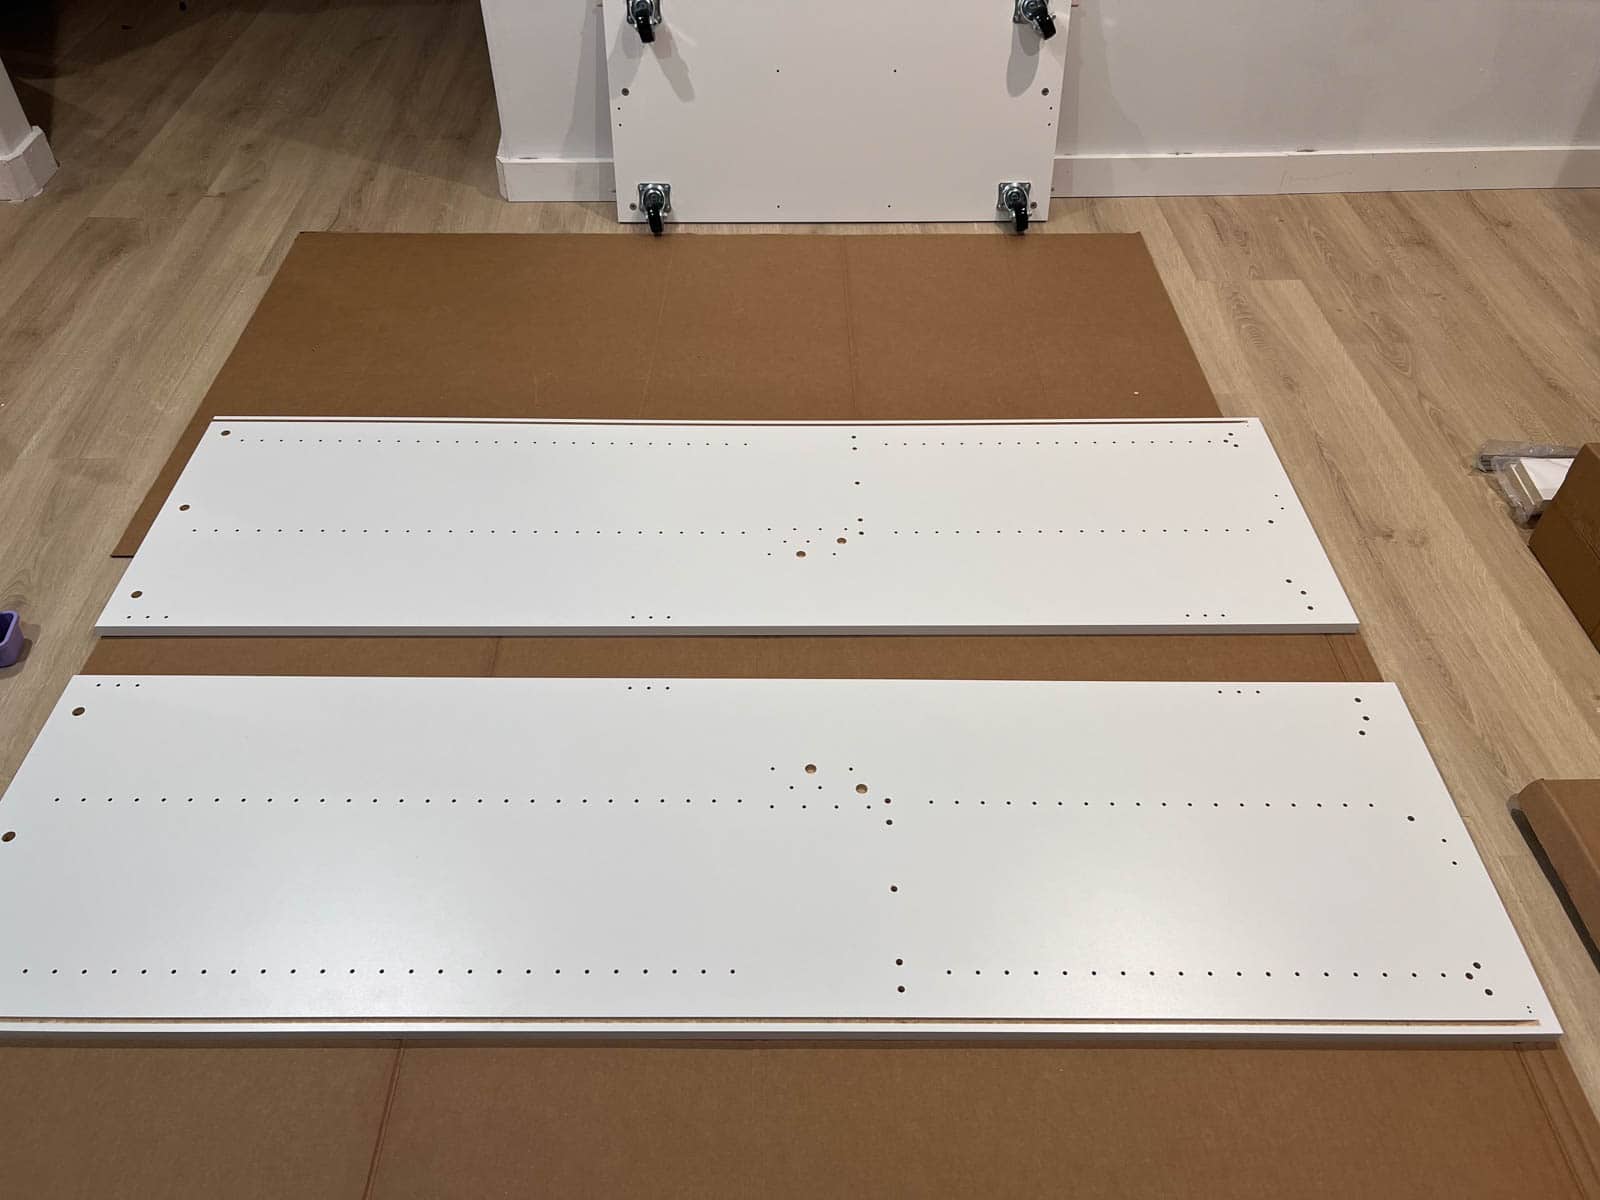
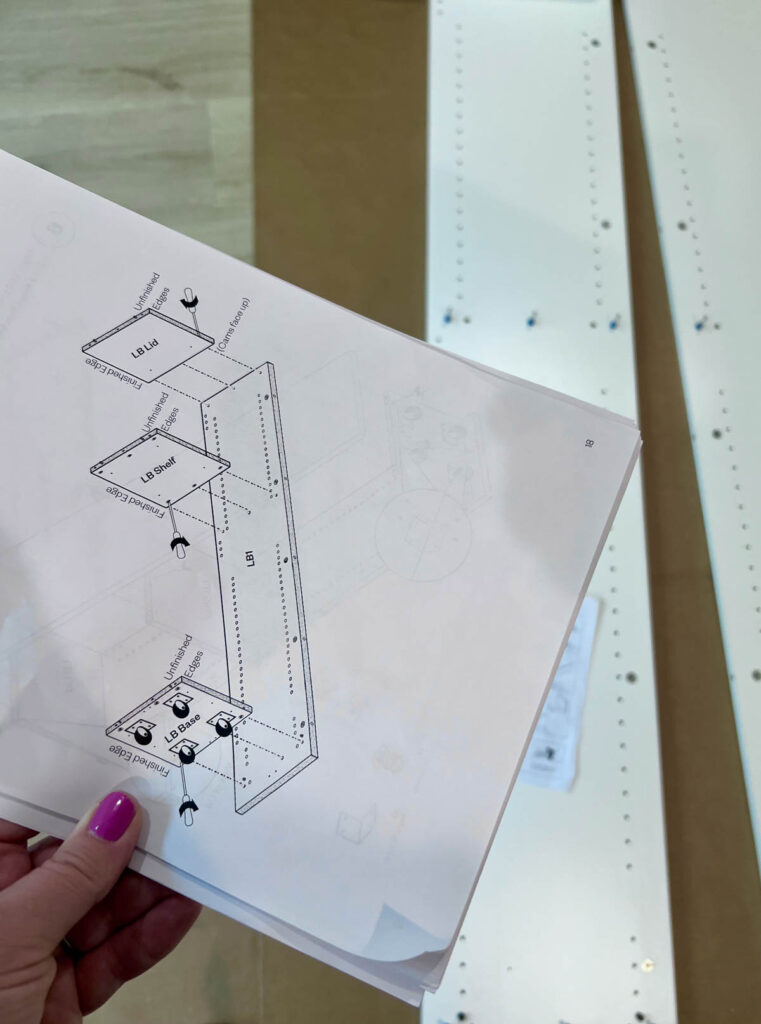
The instructions are super clear and easy to follow. My husband and I both commented on how we loved that Create Room included words AND pictures in the instructions.
I also really appreciated how everything was labeled—it made it super easy to know you were grabbing the right piece.
Apparently, there is also an assembly video that Create Room has, but I never thought to even look for it. I found the included instructions were all I needed!
How long did assembly take?
Create Room estimates that assembly takes 8-10 hours with two people (vs 1-3 hours with the prebuilt). And I found that to be pretty accurate.
If you have an entire day free, you could totally knock it out in one day.
But, as two working parents with young kids, we cobbled together hours in the evening for a few days, then begged grandparents to take the kids for a day so we could finish up.
At the end of the day, you know your skill level and budget best, but if you can follow basic instructions, use a hammer and a screwdriver, and have a bit of time and patience…you can do it!
Quick Tips for a Smooth Assembly
- Bring a buddy – You DEFINITELY need someone to help you, at least for the first part where you are building the different boxes and assembling them together. Beg a buddy to help you!
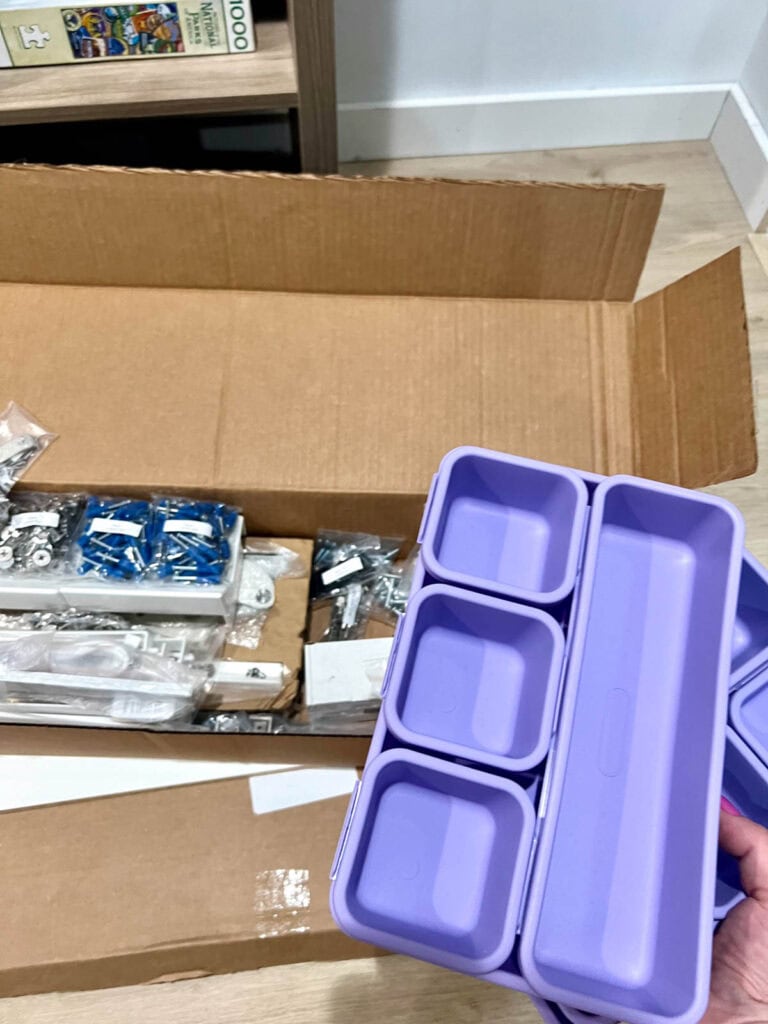
- Create a system for all the boxes before you open them – Use the labels on the outside of the boxes to place all like items together so you are prepped and ready to build.
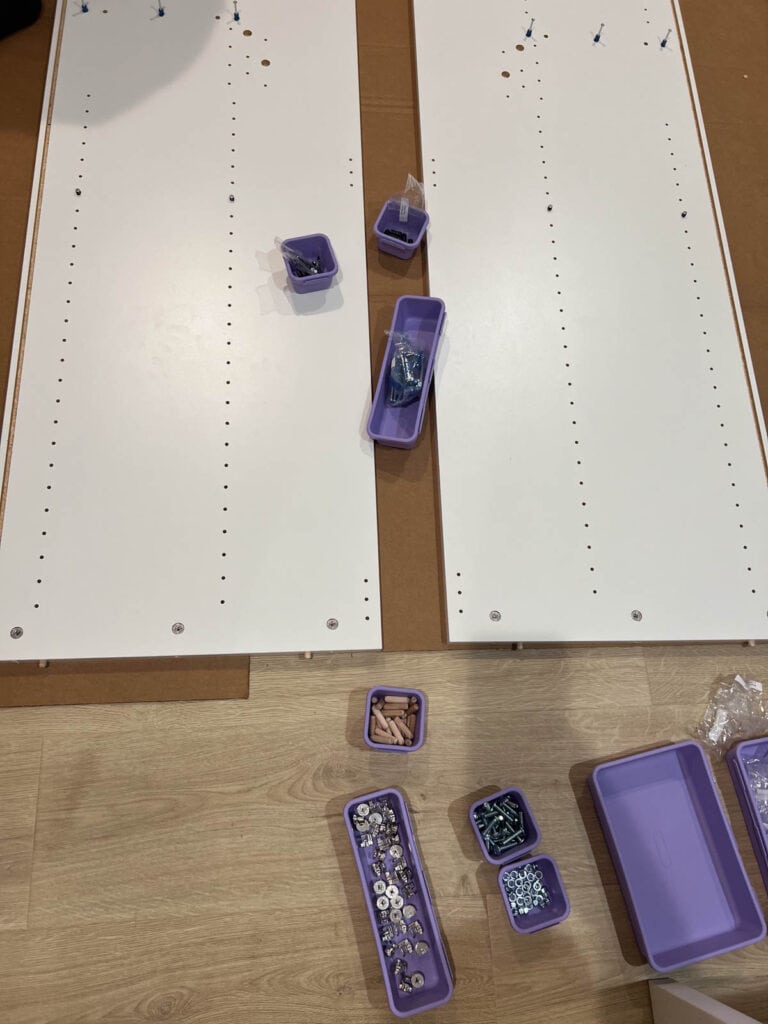
- Use containers to keep your screws corralled – There are a LOT of screws and pegs and small pieces. If you keep them in the plastic bags, you are almost guaranteed to spill them and get them mixed up. Instead, use separate small containers for each type of screw.
- Change the orientation of your paper – If the image on the directions shows a piece laying a certain way, physically stand so that the image on the paper matches the real life version. I had to tilt my paper diagonal several times to make it match up, but it makes it so much easier to avoid mistakes!
- Use a box under the swing doors to help you keep them level – When you are screwing the swing doors into the outer boxes, it feels like you need an extra couple of hands to keep it level and in place. Grab a few of the boxes and use them under the door to help keep it straight and at the right height as you screw.
- Don’t build tired – I know that one should be obvious, but it was so tempting to power through once I was on a roll…but that’s when mistakes happen.
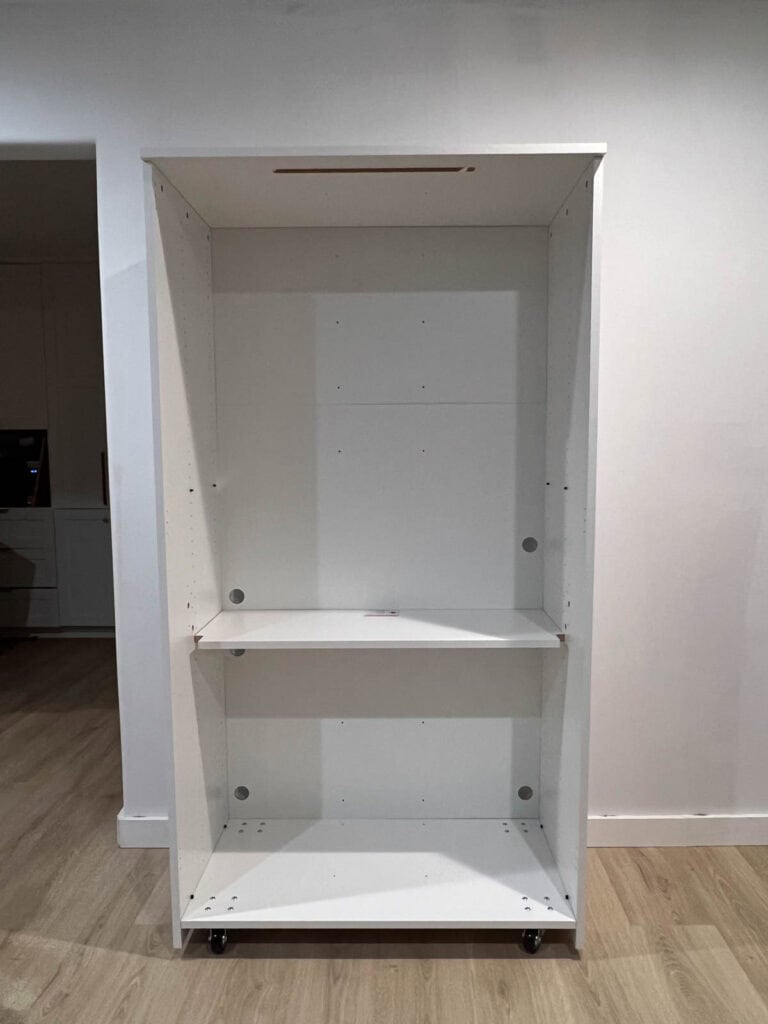
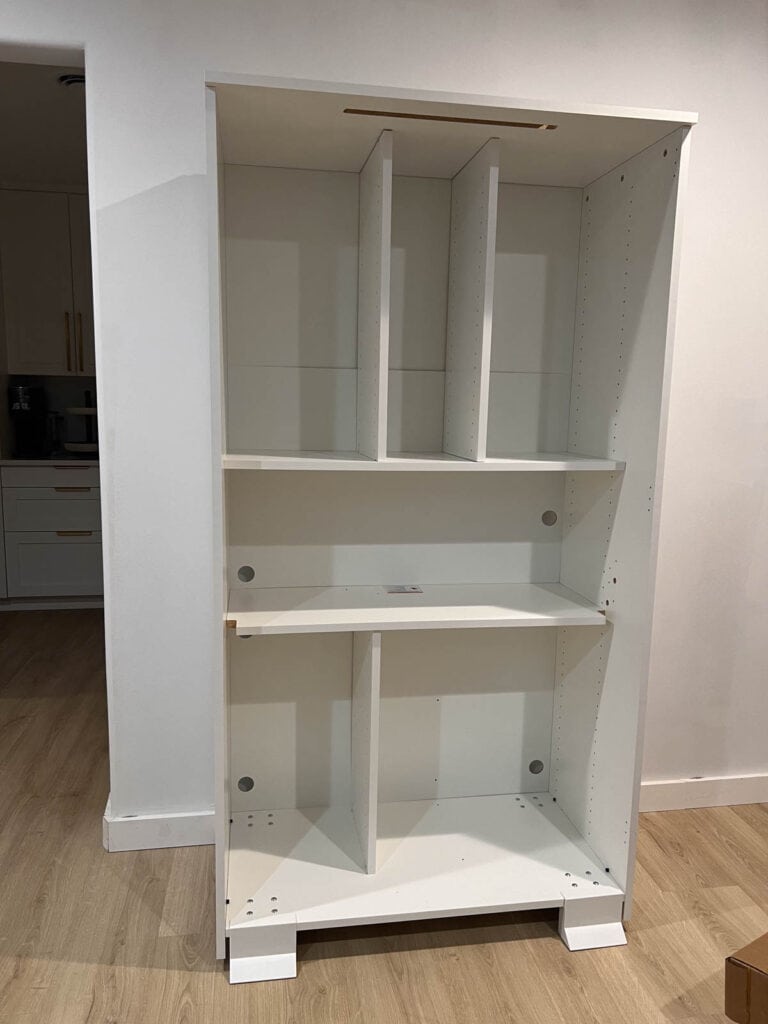
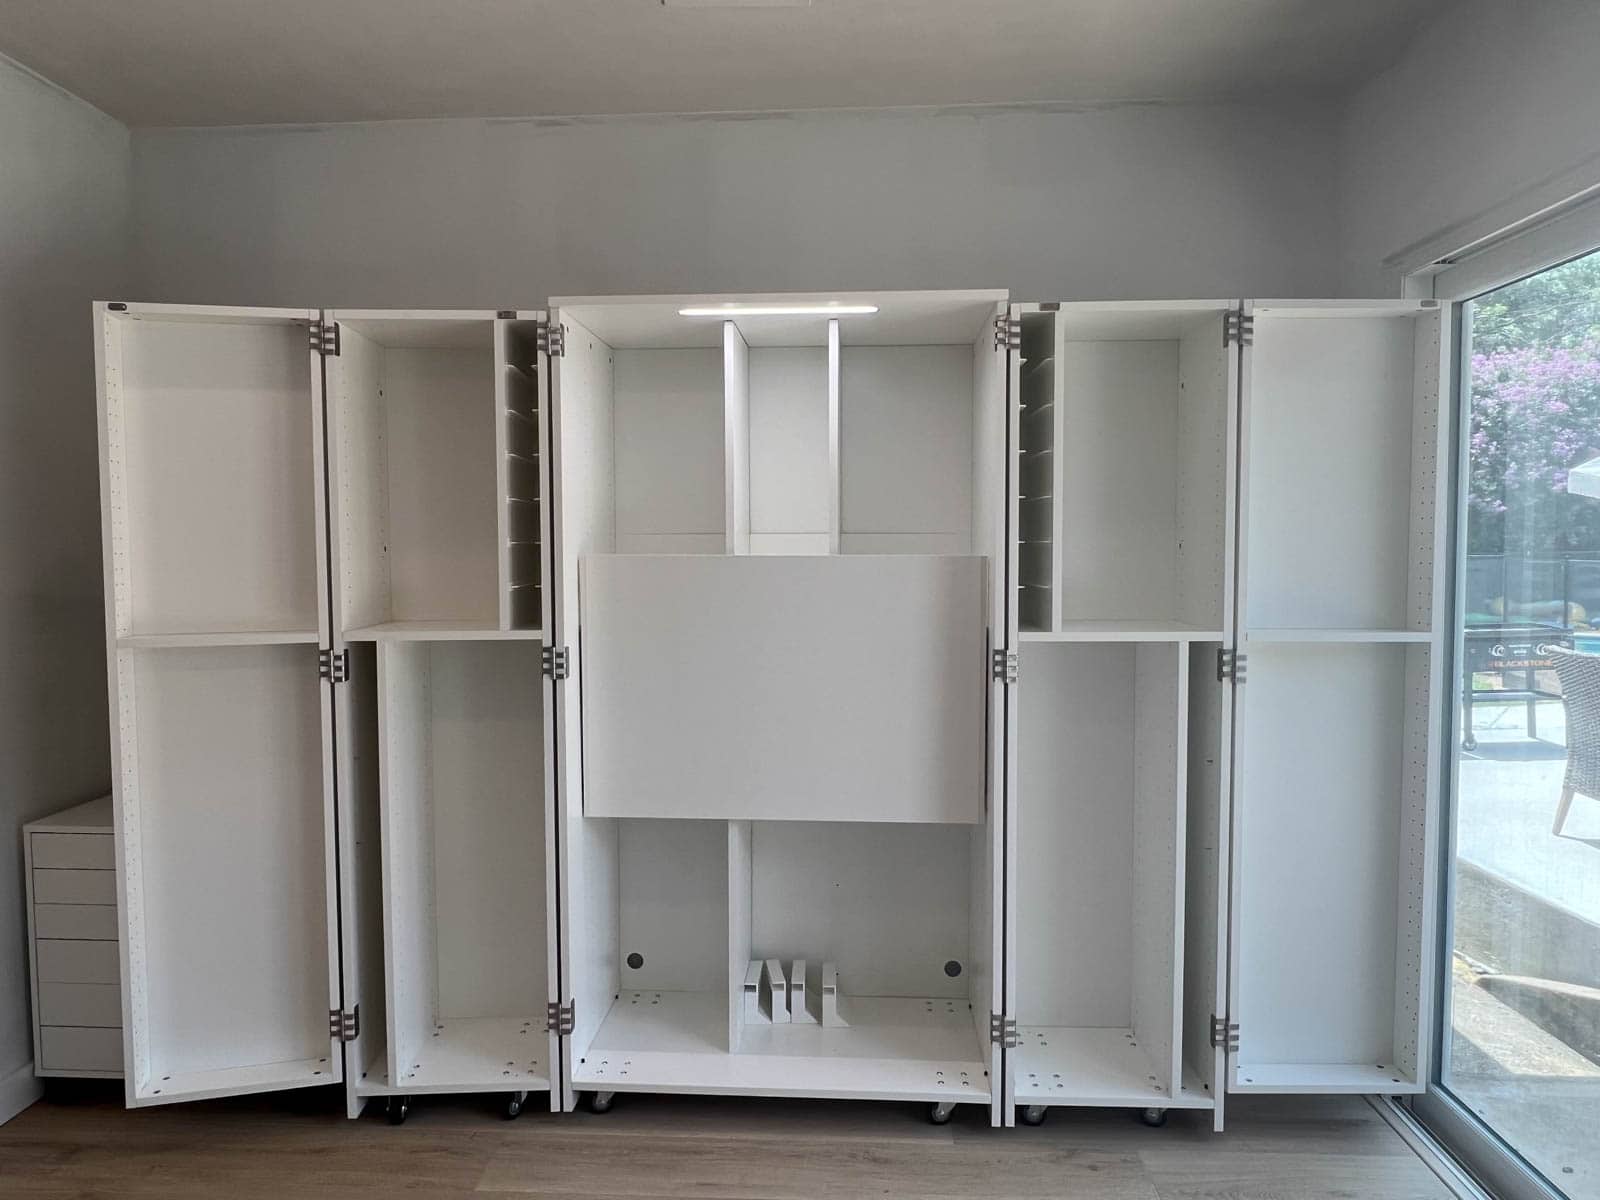
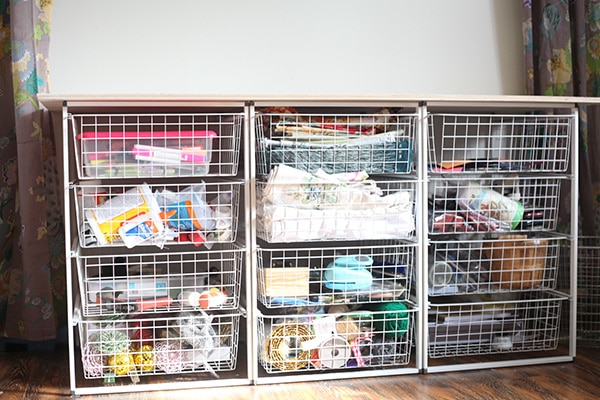
Interior fittings
Once the box was built, it was time to add the interior fittings, like shelves and tracks, which allow the totes to slide out easily.
In the instruction booklet, Create Room gives you a diagram of where to put things depending on whether you have the full totes or half tote package, but you can absolutely change it up and make it your own.
I ended up re-arranging the swing door fittings several times, but that was the only thing I changed!
Filling the DreamBox with Craft Supplies
This was my FAVORITE part. It was so much fun to re-discover some of my beloved craft supplies and give everything a spot.
I have to admit, I was skeptical as to whether everything would fit. To be fair, I am not your average crafter—I have been a DIY blogger for over a decade and have a LOT of stuff!
I used a cart to wheel supplies from my old office to my new one, then got to work!
My main strategy for organizing my supplies and setting up the DreamBox was to group like items together.
All my watercolor pallets were put in a pile, and then all my acrylic paint, clay, glitter, markers, etc.
Once I had everything that belonged to a certain group, I determined which items would fit best in the smaller spaces.
So, the swing doors and small totes were the first areas I planned and started to fill.
With the rest, I looked at the volume and size to determine whether I would need a large, medium, or small tote (or, in many cases, several of each!) to house them.
It took me 2 days to move everything over, again working during nap times and in the evening after the kids went to bed.
The process wasn’t necessarily pretty…but it was fun!
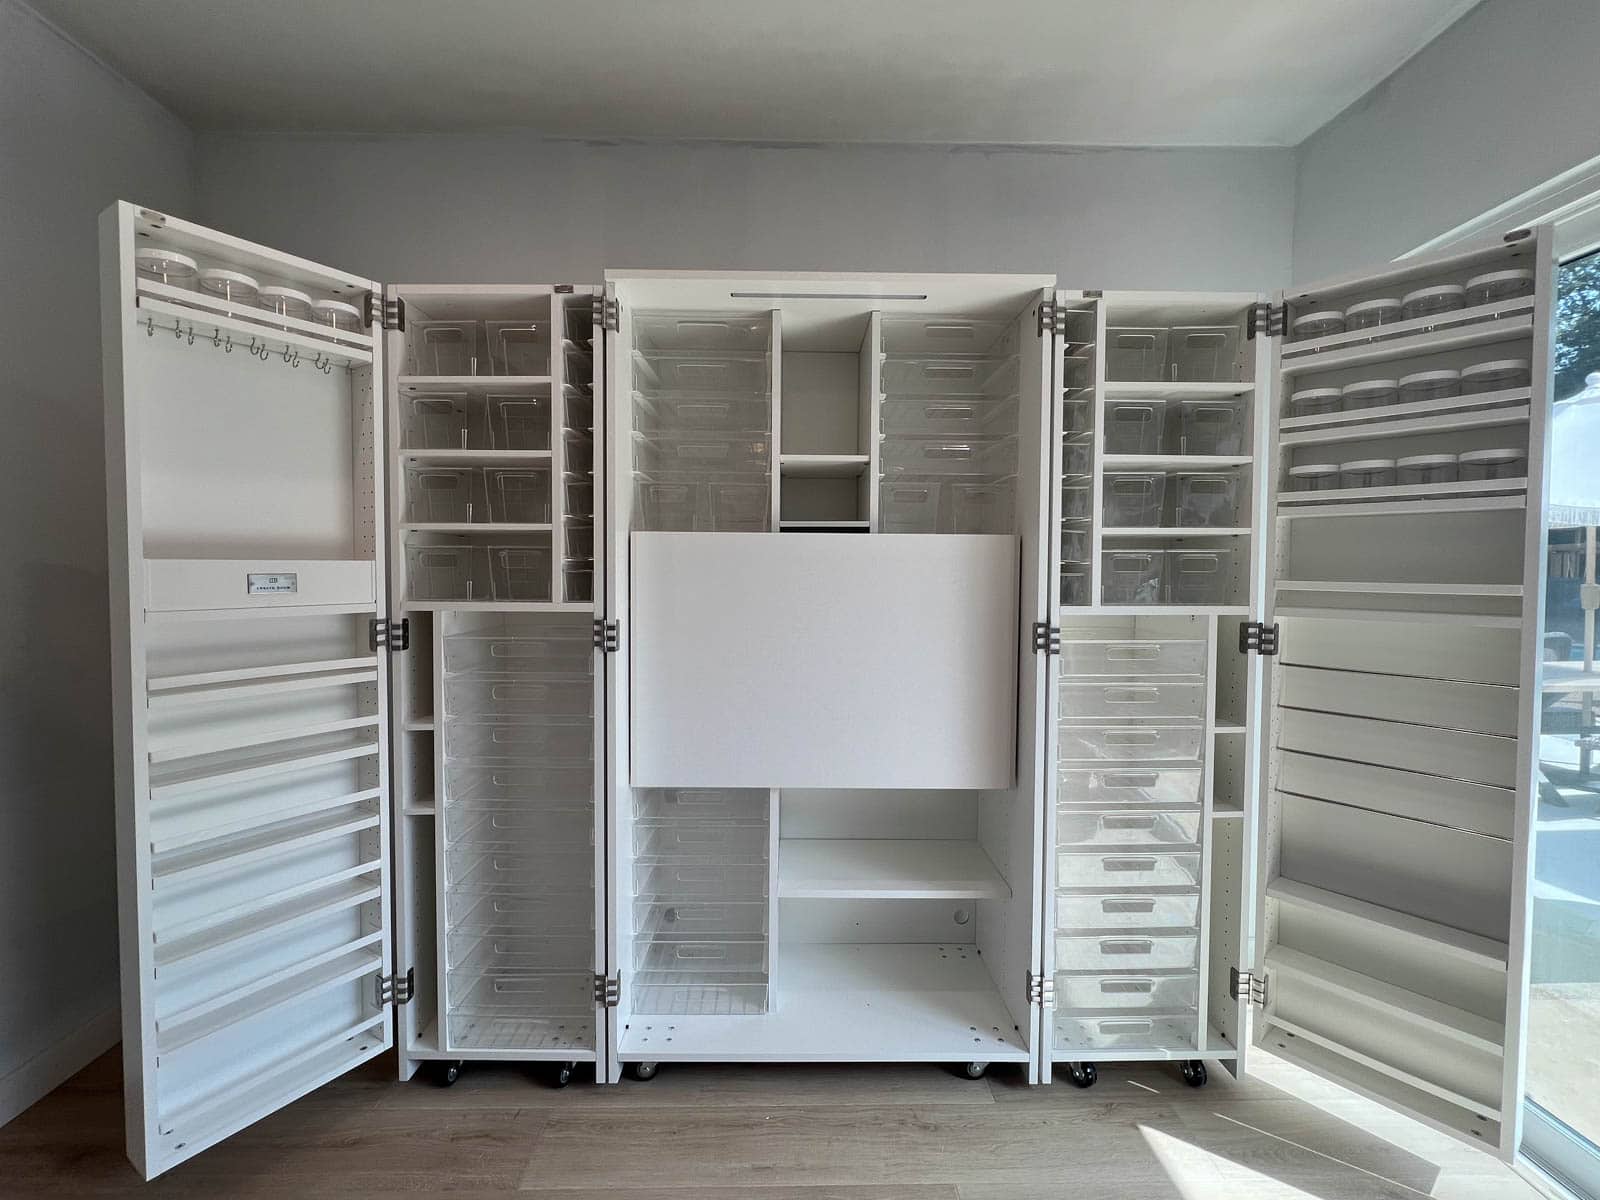
How much can the DreamBox 2 actually hold?
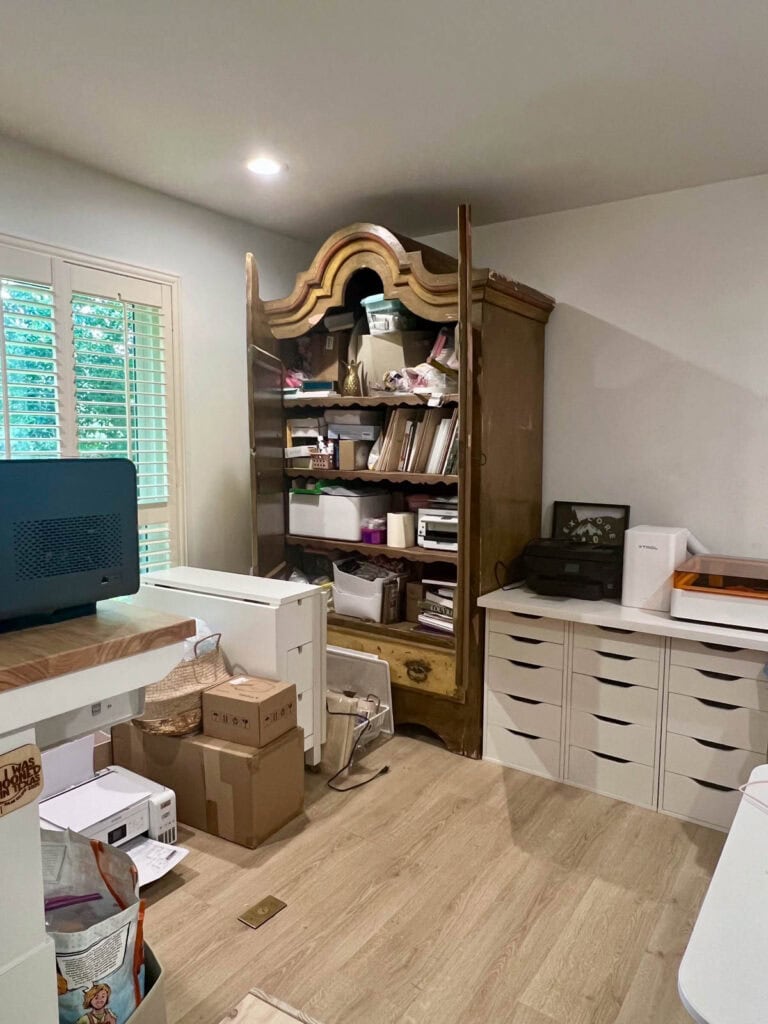
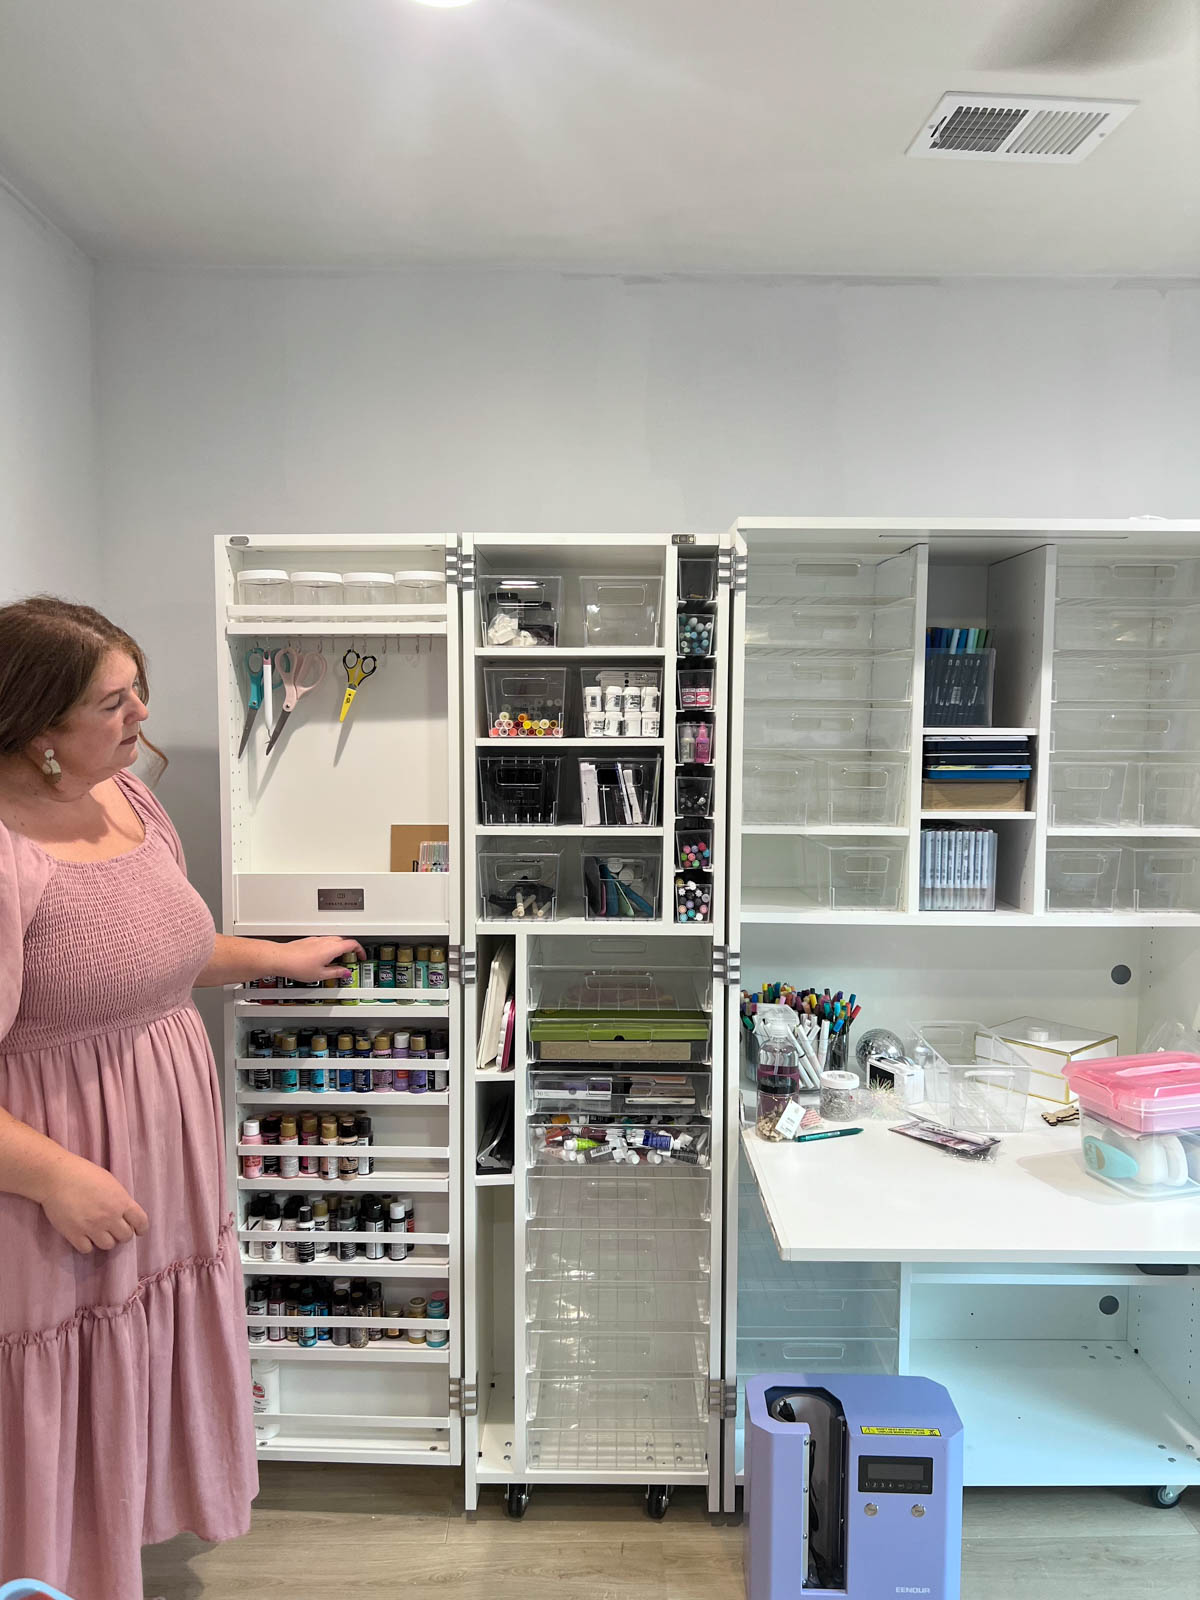
The DreamBox can hold A LOT of craft supplies, guys. I was actually kind of blown away by how much fit into this craft storage solution!
I was able to empty an entire armoire and 4 drawer units (all of which were stuffed to the absolute brim) almost entirely into the DreamBox!
Create Room truly did an amazing job packing a ton of storage into a relatively small space. I was very, very pleasantly surprised!
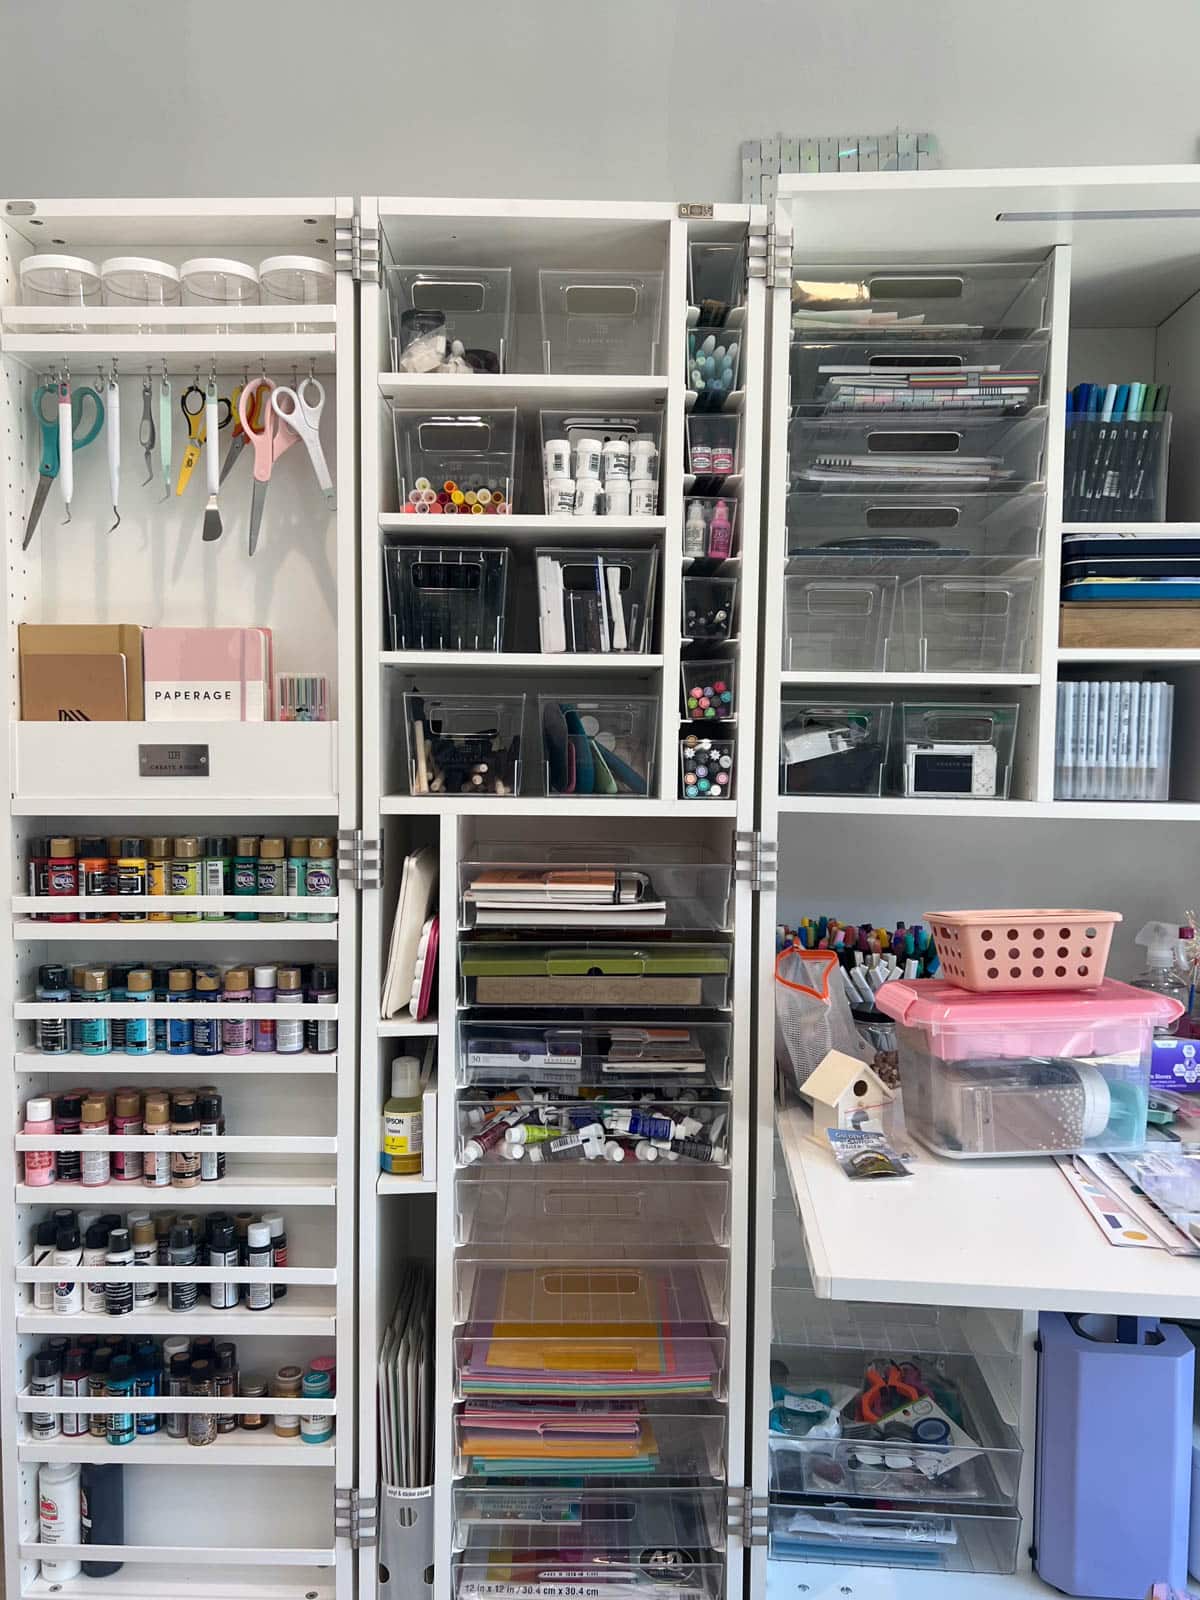
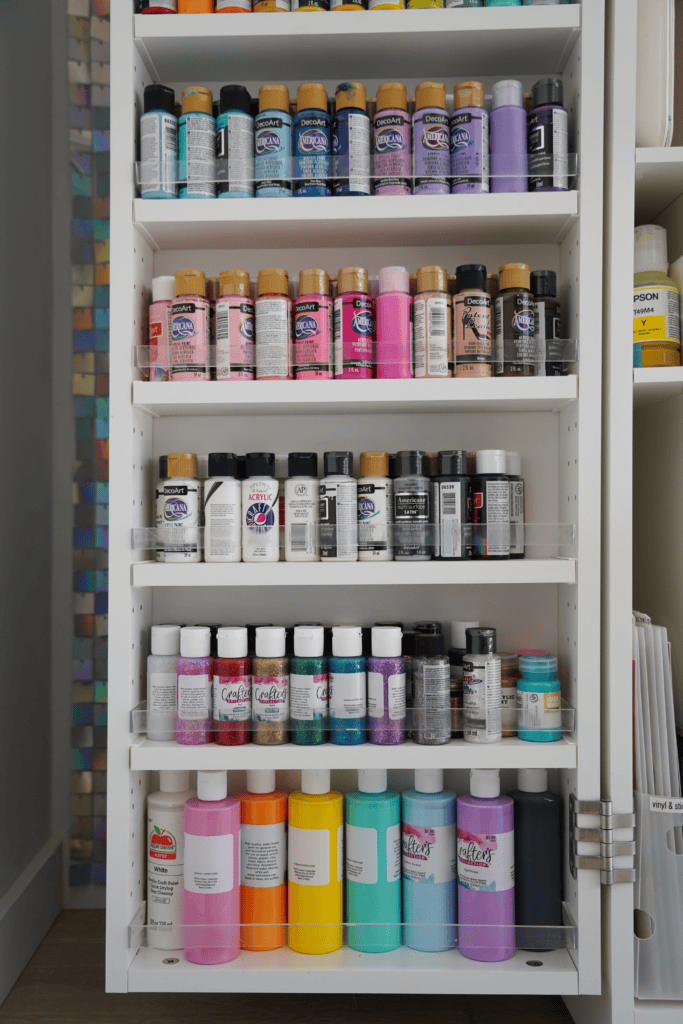
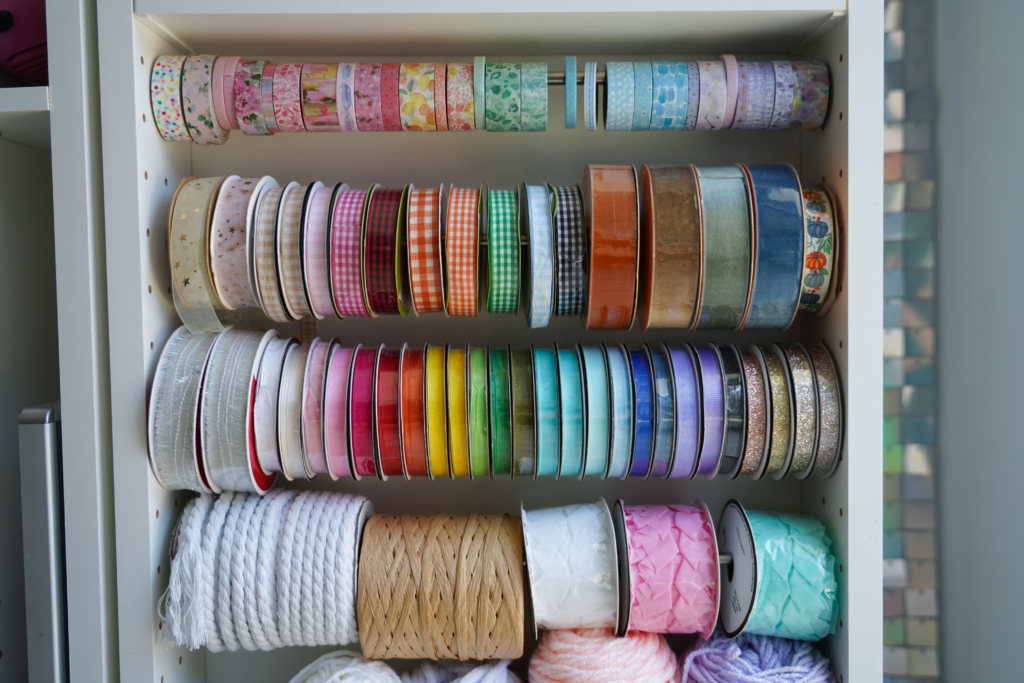
I think the swing doors were the ones that surprised me most.
They are quite shallow, but I was able to put so many supplies there, like paint, ribbon, washi tape, glue, and so much more.
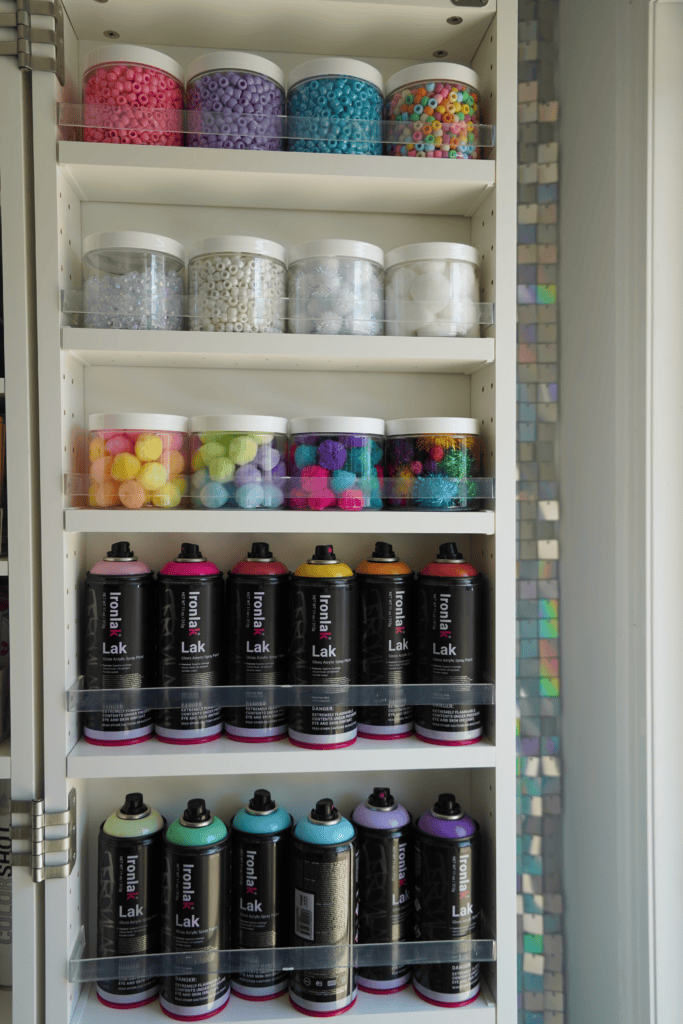
I also highly recommend taking as much as you can out of the original packaging.
For example, all the beads looked so much better in these clear jars than they did in their plastic bags.
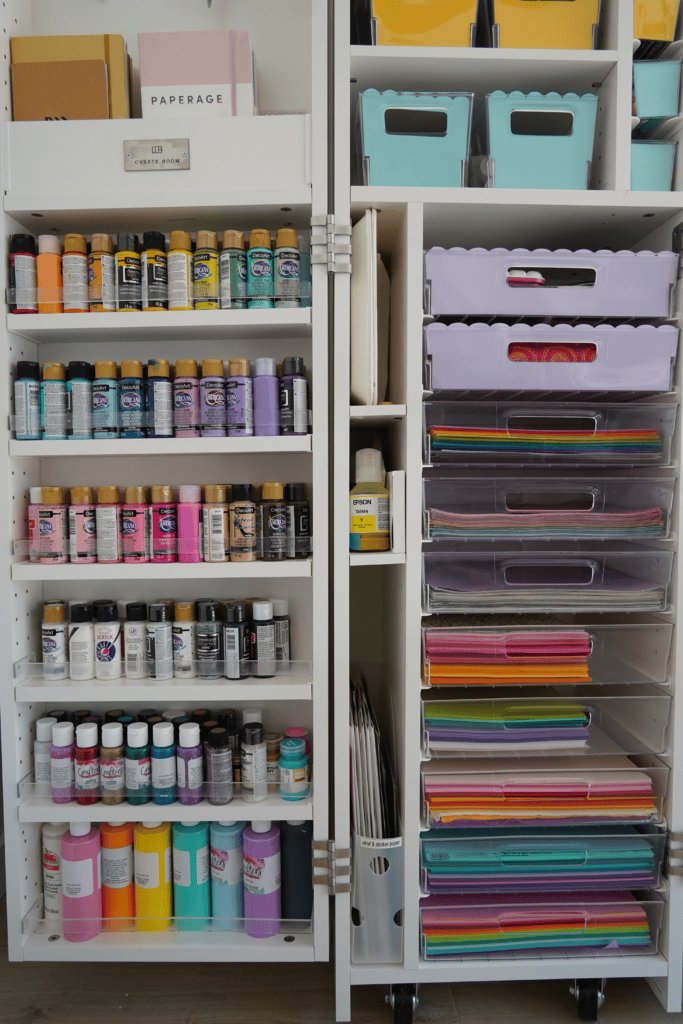
While I was organizing, I also put everything in color order within its relative group. Now it’s SO easy to find whatever color of paint, paper, or vinyl I need.
Practical + oh-so-pretty! 😍
Tote Covers
Once I had everything put away in the DreamBox, I decided to take things a step further and make covers for my totes.
While I appreciate the practicality of the clear totes, I know I can focus and work best when things are a smidge more hidden away. Plus, I wanted some fun pops of color!
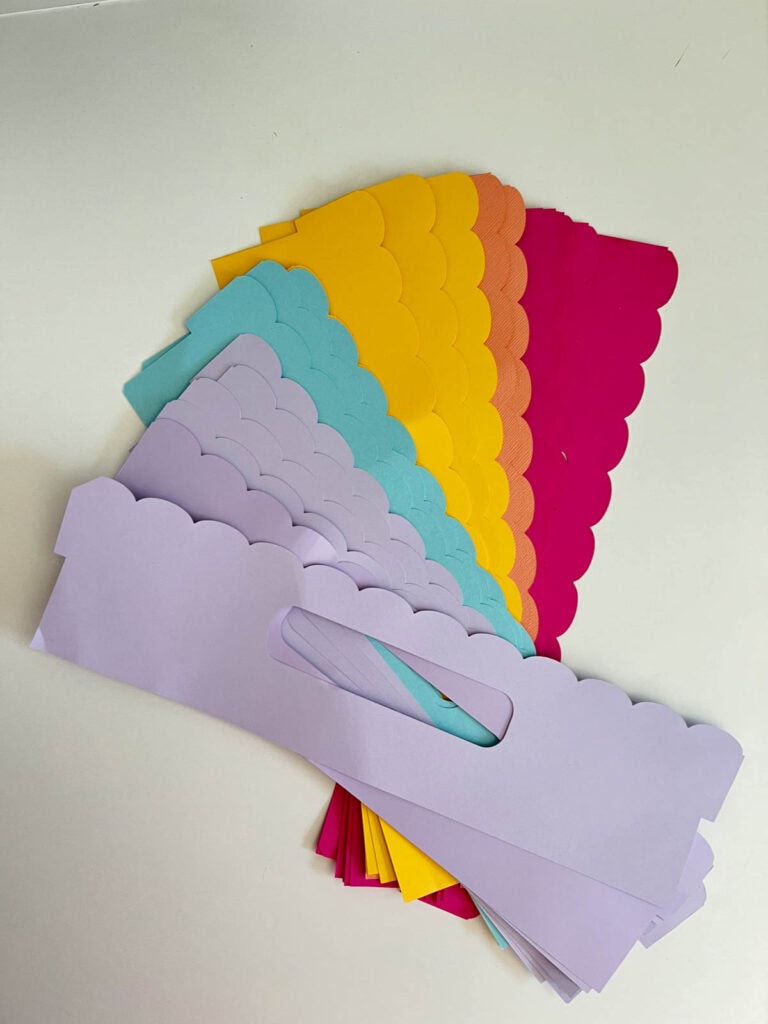
I finally narrowed my color palette to my favorite rainbow shades.
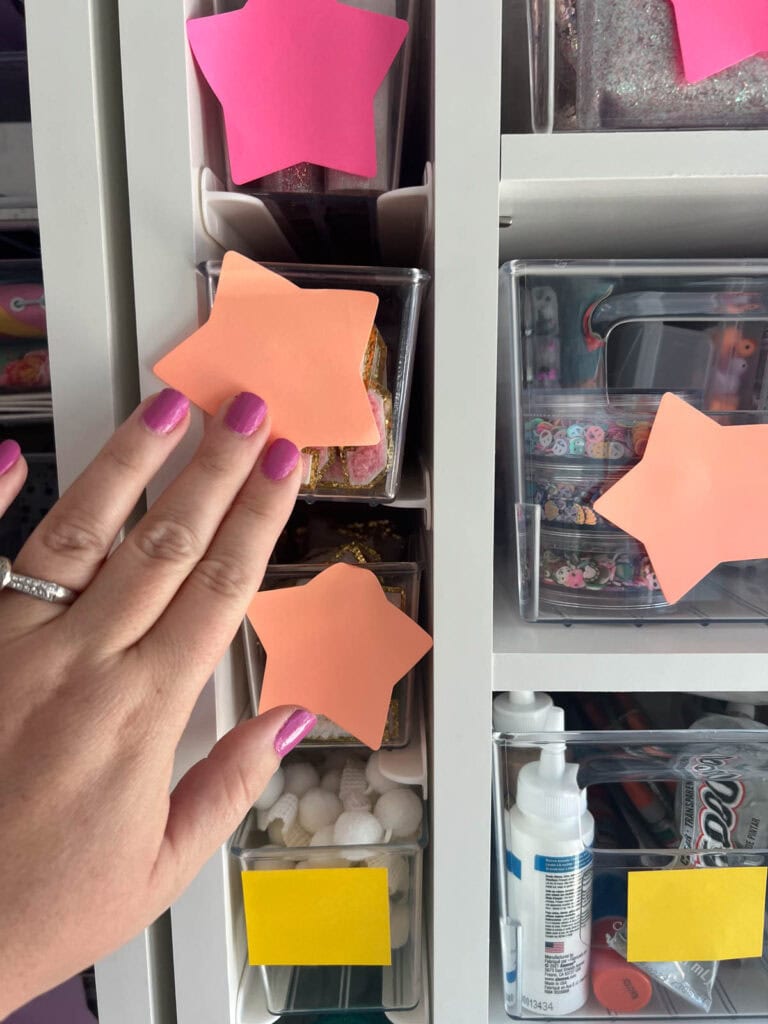
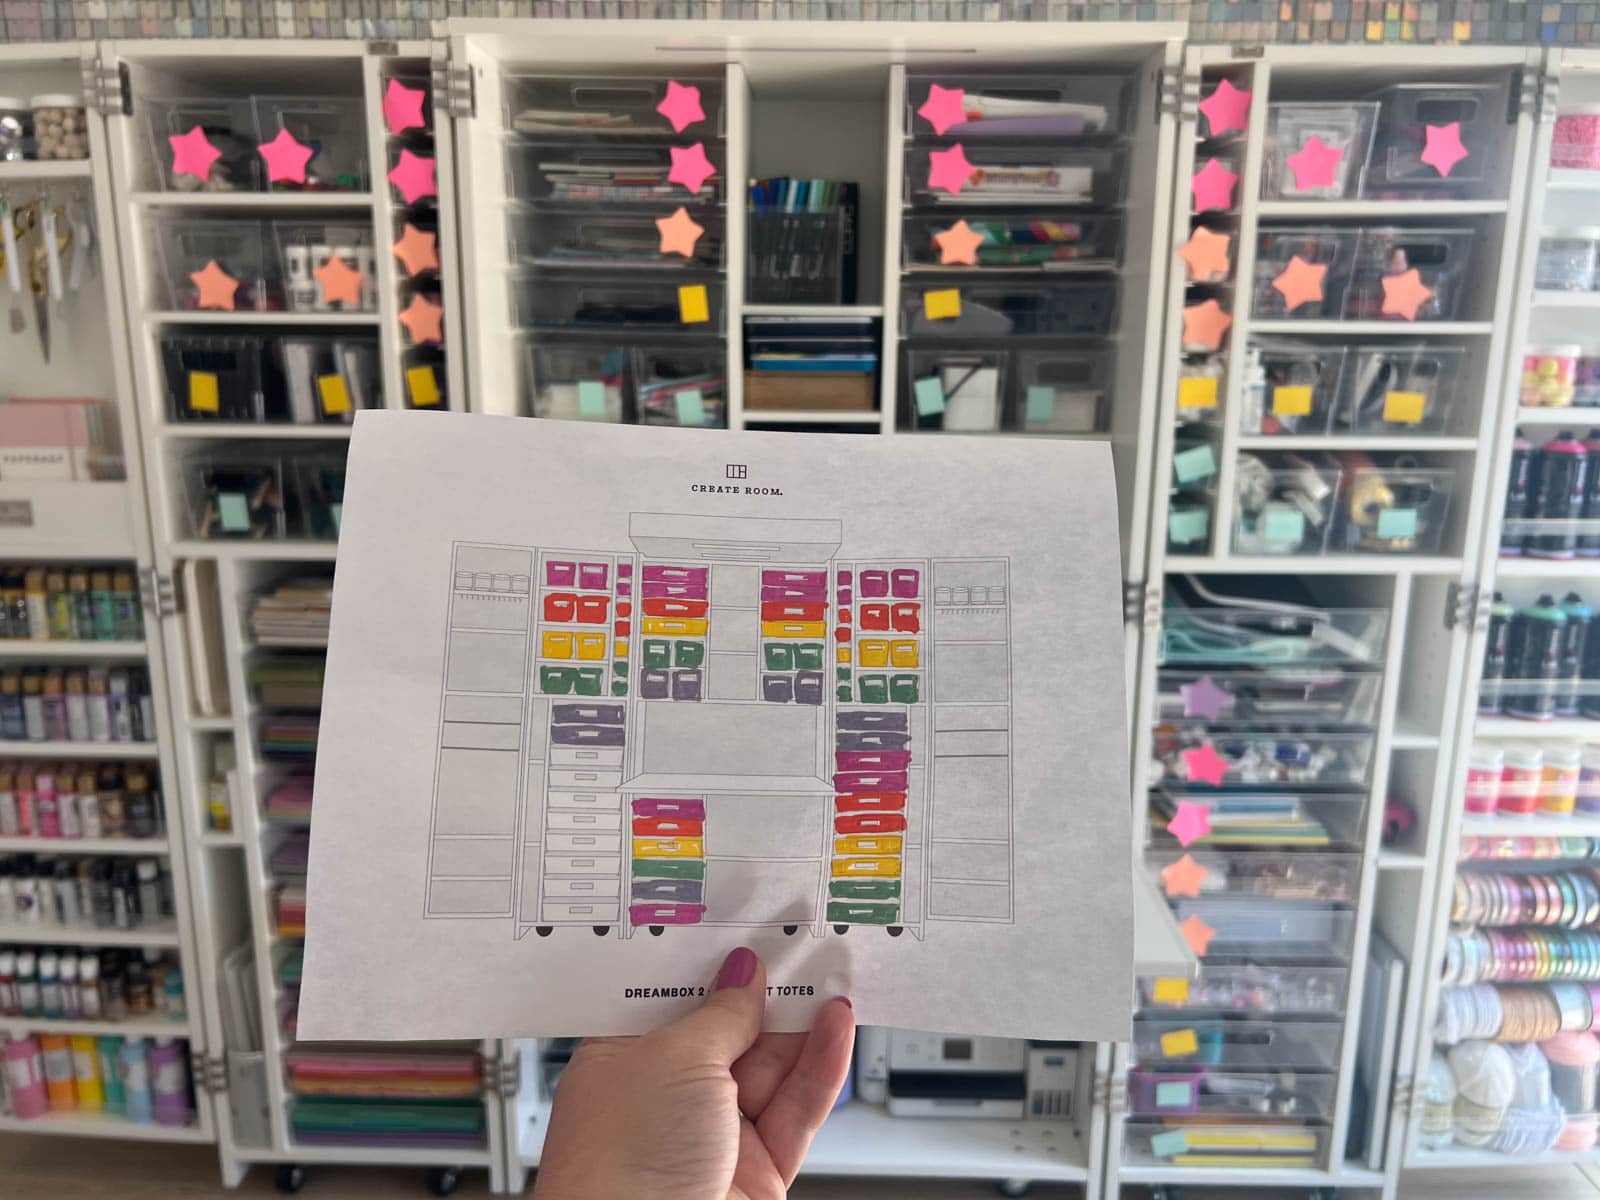
To give myself a visual of where each color should go within the DreamBox, I found coordinating sticky notes in similar colors and added those to my box.
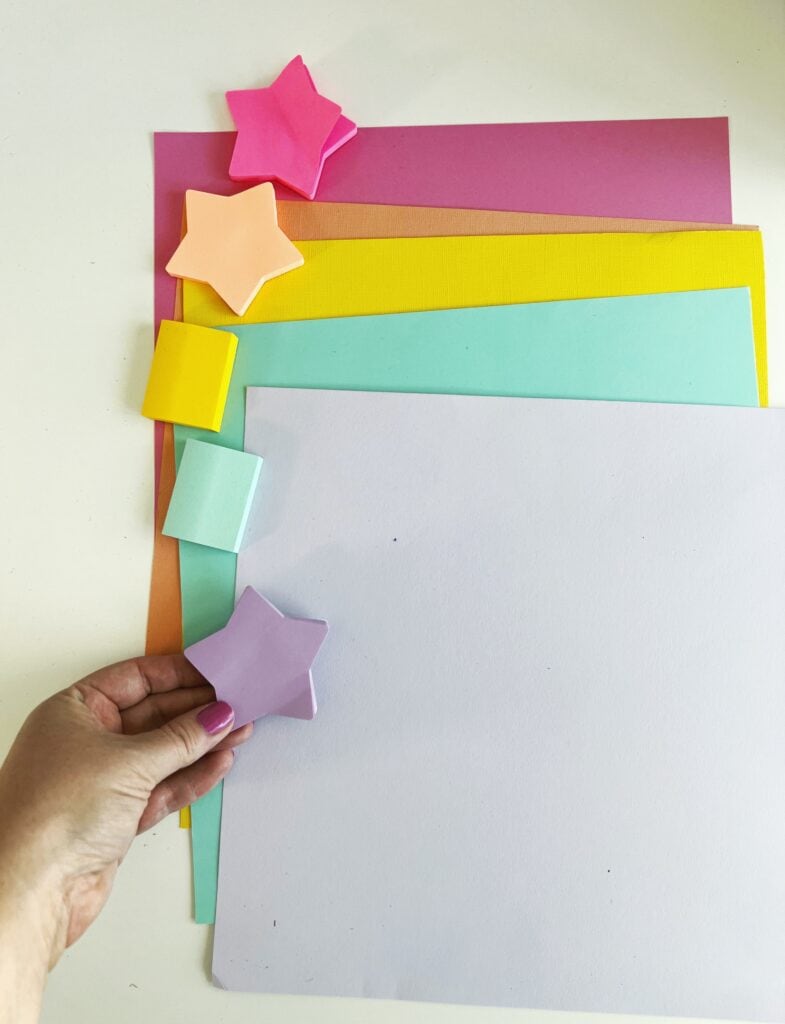
I moved the stickies around until I was happy with the placement of all the colors.
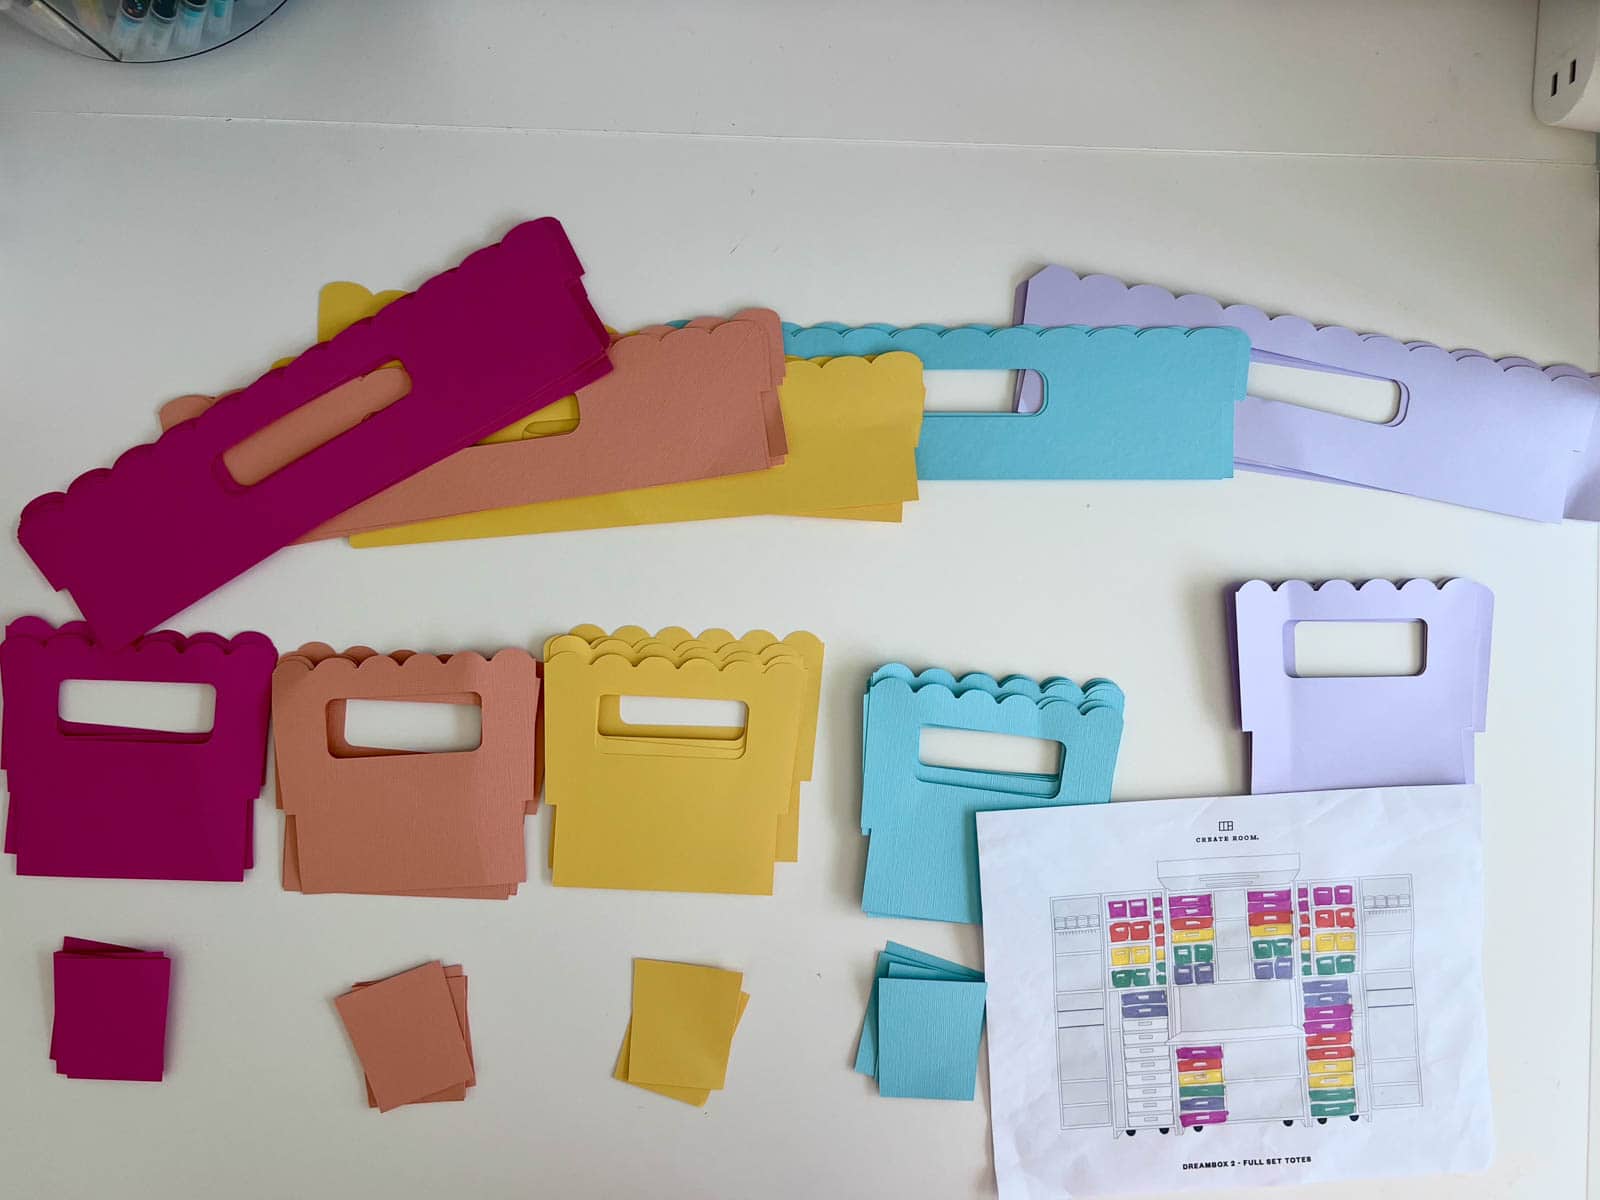
Then, I downloaded one of the free planogram sheets from the Create Room website and colored in the totes to make myself a little map. This was SUPER helpful, especially when the sticky notes started to fall off. 🙂
As you can see, I left a section of totes clear at the bottom left. This is where my paper is, and it made me so happy to look at that I didn’t want to cover it!
Then, it was time to make my tote covers!
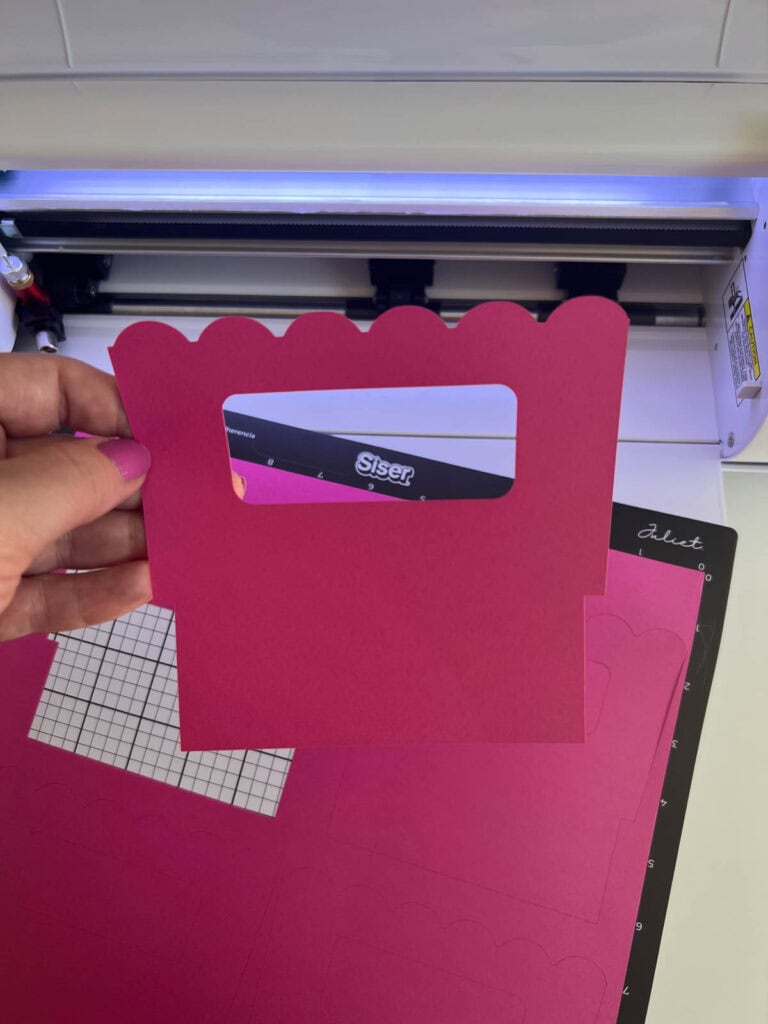
While there are several tote cover patterns out there, they all look very similar. I wanted to make mine a bit different! I designed my own SVGs with a scallop trim at the top for a bit of feminine whimsey. Aren’t they cute?
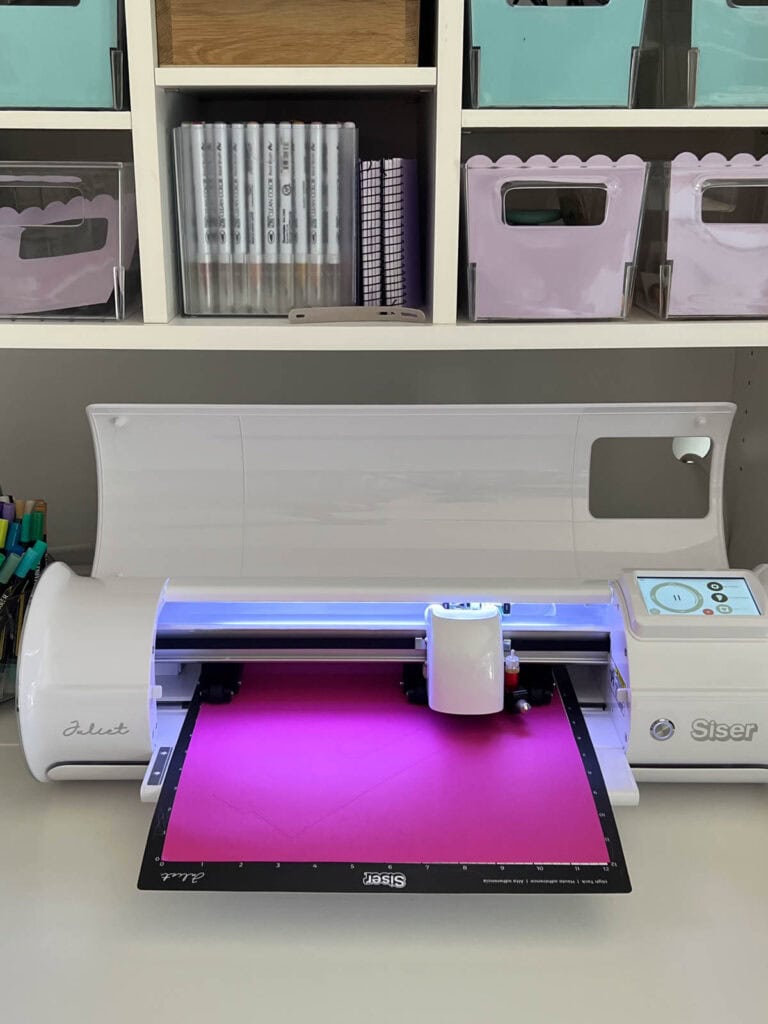
I used my Siser Juliet to cut all 62 covers out, and then added them into the totes. It was a quick and painless process!
Reveal and Final Thoughts on the DreamBox 2
I’ll be (as always) brutally honest. I was obviously super excited to work with Create Room and receive a DreamBox, but I had my doubts as to how much this craft storage furniture could actually hold.
I may have been a smidge skeptical.
But I truly was blown away by how much this baby can hold! I’m talking literal DECADES of supplies.
Every time I open this box up, I get a huge dopamine hit. Between the colorful tote covers, the rainbow-hued paint and paper, jars of beads and pompoms, and thousands of tiny disco tiles I tacked on the wall, this truly is my happy place!
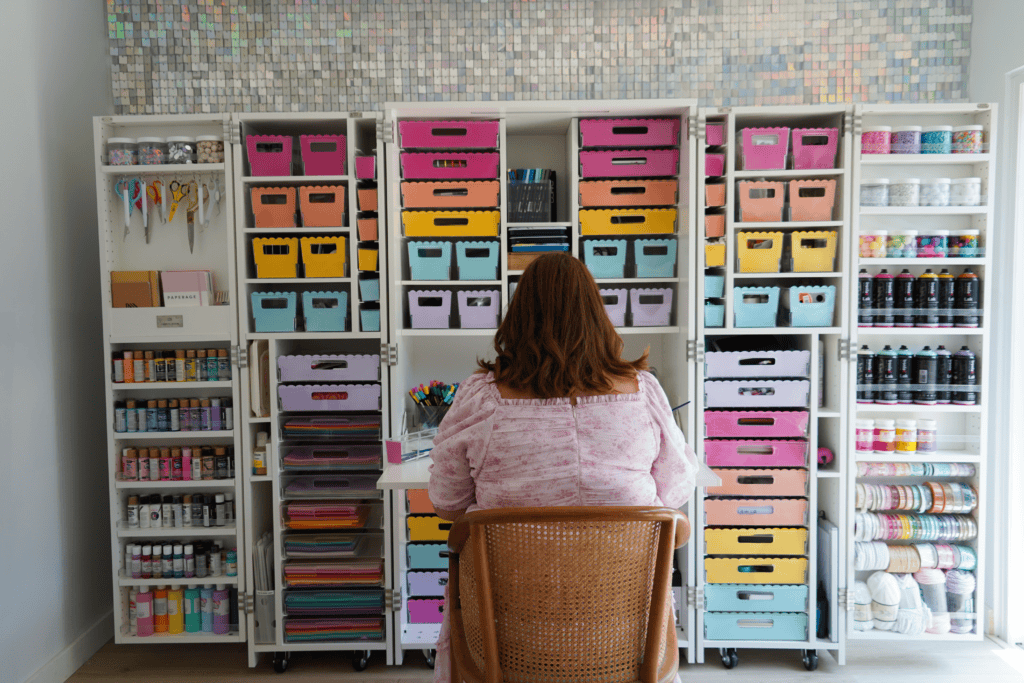
I underestimated just how much I would use the desk. It’s so amazing to have a desk dedicated just to crafting!

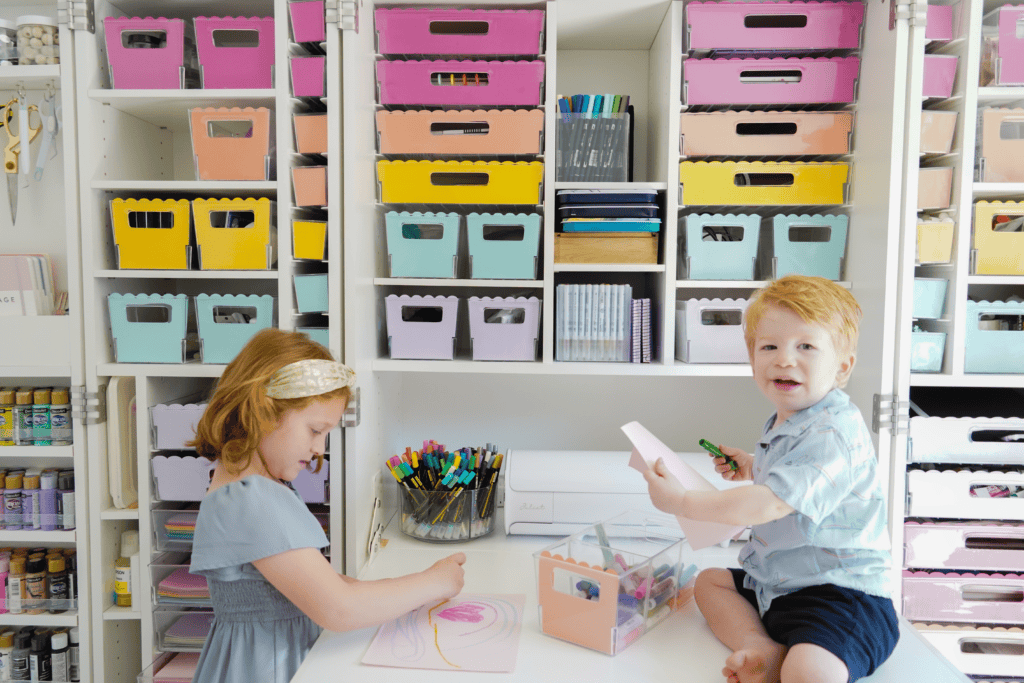
And while I set up this box for myself, I can’t deny that it’s an absolute child magnet. My kids are absolutely obsessed, and my daughter is already asking for a DreamBox of her own!
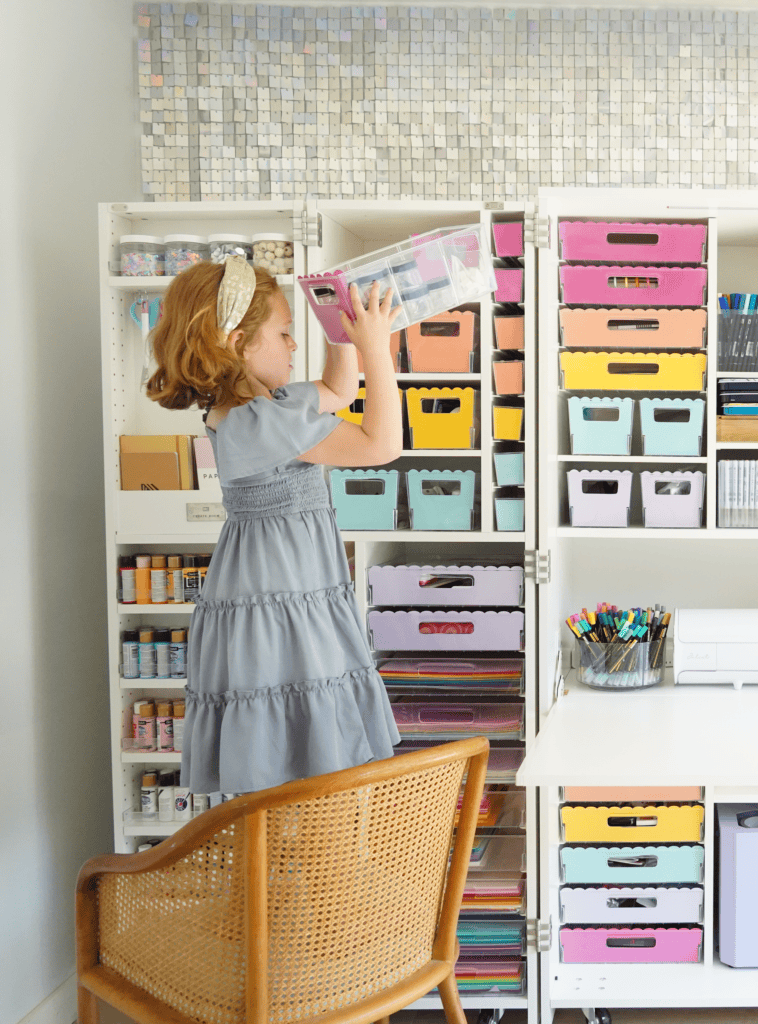
We’ve made some fun memories here over the past few weeks, and I’m so happy to see that both my kids seem to have inherited my joy of creating. I can’t wait to see what their little minds craft up next!

So, is the DreamBox right for you? It depends! If you are a fellow crafty mama, the peace of mind from keeping all my supplies tucked away may be worth the price tag alone!
And if you similarly don’t have an entire craft room any more, you can truly get all the benefits of one while just utilizing a single wall (or corner!).
I have to give this one two enthusiastic thumbs up! You’ll be seeing a LOT of my DreamBox for years to come. 🙂
Buy the DreamBox 2 ✨
So, there you have it – my super honest review of the DreamBox 2!
If, after reading this post, you have decided this craft storage is right for you, I would love it if you consider purchasing through one of the affiliate links in this post (like this one here!). It doesn’t cost you anything extra, and the small commission I receive allows me to continue creating content like this.
Don’t forget to use promo code RUNTORADIANCE for additional savings!
So, what questions do you have about the DreamBox? Leave them in the comments below and I’ll get back to you!

This is a crafting girls dream! What a great way to contain all your supplies in such an efficient way. Thank you so much for the review!
It sure is! Now I have a fighting chance at being somewhat organized in my space, haha. Thanks so much for the kind words. 🙂
I love my Dreambox 2. The only downfall is I also purchased 2 side tables.
While I love the tabletop workspace, I do not like the fact that it is hard to reach things stored in the cabinets below the tables. They have connections to the main dropdown table, therefore you can never close it up unless you take apart the tables. Would be nice if they were stand alone so you could raise and lower them to either close it up or reach for items below the tables.
Hi, Peggy! Thanks for sharing about the side tables – I don’t have any myself, but I definitely appreciate you sharing your experience, and will leave it here so others can review!