How to Make Large-Scale Prints at Home
This post may contain affiliate links. As an Amazon Associate I earn from qualifying purchases.
I love giving gifts but always put pressure on myself when it comes to finding the perfect present for those closest to me—especially Scott! So I was proud of myself for coming up with a brilliant gift idea days before Valentine’s Day. I was going to make Scott a very simplistic frame with a large-scale type of our song.
Problem was, I ran out of time to take my file and have it printed as an engineer print. So when I was lamenting to a friend of mine who’s a designer, she showed me this brilliant way to print large-scale items at home on any printer. Yipee!! It’s called tiling, and maybe it’s super common, but I had never heard of it. It was super-simple.
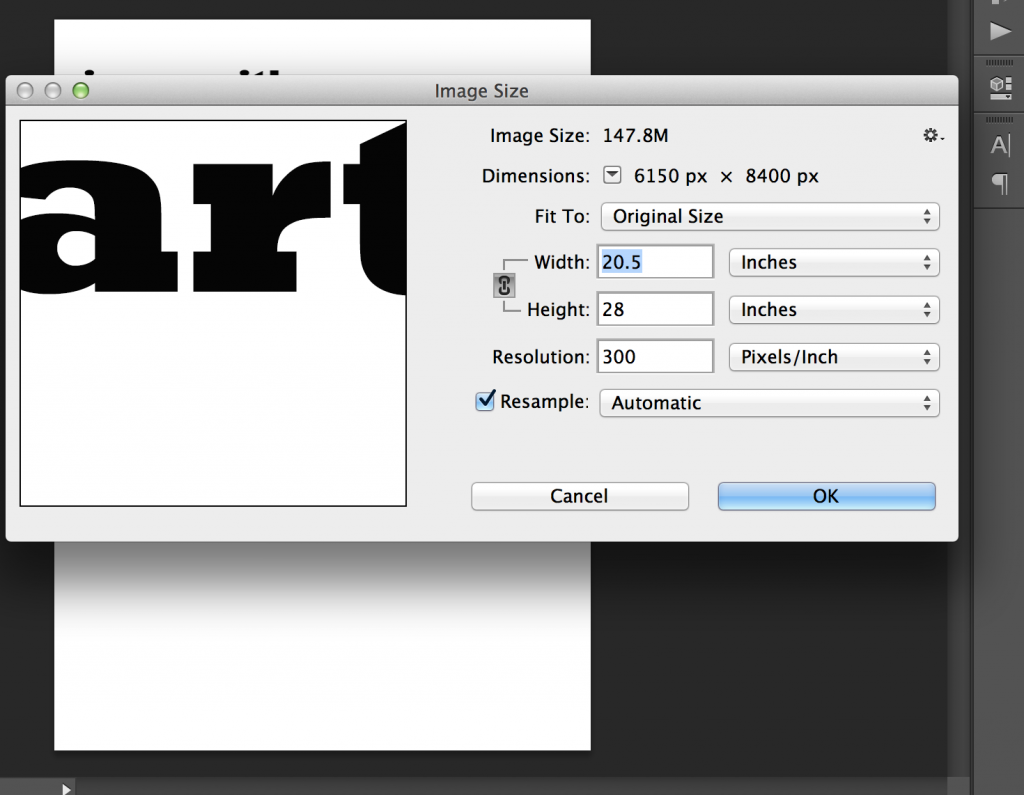
I created my file in photoshop and made it the size of my frame which was 20.5″ x 28″. I typed out the chorus to “Won’t Stop” by One Republic using Rockwall Extra Bold font (download it free here) and when I got it how I wanted it to look, I then saved two copies—one as a psd, the other as a jpg.
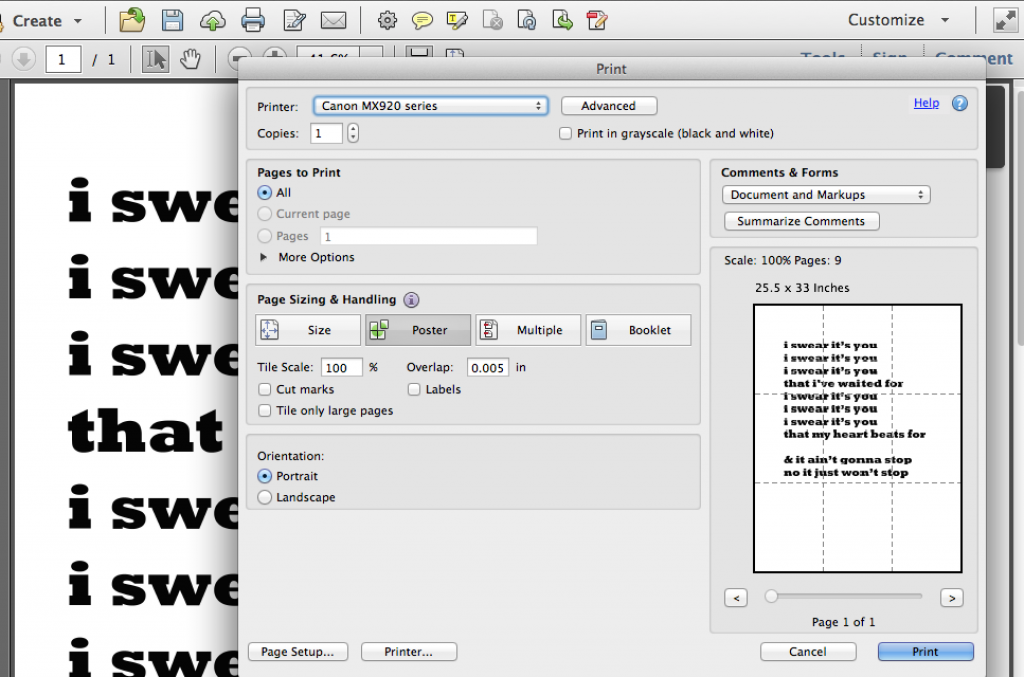
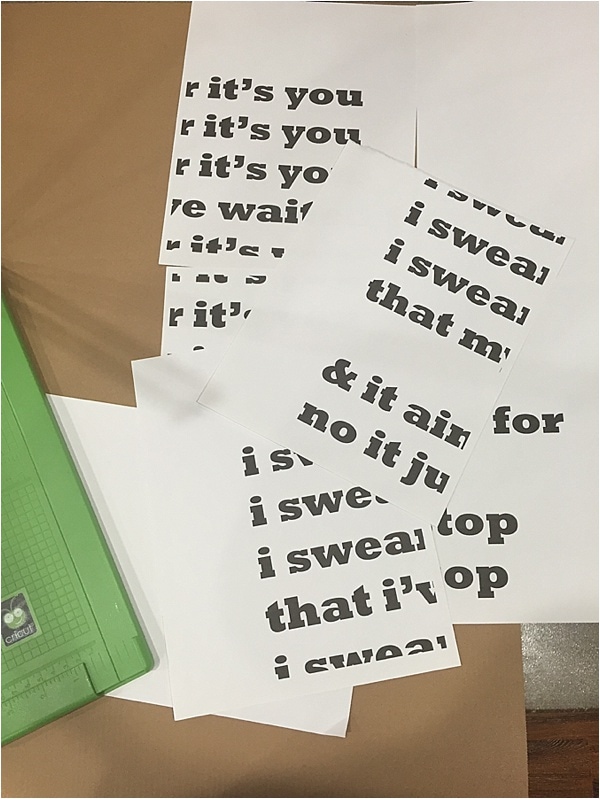
Then I opened the jpg file up in Adobe Acrobat pro and went to file > print. From there I selected “poster” under the page sizing & handling category. You can see on the right side it shows you exactly how it will break the pages up. So this printed out as nine separate pages with a .005 overlap between each one.
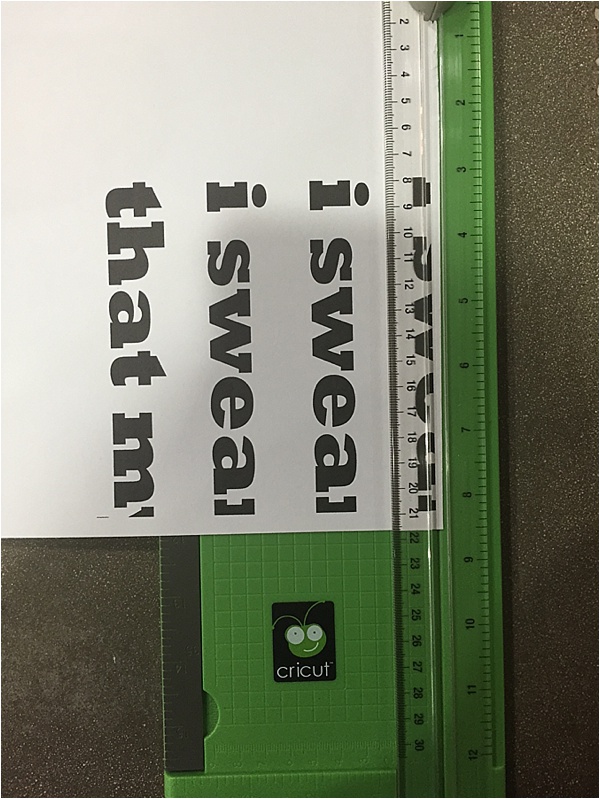
The one thing I didn’t account for was my margins though, so when it printed there was quite a bit more of a gap. I used a paper trimmer (affiliate link) to carefully cut the edges of the pages down so they aligned perfectly.
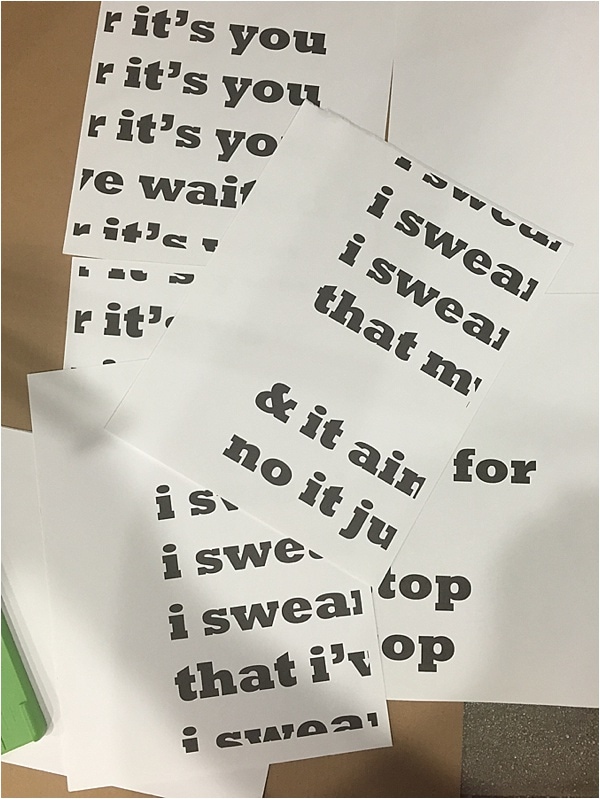
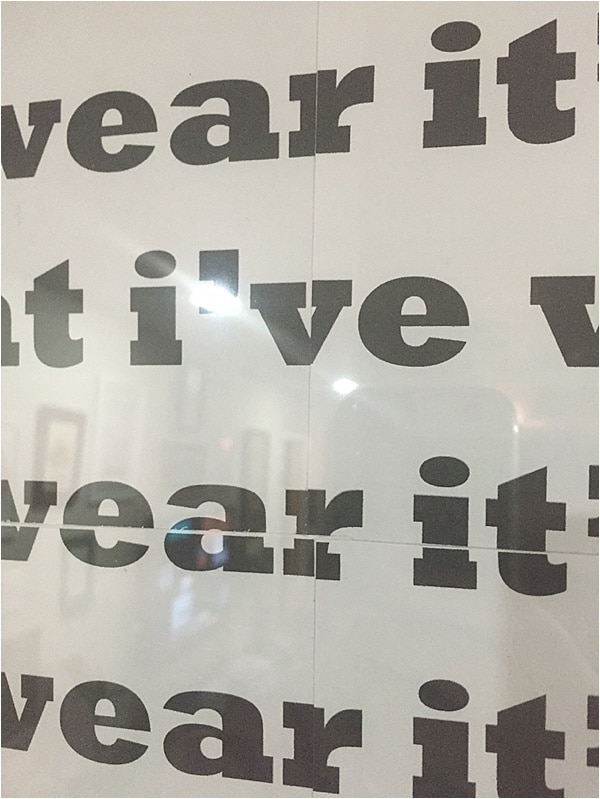
You can see the break in pages if you get really close and stare. From far away you can’t tell at all.
Ta da! A homemade, super-sweet, graphic piece of art for just the cost of the frame and a bit of time.
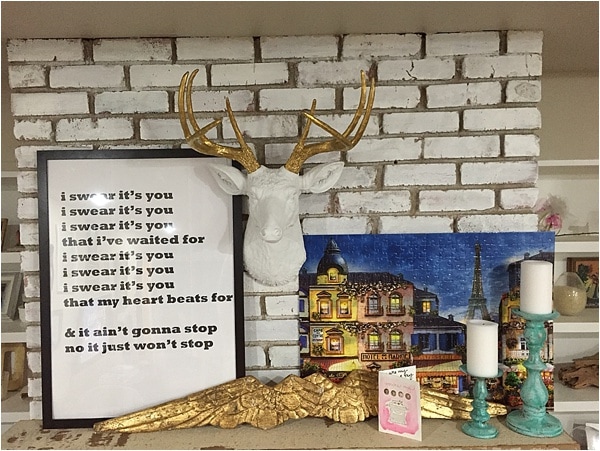
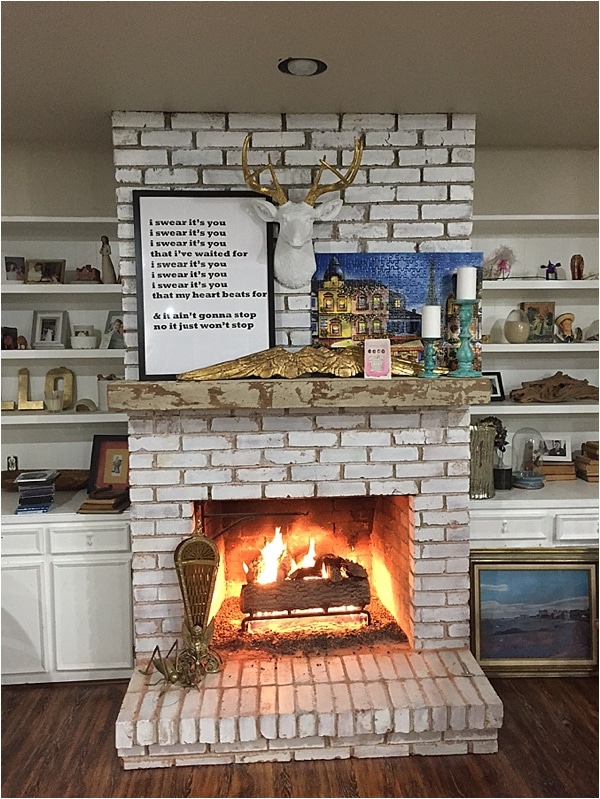
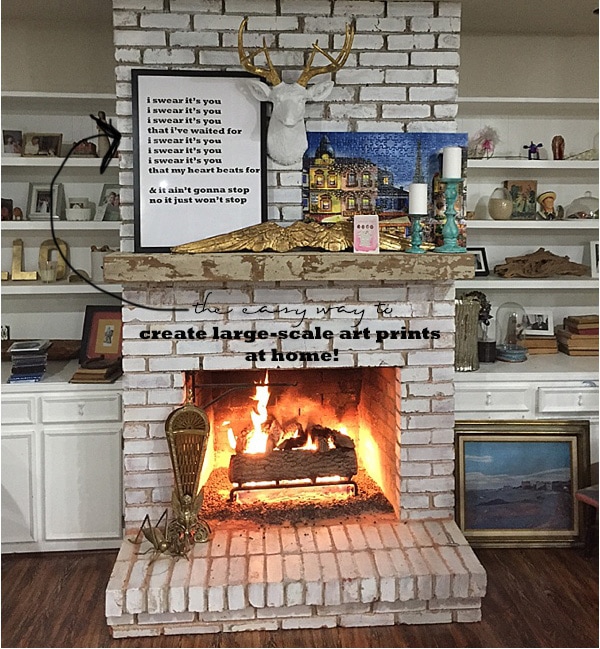
Scott, by the way, loved it. It is now sitting on our fireplace mantle, along with a puzzle of Paris we completed (we miss it there so much!) and my newly-antiqued candlesticks.
PS- You think our fireplace looks good now? You guys have GOT to check out it’s before picture…you wouldn’t believe it’s the same place!

so awesome and a very clever idea!
Wow! I would never have known it’s many different pieces 🙂 It’s like two puzzles on one mantle 😉
How clever! Such a good idea 🙂
A fabulous DIY idea!
What a cool idea! I am going to have to try this.
Love this! So simple and easy but it really makes an impact! Thank you for sharing, this is very cool.
Wow! Awesome! I’m trying to figure out how to do my mantle for everyday and your awesome project is just the inspiration I needed! Thanks a bunch!!
ooooh cool! I know I’m going to need this some time in the future!
This is going to be so handy! Thanks for sharing! I love your fireplace, it looks amazing!
A really great idea.! I’ve used photoshop in the past but I wasn’t aware you could do that. Super useful! Thanks for sharing
Wow, this is awesome!! Thanks for the tutorial. Do you know if the fonts can be downloaded for a mac?