DIY Rope Mirror
This post may contain affiliate links. As an Amazon Associate I earn from qualifying purchases.
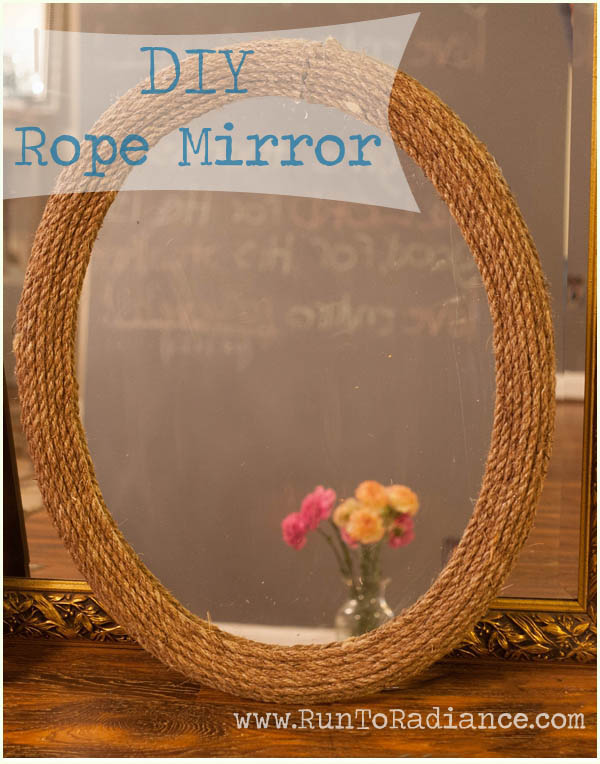
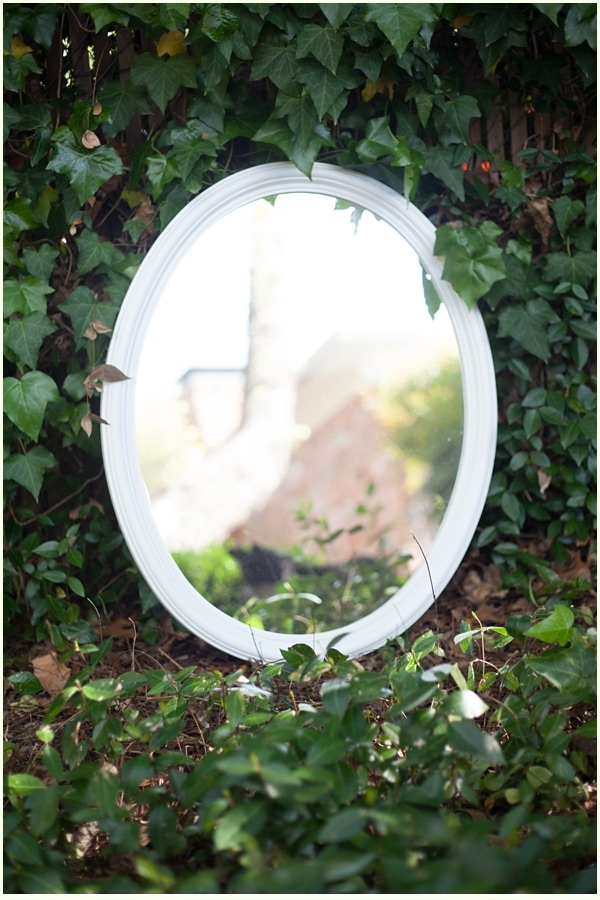
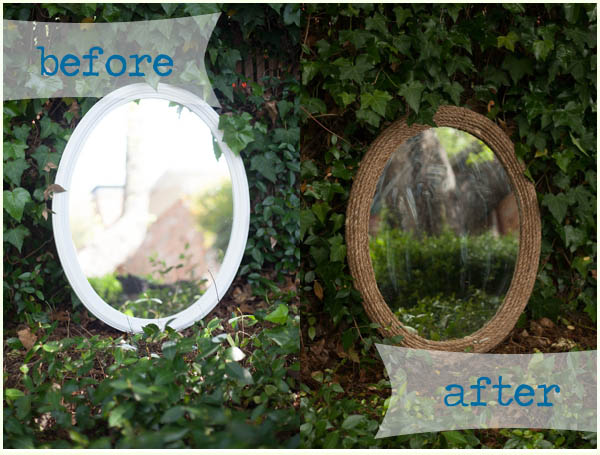
Let me start by saying this is probably my favorite DIY project to date. This had all the great elements of a good DIY- low cost, high impact, and fairly simple. It all started when my father in law bought me a pair of mirrors he picked up at a thrift shop. I think he paid $10 for both. He knew we were redoing the bathrooms and getting rid of the builder mirrors and thought these were something I could use. It sat in the garage for about a month while I mused it over. Then suddenly I was hit with a brilliant idea. Here it was before we began:
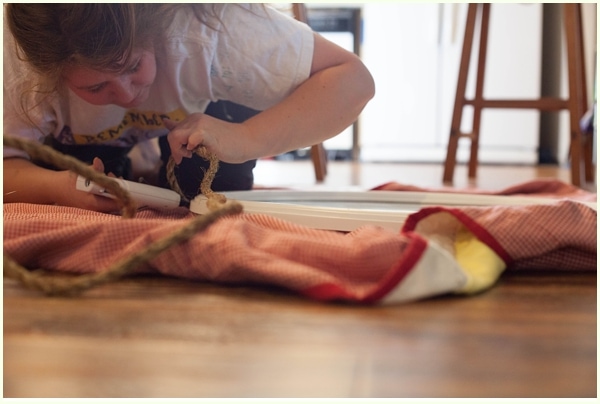
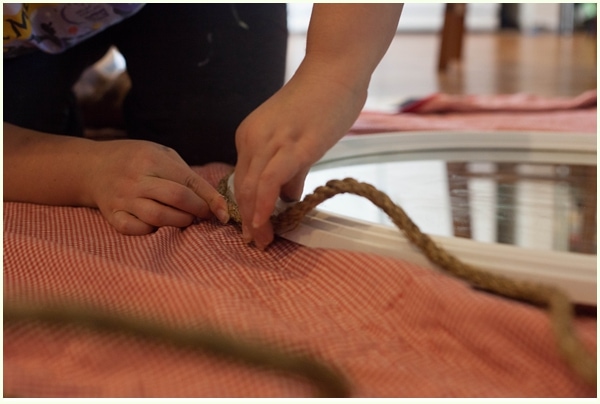
I am really into adding layers of texture and interest into our home right now and one of my favorite ways I had done that was with my DIY rope wreath. Maybe it’s the yearning for summer or maybe I just like the ruggedness of rope, who knows, but either way I randomly was struck with an idea- why not cover the mirror frame in rope? So like any good DIYer, I waited approximately three hours, impatient for Scott to get home from tutoring so we could go to Home Depot. Finally, off we went and I picked up two bags of rope at $6 each, sat my mirror on a blanket and began hot gluing the rope to the frame.

I started by measuring approximately how much rope I would need to make one loop on the outside edge of the frame, then cut it a bit long, just in case. Then I glued and laid the rope down in about 6 inch sections at a time until I got to the end and carefully cut the rope so the ends met perfectly.
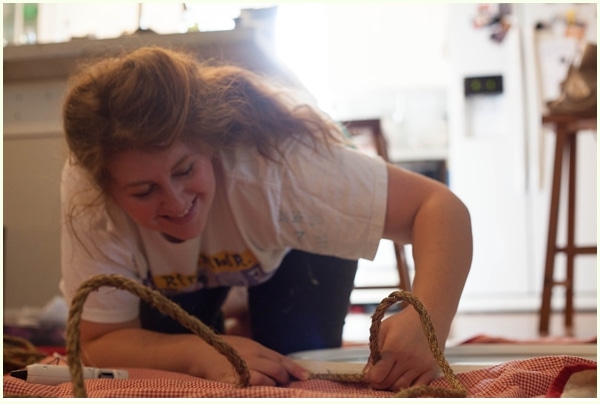
Can I take a moment to say that if you are working with hot glue be careful? I won’t lie to you- you will probably burn yourself at one point. And it will hurt. A lot. But you must go on!
I repeated this process over and over until, 12 hot glue sticks later….I ran out of hot glue. On a Sunday night. 🙁 When all the craft stores are closed and WalMart is at the peak of it’s shopping terror. So…I had to wait a whole day. BOOOOO.
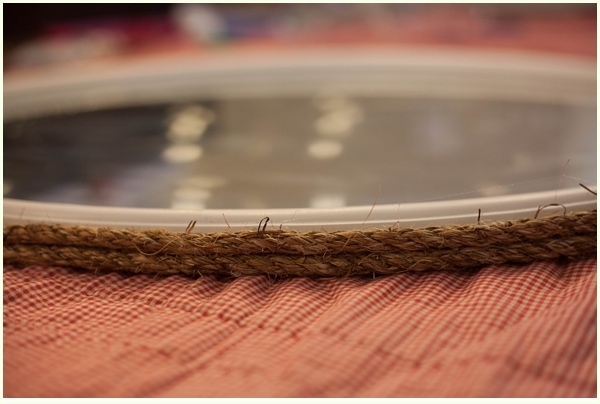
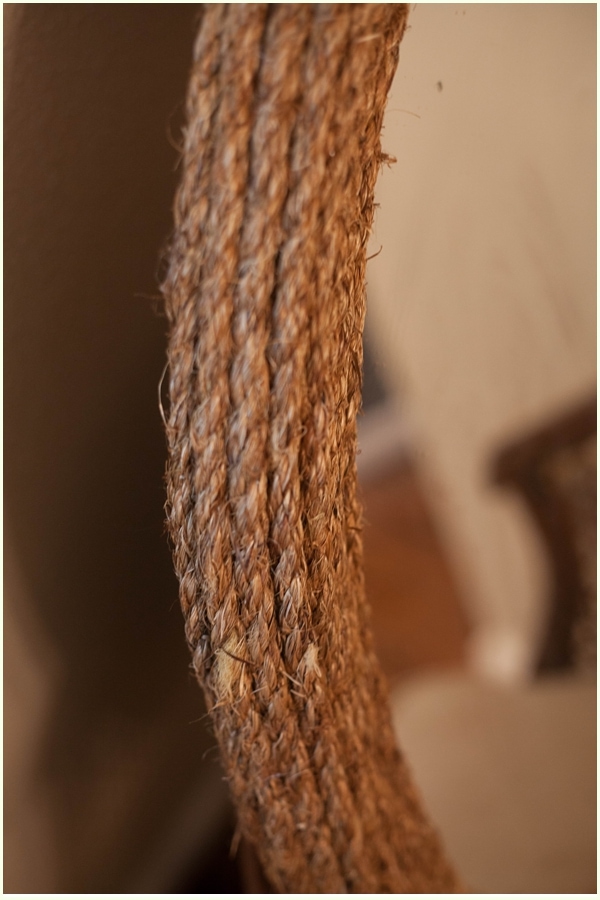
The next night I picked up where I had left off and it took me about 40 glue sticks altogether. Seriously…buy a ton of glue! In the end it took 8 layers of rope to complete the project and I went through about 1 1/4 bags of rope. It took me probably 3 hours altogether but it was SO worth it. Ignore the streakiness and just look at the gorgeousness:
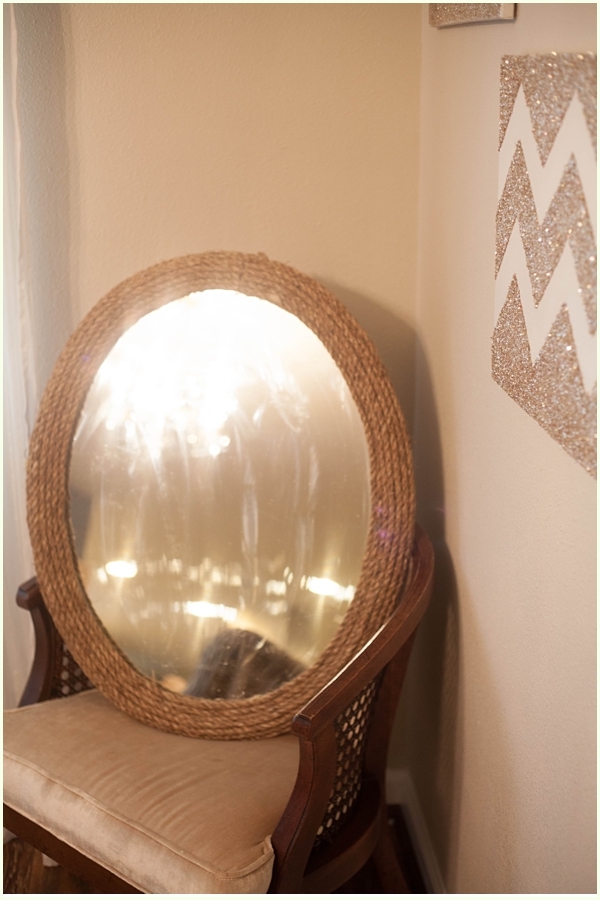
I mean…this texture…love.
Of course- a before and after:
In the end it cost:
Mirror: $5
Rope: $12
Hot Glue: $6
Total: $23
(Since I was given the mirror and used a gift certificate I got from work to purchase the rope- thanks friends!– our version only cost us $6)
I already have a special place for it to hang – check back next week to see! 🙂
What should I cover in rope next? A frame is on my list for sure. A can to make a vase? An old brick to make a chic doorstop? Shoes?!? Who knows…the possibilities are endless!!

I love your mirror! I actually did a similar one and it has turned me into a rope-a-holic, haha. You can check mine out here:http://upcycledtreasures.com/2013/02/nautical-rope-mirror/
~Katie
Katie-
How weird is that?! Yours turned out awesome too! I am definitely obsessed with rope now 🙂 Love your blog!!!
Oh, it looks wonderful! You did a great job!
If you have time, I would love for you to come and share this post over at the Really Crafty link party that is live right now! http://keepingitrreal.blogspot.com.es/2016/03/welcome-to-really-crafty-link-party-12.html).
I love how your mirror turned out. Thanks for sharing at the Inspiration Spotlight party. Pinned & shared.