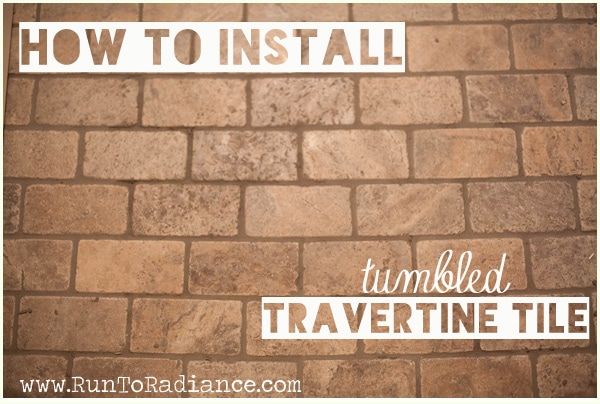
How to Install Tumbled Travertine Tile
This post may contain affiliate links. As an Amazon Associate I earn from qualifying purchases.
Happy Tuesday friends!! Did you all have an amazing labor day weekend? Scott and I totally labored…okay, so we spent the day having a blast with our friends and our families. Whichever. 😛
So we have made so much progress on our hall bath! It’s actually useable now- YAY. It’s so nice to have a space where guests (and we!) can use the restroom without having to go through bedrooms. While it’s not quite finished yet (we are still working on the shower/tub piece), I wanted to share the pride and joy of our bathroom with you all…our floor tile. When we were planning the space and I created my hall bath mood board, I knew I wanted gray tiles in our bathroom. There were so many choices, but none of the ones at Home Depot or Lowes seemed quite unique enough. I had a coworker whose father sells wholesale tile, so we were able to work with him to order some really beautiful tumbled travertine floor tiles. They are rustic, unique and chalk full of character which is exactly what we were looking for. The tile was the biggest splurge of our bathroom by far coming in at around $500 to order, seal, lay down and grout- which is quite a bit for a hall bath!
Worth it.
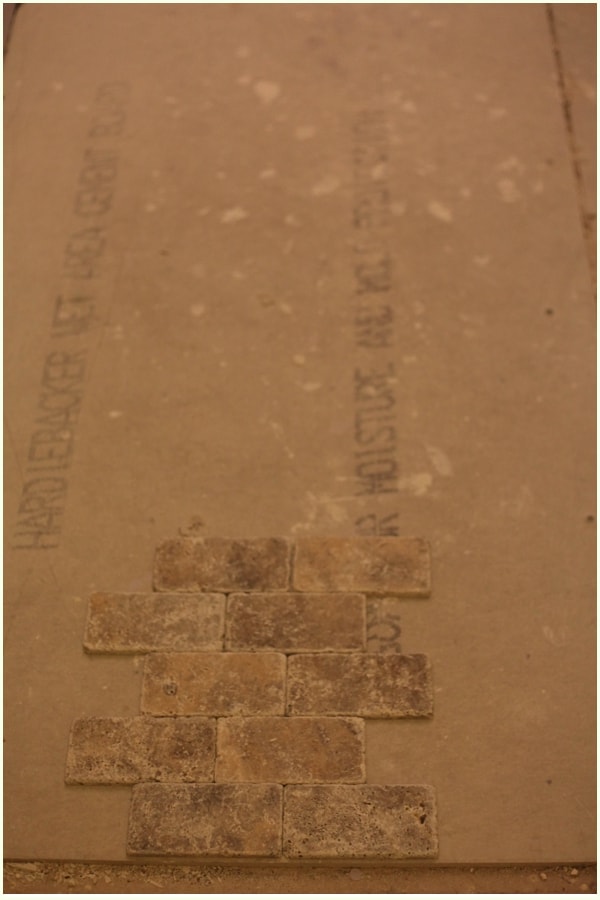
We had debated back and forth on which way to install them. At first I was convinced I wanted herringbone, so we laid out the tile in that pattern to see what it would look like…
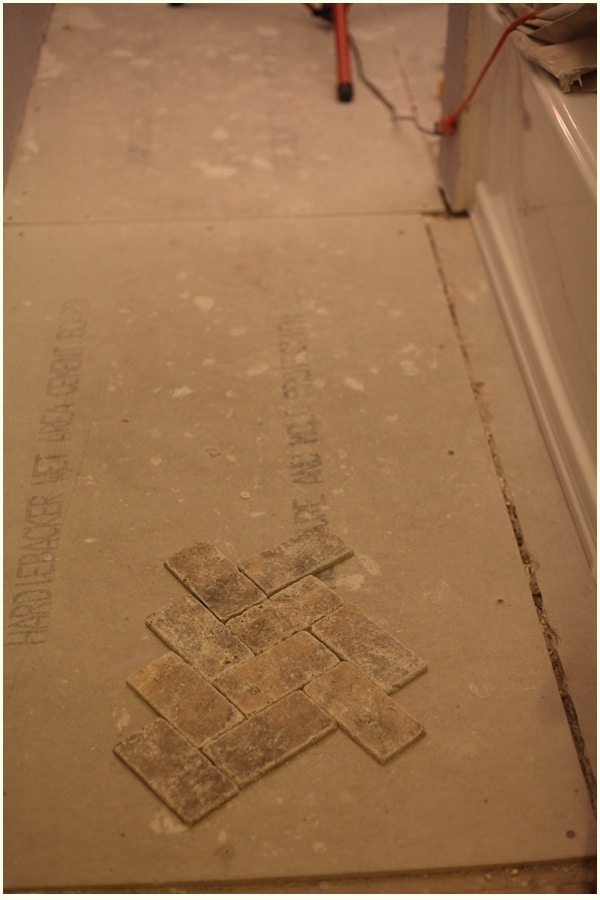
…and I hated it. It reminded me way too much of a chevron…which I am super over right now, even if there is a giant chevron in our entry way (that’ll be taken care of soon I think). So then we laid it a few other ways to see what they would look like.
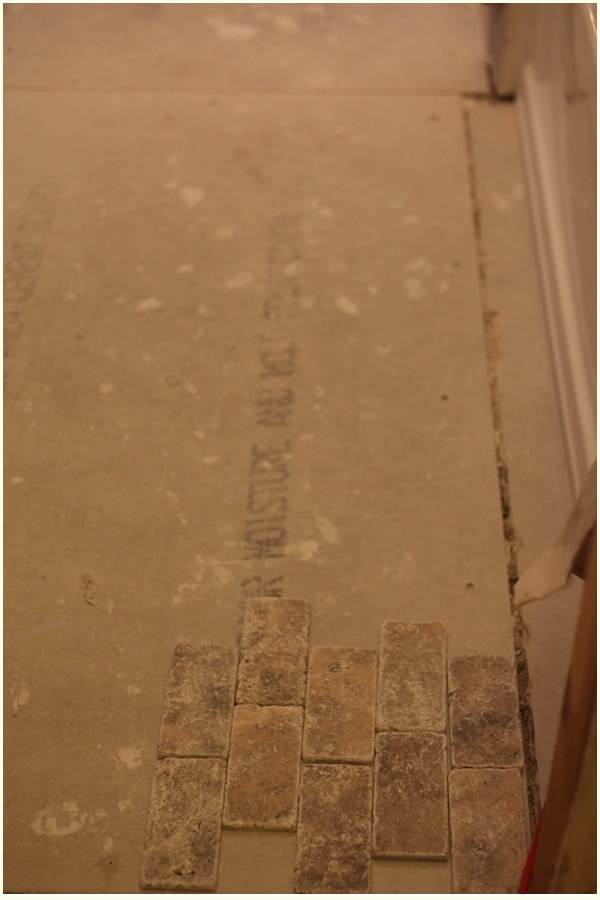
We both absolutely loved the way the tile looked in the horizontal pattern. It reminded us of a rustic brick wall….so we went with it.
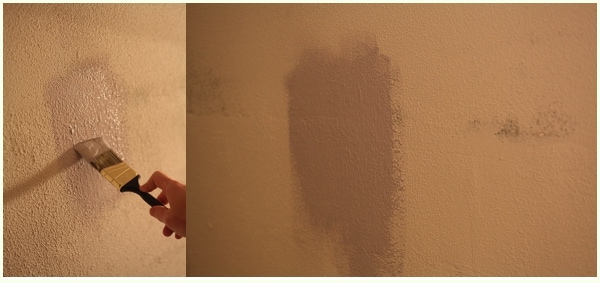
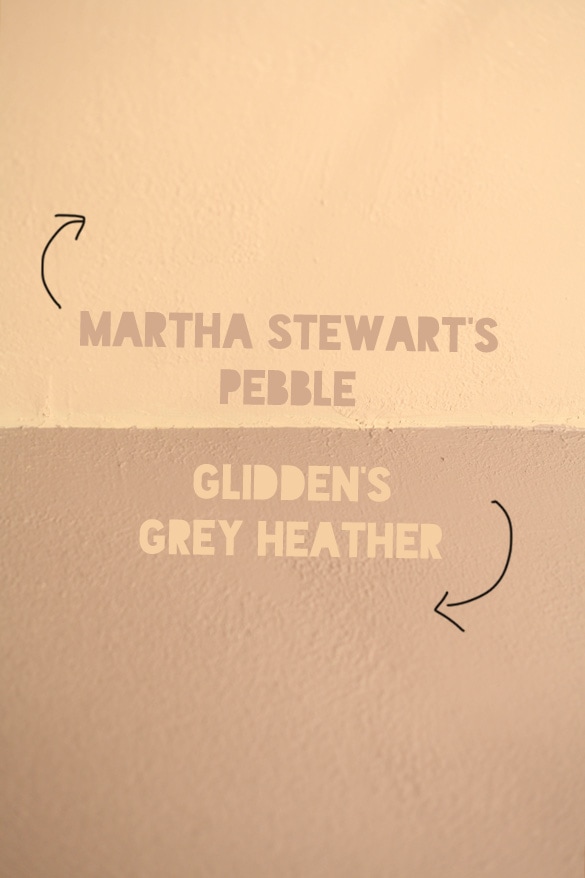
First though- we had to paint the walls and ceiling. I have always wanted a spa-like, relaxing purpley-gray bathroom…so that’s what we did. The walls were painted in Glidden Gray Heather, and for the ceiling we found the most gorgeous creamy gray that reflects the lovely purple- Martha Stewart’s Pebble. Love!

Isn’t it beautiful?
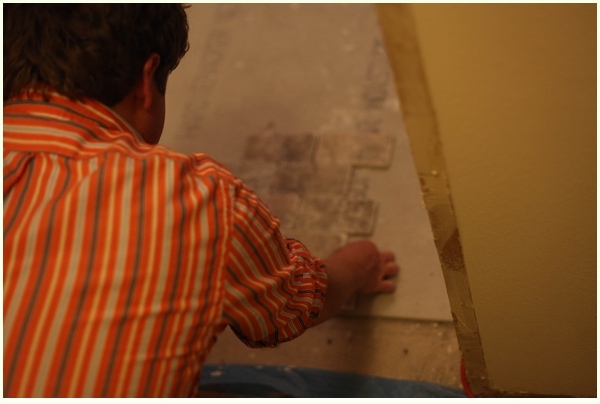
Then it was onto the bathroom tile installation. Scott prepped the floor by sweeping it and making sure it was free of debris, then used a trowel to lay down thin set, checking to make sure it’s level as he went along.
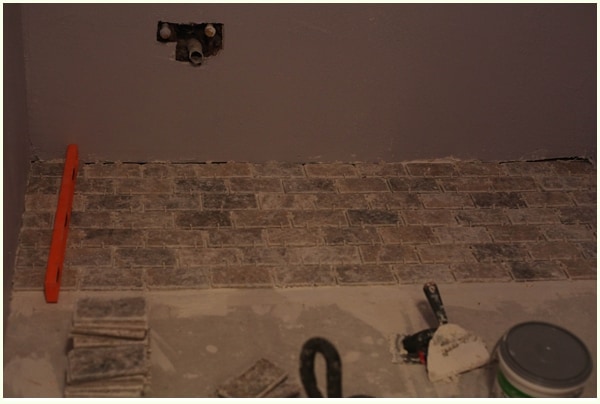
He also used 1/4″ spacers to make sure the tiles were spaced evenly, and worked his way from the back of the room to the front, starting every other row with a half tile so they were off center.

Once they were all down, he used a natural stone sealer to protect the tile. We opted for Ultra-Solv sealer which didn’t turn the stones glossy like some of the others do. We wanted to make sure we kept the tumbled, rustic look that we fell in love with originally!

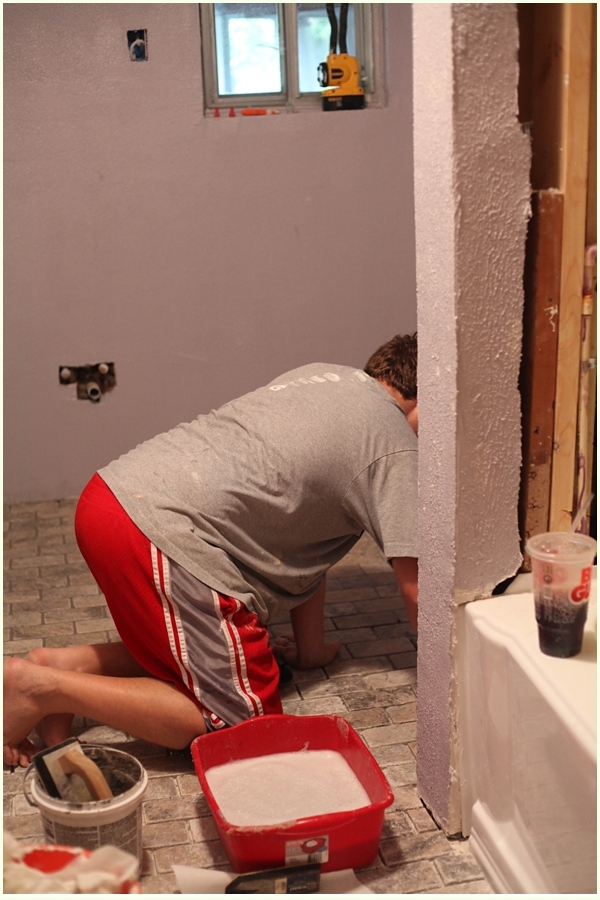
When the tiles were all sealed, we were then ready to grout them. I chose to use Natural Gray grout rather then white for several reasons- one: grout always gets dirty and dingy and if it’s white it’s harder to keep up and two: I felt they gray complimented the tiles and picked up the gray undertones of the wall paint better. Grouting tile was way easier then I thought it would be!
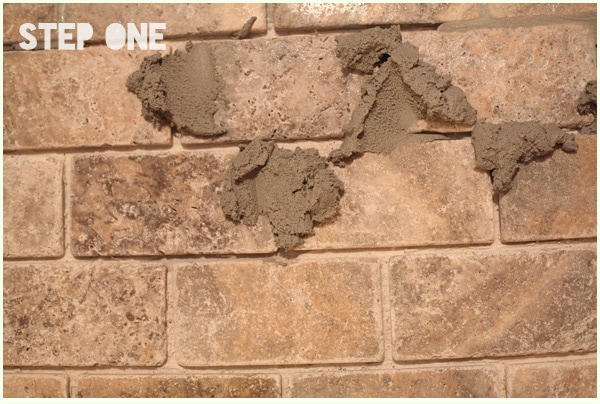
Step one: start with about a 3×3 section of clean, sealed tile. Using a spatula scoop grout and put it in the center of your square.
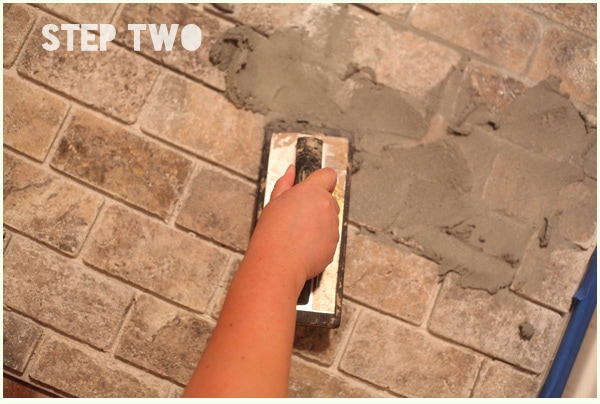
Step two: using a trowel, spread the grout so it gets in the creases between all tiles. Work your trowel back and forth diagonally from the tile lines so they grout doesn’t get swept away.
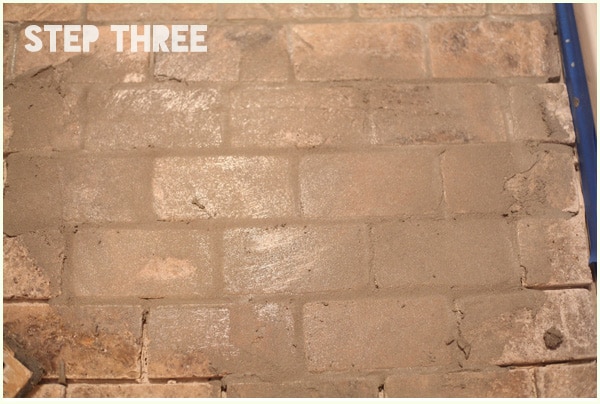
Step three: continue until every space is filled in with grout
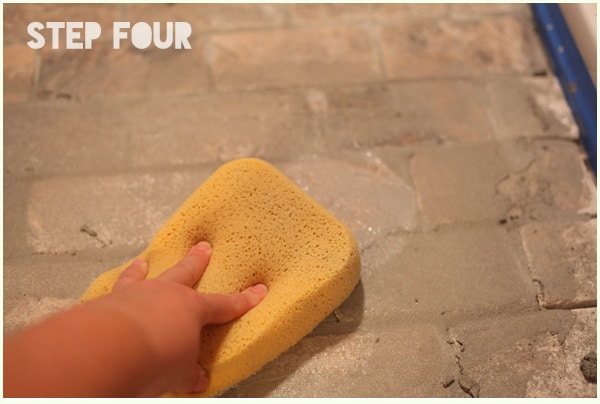
Step four: take a floor sponge and dip it into cold, clean water. Ring it out back into the bucket so the sponge is slightly damp, and wipe the grout off the top of the tile.
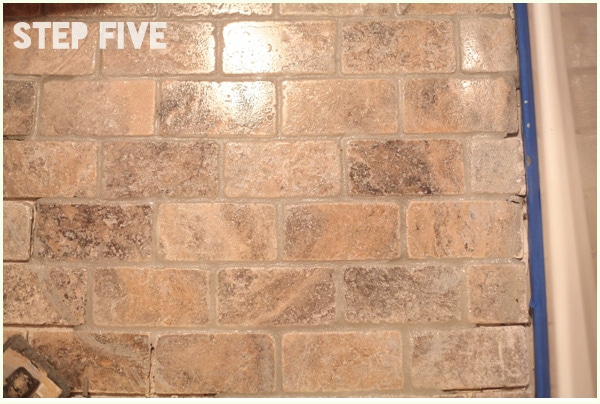
Step five: repeat the rinsing process several times until all grout is removed from the top of the tile.
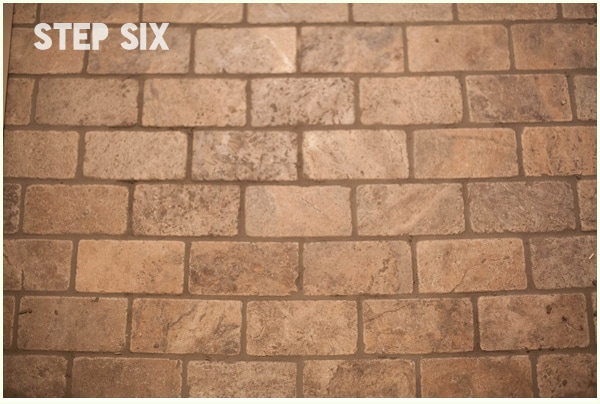
Step six: repeat with the next 3×3 section.
And that’s it! It was way easier then I imagined. Word of caution though…be careful of what you wear. Yes, of course you will want to wear clothes you don’t mind getting dirty, but if you happen to be wearing short shorts that may not fully cover your booty, and happen to sit on some wet grout you will have lines like this…but all over your bum.

And then you will be that awkward person that your husband laughs at and you have to ask after a 10 minute painful shower were you scrub your bum continually if you are clean or still have grout all over you.
Not that he would mind.
And not that this happened to me. 😉
So that’s how we installed the floor. Beautiful. Worth any potential scars from wondering grout lines. 😉
What did you all tackle this Labor Day weekend? I want to hear!

Love this tile so much Ms Tania!!! And your green door is fabulous!
Thank you so much Heidi! 🙂 Come see it in person!!!!
I absolutely love travertine. It’s one of my favorite stones for flooring. I also love subway tile. I googled “tumbled travertine tile” and came upon your page. Did you seal the stone floor Ultra-Solv before or after you grouted? P.S. Stealing this from you. Thank you for the great post!
Love this! Can you tell me how I can get this tile?
Hi Laurie,
Yes—this is the tile I ordered here!
http://www.patarastone.com/product/silver-travertine-tumbled/
We are still so happy with it! 🙂 Hope this helps!!