DIY Embroidery Hoop Wreath {Easy Easter Wreath Idea}

This easy Easter wreath idea is an easy embroidery hoop craft with foam eggs that you can put together in 15 minutes or less!
I love making wreaths because they are a simple, affordable craft project that pretty much anyone can do. This easy Easter wreath idea is no exception- it’s a simple craft that takes just a few supplies—including an embroidery hoop!
I noticed embroidery hoop crafts start to pop up a few years ago, and I totally get why…they are so cute!
To me, the Easter season is all about simplicity and gratitude (and Jesus of course!).
I wanted to reflect the beauty of the holiday by keeping this wreath simple—lots of room to breathe, if you will. I’ll call it a minimalist-ish craft.
Take 15 minutes out of your day to create this and celebrate the season!

How To Make An Easy Easter Wreath
The thing that makes this Easter egg wreath so easy is that it only has a few supplies. All you need is an embroidery hoop, some hot glue, and the decorations.
I had so much fun making it that I wanted to share this craft with you. Get your kids together and have some fun making a few extra ones as gifts.
Supplies needed:
These can all be found at your local craft store (I purchased everything at Hobby Lobby!) but you can also purchase off Amazon via my affiliate link below at no additional cost.
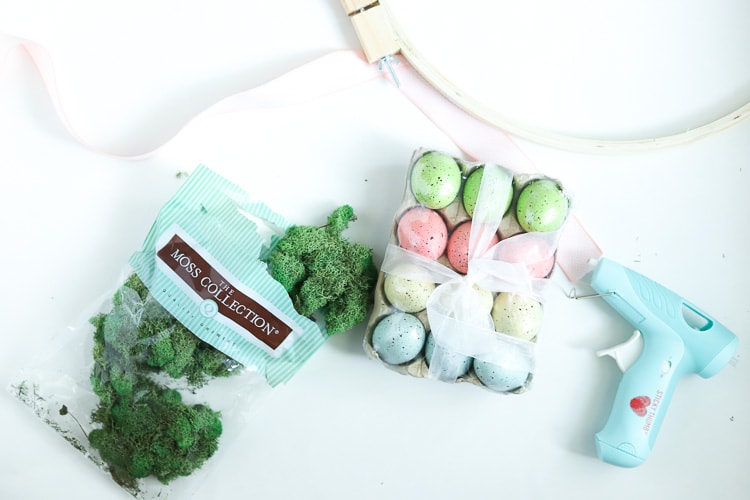
- Large embroidery hoop
- Foam Easter eggs
- Moss
- Hot glue gun + sticks
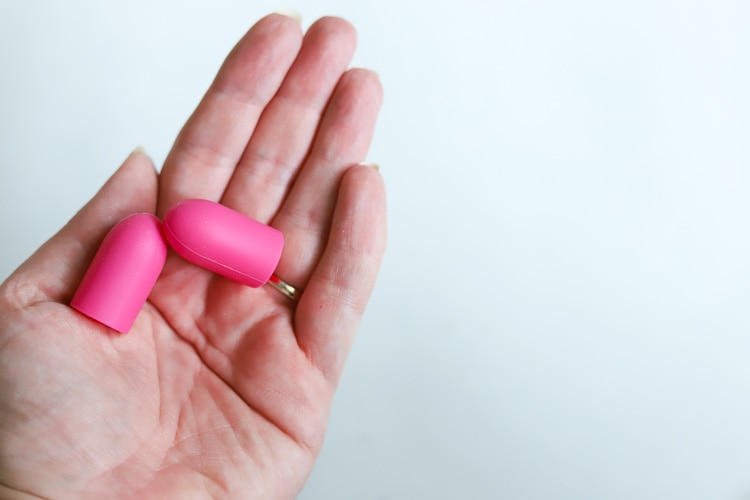
- Hot glue gun finger caps (highly, highly recommend!)
- Ribbon of your choice
Easter Wreath DIY Instructions
Here’s how to make this easy embroidery hoop wreath just in time for Easter.
Putting this together is so easy! I toyed around with the idea of painting or staining the embroidery hoop, but in the end, I decided to embrace the natural wood. For the record, I think this in a pastel mint would be super cute.
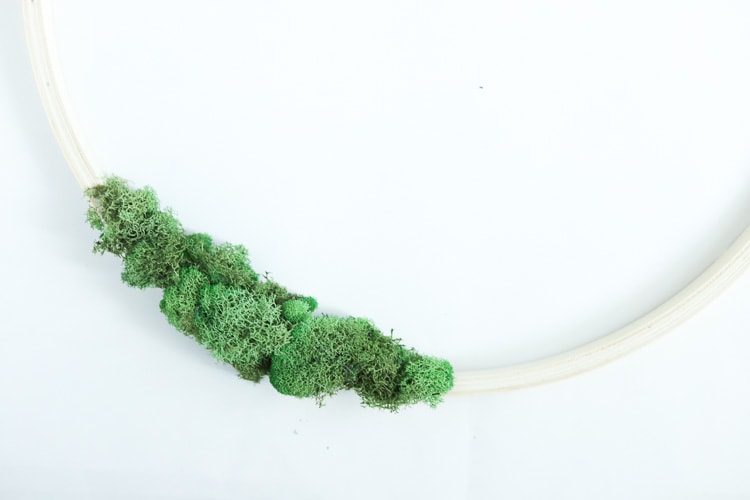
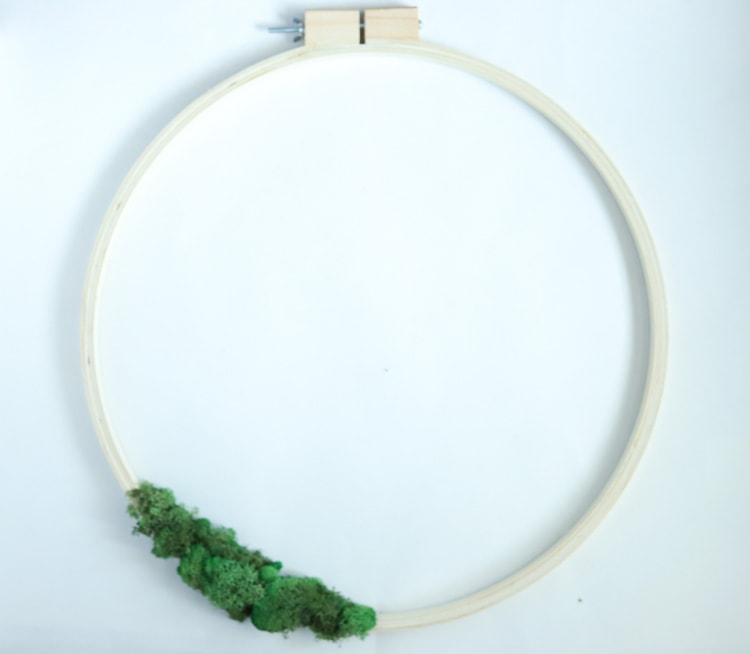
1. Cover A Section of The Hoop With Moss
Take your wreath, and cover a section with moss. You can do as much or as little as you like, but I kept it simple and just did the lower left “corner”.
Use the hot glue to glue the moss to the hoop—make sure you cover the outside, inside and bottom.
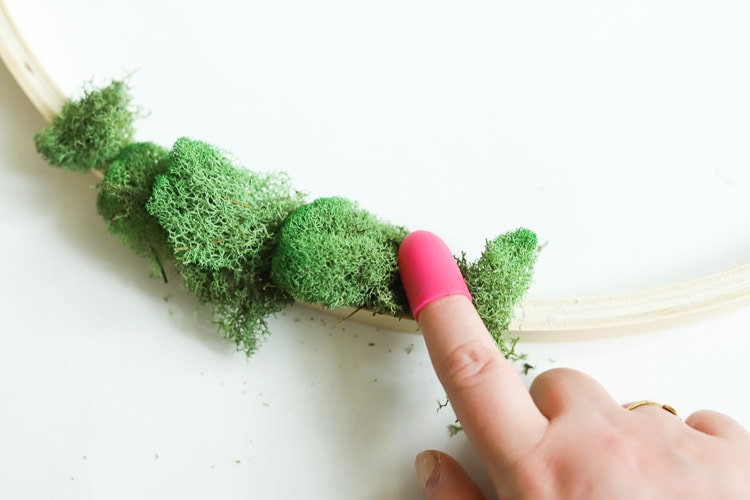
Craft Tip: Use Hot Glue Finger Caps
This is where those hot glue finger caps come in handy! I feel like I am always raving about them, but that’s because life before them was so painful. #neverforget Use them to press the moss down into the glue so it stays put.
2. Plan Your Egg Layout
Once your moss is glued down, take your eggs and come up with how you want them to be laid out. I laid everything out before I started gluing them down to decide my final pattern, then snapped a quick pic with my iPhone to have a guide.
Use Foam Eggs For The Easter Wreath
It’s important to use foam eggs for this project because they are light enough to be bound with hot glue. Each egg was either glued to the moss on the hoop, to another egg, or both.
Attach Everything With Hot Glue
Hot glue is the perfect medium for this project because it dries so fast. It’s also the least dangerous.
You can also try spray adhesive or liquid glue. I just don’t think they work as well as hot glue for this craft.
3. Hot Glue The Eggs To The Hoop
Simply apply a generous amount of hot glue, place the egg and hold it in place for about 15 seconds.

As you can see in the picture above, hot gluing is a messy thing. Don’t use too much glue. You also don’t want to forget to use those hot glue fingers. They are a skin-saver!
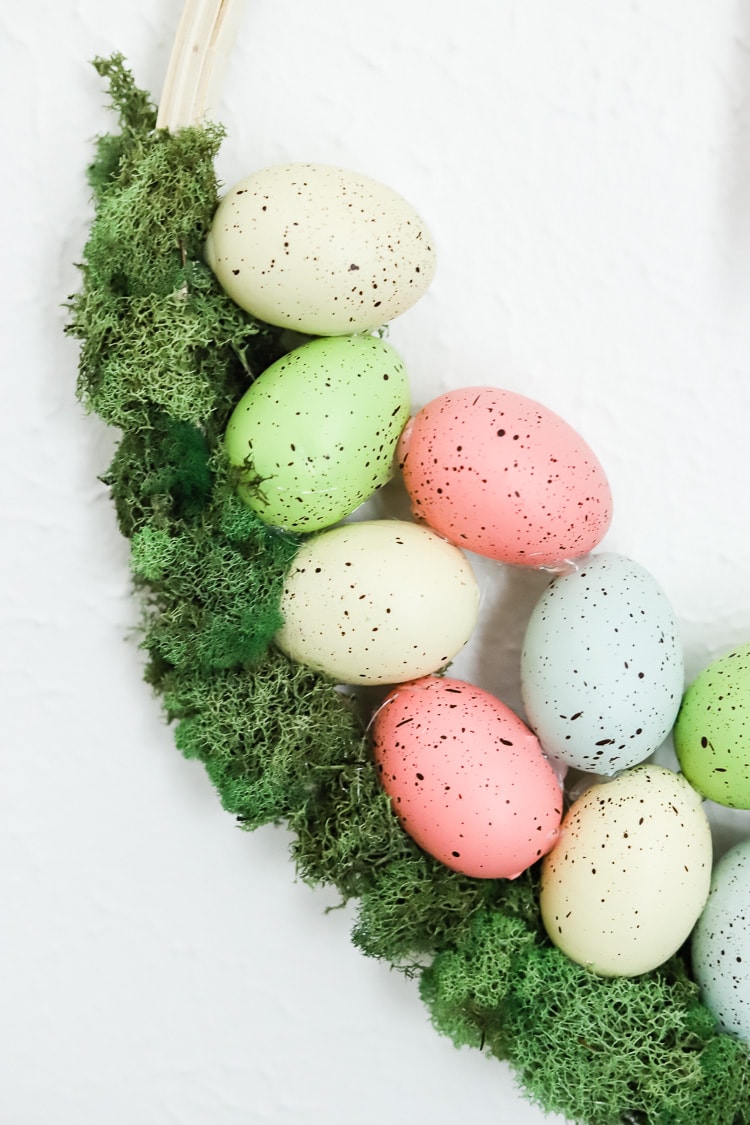
Remember to apply hot glue to every single space where the eggs are touching each other. If you forget, the eggs might get loose and fall off. The more hot glue you use, the more stable they are.
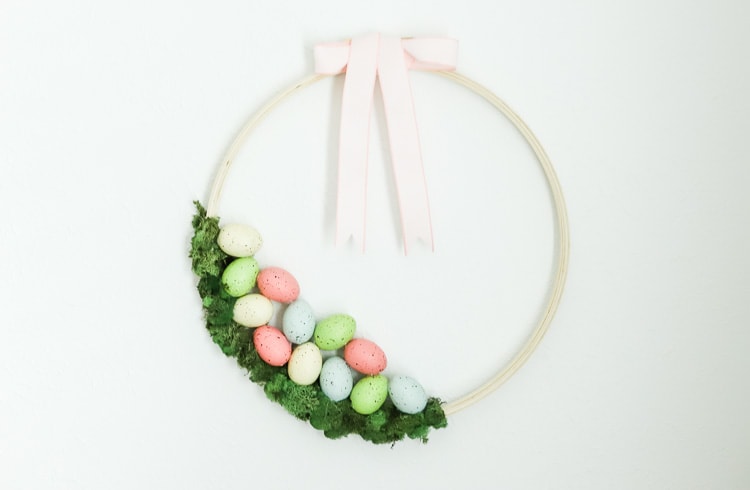
4. Hang Up The Wreath
Once your eggs are glued in place, you can hang the wreath as is, or add a ribbon as I did. Burlap could also look cute on this, but I went with a simple pink ribbon.
I’m pretty terrible at tying bows, but perhaps having a daughter will give me a crash course at some point. One thing I do to help it look a tiny bit better is I use hot glue to secure the bow once I get it even.
And that’s it! 15 minutes later you have an embroidery hoop wreath idea that is the perfect simple Easter wreath DIY.
How To Personalize Your Easter Wreath
This is such a pretty wreath, just the way it is. If you want to personalize it and make it your own, here are some ways you can do just that.
- Add a monogram – Pick out some wooden letters from the craft store and hot-glue your monogram to the hoop.
- Write names on the eggs – Be proud of your family and add everyone’s names or nicknames to each egg.
- Personalize the ribbon color – Use your school’s colors or your favorite colors to the ribbon
- Add some flowers – What is your favorite flower? Pick out a few of them and glue them around the embroidery hoop
How To Hang An Embroidery Hoop Wreath
Burlap or ribbon wreaths are easy to attach hooks to the back. Embroidery hoops don’t have hooks, so how do you hang one up?
This is why I love using ribbons on the top. I hot glue a ribbon on top and hang the wreath by the ribbon.
Other ways to hang up embroidery hoop wreaths could be hot-gluing wire to the back of the hoop. You could also just attach the hoop directly to a hook on your door.
More Easter Ideas
What are your favorite ways to celebrate Easter? I love this time of year! Here are a few of my favorite ideas.


Tania Griffis is an accomplished writer, blogger, and interior designer with a Journalism degree from the University of Oklahoma. She started her popular blog, Run to Radiance, in 2011, demonstrating her design expertise through the personal remodeling of six houses to millions of readers across the globe.
Tania also owns The Creative Wheelhouse, a respected ghostwriting agency for bloggers, further showcasing her talent for creating engaging and informative content.
Super cute! Love it’s simplicity. And the hot glue caps are something I definitely need! Visiting from Mini Linky Party.
Love this simple and chic Easter wreath! Thanks for sharing at #BestoftheWeekend – you are a featured post!
This just came up in my email today, March 27. I’ve made two wreaths for this year, but I’m going to save the idea for next year!
And I don’t have an InstaPot, but I’m putting it on my wish list!
Great job, Tanya.